|
Classic Airframes' 1/48
scale
Messerschmitt Bf 109D
by Floyd S. Werner Jr.
|
 |
|
Messerschmitt Bf 109D |

Classic Airframes' 1/48 scale Messerschmitt Bf 109 C/D is
available online from Squadron
For a detailed examination
of the kit contents,
see the in-box review elsewhere on HyperScale
The history of the Bf 109 need not be covered here.
The Hobbycraft kits have been around for years. They looked nice but
needed a lot of work to make them “accurate”. If you wanted to build a
Bf 109B/C/D they were just about the only thing in town, but not any
more.
This is the second release from Classic Airframes of the early Jumo
powered Messerschmitts. This particular boxing can be built as a C or D
model. Both cowlings are provided.
Classic Airframes' 1/48 scale Bf 109C/D kit is moulded in highly
polished grey styrene with 17 parts in grey colored resin. Also included
are a photo-etched fret, a three piece clear canopy, and clear acetate
sheet. The instructions are well printed with a separate sheet for
decals and painting for four aircraft.
The instructions are easy to understand and relatively simple. Not that
it is a bad thing. You have to decide before you begin what parts you
are going to use. There are parts that are available in plastic or photo
etch or resin. The oil cooler and gear doors come to mind immediately.
This is not a problem. You have to figure out which looks best or which
medium you are more comfortable with.
The resin is bubble and blemish fee. Wonderful work and smartly done.
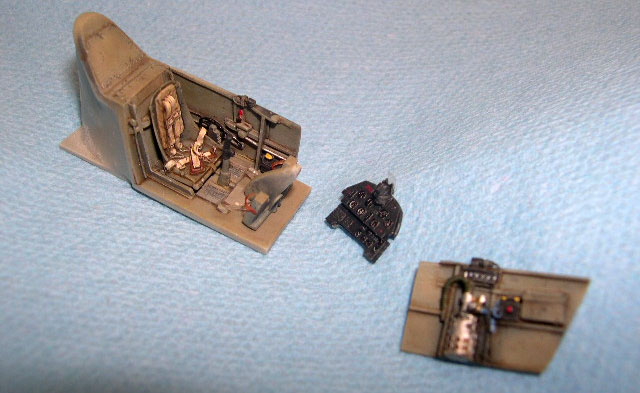
Cockpit and Fuselage
The cockpit is mostly resin, with the photo etch and acetate being
used for the instrument panel. The seatbelts are photo etch as are the
trim wheels. I assembled everything and gave the interior a preshade of
RLM 66 and then over sprayed in RLM 02. A wash of Burnt Umber was all
that was needed to give depth to recesses. Chipping was represented with
a #2 pencil and a silver pencil. The instrument panel was painted RLM 66
instead of the 02 that was recommended in the instructions. I
particularly liked that the gun sight was already attached to the
instrument panel backing plate. That made the whole process more solid
and easy to handle. The cockpit went together real quick. I painted the
seatbelts an Apple Barrel Off white with a wash of umber. Note that the
stick is the spade type and not your typical straight handle.
I glued my fuselage halves together. I then filled the joint with
superglue and accelerator. I rescribed any panel lines that were sanded.
While I had the superglue out I filled the filler hatches on the right
side and rescribed them in the appropriate place. This is the only fault
I could find with the kit. Only a real 109 nut would even care.
Before you offer up the cockpit to the fuselage halves, I recommend that
you sand the fuselage at the back decking almost to the panel line on.
The canopy will hide the step there. Now that that is done, you can dry
fit the cockpit sidewalls with the floor pan. Once you are happy just
tack them in place and you’re off to the races.
The cockpit canopy would be added just before painting.
Engine Cowlings
You have to choose between the recessed exhausts (ala B model) or the
one with the exhaust stacks protruding. As I was doing a D the, one with
the exhaust stacks was used. Carefully remove the part from the backing.
Here is a hint: the plastic part forms a 90 degree angle in the corner.
Take a new hobby knife and make sure it is square. This will aid the fit
of the cowling. Now you can test fit and test fit some more to get a
relatively seamless fit. Make sure it is straight in thrust line. Once
you have the top cowling on the rest of the parts attach to it. I
elected to just use the resin front as molded on the cooler instead of
the photo etch part. While I was in the area I also fitted the
stiffening strips and the drain line which exits out of the bottom of
the lower front cowling. This whole process was done quickly - a
testament on the quality of the model.
The Wing and Tail
Before you attach the tail I recommend that you drill out the pitch
adjustment hole which is just in front of where the horizontals attach.
The tail planes are separate which is really nice. All you have to do is
round the front off and they fit great. Don’t forget to offset the
stick. I did. The rudder is the same way. I did not have any issues with
the support struts. You may want to tack them in place with white glue
until the horizontal tail sets up and then remove them for painting.
The wing is beautiful, with a built in dihedral stiffener. The biggest
issue with the wings is the wheel wells which are separate resin pieces.
You would think just cut the casting block off with a razor saw and sand
a little bit. Not so fast. I ended up ruining my first set this way. The
part is not flat. Grabbing a back up kit, I then used a #11 X-acto blade
and scraped away the pour block. It was real easy. Once that was done,
it was time for test fitting in the wing. Still too high. I couldn’t do
anything more to the wheel well so I broke out the Dremel and sanded the
wing so that the wheel well would fit. Again remember this is a limited
run kit, test fit, test fit and test fit again. Once I was happy it was
just a matter of gluing and filling as usual.
The wings are not done yet. The Bf 109 has leading edge slats and flaps
that need to be added. The slats will not fit as given. You will need to
drill a hole where indicated and then the slats will fit into the slots.
Easy enough to do. The flaps are really a non-issue. Some light sanding
with them and the ailerons and we were ready to join them to the
fuselage.
The front of the wing is cleverly designed to be a part of the fuselage.
Test fit numerous times to make sure the front, back and wing root is
correct. Once happy just glue in place. If you do it correctly you will
not need any filler on the backside. I didn’t of course so I had to
fill, sand and rescribe a little. Add the oil cooler and the cooler door
and it was time to wash the model.
I like to use Dawn dish detergent but any grease cutting detergent will
do. Wash it with a toothbrush and warm water and air dry it.
Preshading was done with Gloss Black. While I had it loaded I painted
the exhaust panels as necessary. I would flat them later in the
weathering process. The gloss black would be a primer for the Alclad
Airframe Aluminum prop blades. Once the black had dried I spayed the
white parts with Tamiya Flat White.
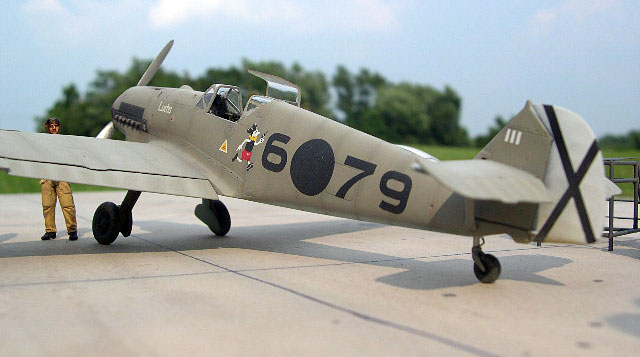
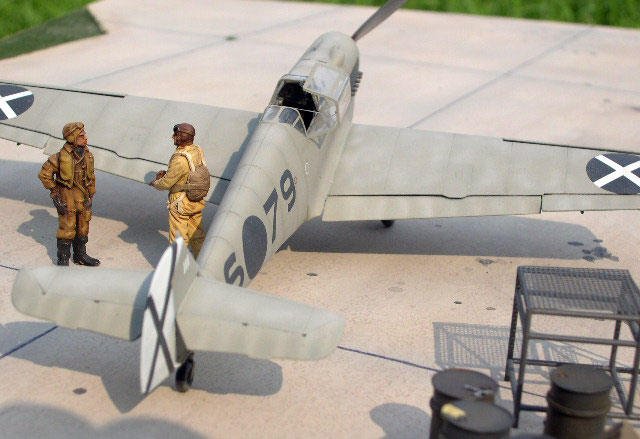
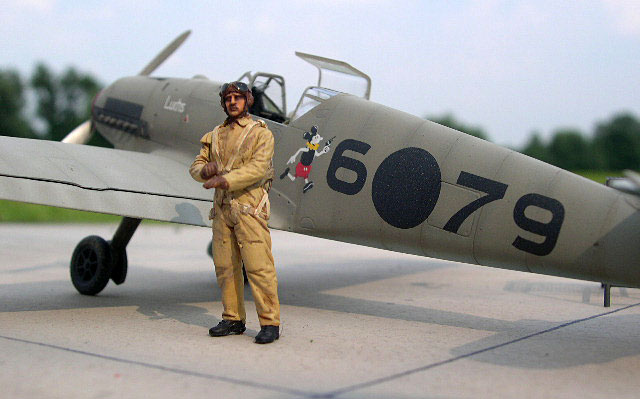
That was all the easy part. There are a couple of pictures of Molders
standing by 6 o 79. What can’t be agreed on is what colors are used. The
Jagdwaffe series of books says that the top color should be a medium
green over 65. I disagreed with that interpretation. If the tone of the
skin is any indication the upper surface color would be less dark and
because of this I determined the color to be RLM 63 on the top side with
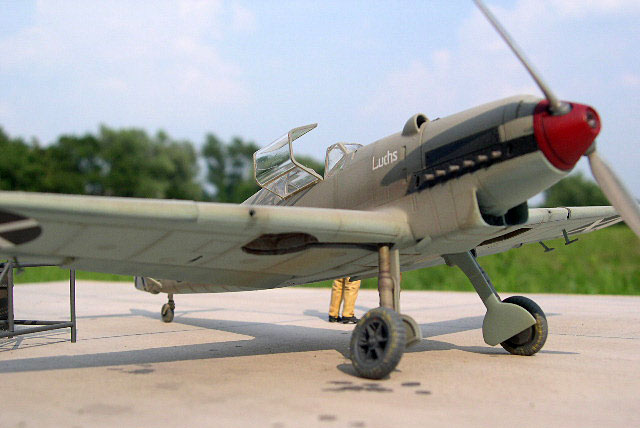
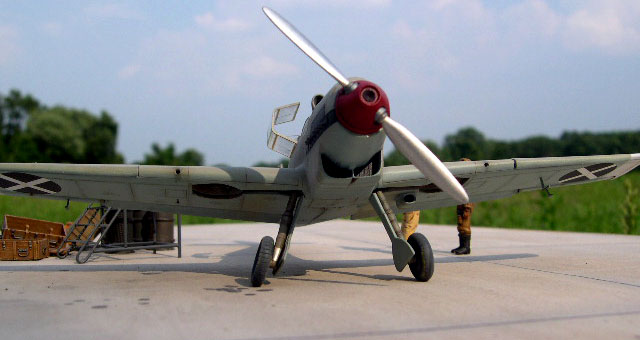
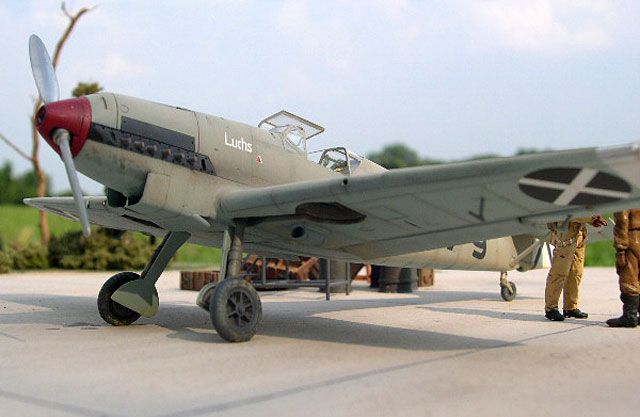
65 on the bottom. The other source of contention is the color of the
spinner. It is decidedly lighter than the black of the exhaust panels.
According to “Condor Legion” it should have been red in keeping with the
Staffel color. Made sense to me and would add a splash of color as well.
After the black and white dried they were masked off and the bottom was
sprayed with Tamiya Light Blue which is a ringer for RLM 65. Once happy
with the results it was time to paint the RLM 63 (looks like 02
actually) over the upper surface. FYI, at that stage of the war RLM 02
was an interior anti-corrosive paint and RLM 63 was used for external
applications. The colors were so close that 02 was used and 63 was
dropped eventually. An application of Alclad gloss made the surface
ready for decals.
Decals- Cutting Edge CED48264
I had three different set of decals for Molders airplane. The Cutting
Edge set (CED48264), an Aeromaster sheet (48-459 Spanish Civil War Part
2), and an Aviation Usk one. The Cutting Edge decals had the proper red
pants on the Mickey Mouse and the Aeromaster sheet had the pants black.
I think I detect a slight color variation on the one photo so the red
pants would do. While the Cutting Edge was based on the Jagdwaffe
interpretation as far as colors go the decals themselves were beautiful
and the ones I decided to use. They fit perfectly and are in perfect
register. They reacted well with Solvaset. Other than fuel and oil
markings I could not make out any stencils on the photos I had so my
aircraft it got only minimal. Once they had dried a coat of Model Master
Acrylic Flat was added.
Weathering
The weathering was started with a wash of burnt umber artist oil with
turpenoid. I followed that up with some silver chipping but it was very
difficult to see. The next step of the weathering process was the oil
streaks and exhaust streaks. The oil streaks were done with the umber
carefully placed and then a wide brush streaking them in the direction
of airflow. The exhausts were done with some Tamiya Flat Black and Dark
Earth thinned a lot. Once happy with that I added some Tamiya Desert
Yellow to the wheels and the area aft of them to simulate mud splatter.
Very thin Tamiya Buff was streaked over the top surface of the model to
blend it with the ground and tone down the decals. I took a look at the
model and it just struck me as needing something else. I thinned down
some RLM 02 with Flat White and dappled it on the wings and fuselage
spine. Now I was happy with the paint scheme. A thin coat of flat sealed
everything in place.
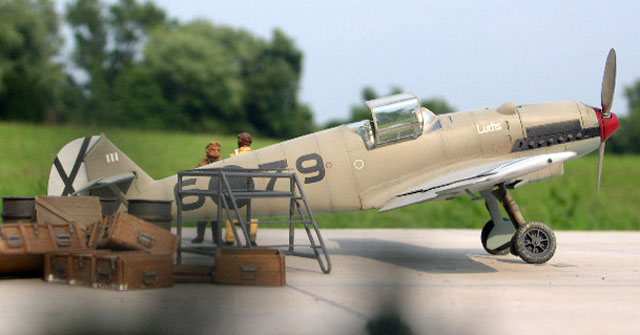
Final Assembly
Adding the landing gear made everything look correct. I chose to use
the plastic gear doors. Not for any particular reason just didn’t want
to deal with the photo etch parts. The tail wheel was added and even
though my aircraft is a D it had a torque knee on the tail strut and
this was added from the photo etch fret.
Luckily, my aircraft did not have an antenna mast so the only fiddly
bits to add were the mass weights and the pitot tube.
This is my second Classic Airframes kit. It was easy to build.
Was it a Tamiya kit? No but it does represent the best kit available
from a limited run manufacturer. Time to put the Hobbycraft kits on the
market or to the troops. If you are looking for a kit to learn resin
and/or photo etch this is THE kit. Like any limited run the key is test
fitting and test fitting again. While this kit doesn’t fall together it
took less time than most models I’ve built.
Kudos to Classic for the choice of subject, but also for the quality of
the whole package, great plastic, resin, clear parts, and decals. I plan
on building at least three more and have even more than that. Bring on
the B model. A word of caution: as these are limited run kits get them
while they last. The Bf 109A is sold out already. Job well done Classic.
Highly recommended.
Thanks to Classic Airframes for the review sample.
References
Jagdwaffe “The Spanish Civil War” Volume One Section 2, Eric Mombeek
with J. Richard Smith & Eddie Creek, Classic Publications, 1999, ISBN
0-9526867-6-78
The Messerschmitt Bf 109 Part 1: Prototype to ‘E’ Variants-A
Comprehensive Guide for the Modeller-Modller’s Datafile 9, Lynn Ritger,
SAM Publications, 2005, ISBN0-9551858-0-7
Condor-The Luftwaffe in Spain-1936-1939, Patrick Laureau, Hikoki
Publications, 2000, ISBN 1-9021109-10-4
The Legion Condor, Karl Ries and Hans Ring, Schiffer Publishing, 1992,
ISBN 0-88740-339-5
Click the
thumbnails below to view larger images:
Model,
Images & Text Copyright © 2006 by
Floyd S. Werner Jr.
Page Created 08 September, 2006
Last Updated
21 February, 2007
Back to
HyperScale Main Page |
 Home
| What's New |
Features |
Gallery |
Reviews |
Reference |
Forum |
Search
Home
| What's New |
Features |
Gallery |
Reviews |
Reference |
Forum |
Search