|
Hasegawa's
1/72 scale
Messerschmitt Bf 109E-4
by Glenn Irvine
|
 |
|
Messerschmitt Bf 109E-4 |

Hasegawa's Messerschmitt Bf 109E-3 is available online from Squadron
The kit was built as a challenge following an
Australian Nationals at EXPO in Melbourne a couple of years ago.
A friend and I decided to choose a kit and both of
us would build it out of box. – This was to try and get me out of my AMS
rut and force me to build a kit and paint it with the minimum of time
wasting modifications. We would then both enter the same category at the
next EXPO, (this was another rule, it had to be finished by the
following Expo) and see who did best. – But the main aim was to finish a
kit (for me),- he is very prolific.
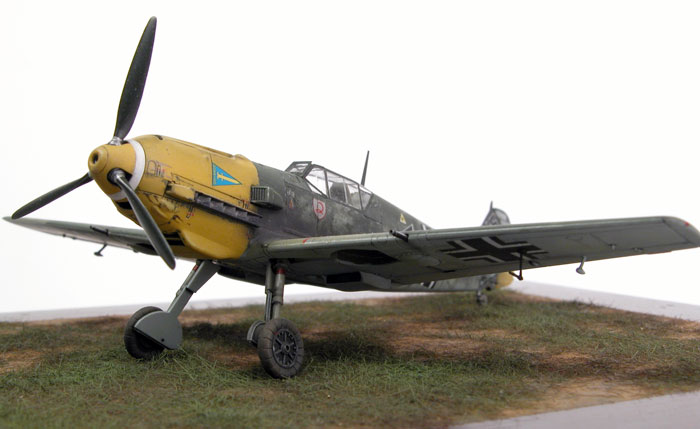
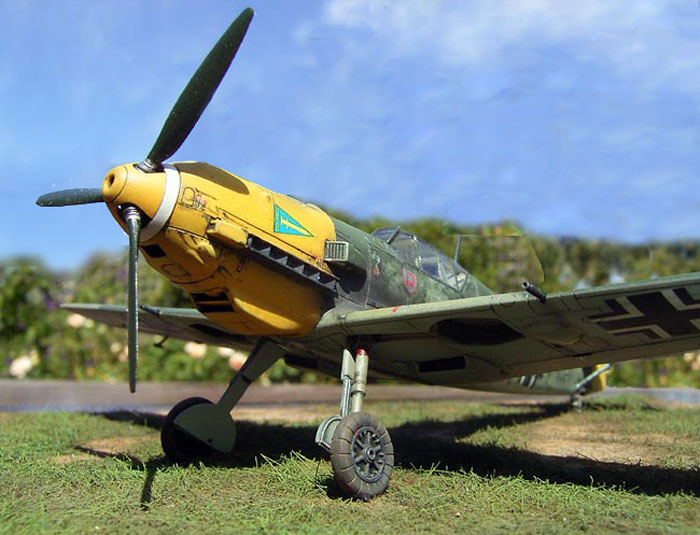
To sum up, the kit was built up out of box. Some
areas were enhanced or cleaned up, depending on your definition. The
cockpit was built as supplied and the kit decal belts were cut out and
carefully glued to the seat. Fine detail was enhanced with careful
shadow and highlight work with a brush. After fitting the kit instrument
decal a touch of matt varnish overall and the instrument lenses filled
with future helped bring up the panel.
The gun sight reflector was thinned down and
polished. The cockpit glazing exterior armored windscreen was glued in
place with Future and the canopy masked with Tamiya tape.
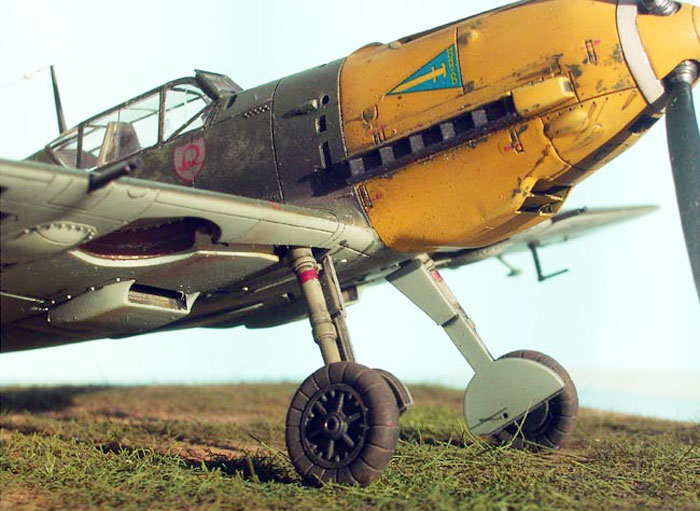
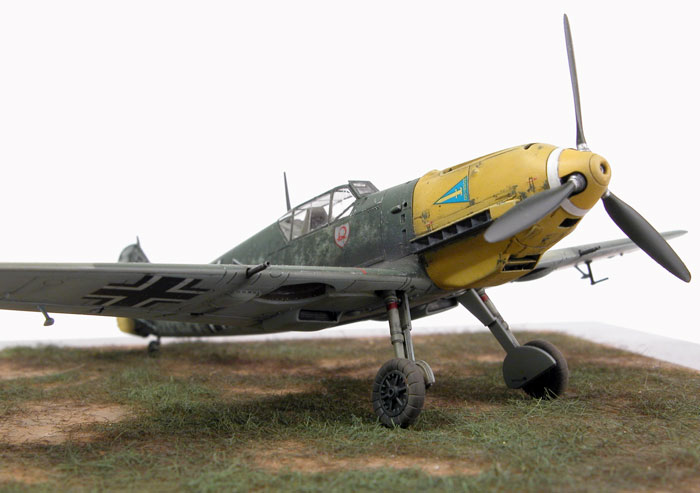
The wheels and oleos were carefully cleaned up and
painted, followed by washes and dry brushing. Intakes and scoops - all
openings were thinned down and repainted, washed etc. The spinner back
plate was painted white and the forward section painted yellow 04.
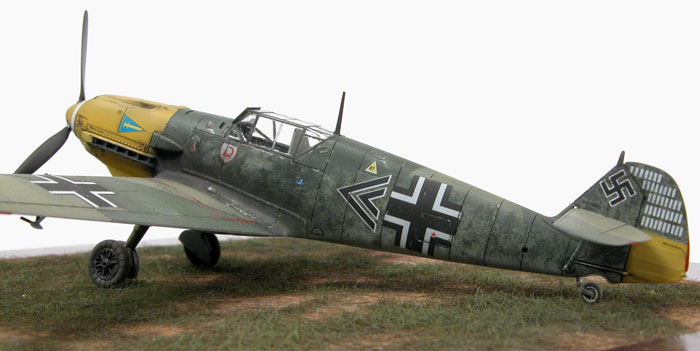
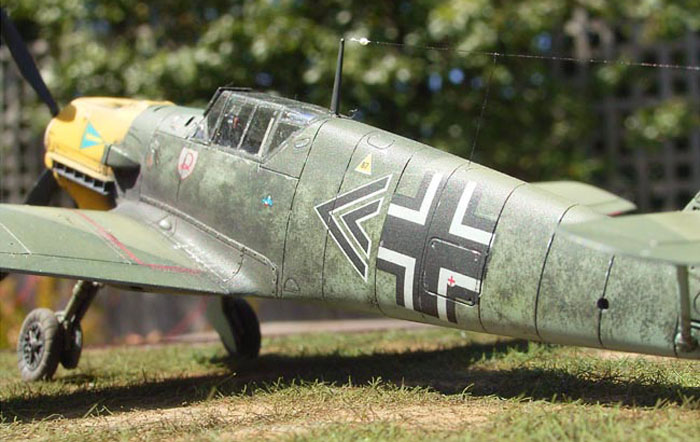
The forward cowl was painted RLM 04 Yellow and
masked off as was the lower section of rudder. The airframe was painted
Aeromaster enamel 65 undersurfaces and most of the fuselage. The wings
and the fuselage spine were painted Aeromaster 71 – 02. The 02 was
darkened with 71. After this the upper surfaces were dry brushed with
standard 02 and lightened 71 to enhance the surface detail and weather
the paint, producing a faded surface finish.
Mottling
The mottling on the fuselage sides was a special
challenge, trying to find a way of successfully duplicating the
particular ‘look’ of this type of application I finally found
duplicating the original method of application in miniature was the best
way of duplicating the distinctive mottling on the sides of Wick’s
aircraft. This was achieved with very small pieces of very fine grade
sponge held in tweezers dry-mottled on the sides of the fuselage to
build up the colour and density variation along the fuselage.
The sponge type is that used by women to apply
makeup, commonly called a ‘foundation sponge’ it is very soft, very fine
grade synthetic type sometimes sold in cubes. A small piece is torn off
and held in tweezers and dabbed in the paint, this is then dabbed on
paper until most of the paint is gone (like dry brushing) and it is
making a definite ‘sponge’ pattern, then it applied to the fuselage
sides and gradually built up. Replacing the sponge regularly also helps.
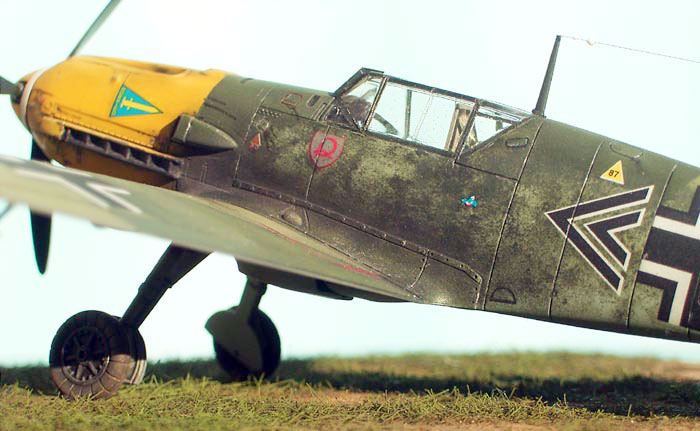
Afterwards, as is so often the case, I felt that I
had overdone it, well; I then tried a method of paint removal I have
seen used before by other modelers, namely Chris Beaumont.
I used a cotton bud and a soft toothbrush loaded
with plain toothpaste and carefully started to scrub the fuselage sides
in a small circular motion. This slowly removed excess mottling and cut
back the paint to reveal a perfect representation of the mottling in
1/72 scale complete with wear marks around the cockpit. (I will be using
this method again) Some of the upper wing panels were treated the same
way to check the effect – lightly does it and it was better I think.
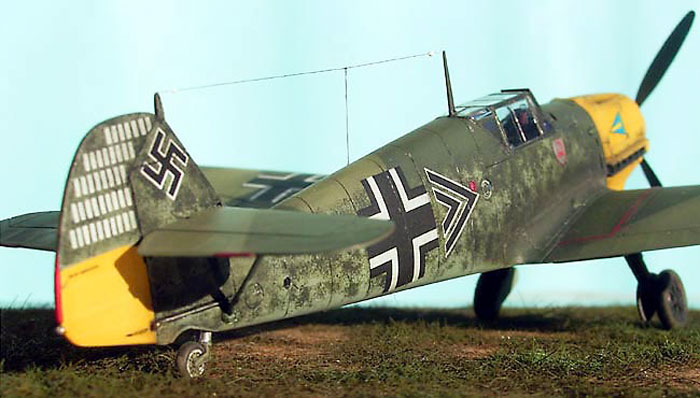
 Testors
Glosscote was applied and the decals followed from the kit and an
application of decal softener. Testors
Glosscote was applied and the decals followed from the kit and an
application of decal softener.
After drying and cleaning up the residue, a product
similar to Testors Metalizer Sealer was applied and a follow up wash of
oils and water colours as appropriate. After drying, Testors Dullcote
was applied and some chipping with a silver prismacolor pencil provided
the finishing touch.
After judging at Expo was over, an aerial was
fitted and a base made to display the finished model.
I hope this helps you duplicate that unique
mottling on Wick’s aircraft, no matter what scale you build.
Click the thumbnails below to view larger images:
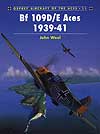
Bf 109D/E Aces
1939–41
Aircraft of
the Aces 11 |
|
| |
|
|
Author: John Weal
Illustrator: John Weal
US Price: $19.95
UK Price: £12.99
Publisher:
Osprey Publishing
Publish Date:
November
15, 1996
Details: 96 pages; ISBN: 1855325969 |
|
|
Model, Images and Text Copyright © 2004
by Glenn Irvine
Images of finished model on white background Copyright ©
2004 by Brett Green
Page Created 05 October, 2004
Last Updated
05 October, 2004
|
 Home
| What's New |
Features |
Gallery |
Reviews |
Reference |
Forum |
Search
Home
| What's New |
Features |
Gallery |
Reviews |
Reference |
Forum |
Search