|
Hasegawa + Aires 1/32 scale
Messerschmitt
Bf 109F-2
by
Matt
Grove
|
 |
|
Messerschmitt Bf
109F-2 |

Hasegawa's 1/32 scale Messerschmitt Bf 109G-6
is available online from Squadron.com
Construction
/ Conversion
|
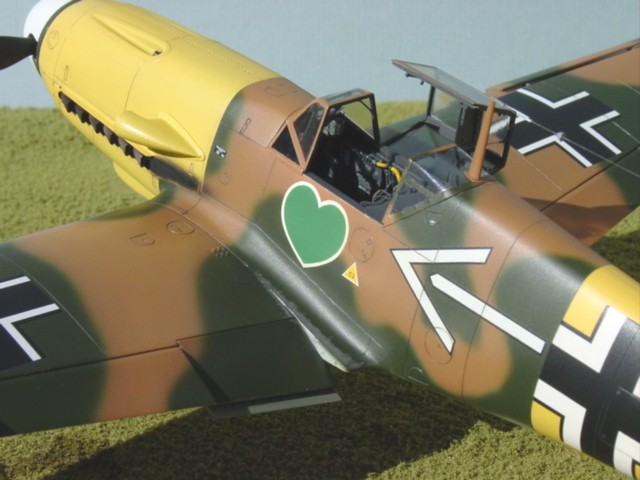
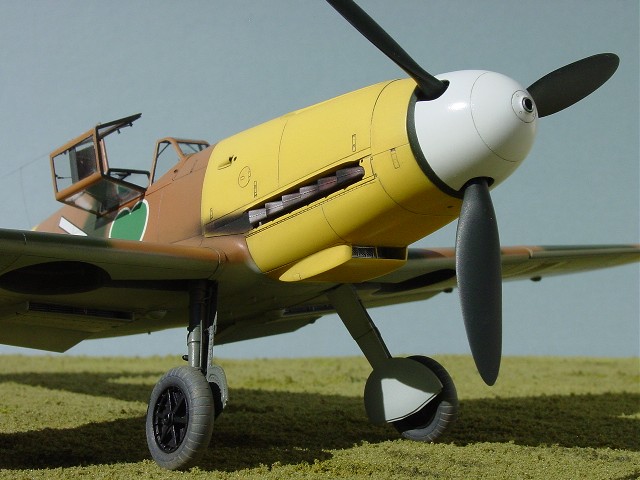
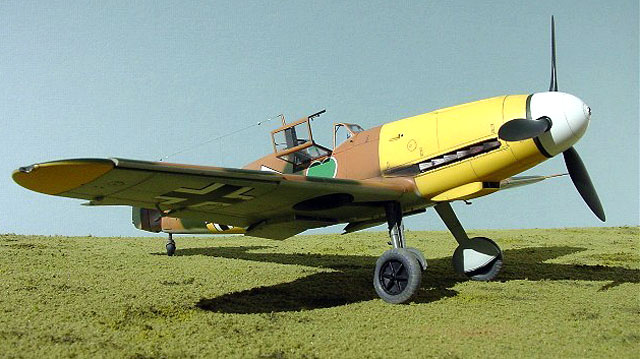
This is the Messerschmitt Bf109F-2 of Hannes Trautloft, JG 54,
Russia 1941. I used the Aires set to convert Hasegawa’s 1/32 109G to the
F version.
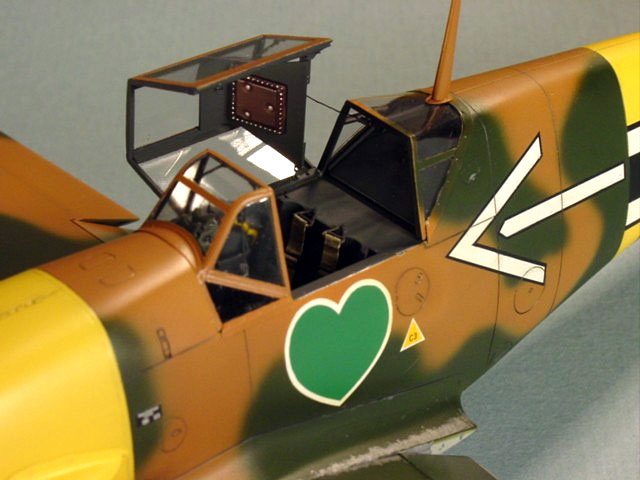
I used the nice resin cockpit pretty much as-is.
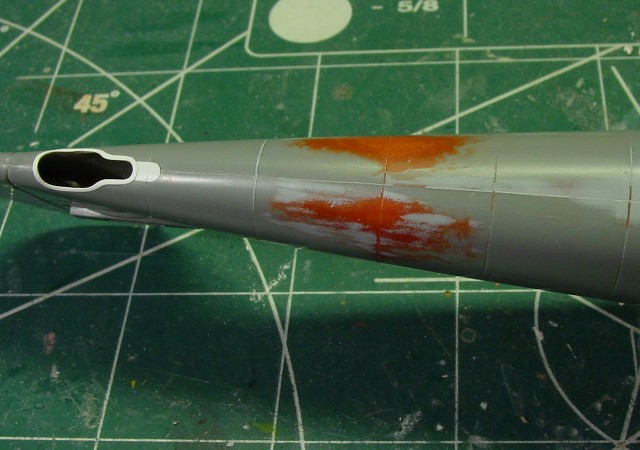
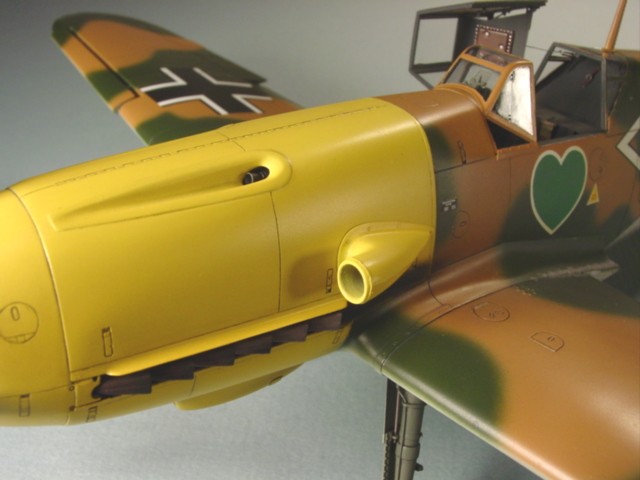
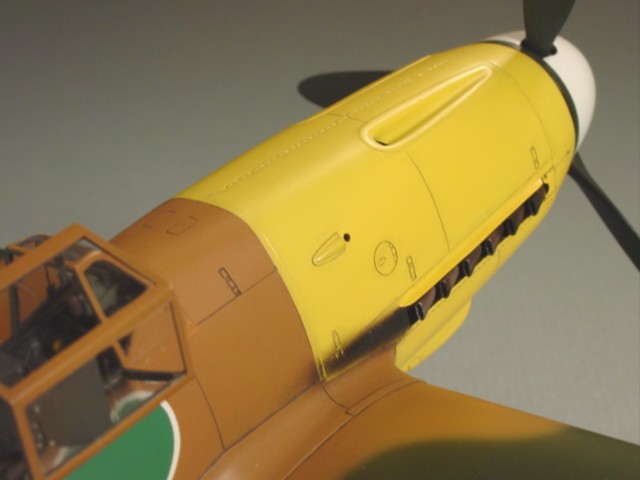
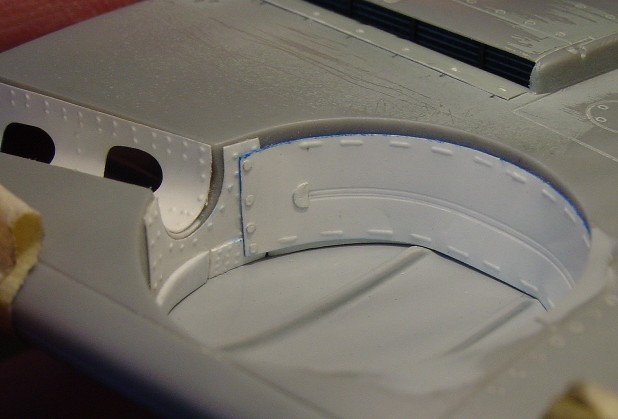
The other main piece in the set is the resin upper cowl. I felt the
gun troughs on this piece weren’t shaped correctly in outline, and on
the real aircraft they were inserts that sat slightly proud of the
surrounding surface. I spent quite a bit of time cutting new outlines
from .005 plastic sheet and blending them with the inner portions of the
gun troughs using Milliput and Mr. Surfacer. I think this captured the
distinctive (but subtle) appearance of the troughs as they appeared on
the F and early Gs. Looking back, it probably would have been easier to
do that using the upper cowl insert from the G-4 kit (which has
incorrectly shaped gun trough outlines as well) instead of making the
Aires cowl fit the kit fuselage, which was a bit dicey.

The Hasegawa kit has a slight but noticeable dip on each side underneath
where the separate rear fuselage section joins the forward section. I
used Bondo to fill these; the stuff takes a scribed line surprisingly
well as long as you’re not too heavy-handed.
I used the Aires set’s nicely done vacform canopy, adding framing to the
interior using plastic strip. I found the key to getting the front and
rear portions of the canopy to fit properly was to add framing around
the edges with plastic sheet so they could be attached to the fuselage
just as they were on the real aircraft.
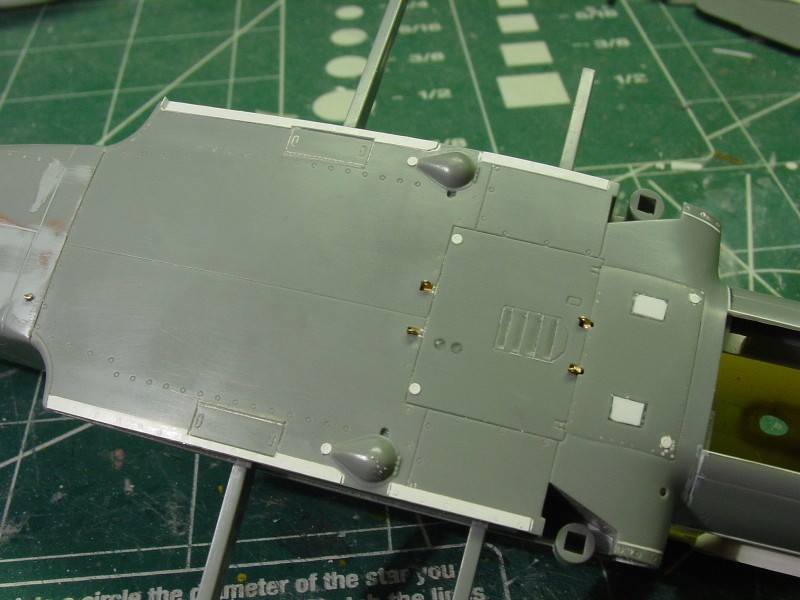
I also did quite a bit with the wheel wells, adding the canvas liner and
visible structure. Getting the shape of the .005 sheet plastic liners
correct took a lot of trial and error, and getting them in place was
tricky. I embossed the plastic to depict the lacing and zipper on the
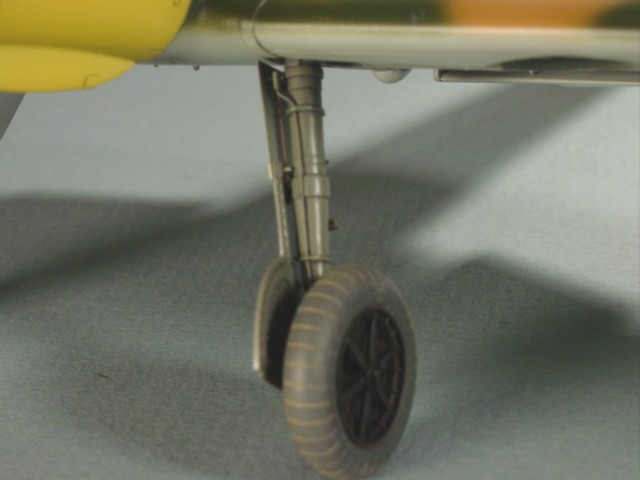
liners. I also reshaped the lower portions of the landing gear legs to
duplicate the gear legs used on the Fs and early Gs and added separate
brake lines.
Click on the thumbnails
below to view larger images:
The Aires tail wheel is a bit oversized, so I may replace it when I
can get a better one.
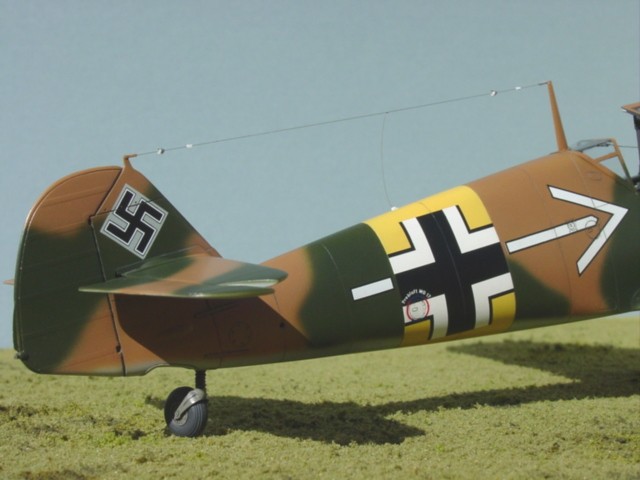
There were a number of items unique to the F to be added, including
various hatches and the strengthening straps on the rear fuselage.
 I used Polly Scale acrylics for the yellow, underside blue (76),
and topside brown (79). The green is Tamiya Olive Green. I used Polly Scale acrylics for the yellow, underside blue (76),
and topside brown (79). The green is Tamiya Olive Green.
The decals are from Aeromaster. The Stab markings were incorrectly
proportioned, so I did a lot of cutting and trimming to reshape them.
The heart is painted.
This airplane had quite a sheen, so I finished with Polly Scale Satin
and Flat mixed about 50-50.

I’ve always been impressed by Ian Robertson’s outdoor shots, so wanted
to try a few myself.
As I look at the airplane now, it seems a little too clean. I’ll try to
work up the courage to add some shading and weathering on the next one!
Click on the thumbnails
below to view larger images:
Model and Images Copyright 2005 by Matt Grove
Page Created 27 April, 2005
Last Updated 26 April, 2005
Back to
HyperScale Main Page
|
 Home
| What's New |
Features |
Gallery |
Reviews |
Reference |
Forum |
Search
Home
| What's New |
Features |
Gallery |
Reviews |
Reference |
Forum |
Search