|
Hasegawa + Aires 1/32 scale
Messerschmitt
Bf 109F-4Z/Trop
by Darren Howie
|
 |
|
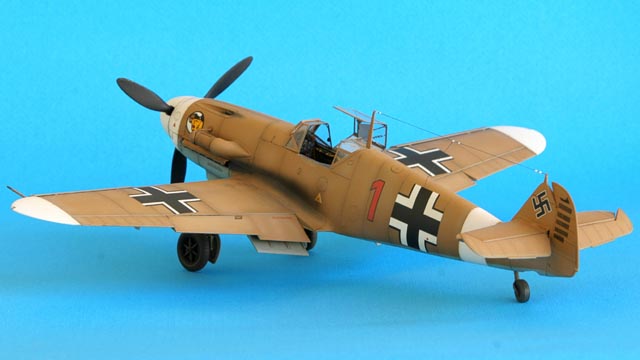
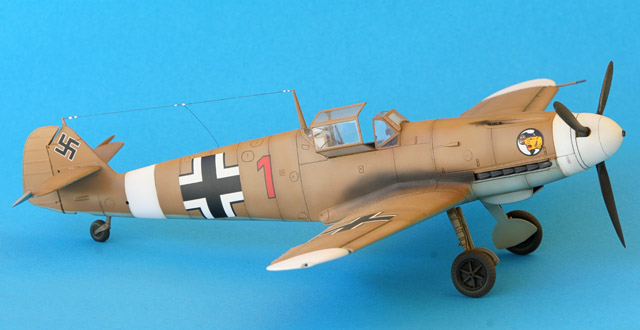
Messerschmitt Bf
109F-4Z/Trop
Leutnant Hans-Arnold Stahlschmidt, Staffelkapitan 2/JG27
Quotaifiya,Egypt 1942 |

Hasegawa's 1/32 scale Messerschmitt Bf 109G-6
is available online from Squadron.com
I am sure all fans of the Luftwaffe from WW2 enjoy looking at the
uniquely painted tropical versions of the ubiquitous Bf 109.From the
early mottles and stripes to the later RLM79/78 scheme’s they make for
great subjects.
Gladly though, enough experten flew these aircraft in the own right to
make them a subject which warrants independent attention. When looking
through for a subject Marseille immediately comes to mind but I decided
to steer away from him looking for a subject a little different but
still with the look of a late Bf 109F Trop of RLM79 over RLM78.
Reading, I stumbled across Marseille’s close friend Han-Arnold
Stahlschmidt who flew a nicely marked Bf 109F-4 "Red One" which fit the
profile perfectly. Nowhere near as well known as Marseille yet a top ace
in his own right he was almost a perfect subject. Being nowhere near as
well known presents its own problems with very few reference photo’s to
go by and its inherent pitfalls which will become apparent.
The Kit and
the Conversion
|
The 1/32 scale Hasegawa Messerschmitt Bf 109G-6 is a
well known kit and has been written about no end so I will add no more
other than to say it’s a great starting point.
Having wanted to do a Bf 109F for some time in 1/32 scale I was pretty
happy to say the least when Aires announced their 1/32 scale Bf 109F
conversion.
It is a wonderful set including a new cowl, cockpit, wheels, oil cooler,
tropical filter, vacform canopy, spinner, propellor and numerous other
resin and PE components - certainly one of the better conversions I have
in my cupboard of resin. It is well worth acquiring and the conversion
itself is not overly difficult nor beyond anyone trying there first big
resin set.
As the aircraft I was modeling was a Bf 109F-4Z/Trop, there were a few
differences are evident between the subtypes. A great article on
Marseille and his aircraft and an excellent great source of information
is one written by John Beaman and Jim Kitchens which appeared I believe
many moons ago in the US IMPS magazine. It has heaps of information on
both required mods to make an accurate Bf 109F-4Z Trop and a huge amount
of information on Marseille’s aircraft. Some of the major features are:
-
The Bf 109F-4Z had the
larger capacity G6 oil cooler.
-
Larger Bf 109G-6 prop
was being used
-
Larger turbocharger
inlet similar to the Bf 109G
-
Armored glass
-
Tropical air filter
Armed with the razor saw its off to work I went.
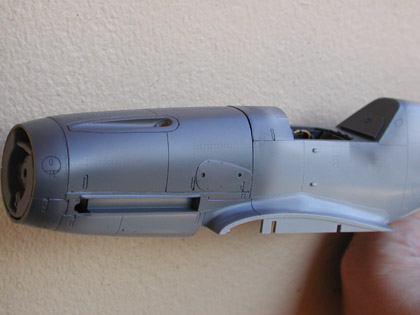
I started by removing the cowl from the original kit
almost according to Aires instructions. I altered the cut and resin cowl
a little to get a much easier cut and resulting less fit problems.
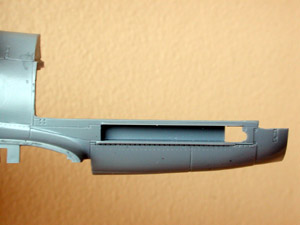
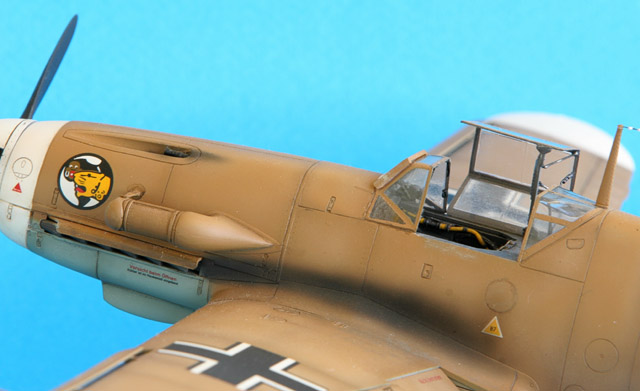
The resin replacement cowl is actually a very nice fit a
goes on quite nicely. As you can see from this initial fit photo it has
good shape re the original fuselage and altogether a nice replacement.
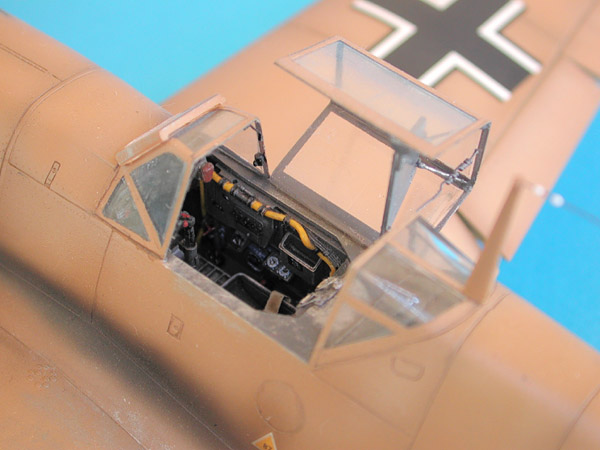
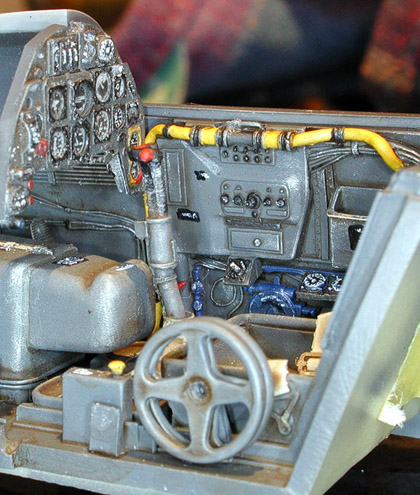
With the test fitting of the nose over I proceeded onto
the lovely cockpit provided by Aires.
It fits well and has great detail which you can see clearly in these
shots.I added handgrips in the cockpit and also the red panel lights for
night flying.
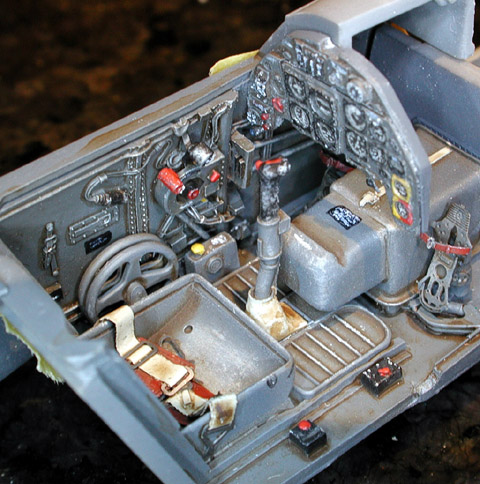
As per normal detail is brought out by using a
combination of raw umber washes followed by dry brushing various metal
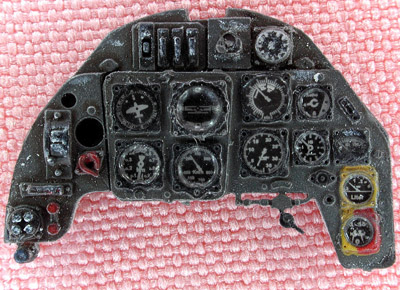
shaded to give the pit that worn used look. The instrument panel is a PE
sandwich with an acetate panel inlay which looks great when finished
With the cockpit finished I joined the fuselage halves
and added the resin nose which as previously stated fitted very nicely
indeed. Altogether pretty smooth sailing for this conversion so far.
Attaching the wing was as per normal Hasegawa form no problem with a
lovely fit, The only problem being a gap at the upper side of the wheel
wells between the well wall and the upper wing section. I eliminated
this by adding some thin plasticard around the perimeter of the well up
to the upper wing thus eliminating the gap.
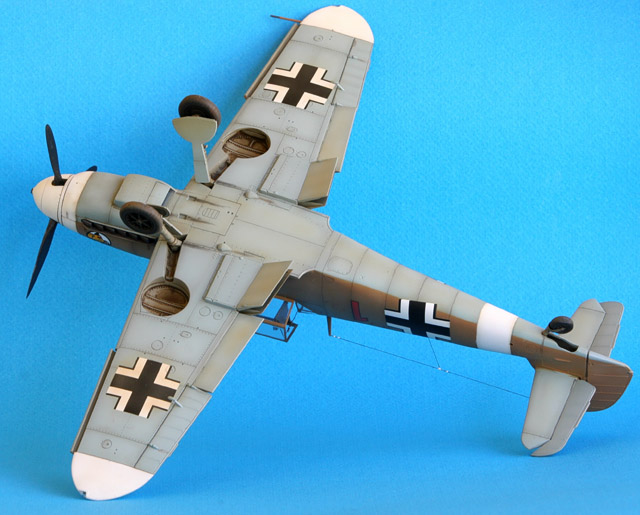
The tailwheel well required Dremel work as the Bf 109F had a retractable
tailwheel. This only took about 15mins of Dremel and filing to make a
nicely shaped tailwheel compartment.
I decided to remove the elevators and place them in a natural down
position and also have the rudder deflected to one side. By scribing
through the plastic this was achieved in quick time and the only major
challenge was to get them in place looking aligned which is always a
problem.
Vac canopies are always a problem for me and this was no different. I am
still not happy with the end result even today.
The front canopy is slightly undersize and the main canopy oversize in
length causing problems with the fit of the front canopy.
Sometimes making vac canopies fi is a bit like washing a cat just when
you think you’ve got it off it goes and does its own thing. What a pain!
Well I finally got an acceptable fit but as I said I am still not happy
but I guess you can’t win them all.
I needed to add some armored glass to the front canopy which was going
to be interesting. I ended up cutting up the kits original front canopy
so that only the centre portion remained. It looks surprisingly good and
was pretty easy to do. Far easier than I originally expected.
With the canopy looking okay it was time to move on.
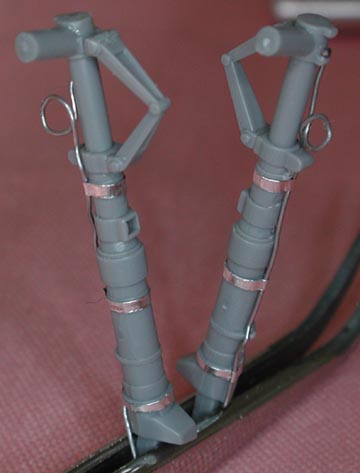
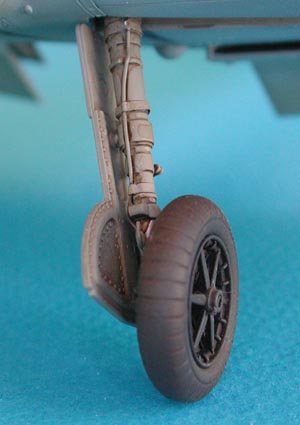
I added brake lines to the gear legs held in place with baremetal foil
strips which looks very realistic as a metal retaining band.
With the basic airframe complete it was time to start
painting.
Apart from some profiles appearing in the Osprey Aces
series I could find very little on this particular aircraft. There are
numerous photo’s of better known pilots from JG27 which helped in
forming an idea on what this aircraft looked like but without good
photo’s you are really flying blind.

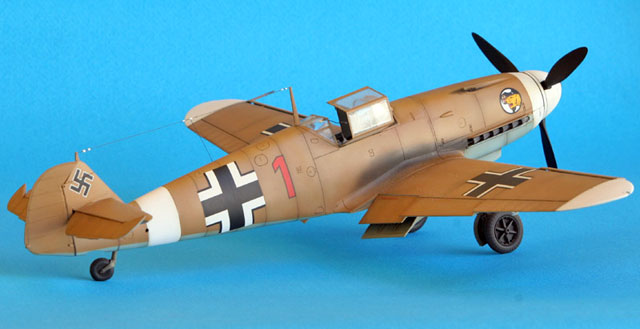
The kit is finished in Gunze acrylics using an Iwata Eclipse 4500 which
is a great airbrush built to the highest standards.
I preshaded the kit and then sprayed the RLM78 topped with the RLM79.
After this panels where faded using lightened RLM79 in the centre areas
of the panels to create a nice faded effect. After decaling using a
combination of Eaglecals and Eaglestrike markings a nice result was
almost in reach.
After decaling I applies an overspray to the entire model of very light
RLM79 to give a real dusty look to the finished model.
Although not entirely happy Model Expo was beckoning so I packed up my
newly finished Bf 109F-4 and headed off to Melbourne.
Given all the Bf 109G-6’s on the table it was nice to be the owner of
something different that stood out in the crowd.
Got some great comments from the guys there as they where as surprised
to see the F4 as I was to find out what was coming in the way of
information about Stahlschmidt’s aircraft.
I ended up hearing that above all of kill markings on the rudder was a
ship kill! You could have knocked me over with a feather!
This was shown nowhere in any of the profiles and was not visible in the
single picture I had of his aircraft.
Well no sooner than my discussion a photo of his rudder with kill
markings and “ship” appeared in my email inbox.
Oh well!
Having returned home after a great comp thoughts of this Bf 109 kept
popping into my mind.
Although happy with the look of the kit something was wrong.
With the information on the new ship kill and not entirely happy with
the finish I had all the motivation I needed to add some more work to
this Bf 109F-4.
I finally stripped the old crosses from the upper side of the wings and
fuselage aircraft along with the swastika’s off the tail and kill
markings.
I repainted the white bands to reflect a less weathered looking aircraft
and was far happier with the final result.
After re-applying all the decals for the markings I made a ship kill
marking that looks quite a bit like that in the grainy photo which
caused this rework.
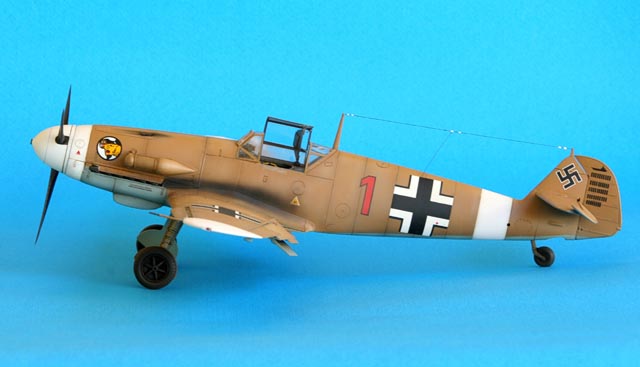
With the new decals in place and some more subtle weathering in place I
am finally happy with my first 1/32 scale Bf 109F-4Z.
This kit was more of an adventure than most with a fair
bit of work involved at all stages even after I thought I had it
finished.
I guess the motto is if you are not happy persist until you are or you
will be tormented by that unfinished beast until you finally give in and
either fix it or turn it into hangar queen.
The Aires set is excellent and well worth the effort and you will get a
nice result.
The Bf 109F-4Z is a great project and I learnt a lot
about modeling and the Bf 109F in the process of building this aircraft
but then I guess that’s why we all build isn’t it?
Finally a big thanks to Brett for running such a high
quality website that has provided me with so many hours of enjoyable
reading and discussion.
Click on the thumbnails
below to view larger images:
Model and Images Copyright 2004 by
Darren Howie
Page Created 20 December, 2004
Last Updated 20 December, 2004
Back to
HyperScale Main Page
|
 Home
| What's New |
Features |
Gallery |
Reviews |
Reference |
Forum |
Search
Home
| What's New |
Features |
Gallery |
Reviews |
Reference |
Forum |
Search