|
Hasegawa
1/48 scale conversion
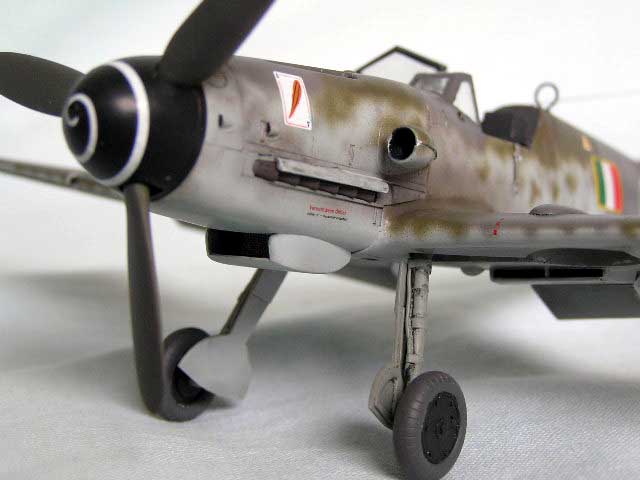
Bf 109G-10 (Erla build)
by Fernando Rolandelli
|
 |
|
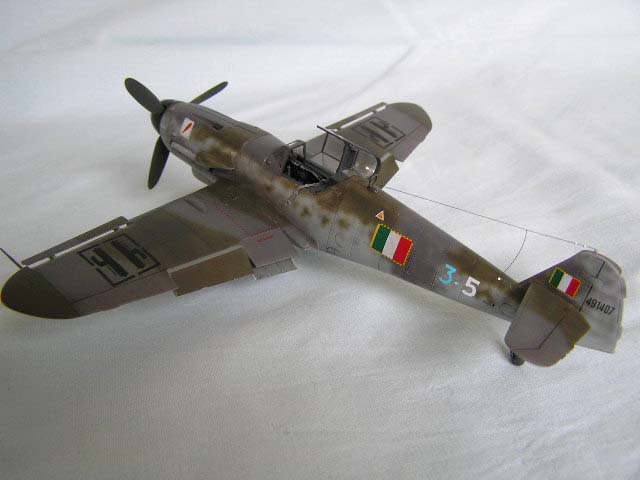
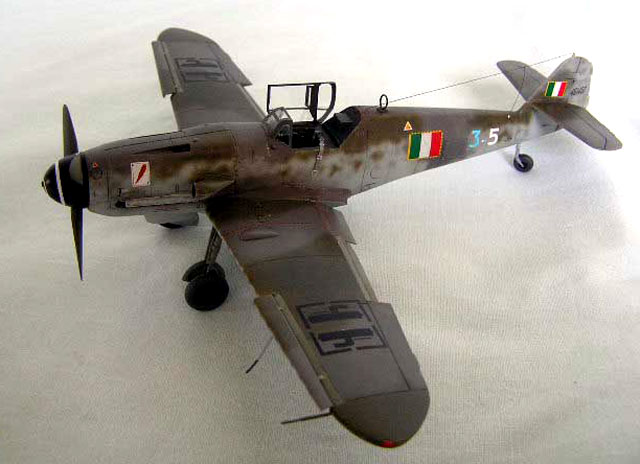
Messerschmitt Bf
109G-10 (Erla)
WkNr 491407, “3-5” from 3ª Squadriglia, 1º Gr. C., Lonate
Pozzolo, 14th March, 1945 |

Hasegawa's
1/48 scale Bf 109G-10 is available online from Squadron
.
Writing a general history of the 109 would be like trying to reinvent
the wheel, so we should instead concentrate on the history of 491407 in
particular. Built at the Erla factory (all within the 490xxx and 491xxx
batches), it was tested on 18 February, 1945, and was among the very
last machines received by the 1o Gruppo, or by ANR as a whole. It is
known to have undertaken undercarriage retraction tests on 14th March,
being somewhat extensively photographed. A few hours later, a formation
that included Cap. Cesare Marchesi flying it was involved in combat with
P-47Ds from the 305th FG, ending in several losses, with Marchesi
himself making an emergency landing at Ghedi, where “3-5” was abandoned.
There exists a report by the Nº 1 FIU, an Allied intelligence unit,
describing it as “fuselage only”. There existed another “3-5”, Wrk.Nr.
491495, another Erla built G-10, which replaced it.
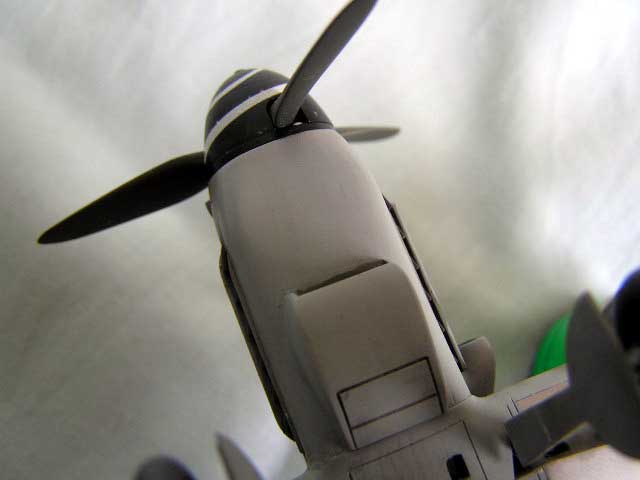
The Erla 109s have been badly misrepresented in the past, and only
recent research has uncovered the true nature of these machines. Rather
than being “G-10/ASs”, as previously considered, they are legitimate
G-10s, fitted with the DB 605 D engine. The Erla engineers devised a new
cowling, the Type 110, which dispensed off with the chin bulges thanks
to a wider and squarer contour. It must be emphasized that the pipes
were there, so the inner space was the same. Neither WNF nor Regensburg
adopted the model, presumably because of the need of avoiding delays in
production. The other hallmarks of the DB 605 D engine (the oil filler
access and the cold weather starting device hatch placed in a higher
position) are present. The round fairing in the left side of fuselage
was also dispensed with, replaced by a square one. All this suggested in
the past the presence of a “normal” DB 605 AS engine, hence the wrong
denomination (true, there was a very short run of G-10s equipped with
this engine, may be 50 machines… they could be identified by the
position of the aforementioned hatches).
The base kit is the Hasegawa 1/48 Messerschmitt Bf 109G-10 “JG 51”,
which, of course, lacks every distinctive characteristic of an Erla 109,
but at least comes with the small upper wing fairings and shows the
proper hatches in the nose area. Apart from that, it is too short in the
nose, a quick comparison with the fuselage of the 109F/G-2 series by the
same manufacturer shows that very well; however, but itself it is hardly
noticeable, total difference may amount to less than 2 mm. All the
conversion sets, like the one by MDC, should be discarded, as based on
earlier inaccurate data. Decals came partly from the SkyModels “Italian
Bf 109s” sheet, partly from the equivalent, long gone and sorely missed,
Aeromaster sheet. Interior was the new and extremely good Aires set.
Armed with this equipment I set to building an Erla 109, scratchbuilding
the necessary conversions.
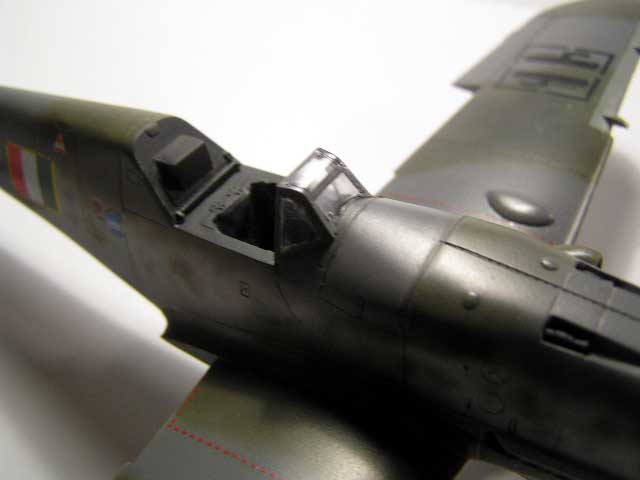
Conversion
Though apparently easy, you should undertake any job like this with
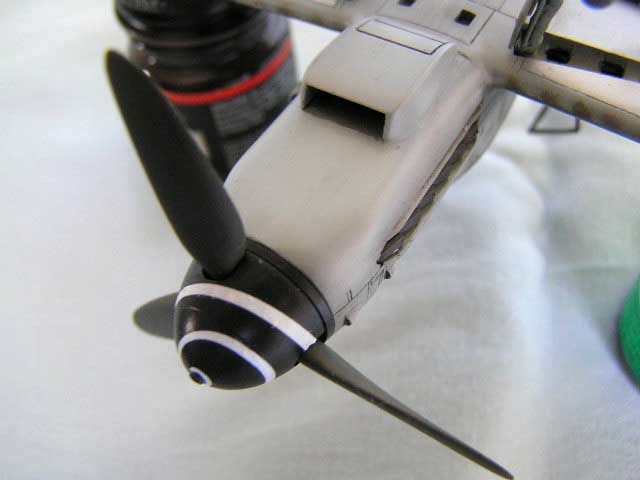
extreme care. My plan was simply fill in with epoxy (the
never-enough-praised Parsecs) the area around the chin bulges and sand
that until the very “crown” of each showed up, a process which would
keep the volume while hiding the bulges themselves.

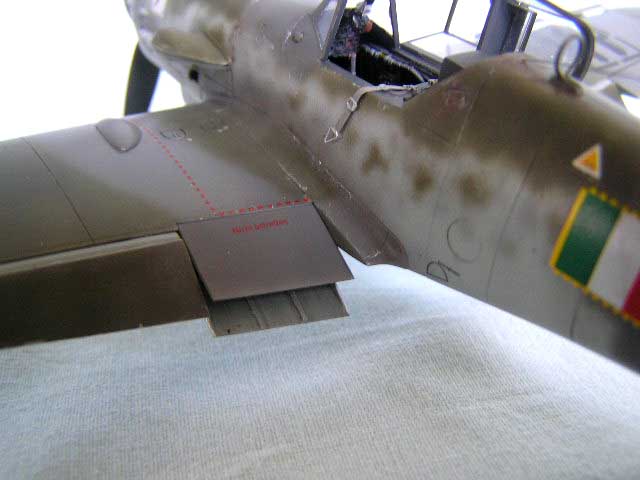
As per the round bulge in the left fuselage, I planned to fill the
crescent-shaped cavity between it and the wing root with more of the
same stuff and sanding it until it faired into the fuselage; then,
rescribe the panel line.
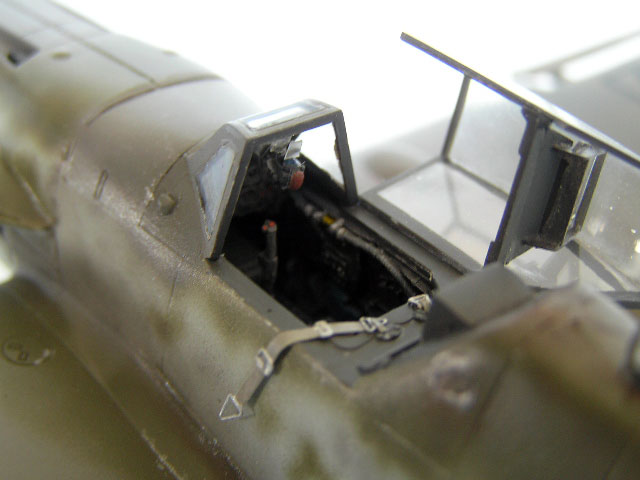
Much to my amazement, all this operations came up quite well. The
windscreen was left a bit narrow, presumably because of the new epoxy
fairing; I just forced it a little, just to the point of strain, and
then faired it in with putty (a vac replacement would be much easier to
work with).
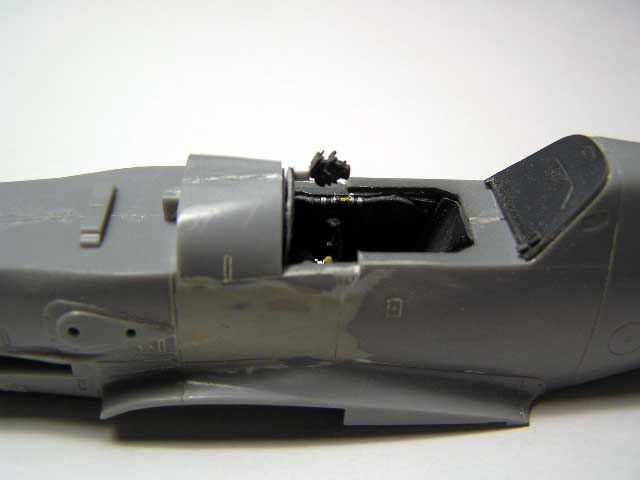
I also sanded a bit of its underside, to avoid the unsightly step
just in front of the windscreen often seen in finishes examples of this
kit (I know, in the real plane panels did not fit at all well in this
area, but in a model it seems a very noticeable blunder)
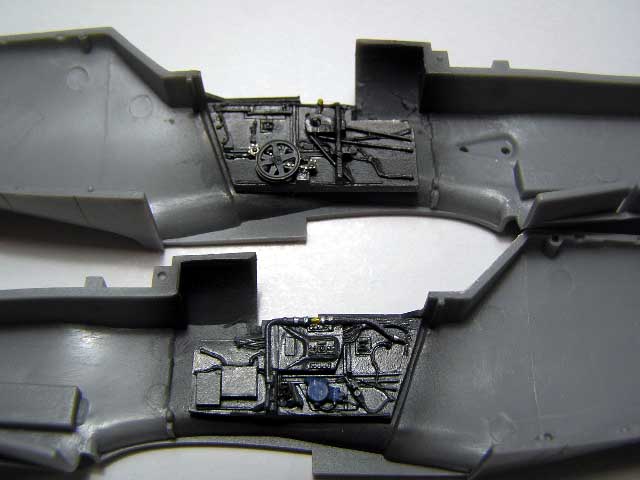
Cockpit, fuselage and wings
Relieved by the success of the conversion work (failure of which
would have resulted in the kit going straight into the proverbial bin),
I installed the resin cockpit, which really fitted like a glove,
including the suspiciously designed backplate, which overlaps the rear
bulkhead and must be carefully faired in with putty, and the plate
supporting the shoulder harness, which must be fitted very carefully to
the kit. Oddly, there is no provision for the very prominent bulge for
the battery in the rear hatch, so I built one with a piece of resin. The
rear armor, in “transparent” resin with tiny photoetched attachments,
looked like a real pain, so I just cut the lower part of the “solid”
shield in the kit and glued it to the proper area in the Aires one.
After some putty and sanding, it looked OK and certainly fitted with
less trouble.
A case should be opened regarding the prominent cannon case housing.
G-10s came with both the MG 151/20 and the Mk 108 as Motorkanone, and
the housings of both differ considerably. Italian pilots (and also
German) referred to any 30 mm armed 109 as a “K-type”, a thing which did
not occur regarding this particular example. On the other side, a quick
mail to Lynn Ritger showed me that he was in the opinion that this
particular machine had the smaller cannon; machines very close in Wk.Nr.
to this one did. Enough is enough.
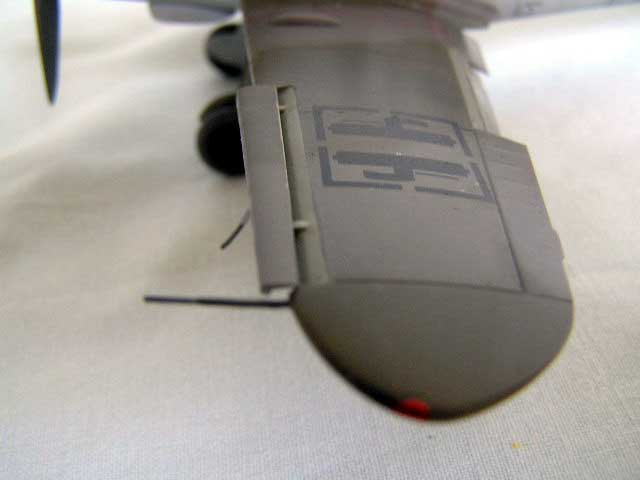
The wings received the usual improvements in the wheel wells, including
the hollowing of the holes in the leg well, which were furnished with
assorted cables from the inside, and the building up of the “false roof”
to mimick the cut out for the wheel in the upper wing. Having built a
“hard wing” Academy example, I decided for a “full down” one, placing
both flaps and radiator louvers in the “down” position. I also faired in
the ugly step at the back of the slats (photos show just the step formed
by the thin metal sheet, indiscernible in scale thickness) and added the
“arms” for the slats projection (they do not “fall”, but “go forward”)
The wing roots were somewhat crazed by the addition of sheet plastic and
other things and took some care to fit, as did achieving the proper
dihedral.
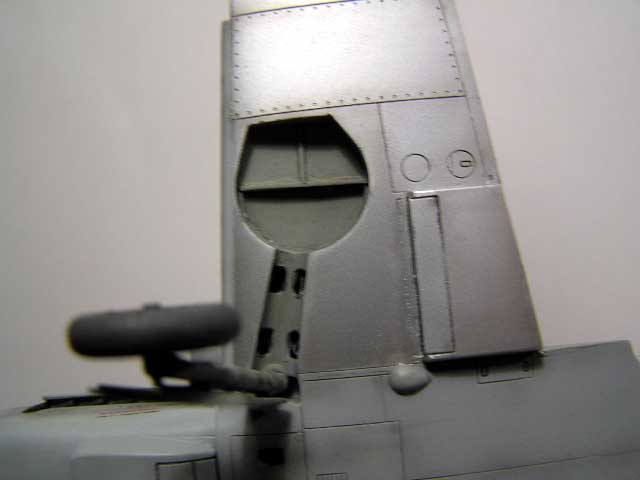
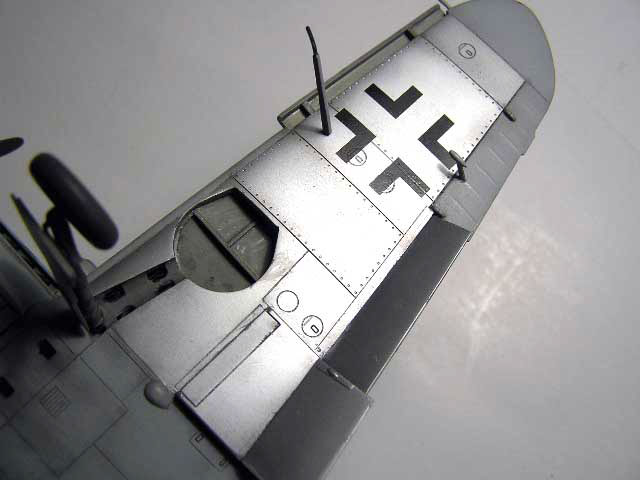
Paint
Why would anyone build a late 109 but for the pleasure of painting
it? In this case, as an Erla machine, the camouflage would be the basic
RLM 75/83/76. Pictures of the undercarriage retraction testing shows
that the wings undersurface were in NMF, exception made of the wooden
tips and the fabric ailerons (and the leading edge, which do not show
the same reflectance, and the undercarriage doors, of course) I decided
to leave in NMF the wings just up to detachment line, so the fuselage
belly would be painted 76 (IMHO, this arrangement would be the most
reasonable; wings were built as separated pieces and there was no reason
not to paint the fuselage belly, which would have even involved some
masking); beware that most drawings show the entire underwing in NMF.
Paints used for the camouflage came from the WEMM line; the NMF from the
Alclad II. Not having any seam crossing the NMF area, I decide to polish
the bare plastic and apply the Alclad straight over it; I did this
without any inconvenience. All airbrush work was performed with a trusty
Paasche VL.
Weathering was achieved by means of a preshade under the “painted”
areas, and an overall post-shade, including the NMF areas, after decals
had been applied. I usually protect enamel painted surfaces from washes
with a clear acrylic coat, and I applied it even on the Alclad; metallic
reflectance does change a little, but being on the safe side for
applying decals and washes is worth the loss. Anyway, I went light with
weathering; the operational history of 491407 was very, very short.
Decals
Most of them came from the Aeromaster Italian 109s sheet; it depicts
this very machine, but the tactical number “3-5” is oversized and the
“3-“ in Green. In discharge of Aeromaster (aka “Errormaster”) it must be
said that D’Amico and Valentini had published this code as being Green
in all their previous works; the “Saxe Blue” colour is very recent
doctrine based upon the aforementioned Technical Report from the Nº1 FIU.
The SkyModels sheet depict this elusive color quite well (IMHO it is too
bright, but quite passable); unluckily, flags are very bad (fringe
“teeth” are too small and numerous) and the general quality of the
decals is terrible (other sheets, notably the one on 190A’s, are not so
bad), so I ended up using only the codes (which were heavily trimmed
down), with all others coming from Aeromaster sheets (the one already
mentioned and another with stencils), whose quality is really amazing.
I have a soft spot for Italian 109s, and for ANR ones specifically: IMHO
the flags look real good on them. A true Erla 109 is also a relatively
uncommon sight in the vast field of 109 models, and the metal
undersurfaces add interest to the camouflage –or lack of- without
compromising the model.
It is incredible that most SkyModels sheets (of Italian origin)
completely missed the ANR flags. If more ANR decal sheets –of good
quality- were available, I would be among the ones to welcome them.
-
“Camouflage and Markings of the ANR,
1943-1945”, D’Amico and Valentini, Specialty Press Publications
-
“The Messerschmitt 109 in Italian
Service”, D’Amico and Valentini
-
“German Aircraft Interiors 1939-1945,
Vol.1 Day Fighters”, K.A. Merrick, Monogram Publications
Click
the thumbnails below to view larger images:
Text and Images Copyright ©
2006 by Fernando Rolandelli
Page Created 11 December, 2006
Last Updated
21 February, 2007
Back to
HyperScale Main Page |
 Home
| What's New |
Features |
Gallery |
Reviews |
Reference |
Forum |
Search
Home
| What's New |
Features |
Gallery |
Reviews |
Reference |
Forum |
Search