|
Hasegawa's 1/48 scale
Messerschmitt Bf
109G-10
by
Tony Bell
|
 |
|
Messerschmitt Bf 109G-10 |

Hasegawa's
1/48 scale Bf 109G-10 is available online from Squadron
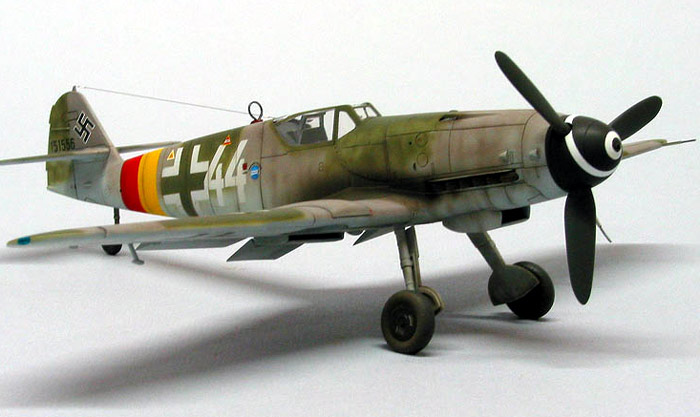
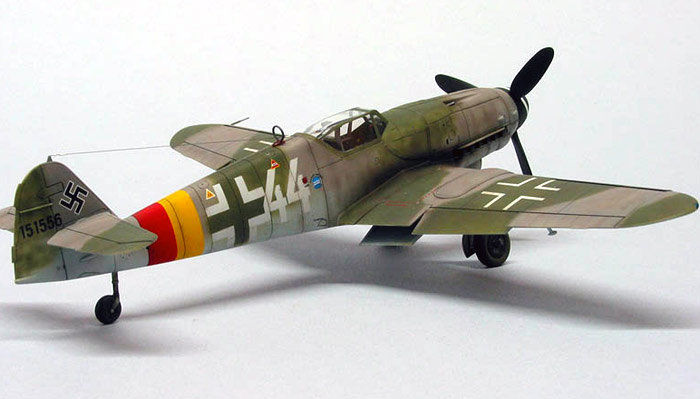
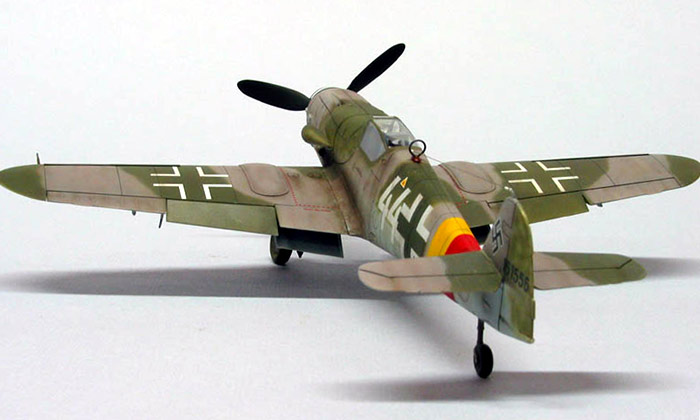
The Messerschmitt Bf 109G-10
was the penultimate incarnation of the ‘Gustav”, featuring the
asymmetrical streamlined cowl bulges to accommodate the DB605G engine
with its larger turbosupercharger and MW50 methanol-water injection. It
also featured beefier main wheels and their attendant wing fairings,
tall tail wheel and tall wooden rudder.
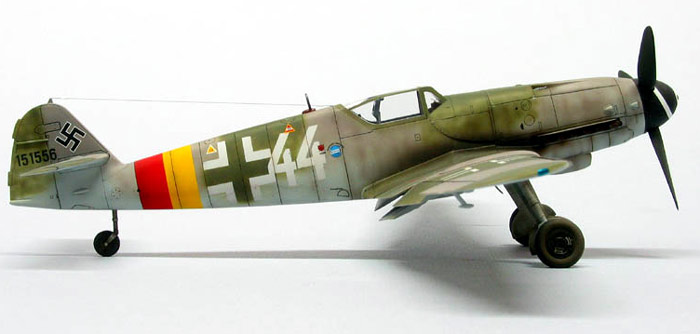
Hasegawa's
1/48 scale Bf 109G-10
|
The late-model Bf 109 series
of kits represent everything that I like about Hasegawa - simple
construction, good fit, fine surface detail and thin, clear canopies.
They also represent Hasegawa’s
primary weaknesses, i.e. simple cockpit detail, minor accuracy issues
(spinner shape, prop blades length and oil cooler scoops location) and
thick, cream coloured decals.
The strengths far outweigh the
weaknesses though, making these kits perennial favourites for WWII
aviation modellers.
As usual,
construction started with the cockpit.
No wait, not this time. Sorry,
force of habit.
Actually, I started
construction with the fuselage, as the design of the kit allows the
cockpit to be inserted after the fuselage has been assembled. The Bf
109’s construction was typically Messerschmitt, in that there was a join
line running along the top and bottom of the fuselage. In order to
duplicate this, I eased the edges of the fuselage halves by gently
sanding them at a 45°
angle. To join the halves together I ran liquid cement along the inside
of the fuselage so as to avoid melting the panel line.
The top of the engine cowling
is a separate piece that took a bit of careful sanding and dry fitting
to get it to appear integral with the rest of the nose. I brushed some
Gunze Mr. Surfacer 1000 into the panel lines and wiped the excess away
with rubbing alcohol after it had dried for 15 approximately minutes.
This results in panel lines of a uniform depth and makes them look
consistent with the rest of the fuselage. The fit of the chin radiator
was a bit off so I worked some epoxy putty into the seam and wiped the
excess away with a damp Q-Tip.
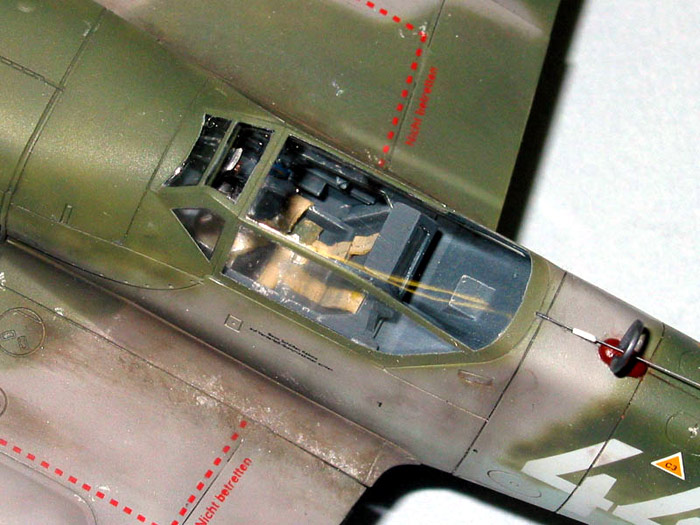
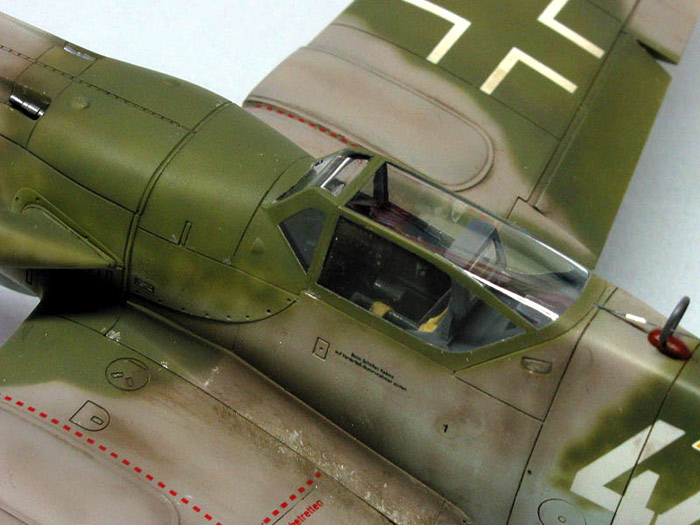
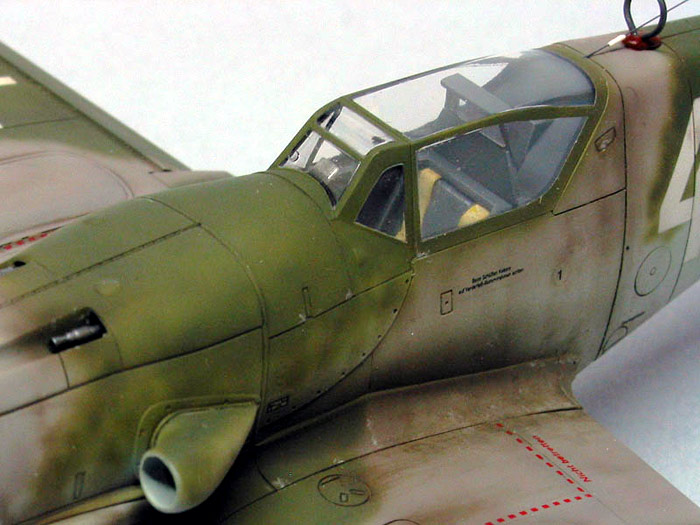
At this point I started the
cockpit, which was sprayed with Tamiya XF-63 Dark Grey, followed by a
coat of Future, a wash of gloss black Testor’s enamel, a coat of Polly
Scale flat and a light drybrushing of medium grey artists’ oils.
Chipping and scuffing was drawn on with a silver coloured pencil to give
the cockpit a lived-in appearance. The kit supplied instrument panel
decal was applied whole and doused with liberal amounts of Gunze Mr.
Mark Softener. I was pleasantly surprised at how well the seemingly
thick decal conformed to the sharp relief of the instrument panel. After
spraying PS flat on the panel, the individual gauge faces were painted
with drops of Future to give them a glassy look.
Because I wanted to do this
kit as an IPMS rules Out Of the Box build, I made the seat harness out
of Tamiya masking tape painted XF-57 Buff and XF-58 Olive Green with
silver buckles and stitching drawn on with a sharp pencil. Positioning
tape belts is easy because they can be stuck to the seat and pulled up
repeatedly until an acceptable drape is achieved, unlike etched belts
that have to be bent to shape first and then attached with glue,
affording only one chance to get it right.
The rest of the construction
was very straightforward, with only minor trimming and dry fitting
required to achieve a perfect fit between the rear of the lower wing and
the fuselage. No filler was used anywhere.
In order to allow for
commonality between their Bf 109-F, -G and –K kits, Hasegawa has you
square off the wheel well openings and scribe a line on each outboard
upper wing panel. My favourite scribing tool is a No. 24 X-acto blade
with a miniscule portion of the tip ground away. Using a piece of
electrical tape as a guide, I drew the blade backwards for a few light
passes until I had cut to the correct depth. I then brushed a small
amount of liquid cement into the lines and let it dry, whereupon I
sanded them smooth with 800 grit sandpaper. The result was a panel line
that is indistinguishable from the others.
After a dip in Future, the
canopy parts were masked and attached with liquid cement. The entire
model was then washed with dish detergent, rinsed and left to fry for a
day.
The model was first primed
with Tamiya Flat White followed by a light coat of Future. Not content
with the thick, creamy coloured kit decals, I applied the fuselage
crosses and “44” to a sheet of Frisket masking film and carefully cut
around them with a new X-acto blade and straight edge. The masks were
then positioned on the fuselage and burnished down with a toothpick. The
reason for over coating the white with Future is that the adhesive of
the Frisket film tends to attack the Tamiya paint, pulling it up when
the masks are removed. The Future eliminates this problem.
The model was then pre-shaded
by airbrushing Tamiya flat black along panel lines and in areas of deep
shadow. The yellow RDV band (Tamiya flat yellow plus a drop of red) was
airbrushed and masked, followed by the red (Tamiya red with a drop of
yellow) which was also masked off.
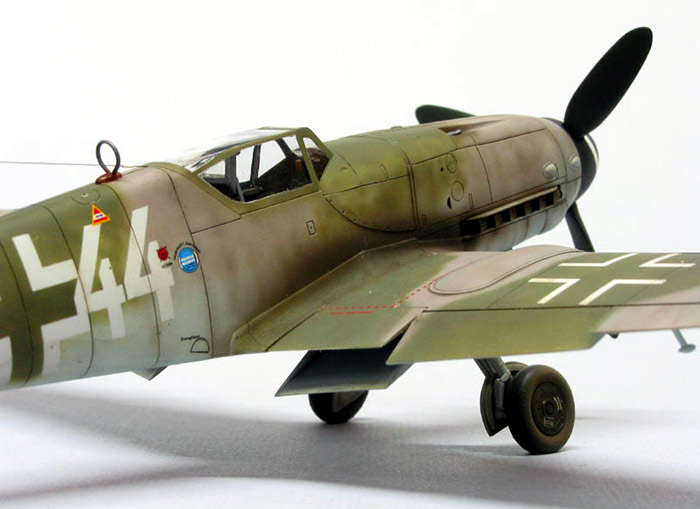
The RLM 76 light blue, RLM 75
grey violet and RLM 83 (or is it 82? I can never remember. Curse you
Official Monogram Guide!) were all mixed from Tamiya paints, using
Aeromaster and Polly Scale colours as guides. Why didn’t I just use the
pre-mixed paints, you ask? Well, I’ve never had much success with either
brand when it comes to fine control required to do Luftwaffe mottling,
whereas with Tamiya I have.
I painted the undersides with
heavily thinned (3:1 isopropyl alcohol to paint) RLM 76 applied in light
coats, allowing the pre-shading to barely peek through. I enlarged the
instructions’ painting guide to 1:48 on a photocopier, glued the pattern
to some heavy paper and cut out masks. I sprayed RLM 75 on the wings and
horizontal stabilizers and then stuck the masks down with little rolls
of Blu Tac so that they were held a few millimetres off the model
surface in order to provide a slightly feathered edge. I then sprayed
the RLM 83 on the wings and stabs, taking care to keep the direction of
the spray perpendicular to the spaced paper masks. The upper and lower
wing crosses were airbrushed on using Frisket masks.
The fuselage mottling was
considerably more diffuse that the camouflage on the wings, so I elected
to spray it freehand. I wanted to somehow mark the demarcation lines
between the colours, but I didn’t want to use a pencil as it would show
through. Then I had a little brainwave and hit upon the idea of using
Future and a fine brush to mark out the pattern. The glossy lines of
Future were nicely visible on the matte surface, but would disappear
under the subsequent clear coats.
The colours were sprayed
heavily thinned (6:1 alcohol to paint), gradually building up a greater
density on the top with a more diffuse look on the sides of the
fuselage. The inevitable boo-boos were fixed with touch ups of 75, 76
and 83.
I removed the masks for the
fuselage markings and airbrushed a coat of Future prior to applying the
decals. I used Aeromaster’s generic Bf 109F/G stencils and the kit Werk
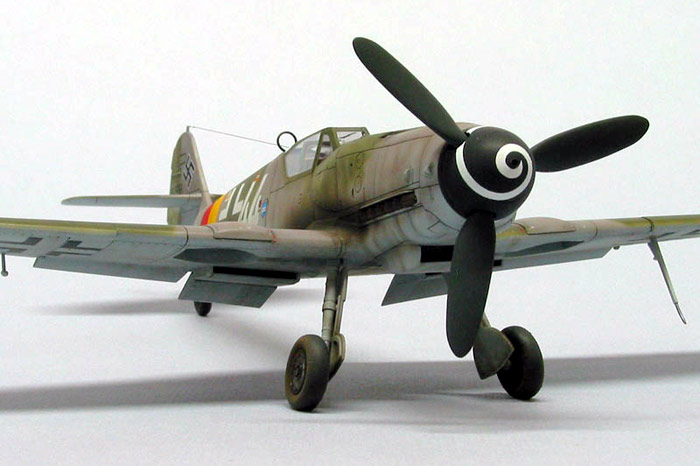
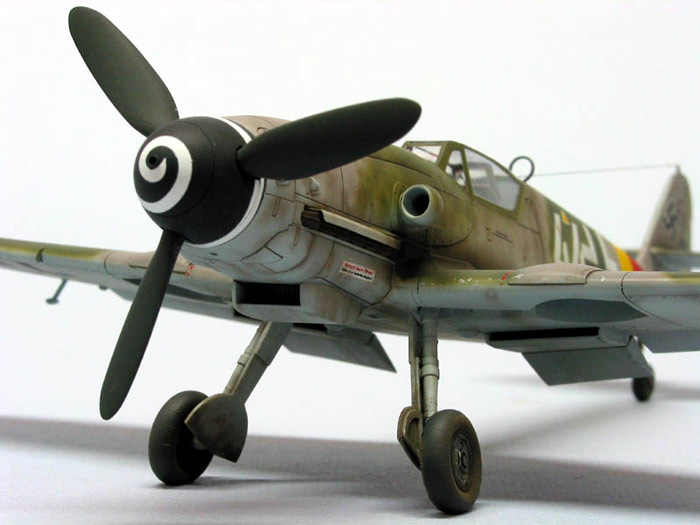
No. I managed to mangle the kit spinner spiral, but William Lawlor came
to the rescue after answering my plea for help on Plane Trading. In true
HyperScale form, he sent me two spiral decals, refusing to take anything
in return.
A thin wash of dark brownish
grey mixed from Windsor and Newton burnt umber artists’ oil paint was
applied to the upper surface panel lines. A similar colour mixed from
Tamiya paints and thinned 90% with alcohol was then airbrushed in a
random, streaky manner over the entire model. The model was sealed with
a coat of Polly Scale flat and some light chipping around the high wear
areas was simulated by gently tapping with a silver coloured pencil.
Yet another mix of the same
dark grey/brown colour, this time from MiG pigments (Soot Black, Ashes
White and European Dust), was applied to the wing roots and
undercarriage and fixed in place by brushing on clean turpentine.
Finally, the exhaust stains were airbrushed with a mixture of Tamiya
black and brown, thinned 90% with alcohol.
The pitot probe, aileron mass
balances and the under wing antenna were attached, and any glue glossies
touched up with Polly Scale flat. On the advice of 109 cogniscentus
Vincent Kermorgant, the ADF loop was painted Humbrol Metalcote steel
with a reddish brown bakelite base. The radio antenna was nylon thread
painted Humbrol steel, with insulators made from sections of stretched
Evergreen styrene tube. To make the insulators, I heated the tube over a
candle and stretched it thin, after which I cut the insulators to length
with a new X-acto blade. These were then carefully threaded onto the
antenna which was then superglued into anchor holes made with a No. 80
drill bit. After tightening the antenna up with hot air from a paint
stripping gun, the insulators were fixed in place with a small amount of
Future brushed on. The little round insulator was made from a dab of
superglue painted white.
Since taking the pictures,
some folks of the ever-helpful Hyperscale community pointed out (with
backup references to boot) that there should be a lead-in for the
antenna where the red portion of the RDV and is. It’s now there on the
model, so just squint your eyes and look off to the side of the pictures
and pretend it’s there!
Of any kit in any scale, there
has to be more reference material, aftermarket decals, resin and
photoetch available for the 1/48 Bf 109 than for anything else. Yet in
spite of this embarrassment of riches, the Hasegawa 109s are a near
perfect choice for an Out Of the Box build because of their simple,
viceless construction and nice detail.
Click the
thumbnails below to view larger images:
Model, Images and Text Copyright ©
2004 by Tony Bell
Page Created 06 May, 2004
Last Updated
06 May, 2004
Back to
HyperScale Main Page |
 Home
| What's New |
Features |
Gallery |
Reviews |
Reference |
Forum |
Search
Home
| What's New |
Features |
Gallery |
Reviews |
Reference |
Forum |
Search