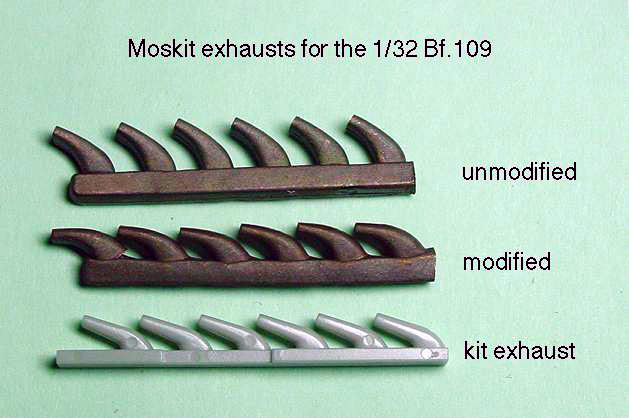
Moskit Exhausts
Moskit exhausts were used in place of the kit exhausts. An advantage
of Moskit exhausts is that their hollow metal design and natural burnt
metal finish look very realistic. However, as can be seen in the photo
below, the Moskit exhausts deviate substantially in appearance from the
kit parts. This problem is not as critical as it seems. To fit the
Moskit parts properly it is necessary to deepen the wells for the
exhausts. This is a straightforward modification that most modelers
would not find difficult. Unfortunately, at the time of building I was
unaware of this solution (and Moskit does not provide instructions).
Instead, I chose to modify the exhausts by pushing the stacks down with
my fingers until they approximated the appearance of the kit parts
(admittedly a crude approach, but in the end it produced a result I was
pleased with).
In summary, Moskit exhausts are worthy of consideration as a
replacement for the kit exhausts, although it is worth noting that both
Cutting Edge and MDC produce replacement exhausts that fit directly into
the kit parts without modification.
Tail Wheel Modifications
The kit supplies a tail wheel with a rubber dust cover. However, the
particular aircraft I was building did not have the dust cover, so I
removed the cover and used a piece of wire to create the oleo.
In addition, the tail wheel well was exposed and a stiffener was made
from strip styrene and glued around the edges of the wheel well. As far
as I can tell the G-2/4 did not have the tail wheel well closed - this
was a modification introduced in the G-5.
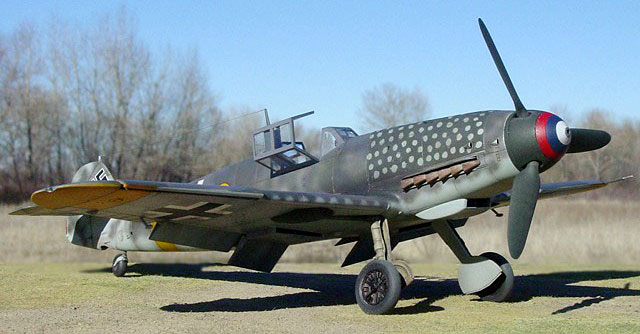
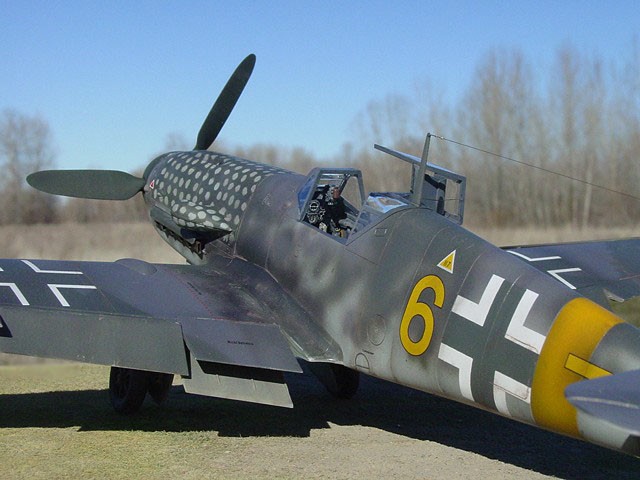
This aircraft displays the standard Luftwaffe mid-war fighter scheme
of RLM 74/75/76, with yellow theatre markings under the wing tips and
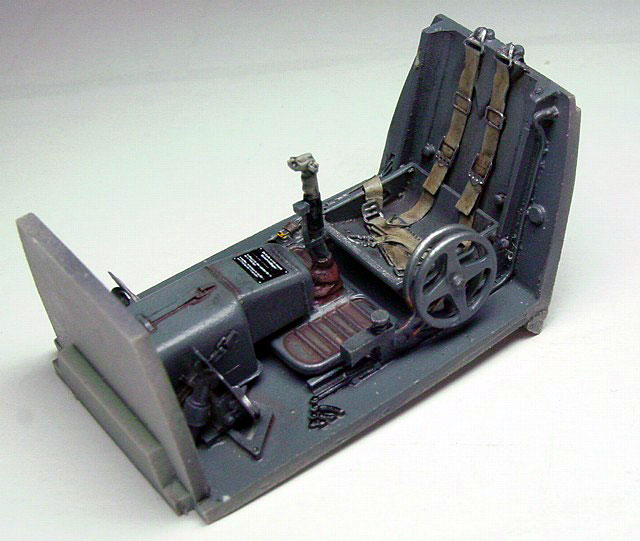
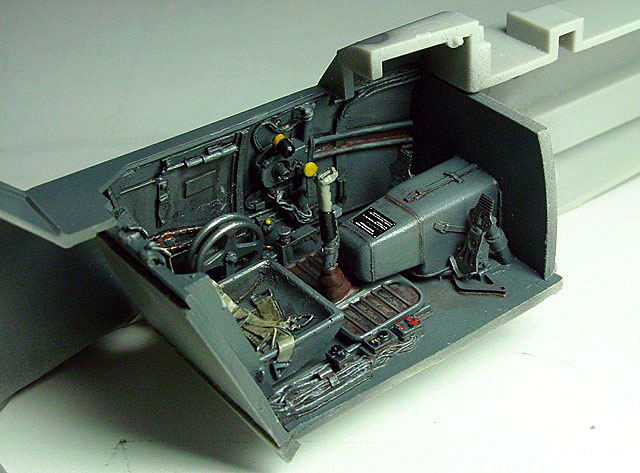
around the fuselage. The cockpit was painted RLM 66, and the
undercarriage and wheel wells RLM 02. All painting was done with Polly
Scale acrylics and an Iwata HP-C gravity feed airbrush.
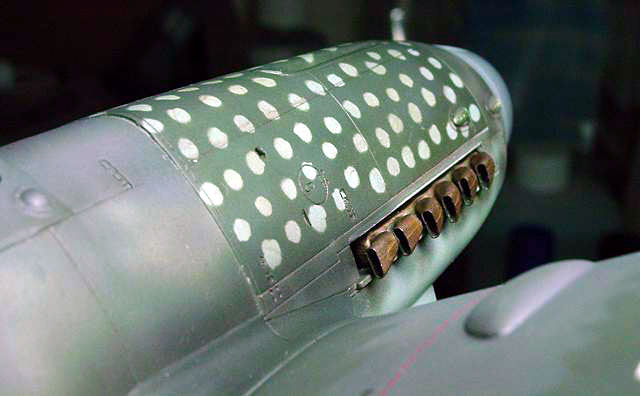
The pattern on the engine cowl was produced by first painting the
cowl RLM 76 light blue. Once the paint had dried, small pieces of
UHU-Tac (an adhesive product similar to blue-tac) were carefully
positioned over the cowl in a semi-regular pattern using photographs as
a guide. The cowl was then sprayed RLM 74 and the UHU-Tac was removed.

Exhaust stains were made by spraying highly thinned black paint. Some
additional "post-shading" over the model was done in a similar manner,
although much more lightly than the exhaust stains. Scratches and scuffs
were made near the root of the port wing to simulate wear caused by the
pilot entering and exiting the aircraft. Panel lines were darkened
slightly using a thinned mixture of burnt umber and raw sienna enamel.
The red, white and blue markings on the spinner were painted using
variously-sized circular masks made from Tamiya tape and/or liquid mask.
I began by painting and masking the white tip, followed by the red
ring and then the blue ring (blue covers best and thus hides the red and
white). The rear half of the spinner was painted RLM 70, as were the
propeller blades.
A gloss coat of Future floor wax was sprayed over the model and left
to cure prior to adding decals. EagleCals EC#41 decals were used because
they contained the appropriately shaped "Yellow 6", as well as standard
Luftwaffe markings and superb stencils. For the final clear coat I
spayed a mixture of 50% Polly Scale clear flat and 50% Polly Scale clear
satin once the decals had dried.
The antenna was made from stretched sprue.
Images of the completed model were taken outdoors with a SONY S-75
digital camera set at its highest picture resolution (2048 x 1536
pixels). Other camera settings were as follows: 200 ISO film speed,
800-1000th/sec shutter speed, and F-stop 8.0 (highest possible). Images
were cleaned up using Adobe Photoshop 6.0 for the Macintosh.
Specifically, the interface between the base and background were
merged using the software's "blur" tool, and edges in photographs were
sharpened using the "sharpen edges" tool. Sharpening images in such a
way helps to restore some of the clarity lost during image compression.
Click on the thumbnails
below to view larger images:
Slovakian and Bulgarian
Aces of World War 2
Aircraft of the Aces 58 |
|
|
|
|
Author: Jiri Rajlich
Illustrator: John Weal
US Price: $19.95
UK Price: £12.99
Publisher:
Osprey Publishing
Publish Date:
February 25, 2004
Details: 96 pages; ISBN: 1841766526 |
|
|
Model, Images and Text Copyright ©
2004 by Ian Robertson
Page Created 31 March, 2004
Last Updated 01 April, 2004
Back to HyperScale
Main Page
|
 Home
| What's New |
Features |
Gallery |
Reviews |
Reference |
Forum |
Search
Home
| What's New |
Features |
Gallery |
Reviews |
Reference |
Forum |
Search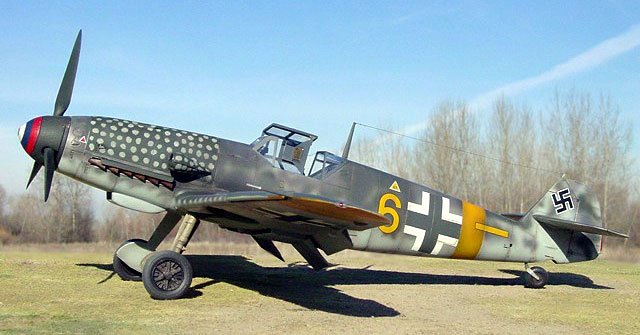

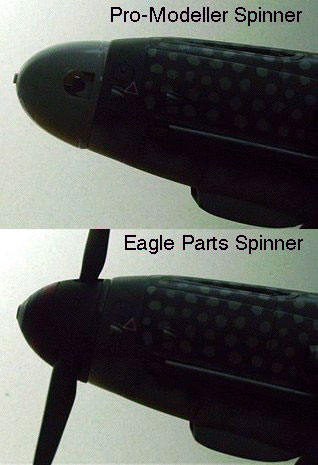 Eagle
Parts Spinner
Eagle
Parts Spinner