|
Hasegawa's 1/32 scale
Messerschmitt
Bf 109G-6
by Brian Geiger
|
 |
|
Messerschmitt Bf 109G-6 |

Hasegawa's 1/32 scale Messerschmitt Bf 109G-6
is available online from Squadron.com
While browsing through all the goodies at the IPMS Nationals vendor
room (Atlanta 2005), I spent some time at Jerry Crandall's Eagle
Editions table. A new book on JG 300
http://www.eagle-editions.com/jg300.htm had just come out and
Jerry had some new decal sheets featuring some of the unique planes
featured in the book.
http://www.eagle-editions.com/decal88.htm . I was immediately drawn
to the dark grungy looking red 6 night fighter scheme. I had yet to
attempt a wilde sau so this seemed like a worthy project. Hasegawa's
1/32 kits provide a large enough "canvas" to pull-off busy schemes with
greater resolution.
Santa was good to me last Christmas and left a set of Floyd Werner's
Master Class Clinic DVDs
http://misc.kitreview.com/bookreviews/masterclassvideoreviewbh_1.htm
under my tree. This would give me the chance to build the kit with Floyd
riding shotgun.
In spite of the near constant ridicule from my kids for "watching
video of someone building a model", I really enjoyed viewing each
segment before attempting the assembly myself. This was the second 1/32
Me109 I've built so I could appreciate many of the tips that Floyd
offered. Maybe I spend too much time "noodling" but Floyd breezed
throught the cockpit in a fraction of the time I usually spend. Yet, it
turned out great. In fact, I really liked how the DVD series moved
through all phases of the model without getting hung up on the little
hurdles that I often dread. I was chagrined to find that there were a
couple assemblies that I had previously done plain WRONG due to
misinterpreting the instructions. I had already been using Mr. Surfacer
to fill seams and had read other's suggestions for using thinner or
accetone to wipe away the excess, rather than sanding. Somehow, seeing
it demonstrated made it work for me. Wow, what a timesaver! When it came
time to start painting the exterior, it was obvious that I had a better
quality build than my previous kit.
Click the thumbnails below to view larger images:
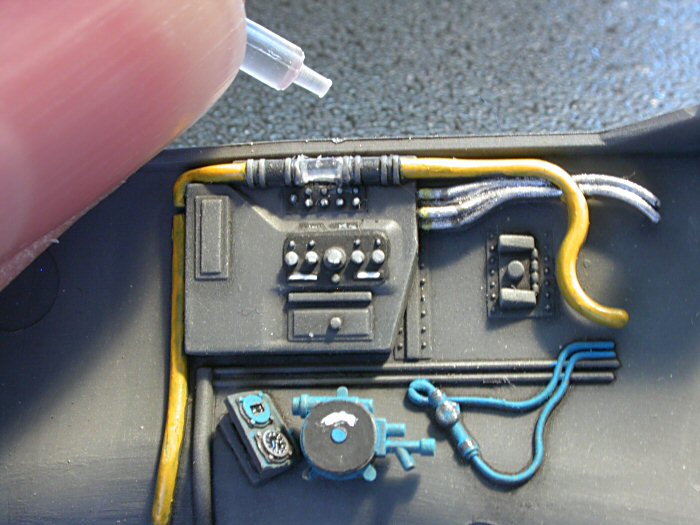
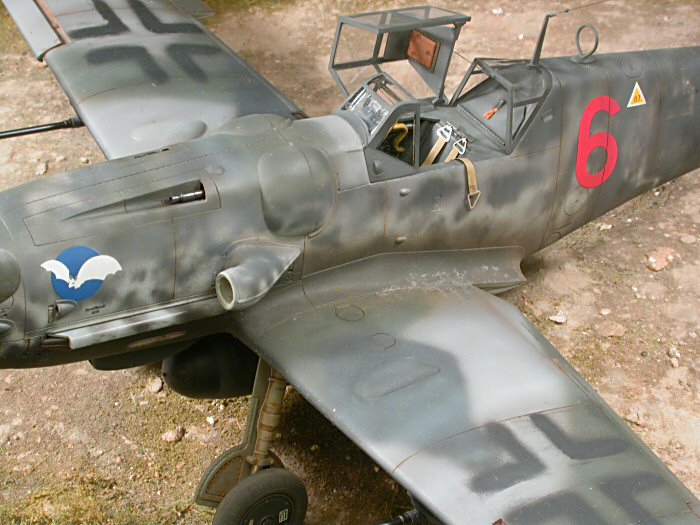
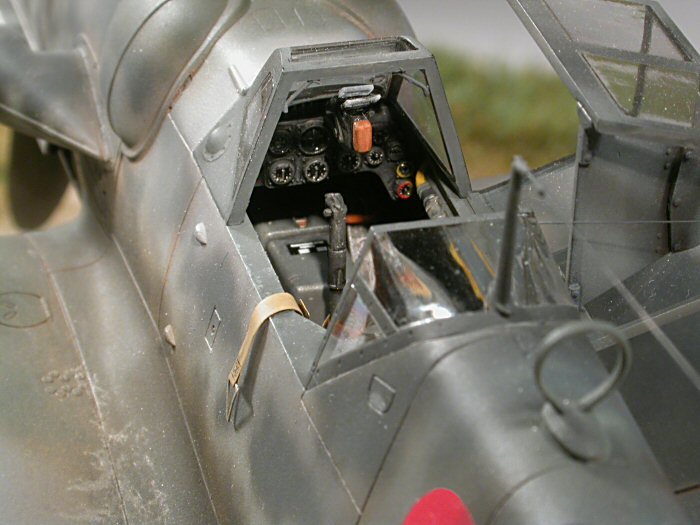
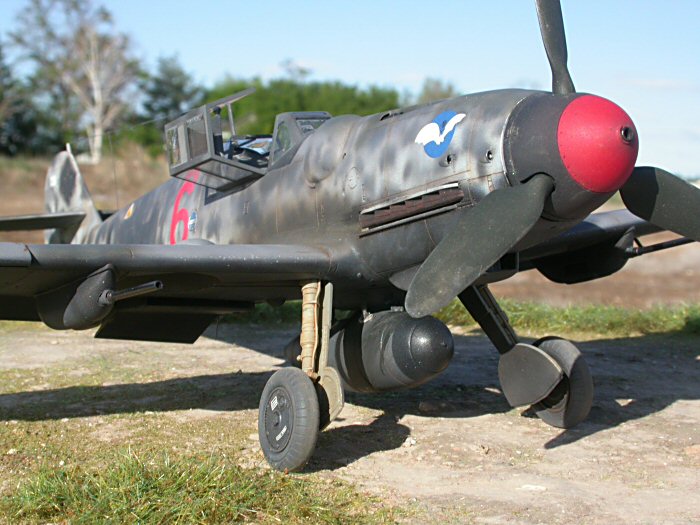
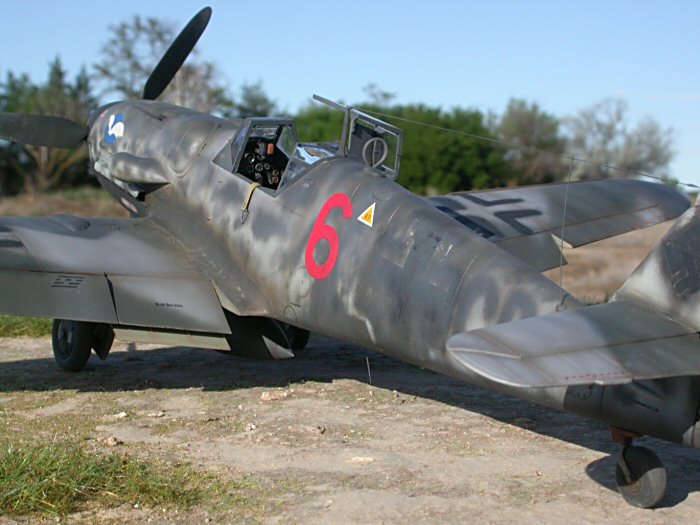
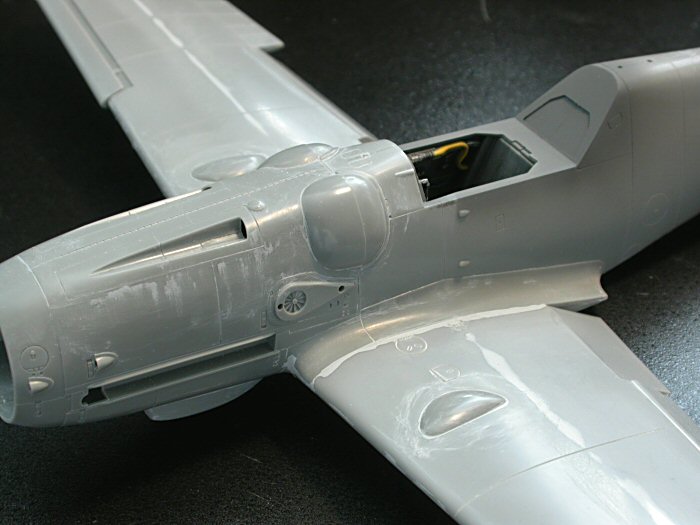
Inside the cockpit, I added eduard pre-painted seatbelts and homemade
foil footstraps. I cut out the clear section of the fuel hose and
replaced it with a piece of thinned down clear sprue. I thought I was
taking the easy road on my last 109 when I used the supplied kit decal.
However, the raised detail on the Hasegawa kit is superb and I was
stunned to see how easily Floyd made it come to life just by hiting the
highlights with a silver pencil. It was easy to do and I really liked
how it turned out. The glass on the gunsight was replaced with thin
clear plastic and I added stretched sprue hand holds to the forward
canopy frame.
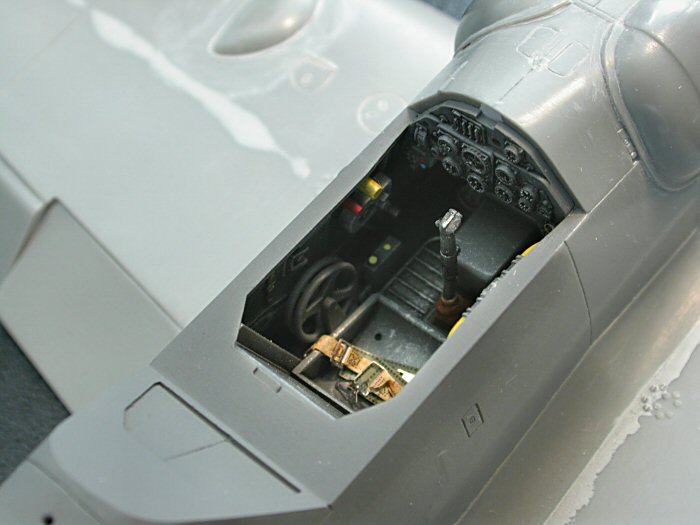
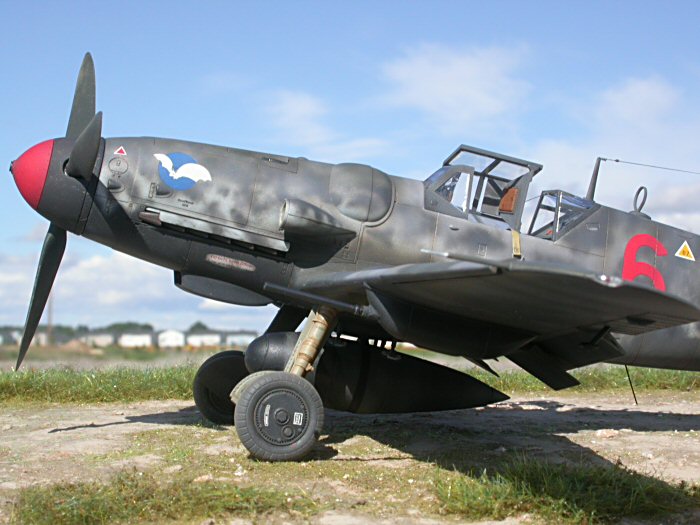
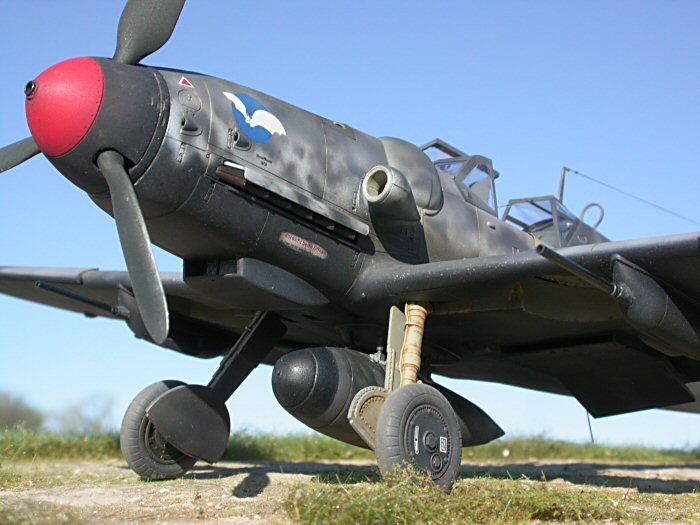
I replaced the kit spinner with the Eagle Parts resin spinner. The
corrected spinner shape really enhances the overall profile.
The underwing 20 mm gun barrels were replaced with aluminum tube and
painted with Humbrol Metal Cote gun metal. Humbrol Metal Cotes respond
to a light buffing, resulting in a convincing metal sheen. I touched
them up with some pencil lead for added glint.
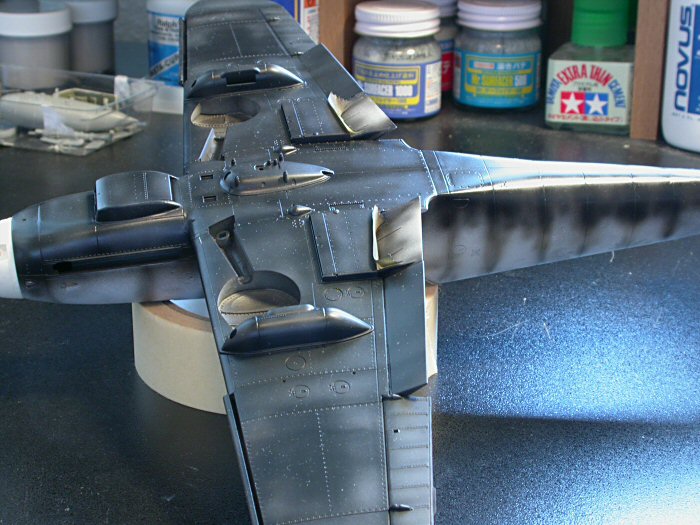
 I
used a combination of Model Master, Floquil, and Humbrol enamel paints. I
used a combination of Model Master, Floquil, and Humbrol enamel paints.
I tried to approximate the same painting steps as the real plane
except I didn't apply RLM 76 to the underside before blackening it.
The black portions received streaks of lighter shades to break up the
surfaces and hint that a light shade was covered over, as evident around
the underwing Balkankreuz.
Click the thumbnails below to view larger images:
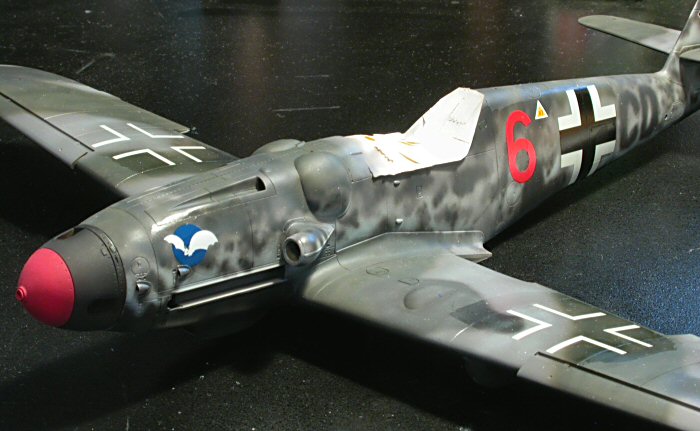
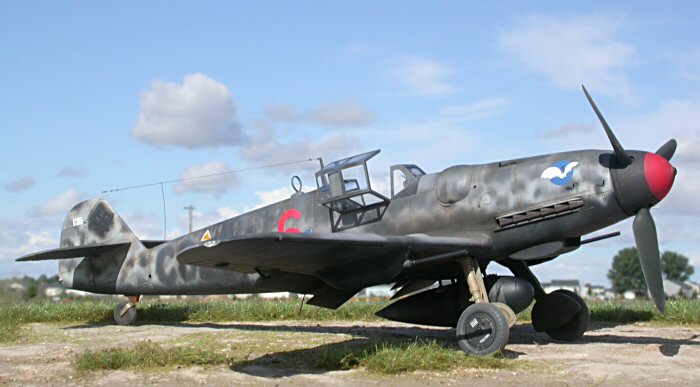
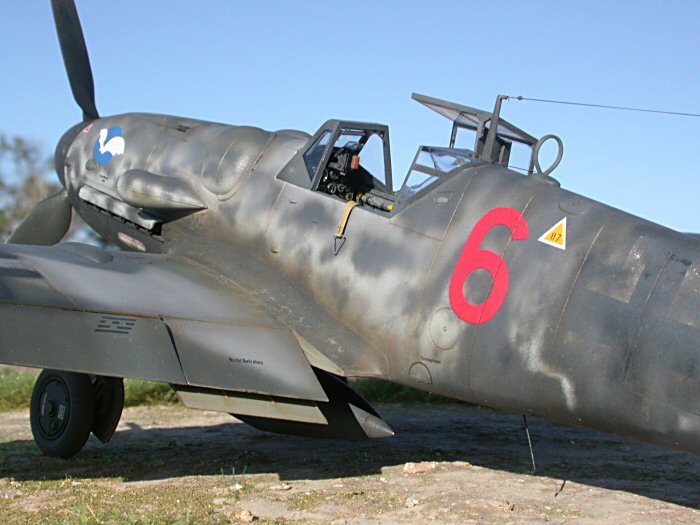
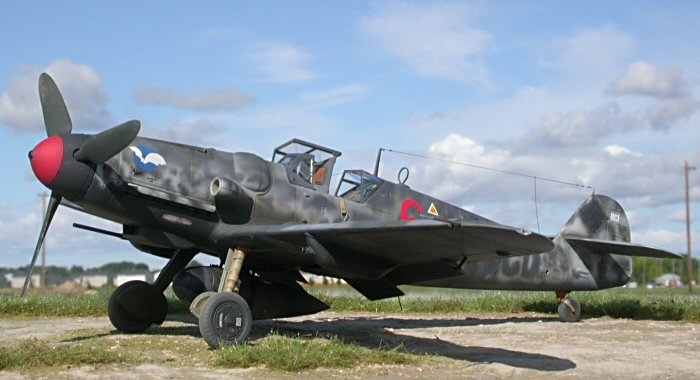
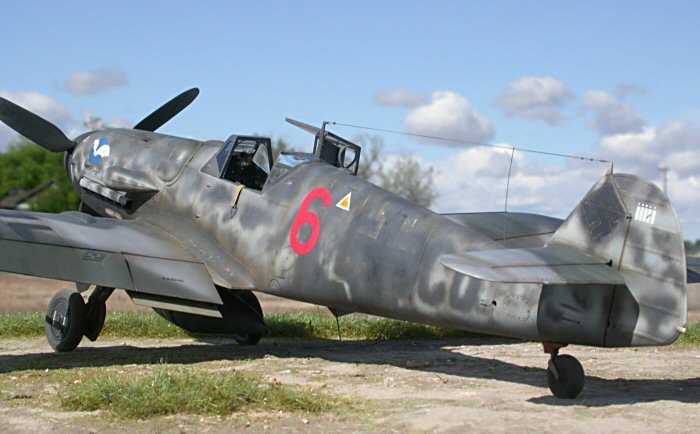
After applying the standard RLM 74, 75, 76 scheme, I added the major
decals. Much of the steciling was over-painted on the actual aircraft. I
used the white cross decals on the upper wing to guide where they would
later be blackened out. I brushed Future Floor Finish over the decals
after they had dried. Besides feathering the decal edges, the Future
also saved my bacon when I decided that the color initially used to
paint over the fuselage Balkandruez was too dark. I wasn't happy with it
so I moistened a cotton swab with mineral spirits, scrubbed off the
offending paint, and got a second chance. The paint scheme was done
freehand with my trusty Badger Sotar 20/20 airbrush.
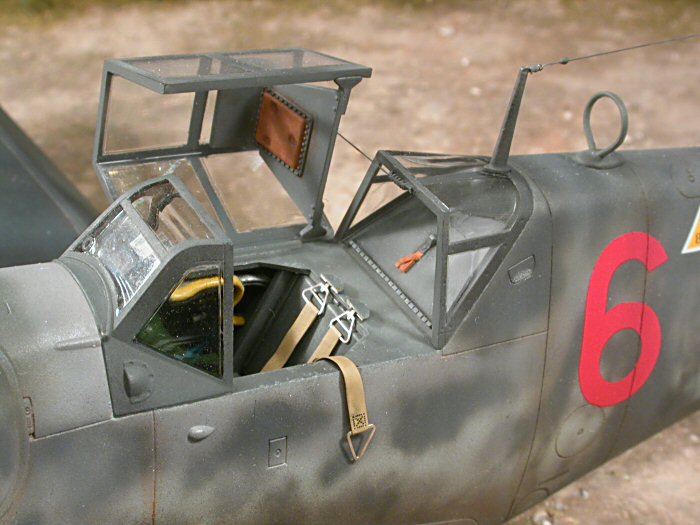
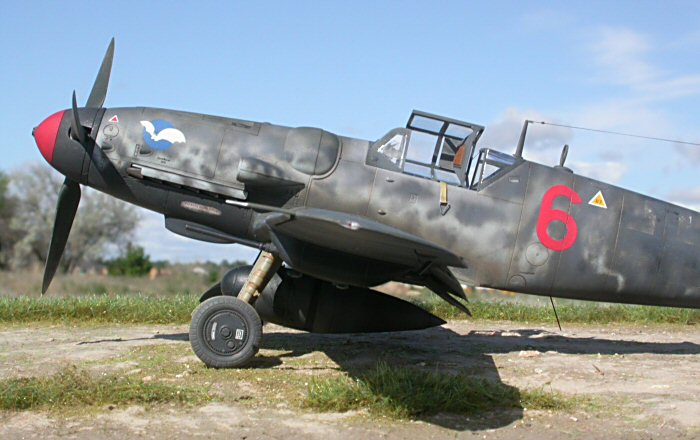
Weathering consisted of a little pre & post shading, washes of artist
oils, silver pencil for paint chipping, and pastel chalks. The aerials
are a combination of stretched sprue and E-Z line (the name says it
all... love that stuff!) with white glue insulators. The tension springs
for the antenna and canopy support are wound wire and a light bulb
filament respectively.
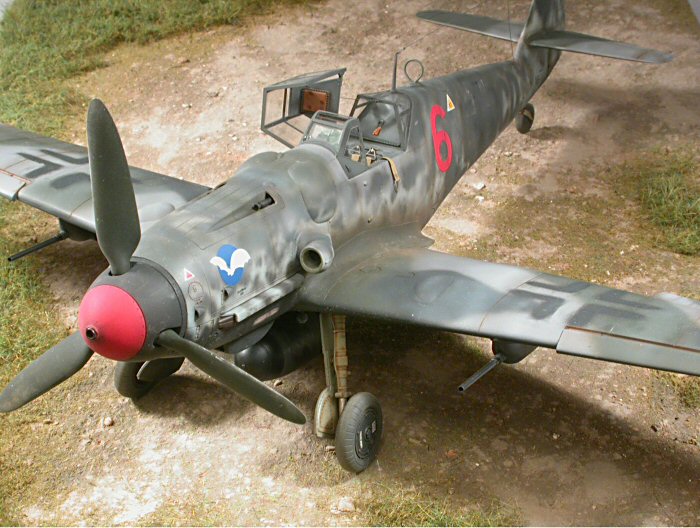
Pictures were taken with a Nikon Coolpix 4500 and cropped, sized, &
sharpened using Jasc Paint Shop Pro 9. The realism of outdoor shots is
rewarding but adds additional challenges of wind and weather.
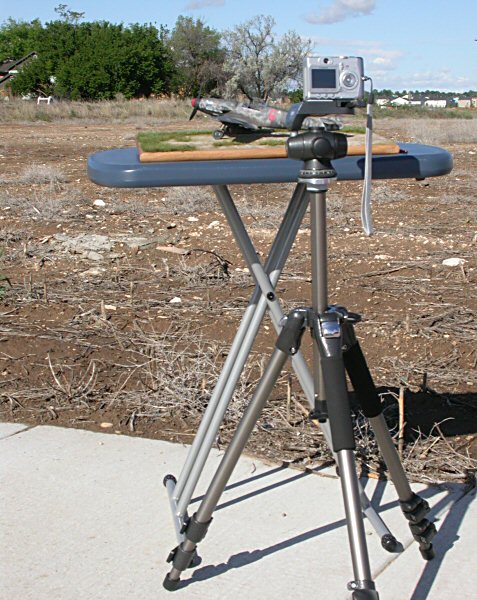
My first attempt almost ended up with the model actually taking
flight just before it started raining! With the new housing developments
going into my neighborhood, I may be looking for another backdrop soon.
The hacked overpainted wilde sau markings add an extra layer of depth to
luftwaffe schemes. The dark menacing colors make for an interesting
contrast in a model collection. I'm happy with this addition and
hopefully it won't be the last.
Click the thumbnails below to view larger images:
Modelling the
Messerschmitt Bf 109B/C/D/E
Osprey Modelling 32 |
|
|
|
|
Author: Brett Green
US Price: $18.95
UK Price: £12.99
Publisher:
Osprey Publishing
Publish Date:
July 25, 2006
Details: 80 pages; ISBN: 1841769401 |
|
|
Model, Images and Text Copyright © 2006
by Brian Geiger
Page Created 03 July, 2006
Last Updated
21 February, 2007
|
 Home
| What's New |
Features |
Gallery |
Reviews |
Reference |
Forum |
Search
Home
| What's New |
Features |
Gallery |
Reviews |
Reference |
Forum |
Search