|
The Challenge
Building Hasegawa's 1/32 scale
Bf 109G almost out of the box
by Glenn Irvine
|
 |
|
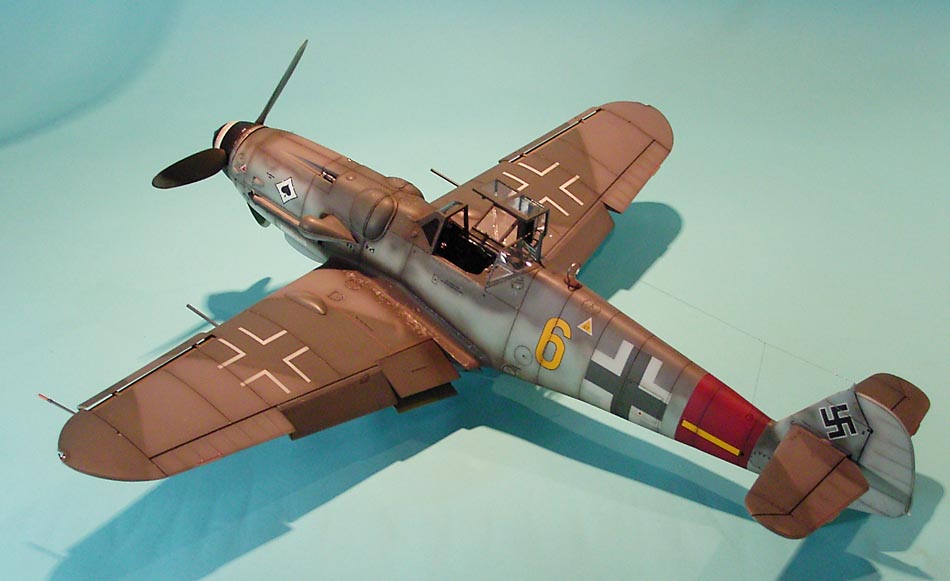
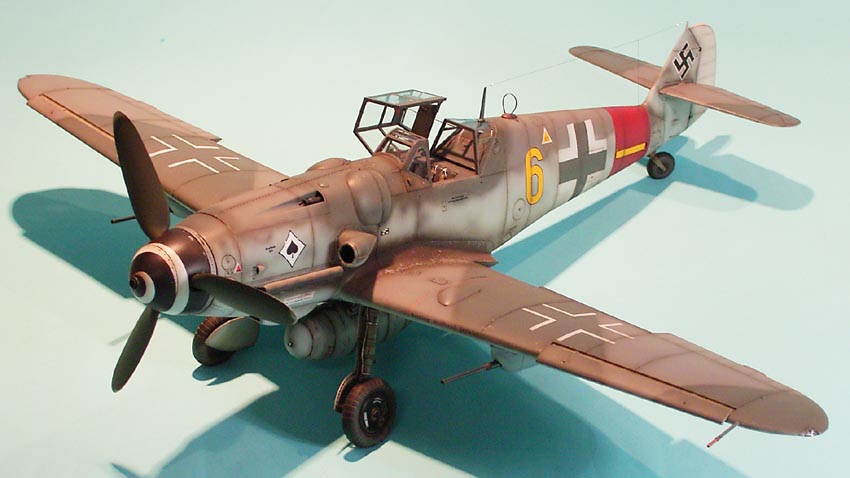
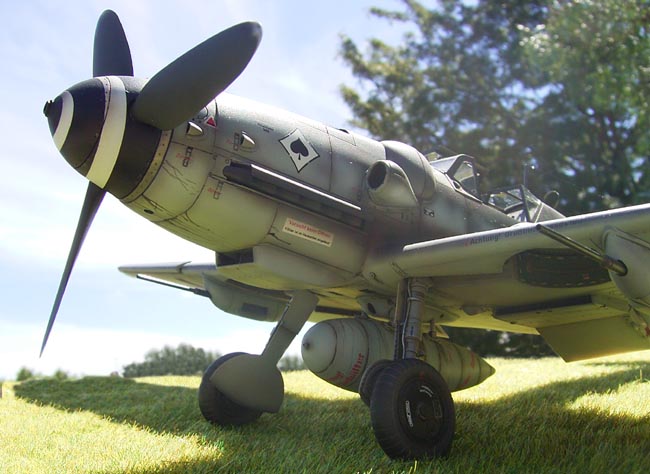
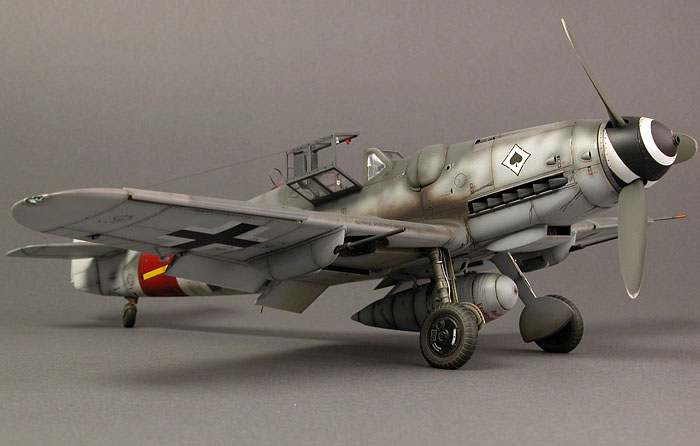
Messerschmitt Bf 109G-6 |

Hasegawa's 1/32 scale Messerschmitt Bf 109G-6
is available online from Squadron.com
It is 2003 at the Australian Model Expo, and we overhear two modelers
discussing the state of the nation, or at least, the current state of
their respective modeling.
“You really need to build more models, one a year isn’t keeping you
motivated, that’s why you aren’t achieving more models per year. Have
you had a look in your collection of unbuilt kits lately?”
“Yes I know what you mean; I try to build more, but life’s
distractions and responsibilities keep getting in the way. Plus, when I
do build a model I can’t help myself, it turns into a tour de force and
ends up taking all year.”
“Well, what you need to do is build one out of box, which should stop
you getting bogged down in all that extra work and you would get a model
finished in a reasonable time”
“I have thought of that, but, I find even when I try that I keep doing
extra anyway and it still takes me too long – I cant do it”
“I reckon you can, and to prove it I am going to issue a challenge. We
both have to build the same kit we agree on by next Expo or we forfeit a
kit or cash of the same value to the other person, and we have our name
and photo on the table as a wus as well.”
“I suppose so…….what can we do to the kit?”
“Basically out of box but any modifications have to be agreed on “
“Ok, now we have to agree on a kit”
“How about the Hasegawa 1/32 109 G, it doesn’t need much out of box and
the level of detail would be acceptable to you.”
“Just what I was thinking, I have one of those and the Cutting Edge
cockpit and Eagleparts spinner and Eaglecals too. Would those mods be
minimal enough?”
“Sounds ok, not too expensive, now let’s see if we can get anyone else
interested.”
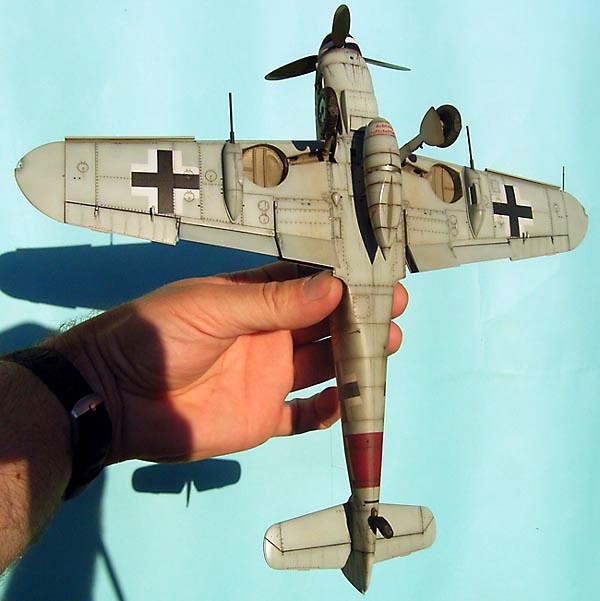
As you can see, this model was a challenge in more ways than one. For a
modeler who normally builds 1/72, the scale of the task (pun intended)
was ….large (more puns). In the end the model was finished the morning
Expo 2004 opened and took me a total of 3 weeks and about 150 hrs to
build.
I won’t go into a full build up as lots have already been said on that
subject, I will confine myself to the modifications and extra work I did
to this out of box…..!? kit.
Basic Construction
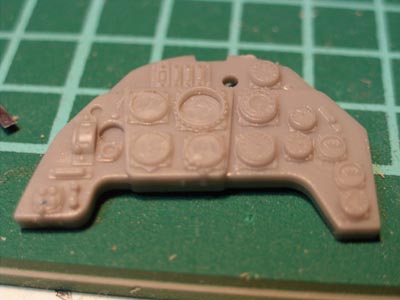
Essentially it was built out of box with the addition of the cockpit
set and the posable belts, the spinner and my own modified prop blades
now available to the modeling masses from Wedgetail via Aeroworks.
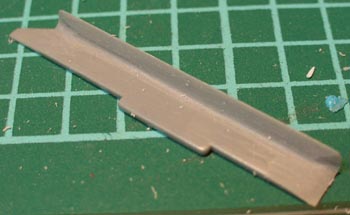
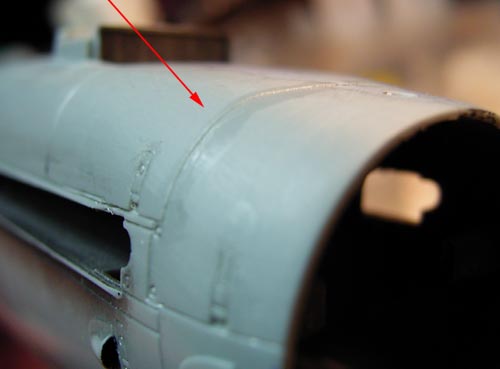
The lower cowling was also altered in shape to more accurately
portray the 109 nose shape.
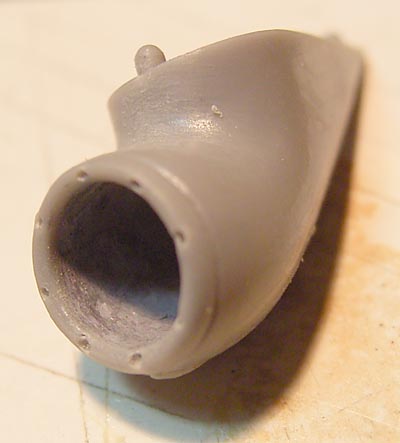
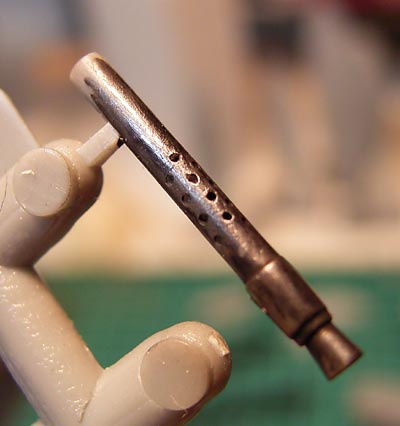
 The
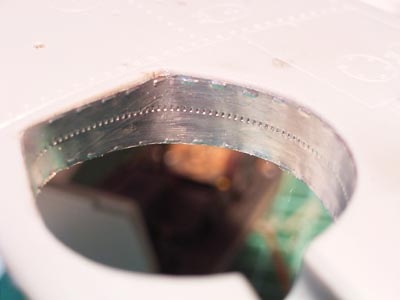
exhausts were hollowed and the intake scoop refined, the gun barrels
were replaced with brass tube and the upper gun barrels were hollowed
and the cooling slots replicated. The forward cowling scoops were
hollowed and the aerials replaced with thin brass and wire. The cowling
‘beules’ had the seam line for the cowling scribed double width as there
was a rubber seal around the rear of the cowling/firewall and the kit
does not replicate this. The
exhausts were hollowed and the intake scoop refined, the gun barrels
were replaced with brass tube and the upper gun barrels were hollowed
and the cooling slots replicated. The forward cowling scoops were
hollowed and the aerials replaced with thin brass and wire. The cowling
‘beules’ had the seam line for the cowling scribed double width as there
was a rubber seal around the rear of the cowling/firewall and the kit
does not replicate this.
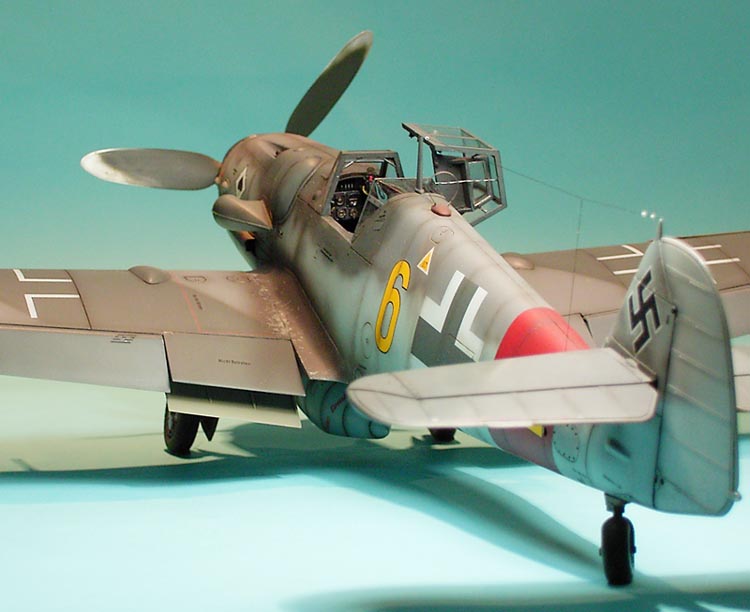
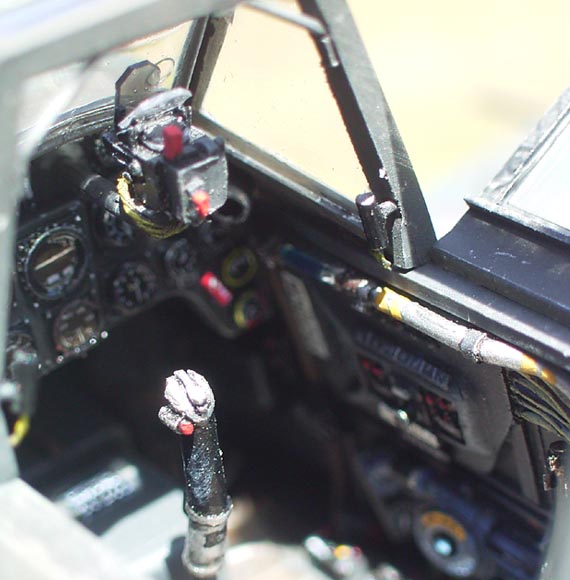
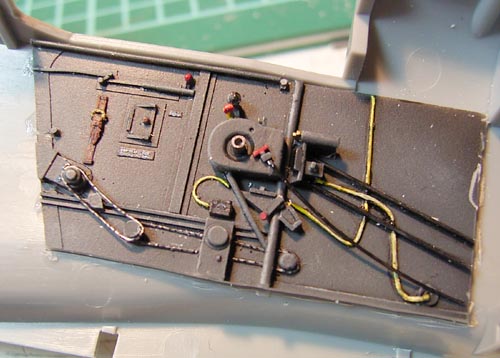
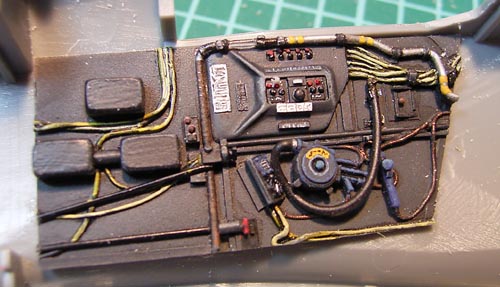
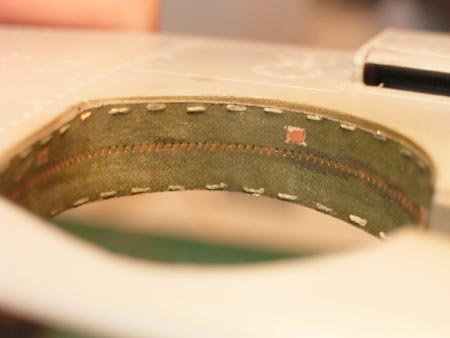
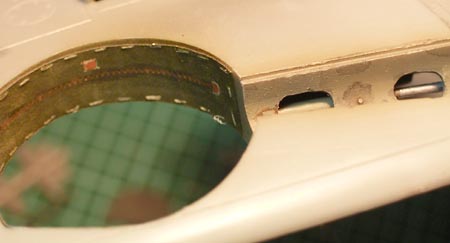
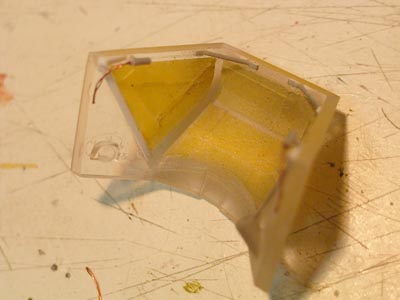
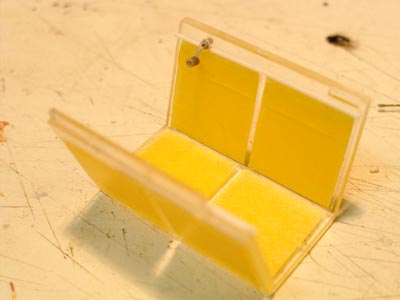
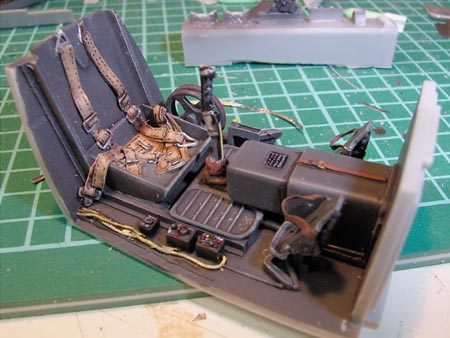
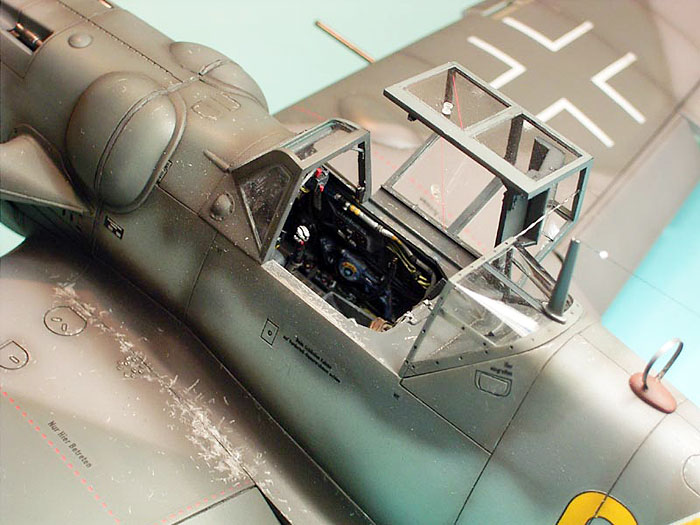
The cockpit was assembled and painted and fitted to the kit. The
posable belts were a drama as they are too thick as the sheet they are
moulded on adds extra material and required a lot of work with a rotary
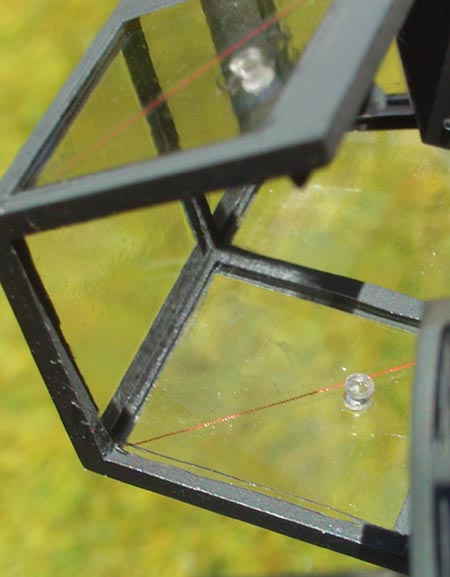
stone to thin down. Another problem that surfaced when I attempted to
fit the windscreen and inner armored glass is that as supplied the gun
sight hits the screen and is too far forward. After checking references
I found that the mounting was wrong too as it had a tube type mount that
allowed the gun sight to sit off centre and could be rotated to the
right for better vision. I scratch built this system and the sight
fitted perfectly.
I thought that in this scale it would be good to add the clear knobs on
the inside of the canopy that allowed the side glazing to be slid back.
These were turned up from stretched clear sprue and glued on with
Future.
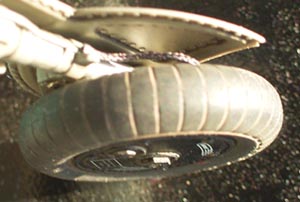
The oleo doors were thinned down and the upper section scratch built
including the mounting and guide rod. There was no flexible hose between
the wheel and the moulded brake line so some fine braided fishing line
was used to replicate this. The tyres were also flattened to simulate
weight.
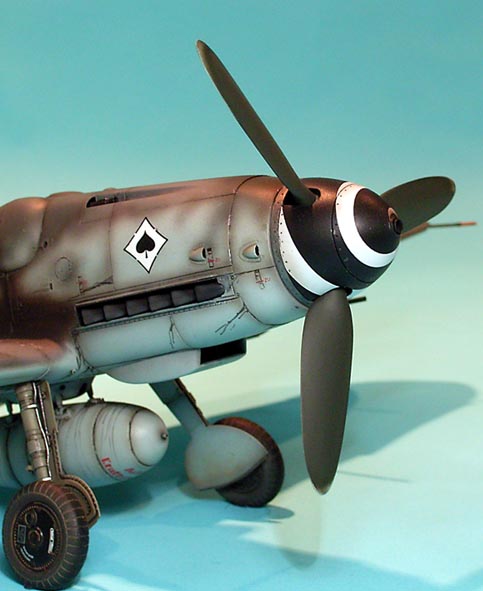
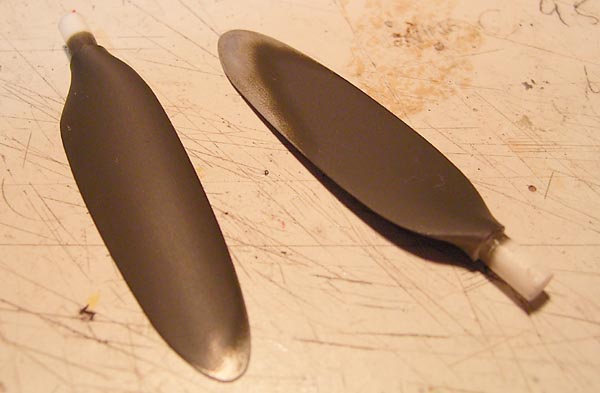
Prop and Nose
When it came to the propeller I knew that I had to fix this as it was
the biggest glaring mistake that Hasegawa made with this kit. If you
look at a photo of a G6 and check out the prop blades, you will see that
the blades supplied are the wrong shape and bear little resemblance to
the real thing.
The real thing is wider and more curved along its length also the blade
does not have a gap between it and the spinner where you can see the
shank of the blade.
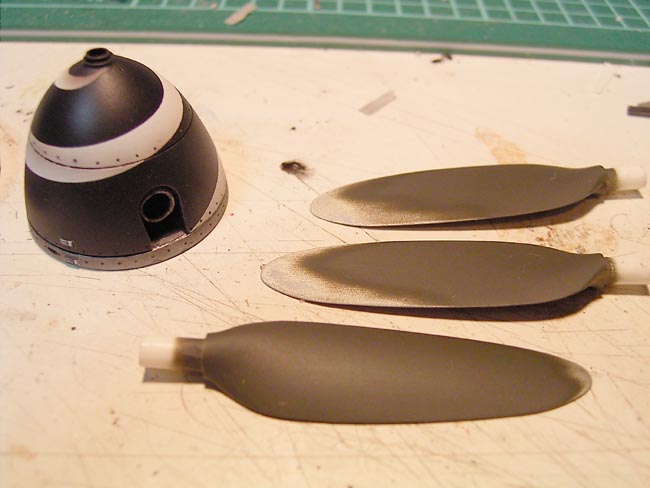
So, with sandpaper, files, superglue and plasticard in hand I built a
new accurate blade and cast it. This was fitted to the Eagleparts
spinner and trial fitted to the nose, it was immediately apparent that
something else was majorly wrong with the nose shape. I referenced
photos and found that the forward lower cowl was too angular at the
first panel line behind the oil tank housing, in photos this line is a
more or less gentle curve and not the pounded off right angle in the
kit. I sanded this area till it was less angular and it improved the
look of the model immensely.
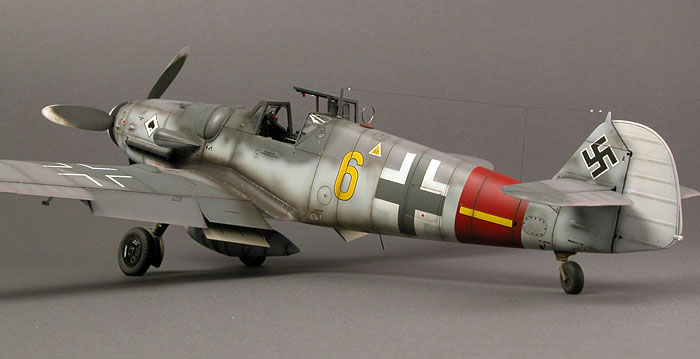
The model was painted and most of the markings were airbrushed on using
masks made from tracing the decals using lowtac sign writers mask
material.
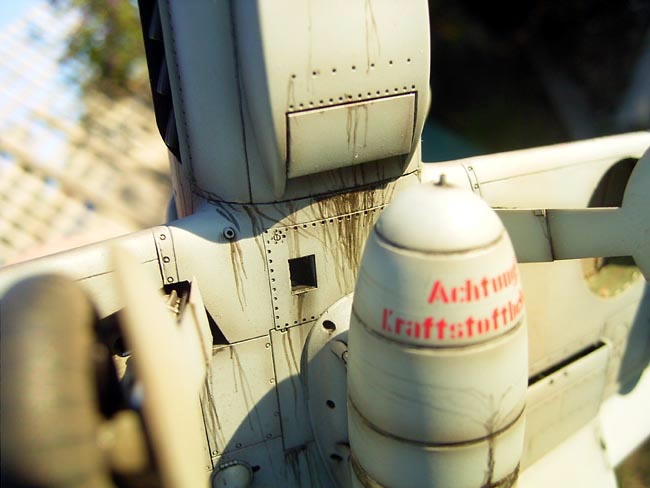
Decals were applied and the model gloss coated and weathered and post
shaded.
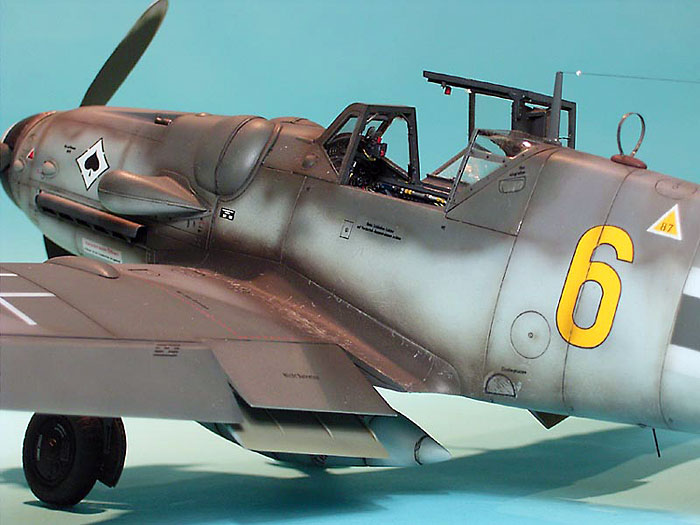
The exhaust staining was rubbed back with toothpaste a cotton bud and
toothbrush and the resulting wear on the cockpit sides looked most
convincing.
So, in the end it was worth it as this model is the fastest I have ever
built a kit and the end result was every bit as good as I was hoping it
would turnout.
…and those two guys?
“So what do you think, now you actually got a model finished in a
reasonable time, are you up for another challenge next year”
“You’re right, I did enjoy it very much, and the challenge of limiting
myself to minimal extra work was good because I didn’t get bogged down.
I think we should do this every year.”
“That’s good, cause I think the 1/32 D9 should be our subject for next
year.”
“You know, I was thinking the same thing, I’ve got the Eagle parts
cockpit and the decals and the prop blades need doing really bad on that
kit…”
In the 2004 Expo, five modelers accepted the challenge and displayed
their models, why don’t you accept our challenge and try this with your
friends at the next competition. Remember, the aim is to finish a model
along with your friends, not win a prize.
There are 3 benefits:
-
You finish a model in a year,
-
You get to inspire others with your
built models
-
You get your enthusiasm back.
Click the thumbnails below to view larger images:
Messerschmitt Bf 109
Modelling Manuals 17 |
|
|
|
|
US Price: $17.95
UK Price: £12.99
Publisher:
Osprey Publishing
Publish Date:
January 25, 2002
Details: 64 pages; ISBN: 1841762652 |
|
|
Model, Images and Text Copyright © 2004
by Glenn Irvine
Images of finished model on dark grey background Copyright ©
2004 by Brett Green
Page Created 05 October, 2004
Last Updated
05 October, 2004
|
 Home
| What's New |
Features |
Gallery |
Reviews |
Reference |
Forum |
Search
Home
| What's New |
Features |
Gallery |
Reviews |
Reference |
Forum |
Search