|
Hasegawa's 1/32 Scale
Bf 109G-6
Metal Mosquito
Chaser
Redux
by
Ian Robertson
|
 |
|
Messerschmitt Bf 109G-6 |

Hasegawa's 1/32 scale Messerschmitt Bf 109G-6
is available online from Squadron.com
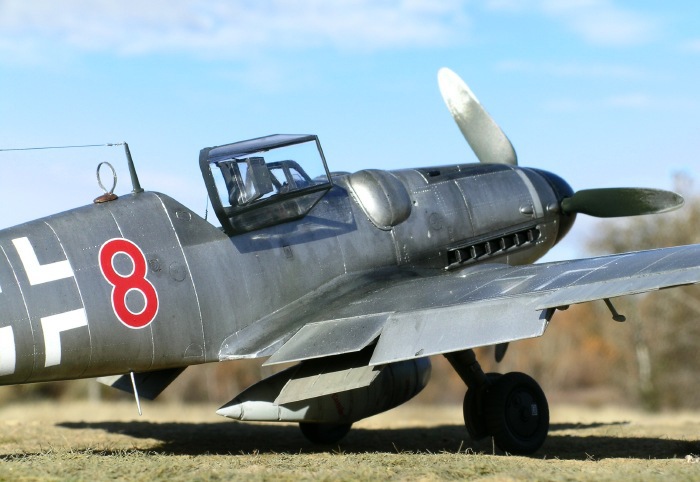
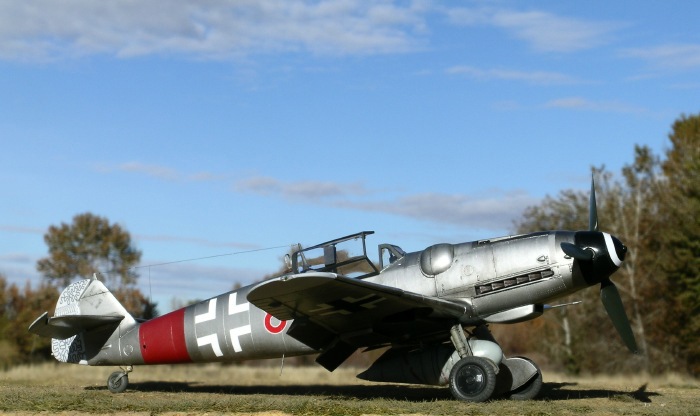
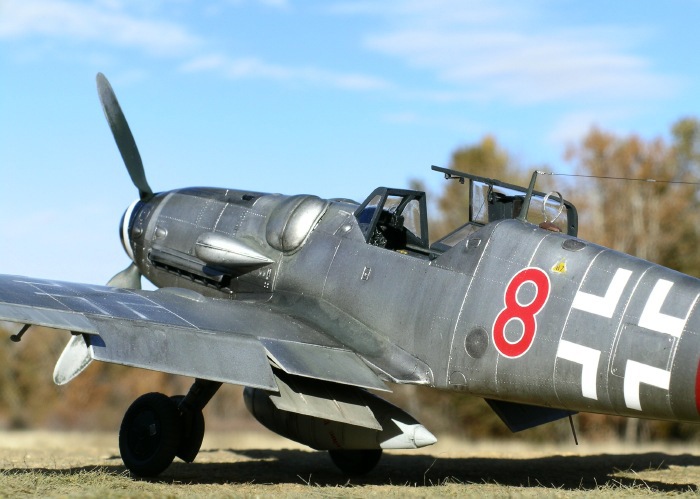
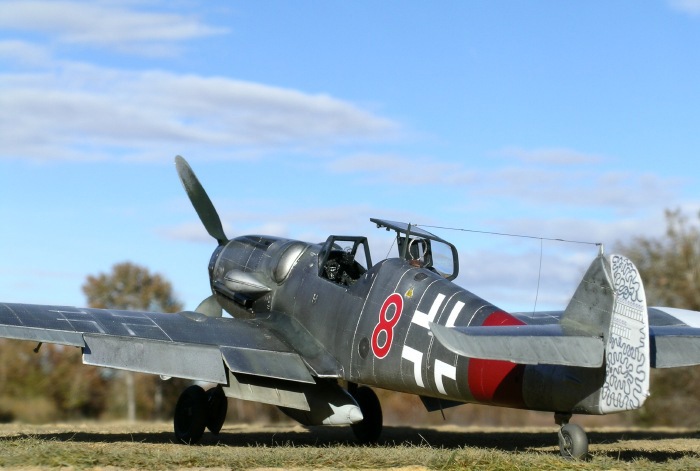
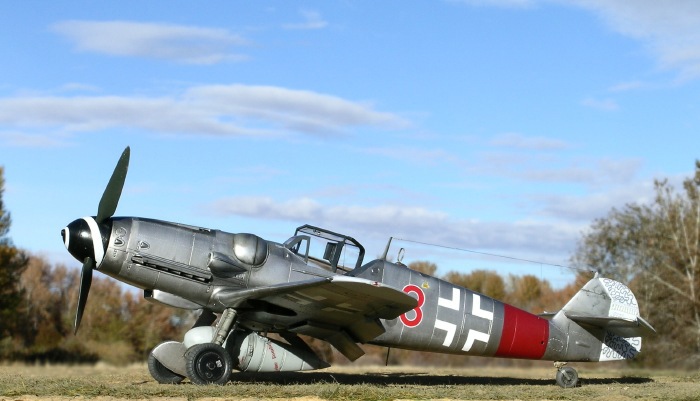
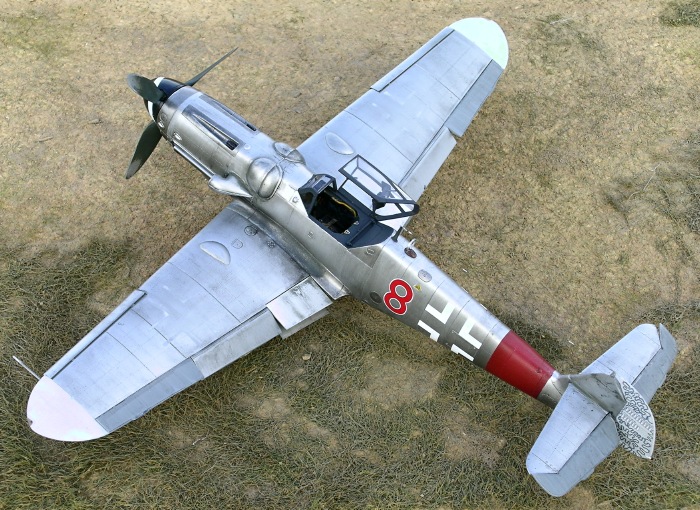
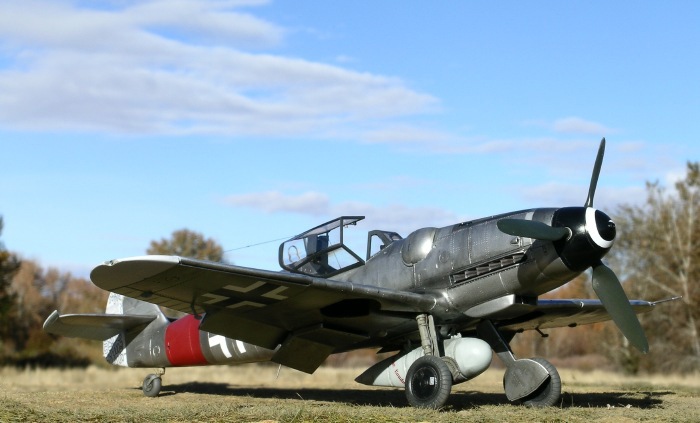
This is my third stab at Oblt. Kurt Gabler’s natural metal Bf.109G-6
“Red 8”, an aircraft featured in the Eagle Editions’ publication,
“Jagdeschwader 300, Volume 1” by Jean-Yves Lorant and Richard Goyat.
The first “Red 8” I
built was done for Eagle Editions and appeared on their display
table at the IPMS Nationals in Atlanta in 2005.
The second was a commissioned project built in 1/48
earlier this year. Since that time I have been eager to build a “Red 8”
for myself. Here it is, finally.
Note – for details on the aircraft and its scheme, please refer to the
link above.
Using Hasegawa’s 1/32 Bf109G-6 and an erla haube
canopy from a Bf109G-14 kit, I made the following
modifications/additions to my model.
-
rivet details using
“Rosie the Riveter” tool
-
cockpit, erla haube
canopy details, and seatbelts from MDC
-
control surfaces on
tail from Cutting Edge
-
tail wheel from
Cutting Edge
-
propeller blades
from Contact Resine
-
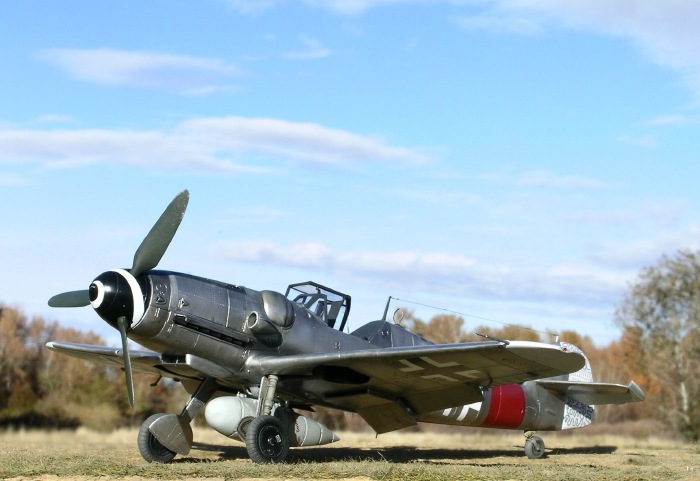
spinner and drop
tank from Eagle Editions (Eagle Parts 20-32 and 21-32, respectively)
-
EagleCals decals
#32-88
The model was painted in Alclad II Aluminum and Dark Aluminum over
Tamiya’s Fine Grey Surface Primer. Once the Alclad had dried, I applied
numerous washes of Tamiya black acrylic to give the metal a worn look.
Panels and access plates were darkened as indicated in photos. Control
surfaces on the wings and elevators were painted with Xtracrylix RLM75
and 76 on the upper and lower surfaces, respectively. Xtracrylix RLM76
was also used on the drop tank. The cockpit and canopy frame were
painted with Polly Scale RLM66.
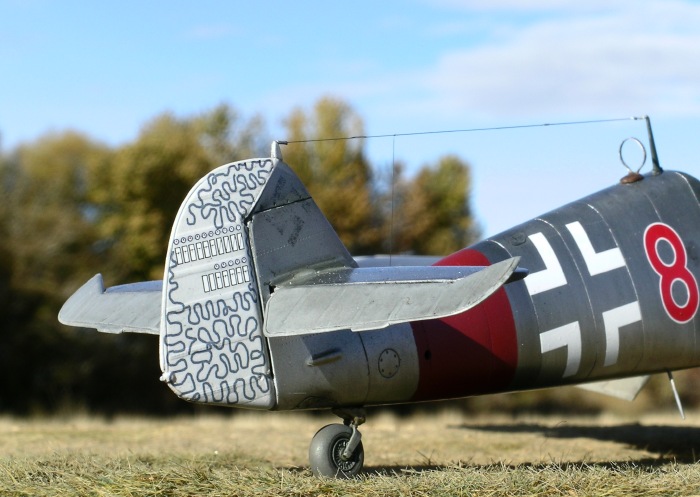
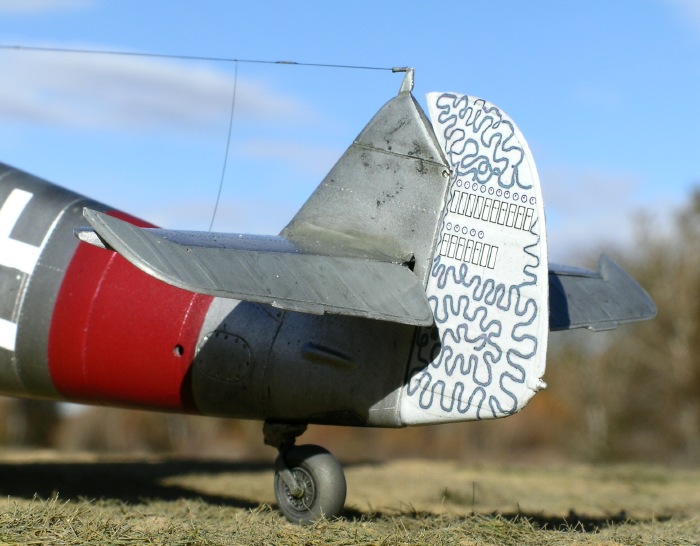
 To
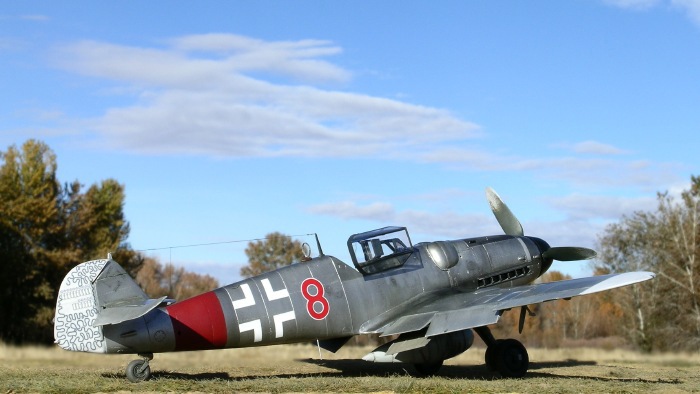
simulate the faded swastikas I cut a template from Tamiya tape and then
sprayed Polly Scale black on both sides of the tail. After a few minutes
I rubbed the swastikas down with a micromesh sanding cloth to replicate
their appearance in photos. To
simulate the faded swastikas I cut a template from Tamiya tape and then
sprayed Polly Scale black on both sides of the tail. After a few minutes
I rubbed the swastikas down with a micromesh sanding cloth to replicate
their appearance in photos.
A similar technique was used for the upper wing
crosses, although in photos these crosses are not visible, perhaps owing
to glare or because they had been completely removed from the aircraft.
Traces of RLM 74 were added to the wing roots and elevator roots. These
areas were sanded down as described for the swastikas, leaving only
faint areas of paint.
I painted the rudder white (with a touch of grey) using Tamiya acrylic.
I made my own decals for the squiggles on the rudder. I first scanned
the aircraft’s tail profile (see pg 333 of JG300 book, or the EagleCals
decals), and then traced the pattern into a new layer using a spray
brush tool in Photoshop. The image was resized and then printed on clear
decal paper. On my previous model I used a Gundam marker from Gunze
Sangyo to draw the squiggles by hand on the rudder. I prefer the decal
approach as it created a closer match to the actual pattern. Note that
the pattern on the starboard side is speculative as there are no photos.
Images were taken with a Nikon Coolpix 5400 digital
camera.
The “unsharp mask” tool of Adobe Photoshop was used to restore
some of the clarity and crispness lost during image compression.
Click on the thumbnails
below to view larger images:
Model, Images and Text Copyright ©
2006 by Ian Robertson
Page Created 29 November, 2006
Last Updated 21 February, 2007
Back to HyperScale
Main Page
|
 Home
| What's New |
Features |
Gallery |
Reviews |
Reference |
Forum |
Search
Home
| What's New |
Features |
Gallery |
Reviews |
Reference |
Forum |
Search