|
Messerschmitt Bf 109K-4
by Roger Fabrocini
|
|
|
Messerschmitt Bf 109K-4 |

HyperScale is proudly supported by
Squadron.com
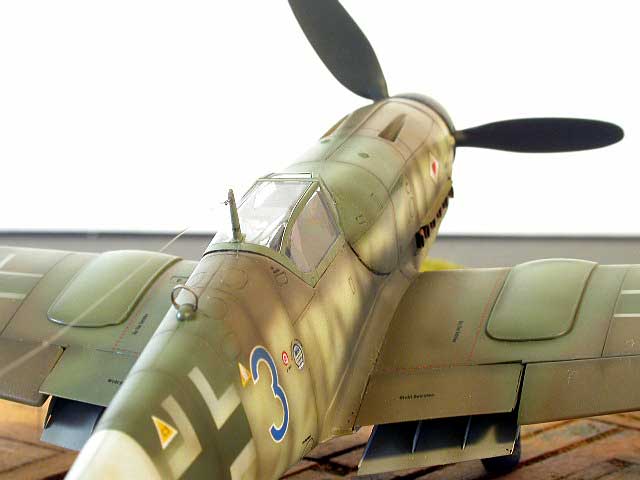
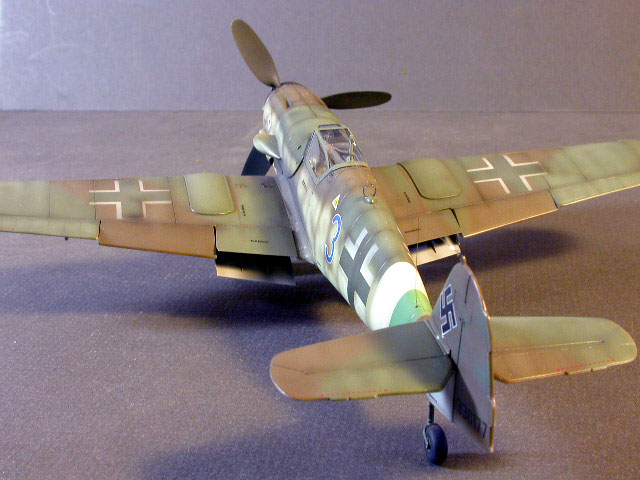
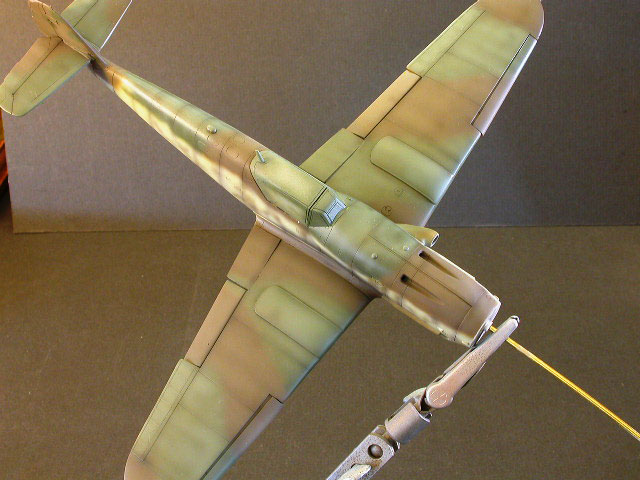
This is Fujimi’s 1/48 scale Messerschmitt Bf 109K-4 (kit #Q-5) finished
in the markings of Feldwebel Hans Rossner of 12/Jg77. Rossner was flying
"Blue 3” wk.#33017 on 23rd December 1944 when he was shot down opposing
the Allied air forces’ attacks against troops and communications during
the Ardennes offensive.
Having conflicting references on the finish
of blue”3”, i chose to replicate Claes Sundin’s excellent profile in his
and Christer Bergstrom’s “More Luftwaffe Fighter Aircraft in profile”.
Though described as “over engineered’, I
found the Fujimi kit to be an easy build. I did use the following
after-market accessories to ‘enhance’ the K-4:
-
MDC #a48010 K-4 cockpit (though intended
for the Hasegawa kit, it fit with very minor alteration)
-
Eduard #48-115 photo etched set for the
fujimi K-4
-
Cutting Edge spinner and prop blades for
the K-4 (further enhanced with a length of 18-gauge stainless steel
cannon blast tube)
-
True Details #48023 resin wheels
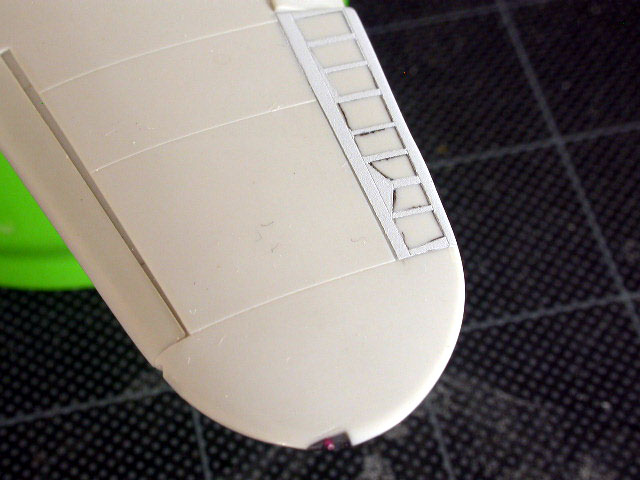
Additional modifications were the
replacement of the wing tip lights with clear stock, various drainpipes
replicated with stainless steel tubing and enhancing the flying surface
detail. Credit goes to Aleksandar Sekularac, a very inspiring modeler, for
the control surface mod.
Painting,
Weathering and Markings
|
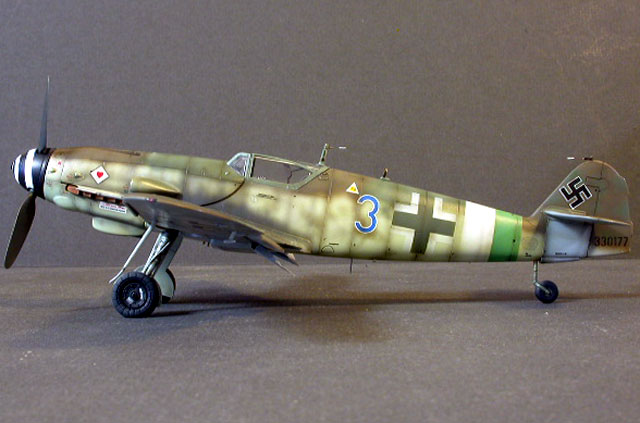
As stated, I chose Claes Sundin’s profile
as a painting guide.
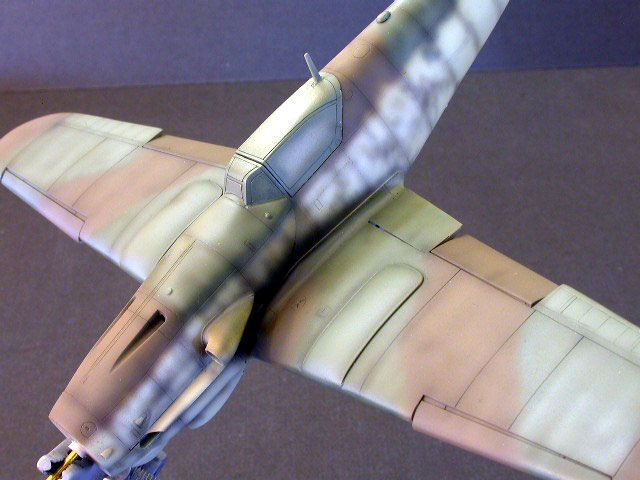
The airframe was primed with Mr. Surfacer
1000 then wet sanded with 12000 grit finishing paper to remove
imperfections. After preshading the wings were sprayed first using Gunze
#417 rlm 76, followed by Mr. color #26 SKY for the lower fuselage. White
was added to the rlm 76, thinned with about 75% denatured alcohol and then
applied in front to back streaks. The SKY with tinted with white, sail
colour and grey, thinned with denatured alcohol and applied in vertical
streaks on the fuselage. Uppersurface colours are next. The same method of
application is used, but to get a soft edge to the demarcation lines a
very thin mix of paint is needed from the outset. For the rlm 81
Brown-Violet i used Mr. color #12 US Olive Drab + a drop of #41 red brown.
White and alcohol is added, then again sprayed in a streaking pattern.
Final colour is rlm83 for which i used Gunze #423.
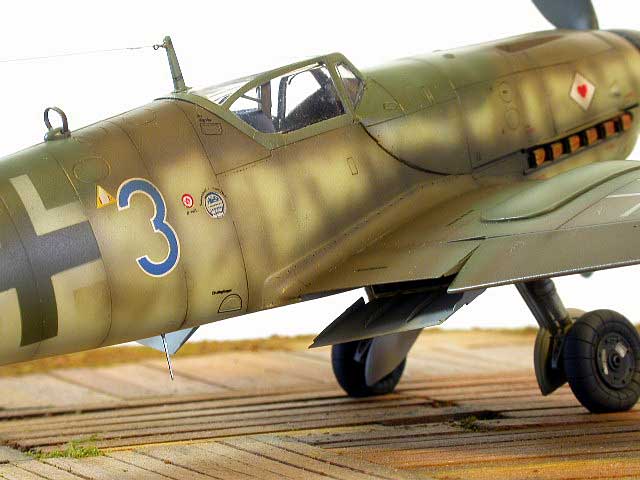
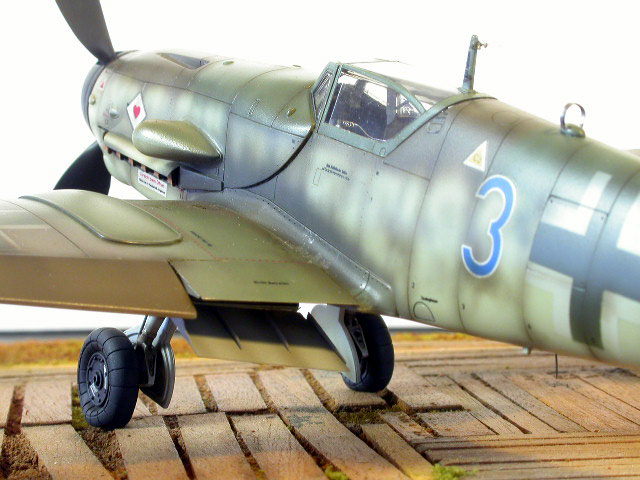
Fuselage mottle was achieved with a very
thin mix of Tamiya black and red brown. The trick I found was to use a
fast drying thinner, like denatured alcohol, and adjust the air pressure
up from zero until a cleanly atomized pattern is achieved. Slowly build up
your shapes using both vertical and horizontal movement, varying the
shapes and their density . The same paint mix was used to start the
weathering process not only post shading the panel lines, but also
streaking the entire airframe. Credit goes to Andrew Dextras for that
innovative technique.
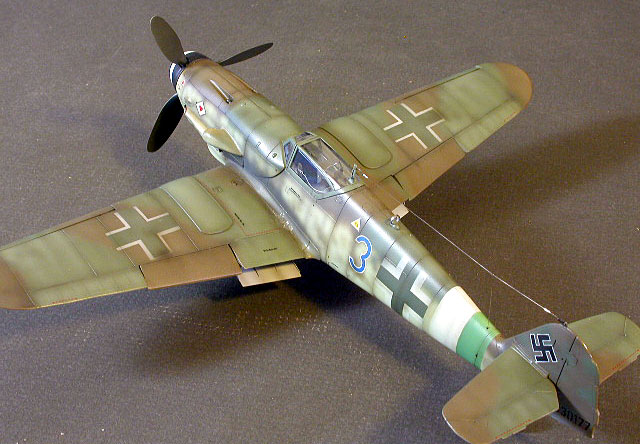
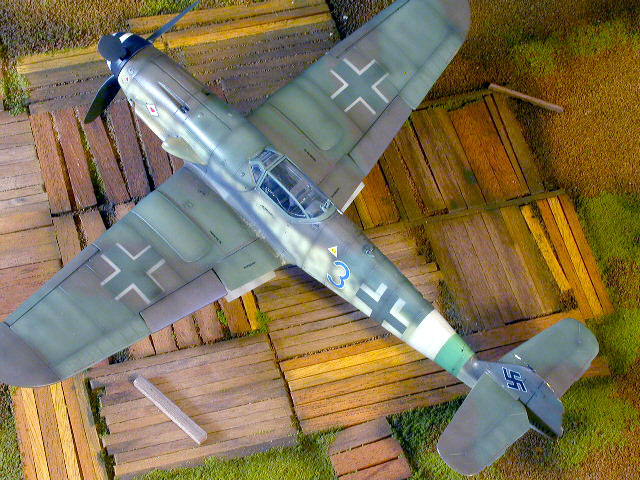
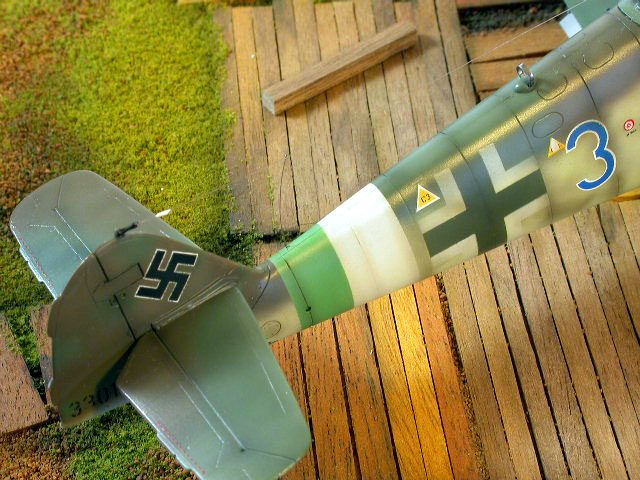
To better compliment the camouflage, the
crosses were painted using the Gunze RLM 83 Dark Green for the interior
and gunze H21 off-white lightly sprayed on for the cross. Reich bands are
also painted on at this time, using the gunze off white and H319 light
Green for the rlm 25 band.
I used Mr. Color Super clear as a decal
gloss coat. Decals are from the Cutting Edge sheet #48086. Data was
sourced from Eagle-Cals sheet #EC-62. After decaling I took a nail
polishing stick to the entire airframe smoothing the finish and weathering
the decals. I was very pleased with the results, especially around the
werknummer. After having a disaster while using an acrylic flat finish, i
chose to use Floquils enamel Flat finish on this K-4. Though not “dead”
flat, the results are pleasing.
Final weathering was done with the afore
mentioned black/red brown mix, overspraying the decals, and a dark grey
was used for the exhaust stains, using Brett Green’s method of vertical
strokes connected with horizontal ones. Very realistic observation on his
part, thank you Brett.
A light wash of raw Umbre/black artist oils
on the upper surfaces, and gray on the lower surfaces complete the
weathering.
Thanks again to not only the afore
mentioned modelers, but to all the others on HyperScale's Plane Talking
forum for their never ending support, inspiration, advise and knowledge.
Click the
thumbnails below to view larger images:
Model, Images and Text Copyright © 2003
by Roger Fabrocini
Page Created 09 March, 2004
Last Updated
15 December, 2004
Back to
HyperScale Main Page |
 Home
| What's New |
Features |
Gallery |
Reviews |
Reference |
Forum |
Search
Home
| What's New |
Features |
Gallery |
Reviews |
Reference |
Forum |
Search