|
ProModeler + Cutting Edge
1/48 scale
Messerschmitt
Bf 1110G-4
by
Floyd S. Werner Jr.
|
 |
|
Messerschmitt Bf
110G-4 Night Fighter |

ProModeler's 1/48 scale Messerschmitt Bf 110G-4
is available online
from Squadron.com
Background
With the launch of the British night offensive the German night
fighter force was found wanting. There were no dedicated night fighters
and no plan to deal with the incursions. Originally slated as a heavy
fighter the Bf-110 was pressed into service. It’s shortcomings were to
become it’s strong points in dealing with the British. It had a long
loiter time, lots of firepower, and an extra set of eyes. The lack of
maneuverability was not an issue early on as there were only limited
British night fighters to contend with.
When it was determined that the Kammhuber line had serious issues the
technical development of an airborne radar system brought the Bf-110
into it’s own. The large antenna slowed the airplane considerably but
the heavy armament, including the slant angle firing, Schrage Musik,
made the Bf-110 a force to be contended with. Originally intended to be
replaced in 1943 by the Me-210/410, the Bf-110 was produced until the
end of the war. Radar equipment and armament varied throughout it’s
career.
The Bf-110 was an adaptable airframe that was capable of doing the
job until better suited airframes, such as the Me-262 and the He-219,
became available.
The Model
The ProModeler kit is molded in light grey plastic with a sprue of
clear parts. The instructions contain some detail photos and tips that
will help in building. The decal sheet contains markings for two
aircraft.
The plastic does have some flaws that caused a major uproar when it was
released in 1997. Truthfully, the flaws were easily taken care of with a
little bit of filler in spots and careful trimming of parts in others.
Basically it is a great kit of an important airframe. There are some
issues that can’t be taken care of by normal modeling skills. The engine
nacelles are undersized by at least 2mm. This is rather noticeable and
will require the Cutting Edge correction set, CEC48416, to correct this
problem.
The Aftermarket Stuff
Cutting Edge Correction Set- CEC48416
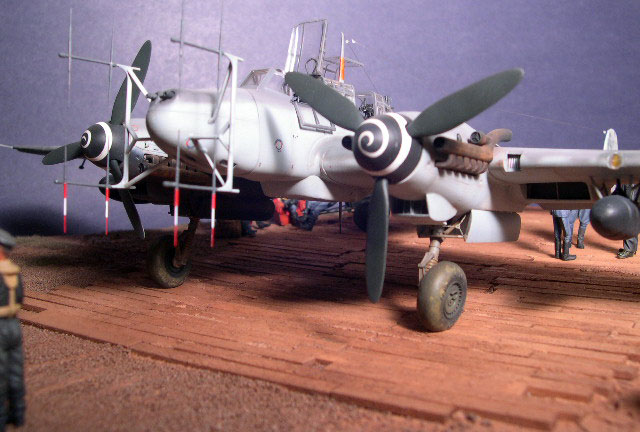
With the small engine nacelles a known and glaring problem, I
decided to use the Cutting Edge correction set. The correction set
includes all the parts necessary to make the change to a larger
nacelle and wing bulge. The instructions are very good and despite
the large areas that need to be cut the set will present no major
problem to the modeler who has worked with resin parts before. The
set is free of bubbles and blemishes.
Cutting Edge Flying Control Surfaces- CEC48430
provides a complete set of flight controls for the Bf-110G-2.
Check the aircraft that you are modeling as the G-2 has a slightly
smaller rudder than the G-4. Most, but not all G-4, had the larger
surfaces rudder. These control surfaces are very nicely done with
the trim tabs off set in the opposite direction as they are suppose
to be. The best part is that the slats which are just like any other
Messerschmitt product should be extended. This is easily done with
this set. Don’t forget to reposition your controls in the cockpit.
Aires- Bf-110G Detail Set- 409
offers the modeler the opportunity to have both engines exposed,
detailed wheel wells, and cockpit. As I was using the Cutting Edge
correction set the engines were not necessary, but the wheel wells
and cockpit were better than that offered in the kit. Molded in
cream colored resin, there was some breakage in the packaging and
some bubbles but nothing too bad. Aires gives you some of the
tightest fitting (read accurate) parts of any aftermarket
manufacturer. You will have to thin the kit parts to paper thin but
the results are well worth the effort.
Black Magic Canopy Masks- CEBM48035
This makes the whole process of masking the canopies so much
easier. I did have some problems with the masks conforming to the
compound curves but the whole tedious task was done in a fraction of
the time.
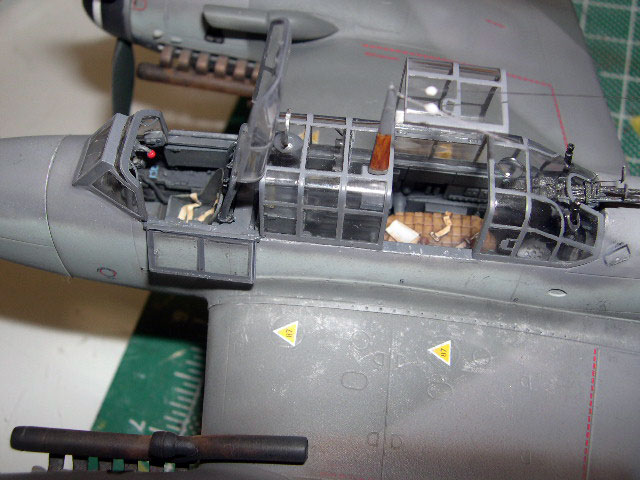
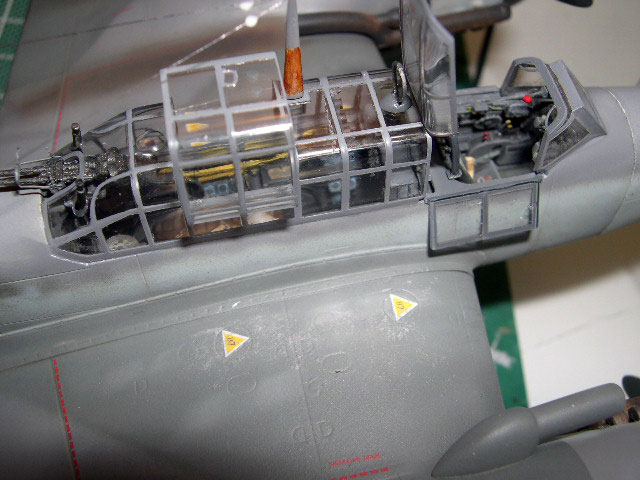
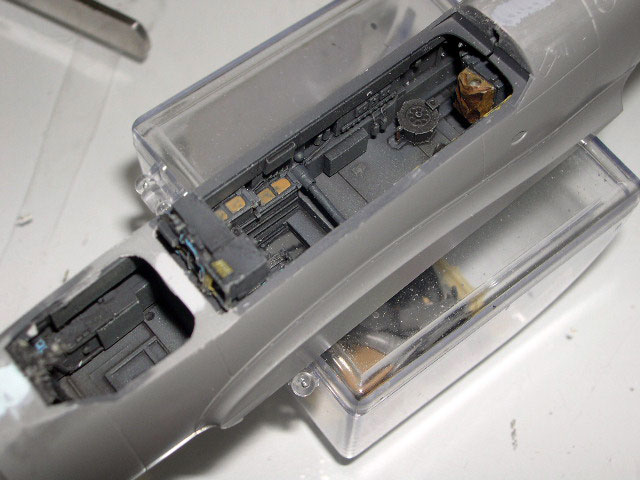
Construction starts in the cockpit as usual.
The Aires cockpit fits great as long as you cut the base to the same
dimensions as the kits. I did elect to replace the wicker seat with the
seat out of the Verlinden set which I thought was more interesting as it
had a flare pistol, map, and the belt. Painted in RLM 66 with detail
painting and the cockpit comes alive. I didn’t have to thin anything in
this area. I did have to cut back the shelf behind the pilot to fit the
Aires radios, but this is easy. Pay attention to the instructions,
especially around the Shrage Musik and MG81. The fit is very tight and
exacting. The fit of the cockpit in the fuselage halves is exceptional
with no problems noted.
Click on the thumbnails
below to view larger images:
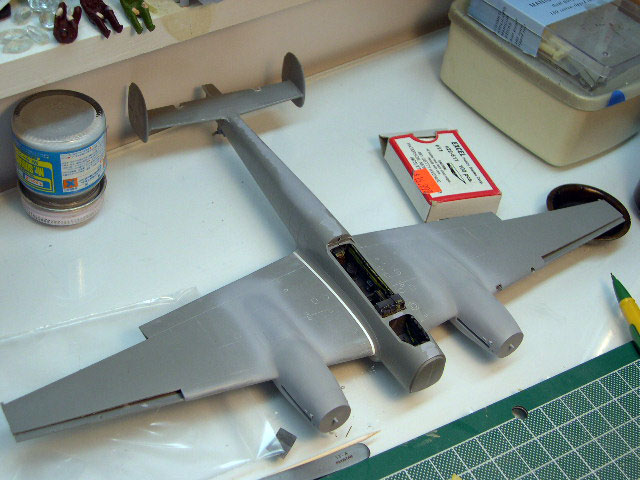
The only filler needed on the fuselage was the molding imperfection
on the spine. I elected to leave off the nose section until later. I
figured the antennas would become and issue and they did.
The wings are next and that means the Cutting Edge conversion set. This
set looks daunting but it really isn’t as bad as it looks. All the cuts,
with the exceptions of one, are along panel lines. I hate to trivialize
this set as it is so large but really the parts fit very well. My oil
coolers had a little excess resin but it cleaned up easily. The one
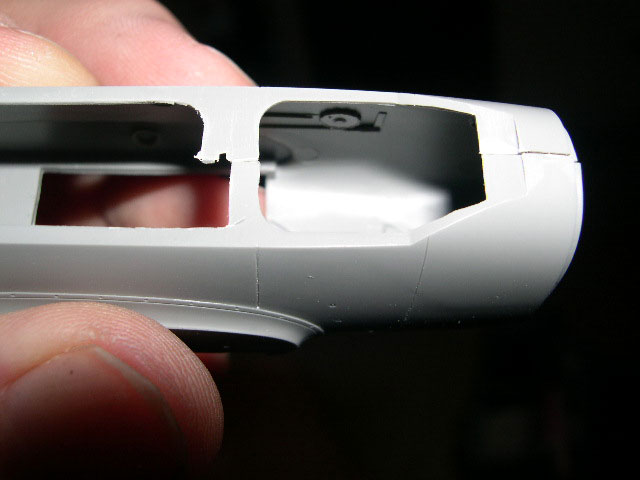
thing that is wrong with the kit is the supercharger intake scoop on the
right nacelle is angled improperly. I fixed this by cutting the intake
front off and repositioning it properly.
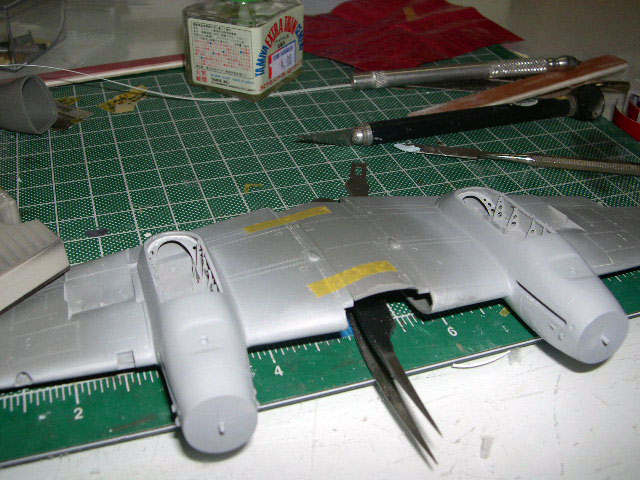
While you are at it don’t forget to open up the holes for the drop
tanks. I had to cut the ailerons. The wings are strangely engineered,
the underside of the right wing includes the center section and the left
wing butt joins the center section. This is a recipe for a problem. I
tried something different. I attached the wings separately allowing them
to dry completely. This allowed the wings to be aligned properly. This
was harder than it sounds but the results were good, besides some of it
is hidden by the bomb rack anyway.
The tail presented a problem. When I first put it on it was horribly
canted. I was able to straighten it with some shims. I did not cut the
rudders as I couldn’t reposition the pedals when I built the cockpit.
Somebody will look in there and see that. Even though the shims were
added the fit was still pretty good.
The wheel wells and landing gear were next. Additional parts, including
bulkheads replaced the kit parts in the wheel well. The landing gear
legs when mounted were too vertical so I added a shim to add a little
bit of an angle to them.
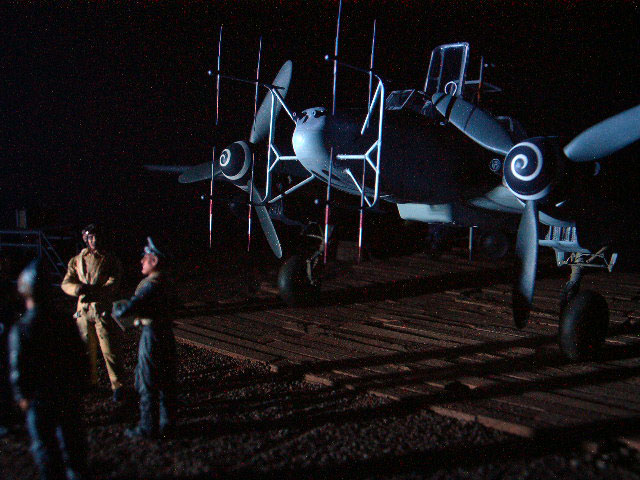
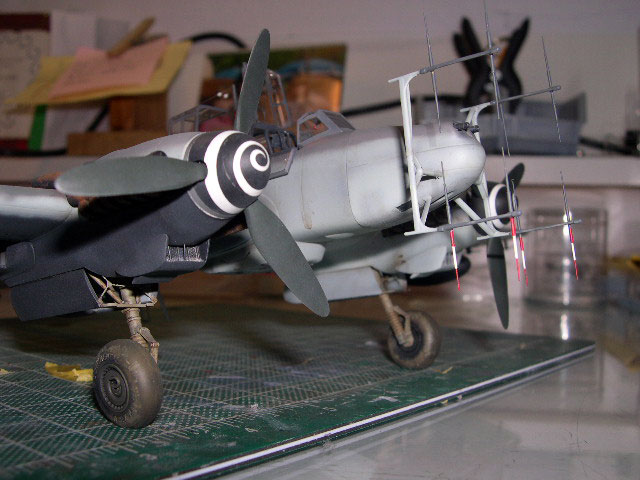
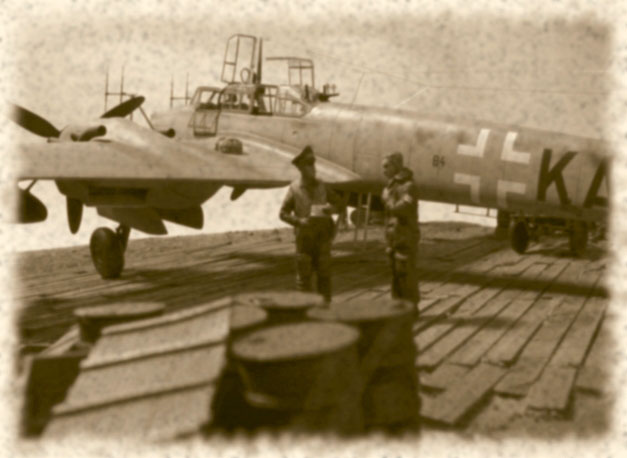
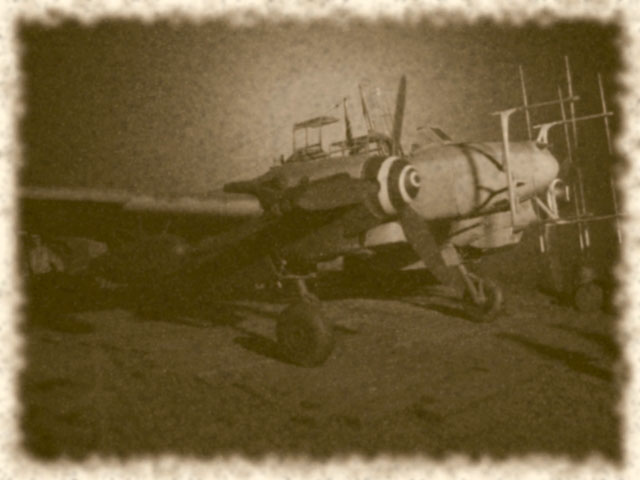
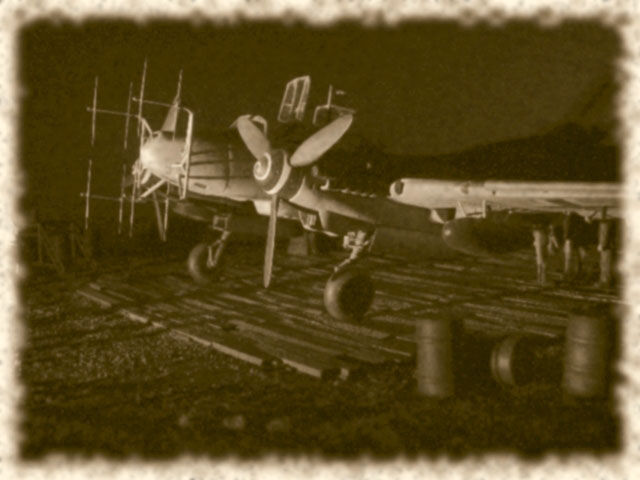
The antennas were next. It was time to select the aircraft I wanted to
model. I went through a lot of decals and finally decided on an aircraft
NJG 3. It had a different antenna setup than was offered by ProModeler.
I had to get the parts I needed from an old Mauve kit. It had the proper
supports and the antennas were brass tubing. It was not a big issue to
add the supports to the ProModeler nose. I could only find one picture
of the subject airframe. The antennas were added and the nose was set
aside.
I tried to use the Aires wheels for the Bf-110G but I could not get the
fit of the wheels to be acceptable so I resorted to the kit wheels which
were quite acceptable.
Using the Black Magic masks I masked off the canopies in preparation for
painting. The masks had a little difficulty sticking to the curves but
while they didn’t work they did provide the answer. I used the shadow of
the masks on the sheet with Tamiya masking tape. While this seems to
defeat the purpose of the masks it isn’t. The time to cut the masks out
was nothing compared to the hours I would have spent trying to mask the
canopies. There are a lot of canopies to mask there. The whole task took
only a few minutes, that includes making Tamiya masking tape masks.
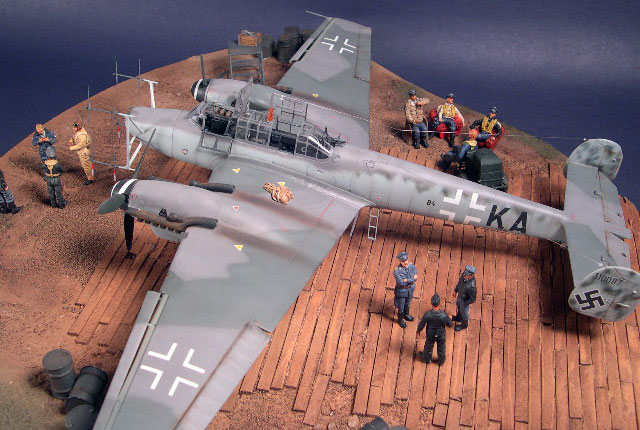
Painting
 The
whole airplane, including the canopies, was preshaded with RLM 66. The
whole airplane, including the canopies, was preshaded with RLM 66.
Using Model Master Enamels throughout I painted the lower right wing
a coat of Flat Black. This was followed up with RLM 76 on the lower
surface and the side of the fuselage.
RLM 75 was added to the top surface. This color was lightened
slightly with flat white and was applied front to back on the wings and
top to bottom on the fuselage.
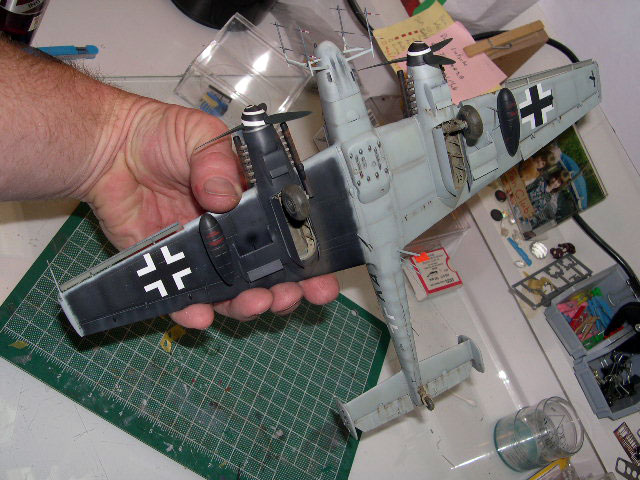
The camouflage was applied free hand with the RLM 74. Again this was
lightened and thinned down. Some patches of RLM 71 were added to the
sides and tail.
Decals
I used Cutting Edge decals from CED48045 Bf-110G Part 1, which has
markings for EIGHT airplanes. They fit like a champ and snuggled down
perfectly with Micro Set and Sol. Once the decals had a chance to dry
overnight, the whole model was given a highly thinned coat of Tamiya
Buff again streaked from front to back and top to bottom. This blends
the decals and “attaches” the model to the base.
Weathering
I used a silver pencil and pen for the chipped paint. This was
followed up with a wash of burnt umber artist oils in the panel lines. I
then used Tamiya Dark Tan and Flat Black to represent the exhaust
streaks. I start out with a two drops of Dark Tan and a drop of black
and a lot of thinner. Once I have the pattern built up I add another
drop of flat black. To this I used some pastels to give the exhaust more
color.
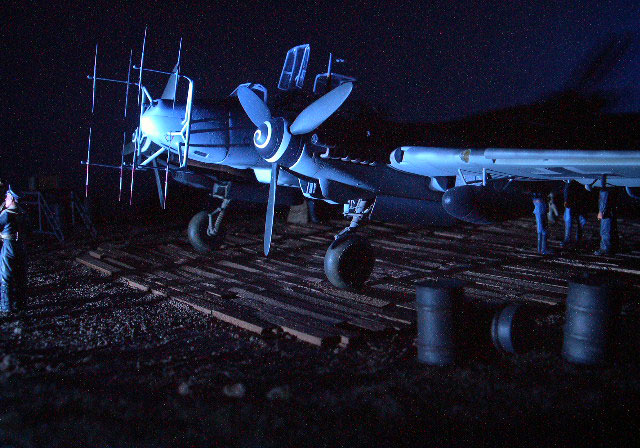
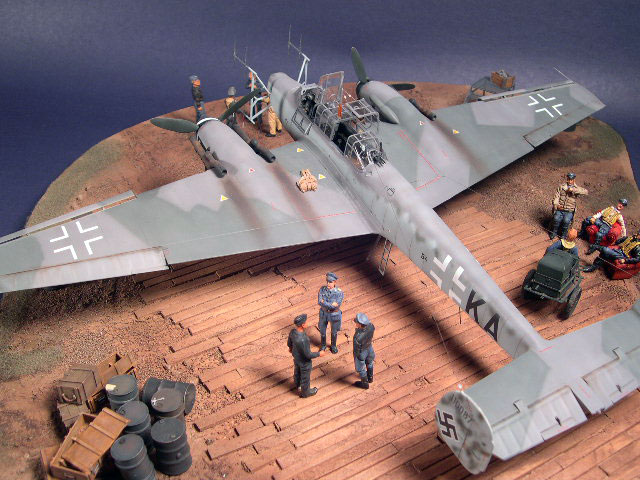
Final Assembly
I added all the little parts that were left, which mostly consisted
of antennas, doors and articulated sections of the canopy. I added the
antenna wire. Finally I added the nose with the deer antler antennas and
then it was done.
This kit is not as easy to build as I would have liked but it is
easily within most modeler’s capabilities.
If you elect to add the Cutting Edge correction set I don’t think
that it is too far beyond the capabilities of your average modeler who
has worked with resin before. It actually was the easiest part of the
construction for me, very anti-climactic.
The Aires set, especially the interior, is superior to the kit
offering and adds a lot to the look of the airplane.
The Cutting Edge flight controls added a lot to the look of the
finished model. The Black Magic masks are essential as far as I’m
concerned.
I was happy with the finished results. In summary, all the
aftermarket stuff did what it was intended to do and they add
considerably to the finished model. All are highly recommended.
-
Walk Around Messerschmitt Bf-110G,
Ron Mackay, Squadron/Signal Publications, 2000, ISBN 0-89747-420-1
-
Aero Detail 21 Messerschmitt Bf-110G,
Dai Nippon Kaiga, Aero Detail,1998, ISBN 4-499-22680-5
-
Modelling the Messerschmitt Bf-110,
Brett Green, Osprey Publications, 2003, ISBN 1841767042 (very
inspiring work)
-
Monogram Close-Up 18 Bf 110G, George
Hopp, Monogram Aviation Publications, 1986, ISBN 0-914144-18-9
-
Model Art No 480-Luftwaffe Night
Fighters, Model Art Co., 1996, ISBN 00140-6-196313
Click on the thumbnails
below to view larger images:
Modelling the
Messerschmitt Bf 110
(Osprey Modelling 2) |
|
|
|
|
Author: Brett Green
US Price: $17.99
UK Price: £12.99
Publisher:
Osprey Publishing
Publish Date:
September 25, 2003
Details: Paperback; 80 pages; ISBN:
1841767042 |
|
|
Model, Images and Text Copyright ©
2005 by Floyd S. Werner Jr.
Page Created 03 August, 2005
Last Updated 02 August, 2005
Back to
HyperScale Main Page
|
 Home
| What's New |
Features |
Gallery |
Reviews |
Reference |
Forum |
Search
Home
| What's New |
Features |
Gallery |
Reviews |
Reference |
Forum |
Search