|
Mauve's 1/48 scale
Messerschmitt Bf 110
G-4
by
Jan Forsgren
|
 |
|
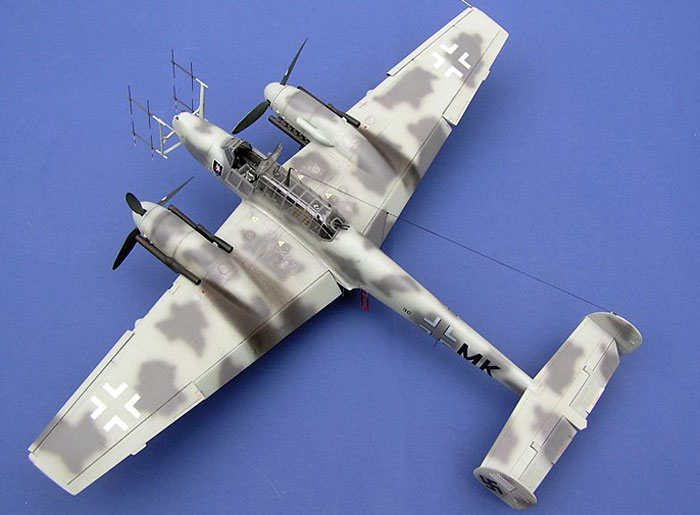
Messerschmitt Bf 110
G-4/R3 |

HyperScale is proudly supported by Squadron.com
I don’t remember when I first saw the name Mauve in Hannant’s
catalogue, but it must have been in the eighties. To me it signalled
quality and mysticism, being Japanese, and none of us local modellers
had ever seen any kit from them.
In 1995 I spent a lot of time in Tokyo because of my work, and had the
opportunity to visit most of the modelling shops there, and eventually I
found some Mauve kits. I was particularly looking for the 1:48 Bf
110G-4, but I found a G-2, from which I thought it would be easy to make
a G-4.
The kit comes in a nice coloured box with the old Fujimi sprues, lots of
extra sprues and white metal, and some rather unnecessary photo etched
parts as I intended to use a resin cockpit. In a shop in Paris a few
years later I bought the old True Details resin cockpit for the Bf 110
C/D which I planned to use, slightly modified to go for a G cockpit.
This project started in the spring of 2002 and in parallel to the Mauve
kit I also built the ProModeler G-4, and my plan was to write a feature
comparing the kits. But like most projects it was delayed, this time due
to me selling one house and buying another, and at Scale Modelworld 2003
the Osprey book of the Bf 110G was for sale and that was it for my idea.
Not that I in any way would compare my idea with the Osprey book, but I
never thought the interest for the Bf 110G was great enough for a book
like that to be published. The book is excellent, but to me old news was
in it.
In 2007 Eduard will release a completely new 110 in different versions,
True Detail has just released a n updated and improved resin cockpit,
and Lone Star Models have released their resin cockpit set for the old
Fujimi 110 C/D which still is around and can be bought. There are many
nice decal sheets for the 110; I especially like the different Cutting
Edge sets, so for us 110 freaks the future is bright!
The old Fujimi kit
Originally released decades ago, and it is still available. Compared
to other kits of that vintage it’s of a much better quality, the only
drawback is its slightly narrow fuselage and the complete lack of detail
in the wheel wells and in the cockpit. The surface detail could be
better except for one great quality: the crisp and subtle panel lines!
Compared to the much more recent Pro Modeler Bf 110G there are many
differences. The PM has a much more logical design with hidden joints
and much better surface detail, but the overall accuracy in my opinion
is better in the old Fujimi. The not so prominent wing kink at the
engine centreline is missing in the PM, and the engines are very poor
resemblances of the original and the wheel well is much too square,
whereas the Fujimi is almost perfect in all these respects.
The Mauve boxing of the 110 is from the early nineties and the injection
mouldings are very crisp and completely flash free.
The fuselage is split vertically in the traditional manner, the wings
attach on each side and the tail section sits on top of the empennage.
For the G-2 (and the G-4) Mauve supplies a new nose cone with double MK
108 cannons. Other changes are the broader fins and the typical engines
with a dorsal hump for the compressor on top of the engine. The white
metal parts I used were the hump, the oil coolers under the engine and
the belly gun pod. I did not use any interior details, the landing gear
and the tail wheel.
Wings
A hole for the main wheel was made in the wheel well, not exactly
correctly as I did not buy the Eduard PE set until after this operation
(it was a very long lasting project!), and all openings seen in the well
was blanked off. Stringers were added in the wheel wells, an item also
covered in the PE set, if I would have waited.
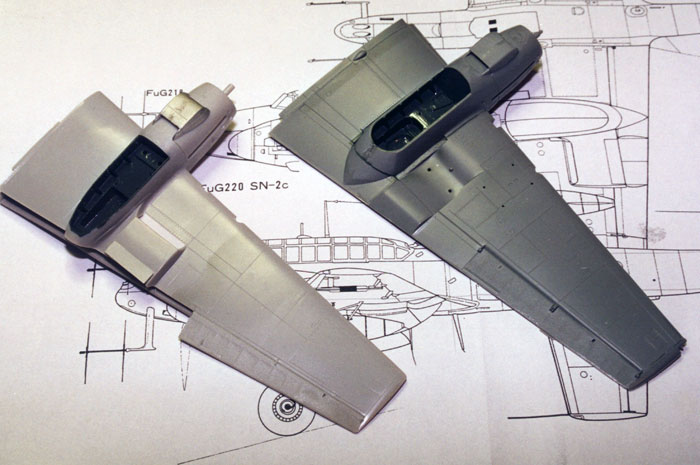
The flaps were cut out on the upper and lower wing halves and the wings
were glued together. In this picture it is apparent how different the
wheel wells on the Mauve (left) and the PM kit (right) are, and even
though the Mauve wells are not perfect they are much better than the PM
too square wells.
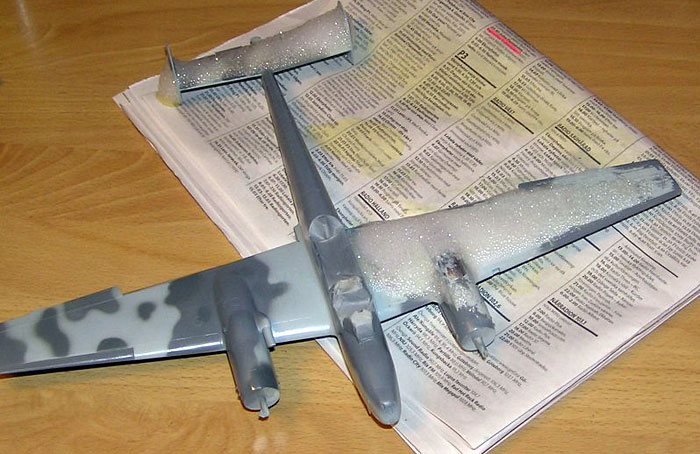
Nacelles
The engine nacelles are Mauve parts and they look miles better than
the PM very low nacelles, the only problem is the fit. It actually
concerns the whole Fujimi/Mauve Bf 110; apart from the fuselage and wing
assemblies, nothing fits well! A major drawback for many modellers, but
for us enthusiasts this is no problem. After assembling the engine
halves and attaching to the wings it’s only a case of putty and sanding.
The white metal parts look very good and with lots of work with my files
they fit all right. Endless layers of thick Humbrol matt colour acting
as putty was used to blend the hump to the top of the nacelle and the
ventral oil coolers. When the wings were mated with the fuselage I
compared the nacelles with photographs of the real machine, and added a
1 mm plastic card to the front end. With a file I changed the angle of
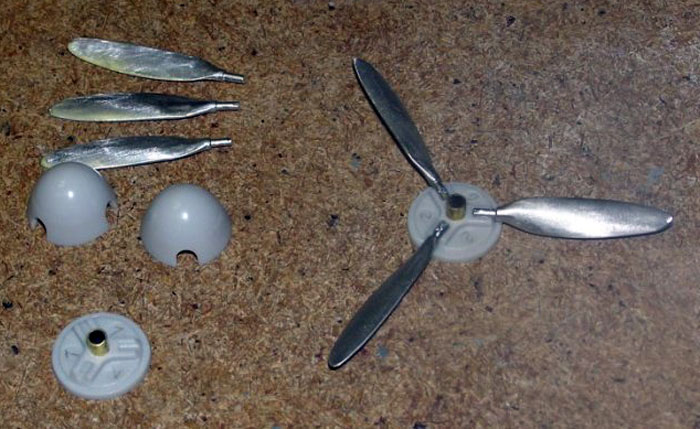
the front ends to a more realistic look. The spinners were also modified
to match photos, but only by shortening them, this way I got an almost
perfect Bf 110G in profile. To support the propeller I used a brass tube
with an inner diameter of 1/16”. After measuring and drilling the centre
of the front end it was inserted into the nacelle and glued with CA. In
the propeller hub I drilled a hole and glued a 1/16” piano wire of the
appropriate length.
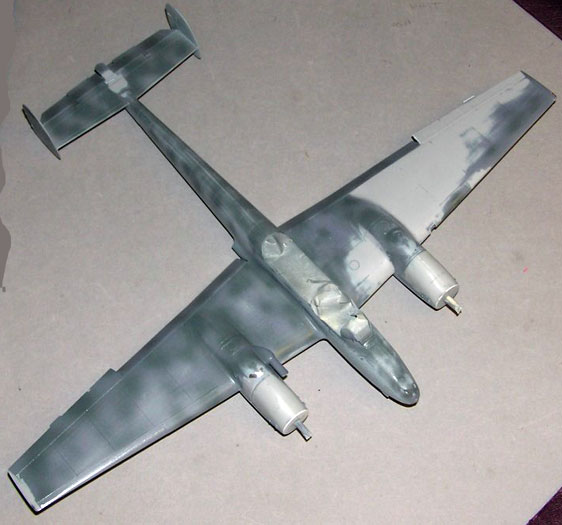
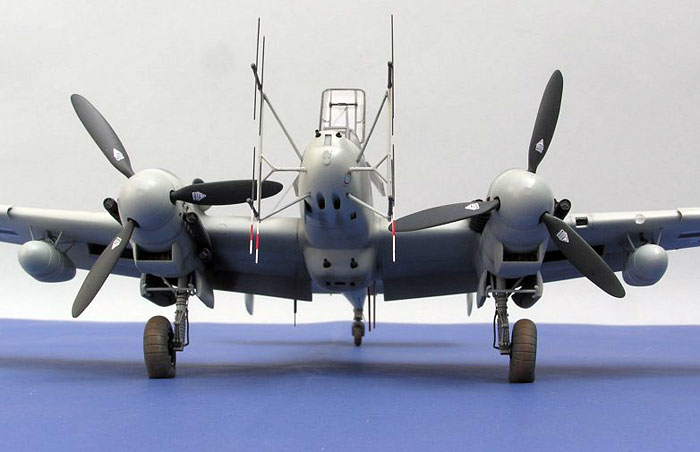
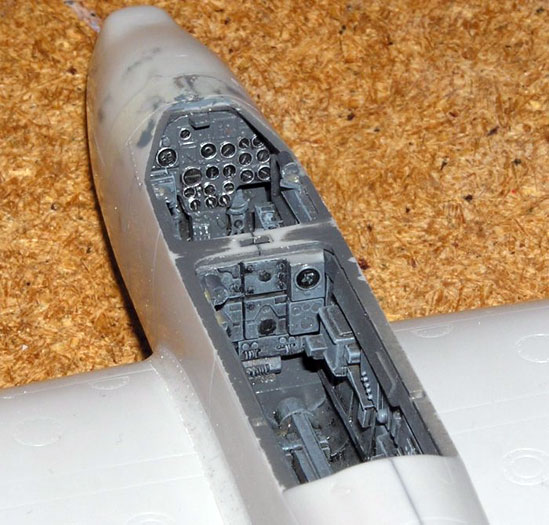
The air scoop for the compressor on the starboard engine is located on
the inside at roughly 30º from the horizontal plane. I used a PM scoop
as it looked better than the white metal part supplied by Mauve. The
position of this scoop is much more correct on the Mauve than on the PM,
and the difference in engine height is also evident when comparing the
two photos. The kit with the round engines is the PM and the more
realistic oval profile is the Mauve kit. The port engine compressor
inlet is on the wing leading edge outside of the engine.
Click the
thumbnails below to view larger images:
Metal propeller blades are provided by Mauve. They were carefully
sanded and glued to the hubs using a simple jig to get the correct AoA
of the blades.
The exhaust pipes are from the PM 110. They don’t fit very well on the
Fujimi, they are too long (Fujimi and PM don’t agree on the engine
length) and the curved part over the wing is different. I did my best to
adapt the exhausts and even used heat to make them fit. I opened up the
rear end and painted them black.
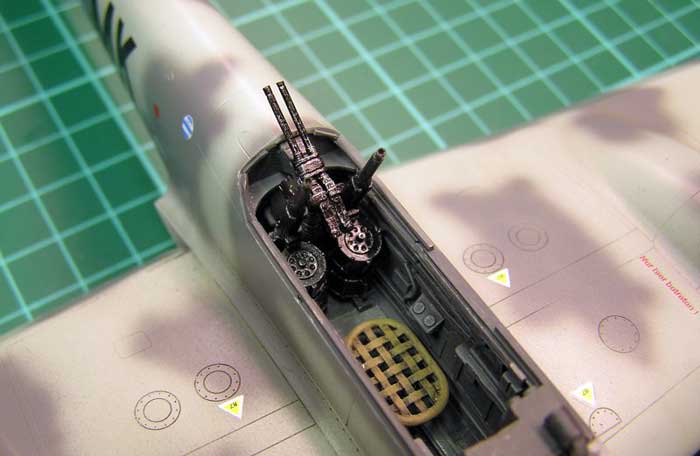
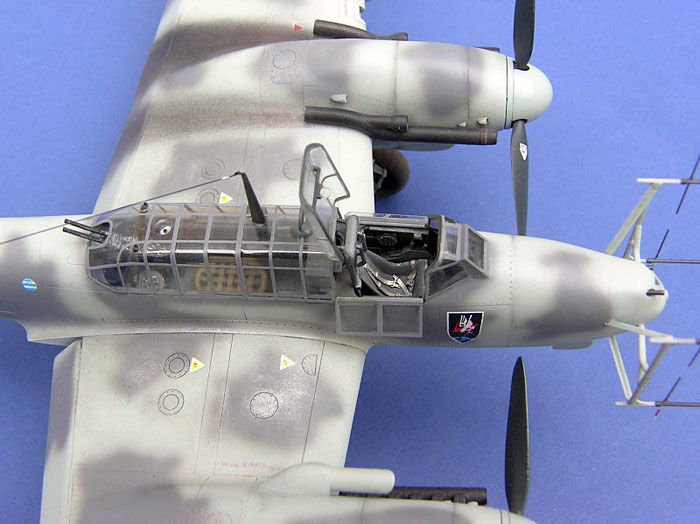
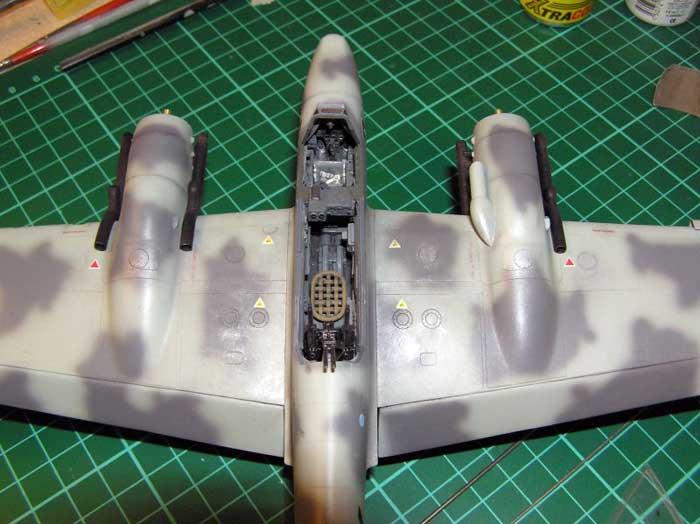
Cockpit
The True Detail resin cockpit parts (for the 110C/D) were compared to
photos of G cockpits and no major surgery was necessary. A spare PM
110G-4 was butchered for the pilot seat and instrument panel as the
resin parts were of poor quality, and the radar operator’s equipment and
the two Mk 108 for the Schräge Musik.
All traces of the original cockpit interior were removed from the
fuselage halves and the resin cockpit sidewalls were thinned
considerably. Some surgery was necessary to get the cockpit sides,
bottom and front and rear ends to fit to the fuselage. I painted (Xtracolor
enamel was used all through unless otherwise noted) all interior
surfaces dark grey, a lighter shade than the real RLM 66, and used a
black oil colour wash with white spirit. I painted the instrument panel
dials black with white indicators and dry brushed Humbrol 11 Silver on
the raised rim of each instrument, and I find the result pleasing with a
minimum of effort. All interior surfaces were dry brushed with a lighter
grey. The cockpit sides were glued to each fuselage half.
After I painted the pilot’s seat grey and dry brushed it with Humbrol 11
silver, I cut thin strips of lead from a wine bottle for seat belts, and
Re-Heat buckles were used on the seat belts and all were glued to the
seat.
The “net” seat, shared by the radar operator and the rear gunner, was
painted brown and given a dark brown wash.
The Schräge Musik parts were painted black and dry brushed with Humbrol
11, this was done after a large amount of fitting had been done, because
the Fujimi cockpit is narrower than the PM where the guns came from, and
the barrels had to pass through the canopy in the correct place which
was not so easy. The assembly of the Schräge Musik was done at a later
stage when work with the canopy was under way.
Click the
thumbnails below to view larger images:
Fuselage
The fuselage halves with the cockpit parts were assembled, a tricky
operation getting all the different cockpit parts together correctly.
The fit of the fuselage halves really is good and by carefully aligning
the top and bottom seams the result was very good.
The C/D nose was removed with a razor saw and pedals for the pilot
were installed from the front end. The new G nose is a bad fit, and
putty is a poor material for scribing panel lines but that’s the way I
did it.
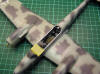
The protection plate for the Mg 151/20 shells on the nose cone was made
from thin plastic card and glued in place.
Major Assembly
At this stage the main wings were attached to the wing roots on the
fuselage. First the dihedral was checked against photos of the real
thing, and some adjustments had to be made to the wing roots.
Care was taken not to destroy the small gap (“panel line”) between wing
and wing root on both upper and lower sides; not much liquid glue was
used.
I chose the Mauve white metal Waffenwanne MG 151 Z belly gun pack
instead of the more common ETC500 bomb rack (was it carried because the
aircraft were also used in daylight attacks?).
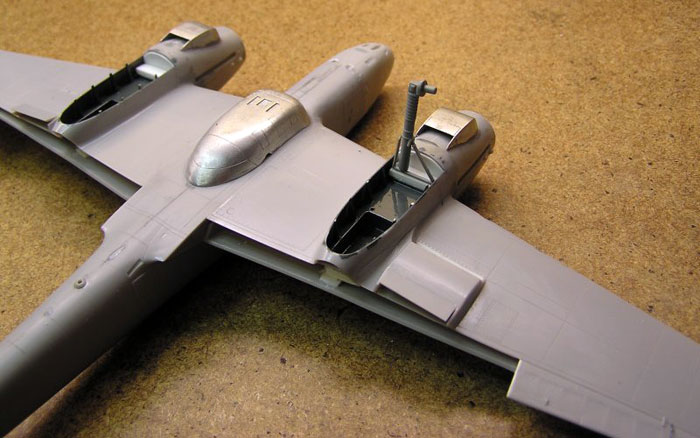
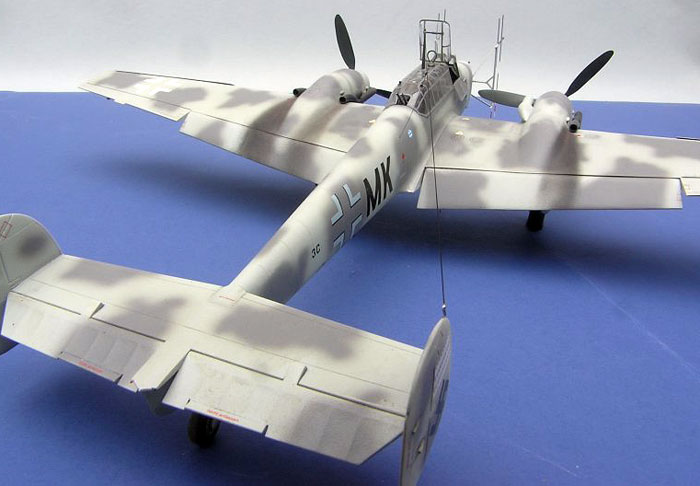
I decided to paint the model as Hauptmann Martin Becker’s 110 G-4 of
2./NJG 4, based in Florennes in the summer of 1944, using the TechMod
decals. It may not have had the gun pack, but you can’t be sure as the
photo documentation is incomplete! The Waffenwanne installation makes
this G-4 an R3 variant.
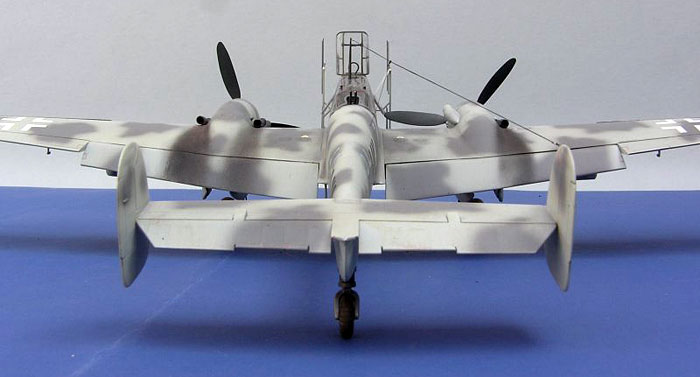
On the tail plane I cut out the elevators, as I’ve seen several photos
of 110’s on the ground with the elevators “hanging down”. The trim tabs
were cut out from the elevators and glued slightly upwards and the
actuators for them were adjusted, and finally the elevators were
attached in a down position.
The trickiest part of the flaps on the 110 is how it meets the wheel
well, I used mostly guesswork and it looks right to me after seeing the
real thing at Hendon. The flaps halves were assembled and test fitted
against the wing, and after many trials both flaps were glued to the
wings.
The slats are made from thin sheet brass. I used the wing leading edge
as a pattern and bent the brass over it, then trimmed the slats with a
pair of scissors. By cutting very little each time the brass will not
warp so much, but I had to use some putty to make the slats flat. I
sanded some plastic off the leading edge where the slats would retract,
and glued small pieces of thin plastic card as slat rails. The slats
were left aside for final assembly.
The vertical stabilizers were glued in place and now the airframe was
prepared for painting. But before that I marked the position of the drop
tanks and drilled four holes on each wing.
Painting Troubles
In the autumn of 2002 I painted my Mauve, and my only information of
the camouflage pattern was in the TechMod decal sheet instructions. It
specified all three greys on the upper surfaces in a mottle pattern, to
me a very unusual camouflage for a late war 110 G. Much later when I
restarted the project I had received a description of one photograph
from Mr GR Morrison, from which I painted the whole aircraft. I don’t
claim to be completely correct in my interpretation of the colour
scheme, but close enough.
Anyway, my first attempt was not up to my liking. I followed the decal
sheet paint instructions and it looked like nothing I ever had seen. I
packed all my modelling gears (and of course everything else) and moved
to a new house, and three years later I used Mr Muscle and stripped off
all paint.
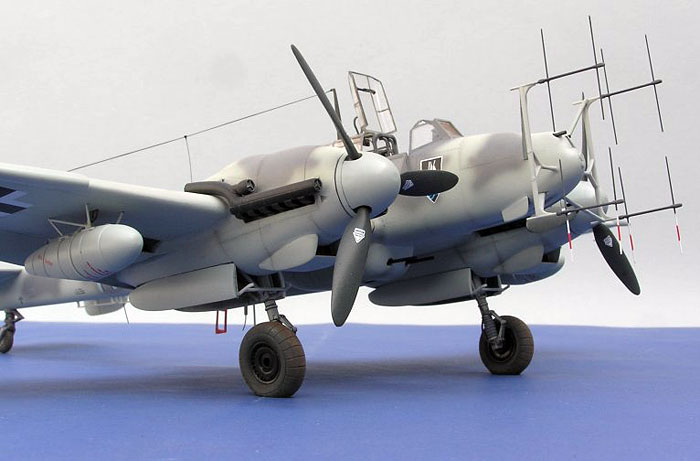
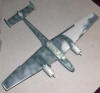
The second attempt was better, but I thought the model was too dark, so
I decided use only RLM 76 and 75. After stripping off the paint once
more, the final layers were sprayed and I liked it! It’s a pattern very
much like the late war Ju 88 scheme.
Before painting I had glued the windshield with harmless white glue and
the joint was made smooth with putty, because the original canopy’s fit
wasn’t that good.
I used some of the ExtraTech decals, but all crosses (except for the
grey crosses) and Swastikas were Superscale. I had to use lots of Micro
Sol to get rid of the silvering on some ExtraTech decals, even though I
had a perfectly polished surface. Several coats of Johnson Klear with
water sanding in between was used to hide all traces the carrier film on
the decals.
The FuB 12F ventral blind landing antennas from the Eduard 48-253 PE set
was badly damaged several times during my painting sessions. Finally I
flattened it and put it aside until the project was almost finished!
All gear bays were painted RLM 02 prior to the coat of RLM 76, and all
bay doors also got 02 on the inside and 76 on the outside.
Click the
thumbnails below to view larger images:
|
|
|
|
Before
|
|
|
|
After
|
|
|
Final Assembly
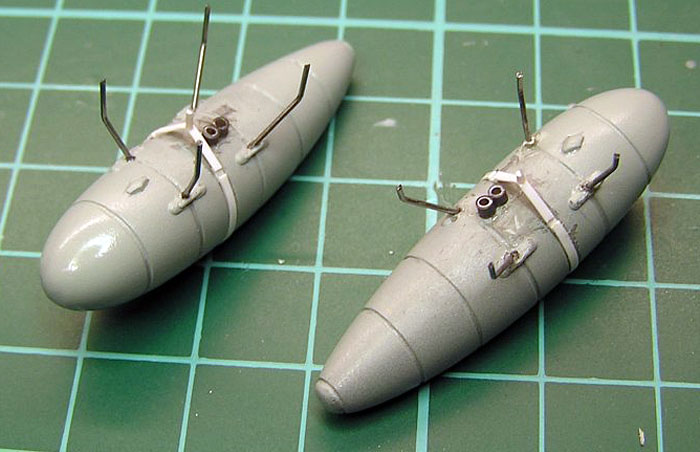
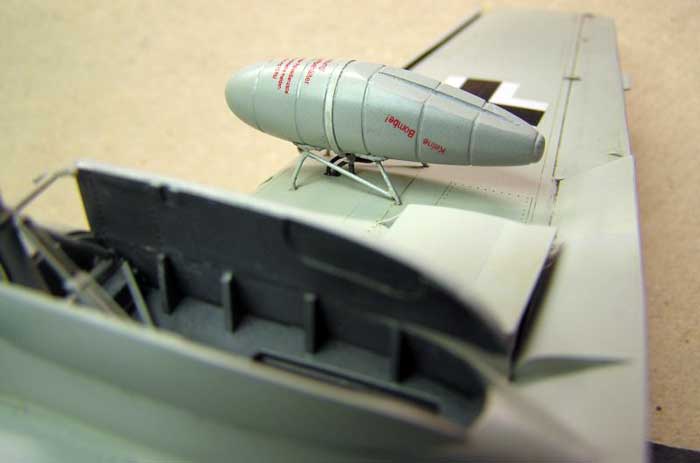
I had the True Detail resin drop tank set lying around, tanks of
different shapes, I chose two of the same shape as supplied in the PM
kit, drilled holes for the sway braces and painted them RLM 76. For the
sway braces I used pieces of thin piano wire that were cut and bent with
pliers and inserted in the holes. Each drop tank with sway braces was
tested and adjusted to fit. The suspension parts were made from plastic
strips and rods, and the fuel hoses between the wing and the drop tanks
were made from copper wire, and appropriate holes for the hoses were
made in the wings.
The rods between the support legs were glued with CA after the drop
tanks were attached to the wings.
Click the
thumbnails below to view larger images:
The PM main landing gears were adapted to fit in the wheel wells,
painted RLM 02 and provided with hydraulic oil pipes, and the link
mechanism from PM was also used. True Detail wheels were painted dark
grey and dry brushed with mud brown. The white metal tail wheel looked
very small to me so I opted for the PM tail wheel instead.
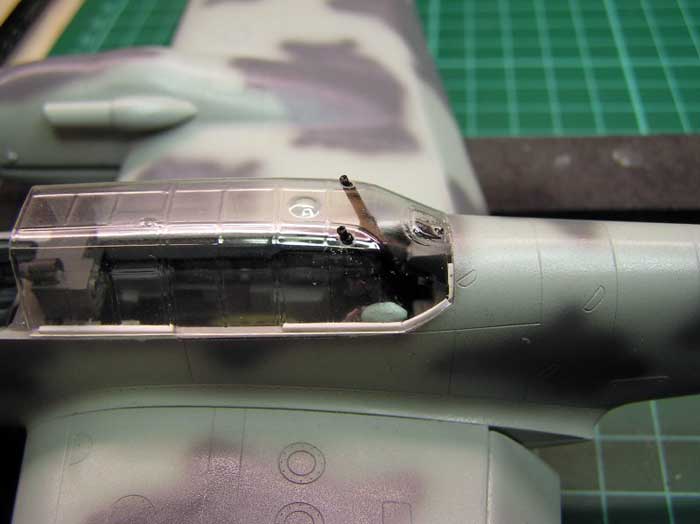
The opening in the fuselage for the canopy is very round in the rear; I
made it square and cut the Squadron canopy to fit. I glued plastic
strips to make a ledge on the canopy sill for the vacuum formed canopy,
and painted the strips dark grey. Originally I had planned to cut out
the rear entry part of the canopy, but as I only had one canopy and did
not dare to cut the soft plastic, I left it closed. I also cut away the
front opening and used PM parts for the side windows and the top that
opens backwards.
Now it was time to drill the holes for the barrels of the Schräge Musik
in the canopy glazing, and the cannons were glued in place after dry
brushing with Humbrol 11, silver. The MG81Z was painted like the MK108’s
and for the shell chute I found parts in an old Verlinden box, 1261
Luftwaffe Aircraft Guns.
The canopy was painted after careful masking first in one direction and
then the other, to me the simplest way to achieve a good result. It was
glued with epoxy glue and held down firmly with tape until the glue had
cured. The antenna pole was painted and then glued with CA, but only
after careful masking of the canopy to avoid the white fogging on clear
surfaces.
The exhaust pipes were dry brushed rust brown and attached with CA glue,
and the FuB 12F antenna was glued in place and painted RLM 76.
In this picture it is possible to see the Humbrol 11 dry brushing I
did to simulate worn paintwork on the wings.
Click the
thumbnails below to view larger images:
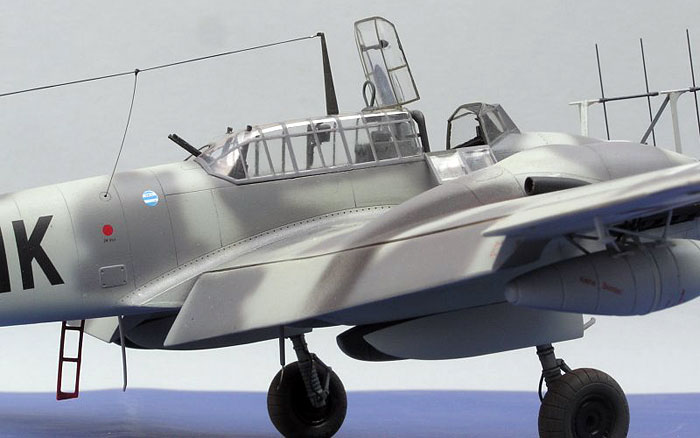
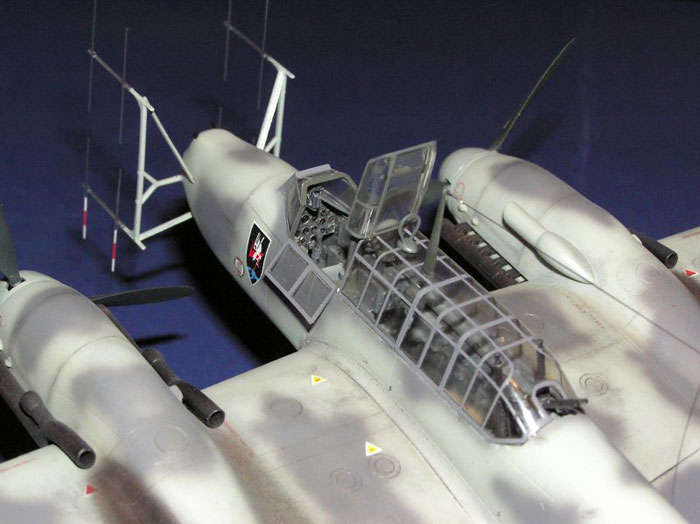
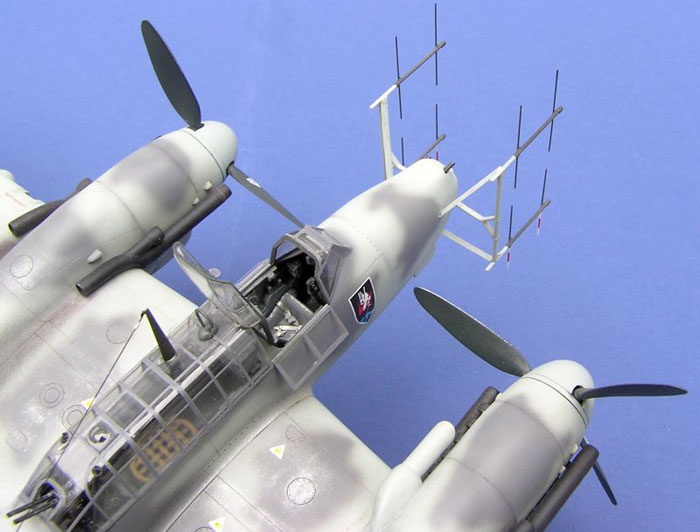
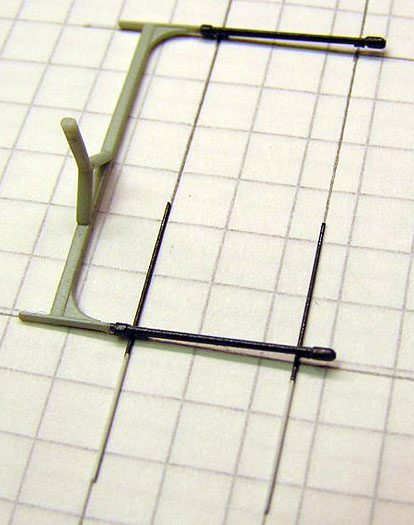
Now for the most delicate parts!
Antenna poles for the FuG 220 Lichtenstein SN-2, one of the older
layouts sometimes called G-4b, was fabricated from plastic strips and
rods. They were assembled except for the diagonal supports, and painted
RLM 76. The antennas are 0,25 mm piano wire, and they are glued to the
poles with CA glue and painted dark grey, red and white.
Each unit was attached to the nose with CA glue. Attaching the
antenna arrangement to the nose is not easy, at least if you want them
in the correct angle; slightly downwards and in plan view straight
ahead. I only glued the centre support on both sides before trying to
adjust the diagonal supports to fit. In the end I succeeded, and it’s
one of my best antenna installations!
For the radio antenna wire I drilled a hole in the starboard fin and
inserted a small photo etched loop. A piece of stretched black sprue was
used between the antenna pole on the canopy and the loop, and to the
fuselage.
The canopy was completed with side and top windows for the pilot after
painting the frames.
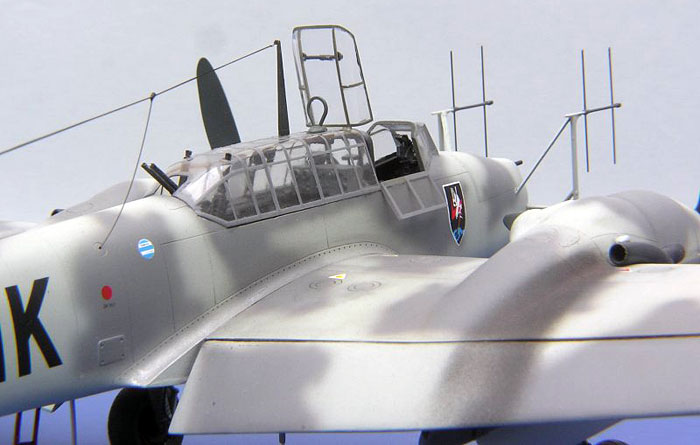
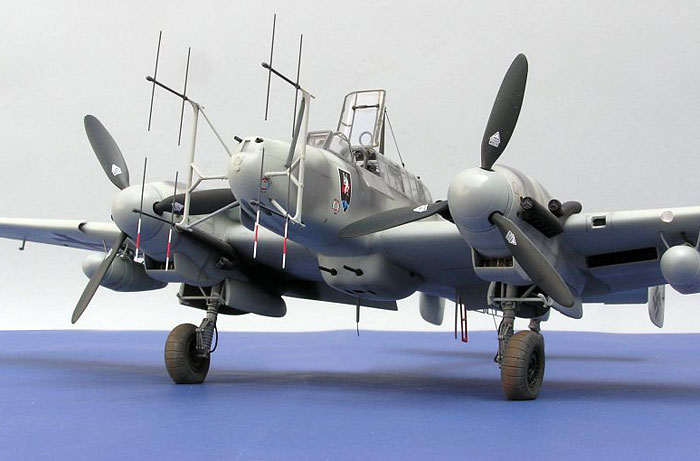
Not the best of models, regarding good fit, but since the Pro Modeler
G-4 was a disappointment to me this is my favourite! I’m a Luftwaffe
night fighter nut, which you may have noticed from my previous feature
articles, and the Bf 110G-4 is something special. A complete failure as
a day escort fighter it was turned into a success at night, and it was
used during the whole war.
Now I must build a C night fighter from the Fujimi kit and a PM G-4 with
the Cutting Edge correction set!
Click the
thumbnails below to view larger images:
Modelling the
Messerschmitt Bf 110
(Osprey Modelling 2) |
|
|
|
|
Author: Brett Green
US Price: $17.99
UK Price: £12.99
Publisher:
Osprey Publishing
Publish Date:
September 25, 2003
Details: Paperback; 80 pages; ISBN:
1841767042 |
|
|
Model, Images and Text Copyright ©
2006 by Jan Forsgren
Page Created 05 November, 2006
Last Updated 21 February, 2007
Back to HyperScale
Main Page
|
 Home
| What's New |
Features |
Gallery |
Reviews |
Reference |
Forum |
Search
Home
| What's New |
Features |
Gallery |
Reviews |
Reference |
Forum |
Search