|
CA-19 Boomerang Mk.II
by Larry Cherniak
|
|
|
CAC CA-19 Boomerang Mk.II |

HyperScale is proudly supported by Squadron.com
Before building this model (after winning it in a raffle
at my model club- thanks Rick!) what little I knew of the Boomerang was
mostly innaccurate or downright false. I had thought it was a failed
quick-fix lashup of wings derived from North American trainers with a new
fuselage. In actuality I have come to consider it a quite successful,
mostly original, design, forged quickly (5 months from inception!) in the
heat of fear of the Japanese fighters, using a great deal of ingenuity and
resourcefulness. Certainly the design was derived from the Wirraway
trainer, but in the end nearly everything differed from it- especially the
wood-covered tubular steel fuselage.
Although fitted with a two-stage supercharged Pratt and Whitney
R-1830-S3C4-G engine optimized for high altitude interception, in the
event the Boomerang was superceded by Spitfires and P-40's in that role.
Yet it found a successful niche in hopping in and out of jungle valleys
just above the treetops, scouting out Japanese troops. They flew in army
cooperation and tactical reconnaissance roles, with an F24 camera fitted
behind the cockpit (a detail I conveniently left off my model until I can
find a plan showing where to put the window!). They also marked targets
with smoke canisters for followup by ground-attack squadrons, and used
their two 20mm cannon (and 4 x .303 machine guns) to good effect in
strafing work (in one instance shearing off the treetops so that the
ground troops could see where to target their mortars!). Unfortunately, it
sometimes fell victim to "friendly fire" in this role- but crashes on
landing took a far greater toll. Check out
http://www.kiwiaircraftimages.com/boomer.html
for a lot more information, and
http://www.adf-serials.com/2a46.shtml for
a history of every Boomerang known.
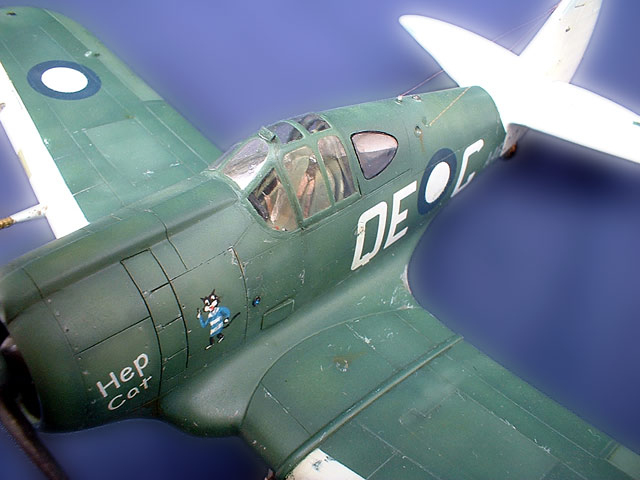
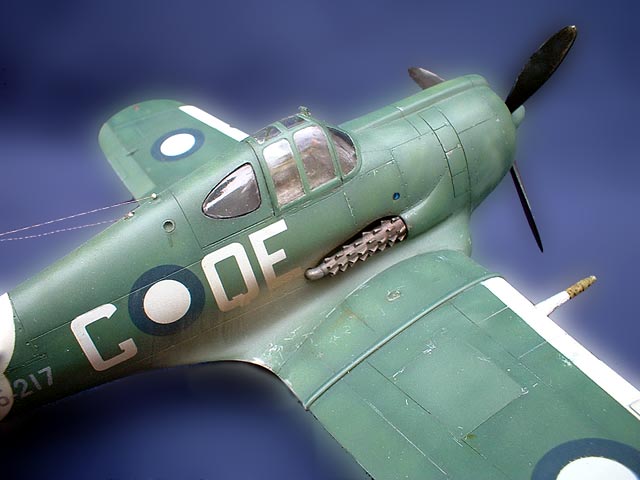
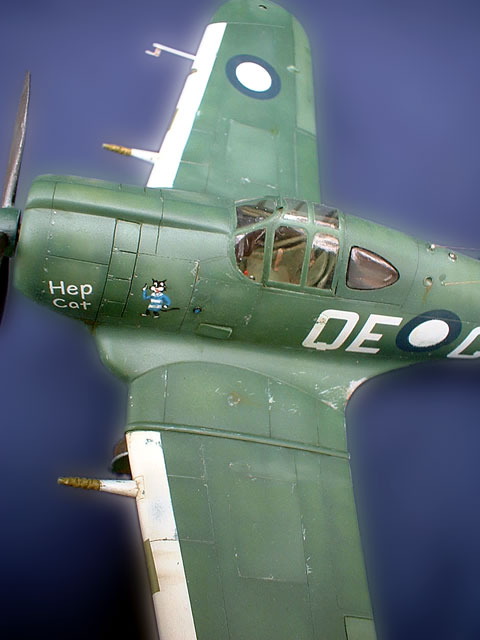
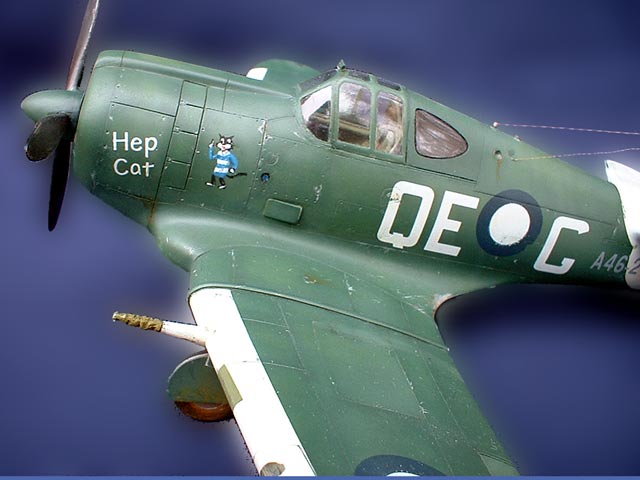
My model depicts A46-217 "Hep Cat", a CA-19 Boomerang Mk. II, C/N 1040,
Delivered in 8/1944, 4th Squadron RAAF, Morotai, Halmaheras, early 1945.
The "Hep Cat" nose art was painted by resident squadron painter G.
Chambers. There was no particular pilot, as the pilots flew whatever was
serviceable at the time. It was later passed on to the 5th Sqn and swung
off Cape Hoskins strip on New Britain on 12/2/1945, whence it was reduced
to components.
The Boomerang
in 1/48 Scale
|
Now, what about modeling the Boomerang in 1/48? You don't see many around,
although John Burns lists no less than 8 kits available- mostly vac or
resin I suspect. LTD was an early enthusiast-run limited run company which
I'm sure helped pave the way for todays burgeoning Eastern European model
industry, and I for one am happy to have their efforts (the LTD IAR 80 and
LaGG3 are still the only games in town). But they do take a little more
work than even the average limited run kit of today. I hope this article
can encourage more builders to add one to their collection. (The Tasman
models kit KW4801 is also limited run injection and perhaps more commonly
available).
The first step was carefully snipping all of the parts off the sprues and
filing off the nubs, etc. A razor saw would have been a better tool at
some points than sprue nippers. (A few hours spent this way can actually
be enjoyable if you like working with your hands- I did it over coffee and
lunch breaks at work and had it done in three days). Testfitting,
trimming, and cleaning up of rough edges is the order of the day
throughout. The plastic is quite soft and workable.
Next, I glued (using MEK throughout- This strong solvent dissolves enough
of the soft plastic to self-fill small gaps nicely) the outer lower wings
to the lower center wing section, taped them on to hold the dihedral, and
set the lower wing assembly aside to dry. This yields a one-piece lower
wing with set dihedral, aiding later assembly.
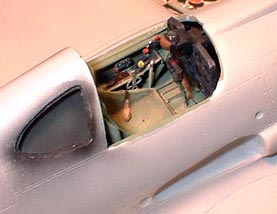
The cockpit came next. What is there is barren but acceptable except for
the sidewalls, which could use some tubular framework, consoles, throttle,
etc. I built on what was there with metal rod stock, PE leftovers, spare
parts, etc. References were the excellent shots in the reference section
of this site as well as Ventura Publications "Classic Warbirds No.7".
 One inner rear quarter window part was either missing or lost, but
curiously only one is seen on the instructions. I fabricated a new one
from sheet stock. Using ModelMaster or Floquil enamels throughout, the
interior was painted British interior grey-green with black consoles and
inner rear quarter windows. The cockpit floor, rear, back armor, and
engine bulkhead were glued in place. The engine interior area was painted
aluminum. Excellent Boomerang color information like this was found on the
Red Roo Models website. One inner rear quarter window part was either missing or lost, but
curiously only one is seen on the instructions. I fabricated a new one
from sheet stock. Using ModelMaster or Floquil enamels throughout, the
interior was painted British interior grey-green with black consoles and
inner rear quarter windows. The cockpit floor, rear, back armor, and
engine bulkhead were glued in place. The engine interior area was painted
aluminum. Excellent Boomerang color information like this was found on the
Red Roo Models website.
I would have liked to add the upper wings after the lower wing was already
glued to the completed fuselage, in order to keep a looming substantial
wingroot gap to a minimum, but the large fairing on the wings runs from
top to bottom so they really needed to be aligned precisely. I therefore
glued the upper wings to the lower and would have to deal with the
promised wingroot gap later.
The engine came next. This is quite crisply done, just missing pushrods
and accessories. The cylinders were painted Tamiya gloss black with a
silver drybrush and the rest gloss grey. Pushrods were then added from
stretched black sprue. An ignition harness was added from solder. The
engine was glued in with epoxy and adjusted after fitting the fuselage
halves together. Did I mention the need for careful testfitting? Some
cylinder heads, and the bulkhead, needed to be filed down a little to
close the nose up.
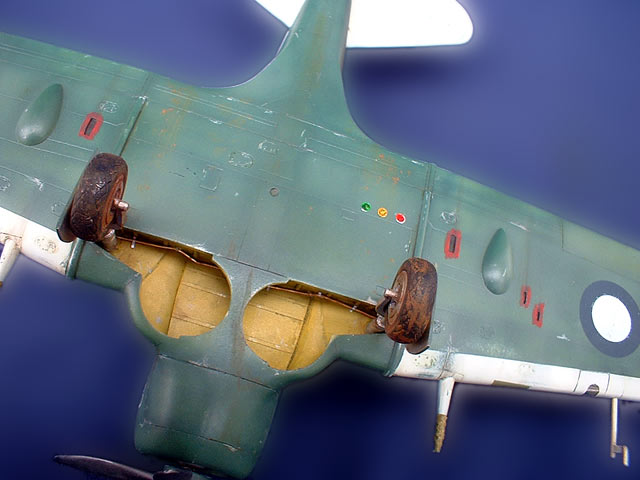
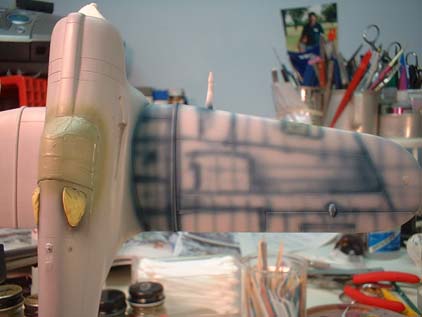
I then testfitted the wings and sure enough, there was a wingroot gap big
enough to trip a (scale) horse. I ended up having to forcibly shove the
landing gear bay roof piece up into the fuselage a ways to wedge the
bottom of the fuselage apart enough to fill the gaps, fixing it in place
with CA and accelerator when ready. This opened up a 1.5mm wedge-shaped
gap at the bottom of the engine, which was a better place to fill
unnoticed with gapfilling CA. Unfortunately, this now put the engine off-center,
so I (cursed, then) snapped it off and glued a couple of cylinder heads to
the inside of the cowling with MEK to re-center. I flooded the wingroots
with MEK after careful tweaking of the joints and about 5 clamps in
different places.
 The tailplanes were tweaked with careful filing then glued on. I drilled
out the locating holes, but one side fit better with the locating bumps
removed altogether. Although an unreinforced butt joint, the MEK bond is
quite strong. Several joints now needed minor filing, puttying, and
sanding attention. The surface had a fine pebbly finish and faint panel
lines. I sanded overall, then deepened the control surface divisions, cowl
flaps, and major panel lines with a simple used #11 hobby knife blade
pulled backwards across the molded lines. The tailplanes were tweaked with careful filing then glued on. I drilled
out the locating holes, but one side fit better with the locating bumps
removed altogether. Although an unreinforced butt joint, the MEK bond is
quite strong. Several joints now needed minor filing, puttying, and
sanding attention. The surface had a fine pebbly finish and faint panel
lines. I sanded overall, then deepened the control surface divisions, cowl
flaps, and major panel lines with a simple used #11 hobby knife blade
pulled backwards across the molded lines.
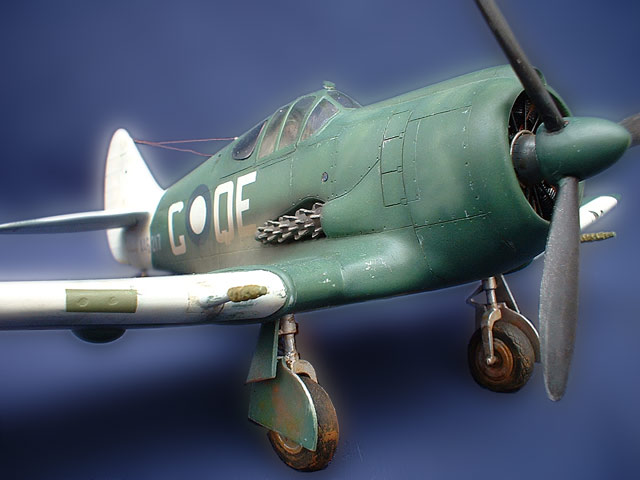
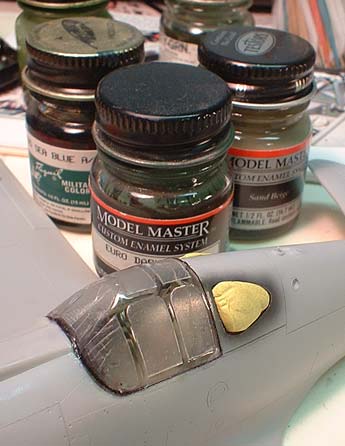
The rest was pretty standard finishing-up work. The landing lights were
homemade from chrome mylar and covered with tape. The better of the two
vac canopies was dipped in Future and trimmed to fit. Of the two sets of
wheels provided, use the larger pair as they scale up closer to the real
thing (If you have spare T-6 Texan wheels and struts they should work here
as well).
Although
I had detailed the interior just enough to show it off, I thought opening
the canopy would disturb the pugnacious lines of the beast too much so I
masked the canopy with Parafilm M and glued it on with CA. I then
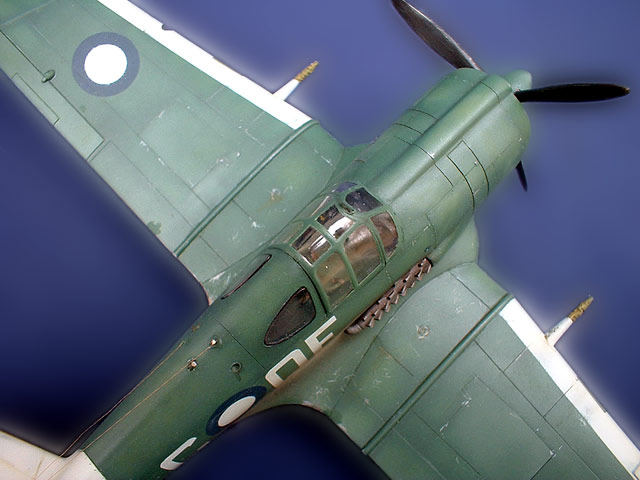
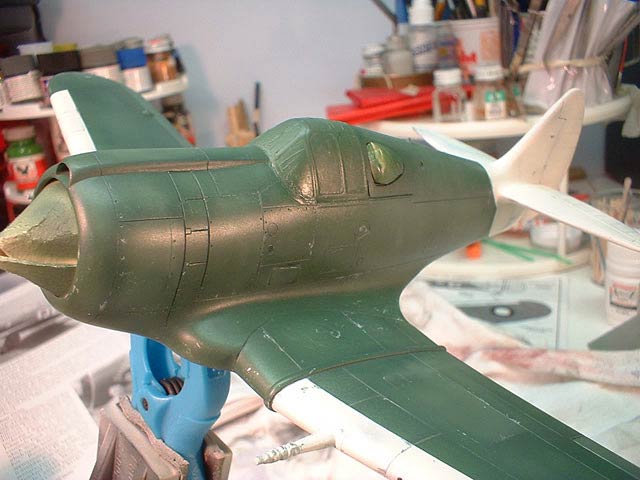
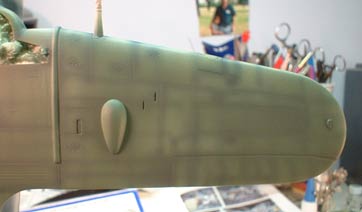
preshaded the panels with dark blue.
Next Modelmaster Euro I Dark Green FS
34092 (A good match for RAAF Foliage Green) cut with lacquer thinner was
applied thinly and built up. Then a mix of the green and some tan was
sprayed on randomly for a faded look. When this was dry I masked and
sprayed the white wing leading edges and tail. This replicated the order
in which the originals' paint was applied, allowing sanding and scratching
to reveal wear-through to the underlying green.
Decals, applied over a Future coat, proved excellent. I love the "Hep Cat"
nose art, although I couldn't find any pictures of this exact machine
("Phooey" and several other 4th Sqn birds are covered in the Ventura
book). Another coat of Future sealed the decals in, then Modelmaster Acryl
flat varnish finished up. Oil washes (mostly raw sienna blends over the
white, raw umber and pthalo blue on the green) and pastels followed.
On a light note, after struggling with this thing on and off for months,
thinking I had built something unique (having never seen one at a contest
in the region in the last 6 years since I've been back at the hobby), what
do you think happened when it debuted? That's right, a foot down the
contest table was another nice foliage green LTD Boomerang! I felt like
women say they do when they show up at a party in the same dress. Go
figure.
On another light note, my daughter, then 7, pulled me aside after
examining it and said "Umm, daddy, I think you made a mistake." She looked
a little downcast (she's so proud of her daddy WINNING before at the
NATIONALS! And now he messed up...). "What?", I asked, curious. "Well, I
can see scratches in the white paint where you can see some green." Sigh.
I gently explained my replica-building philosophy, and how I carefully put
those there- just to please myself, I guess.
I enjoyed researching this plane and came to appreciate the pugnacious
little Boomerang and respect its role in scouting out the enemy in island
jungles. I’m sure that many an allied ground-pounder cheered when he saw
one overhead, and many a Japanese soldier who was tempted to take a
potshot at one didn't survive the day. It deserves a place on our shelves,
squatting between the more graceful Spits who overtook it and Corsairs it
sometimes directed. It wasn't beautiful or glamorous, just a stocky
mud-crusted soldier doing its job- but there's valor in that as well.
Click on the thumbnails
below to view larger images:
Model, Images and Text Copyright © 2004
by Larry Cherniak
Page Created 14 March, 2004
Last Updated
15 March, 2004
Back to
HyperScale Main Page |
 Home
| What's New |
Features |
Gallery |
Reviews |
Reference |
Forum |
Search
Home
| What's New |
Features |
Gallery |
Reviews |
Reference |
Forum |
Search