|
MPM / HML 1/48
scale
Blohm und Voss BV 138
by
John Valo
|
 |
|
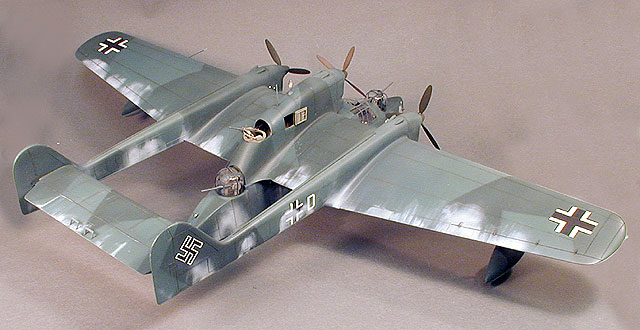
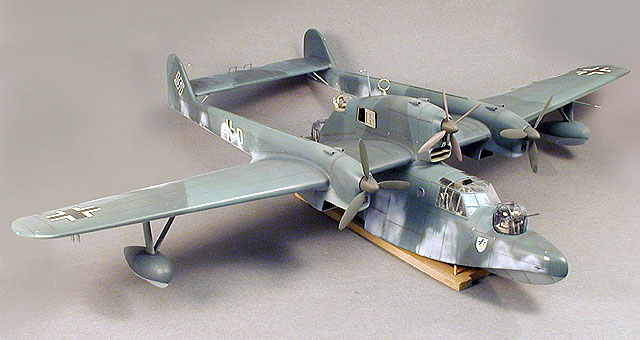
Blohm und Voss BV 138 |
As part of MPM's HML (Hand Molded Limited, I believe)
line of large resin-cast model kits, the BV138 exhibits the three major
characteristics of the line: it's big, it's rather pricey, and it's
heavy!
The parts are very well molded, including the hollow fuselage, but the
wings, booms and empennage are solid (read: heavy) resin. The kit
provides a rather complete cockpit and armament group, with simple
turret interiors and beautifully molded guns. Vacuformed transparencies
are provided for the cockpit and turrets; these look very nice after a
bath in Future.
Propagteam provides a beautifully-printed decal sheet
with three marking options.
From the outset, I noticed a number of pinholes in the
major parts, which I filled with putty and coated with primer. All of
the smaller resin detail parts were clear of pinholes, but I did spend a
considerable amount of time liberating the parts from their casting
blocks and cleaning up the resin flash. All of the smaller parts were
bagged in groups according to which assembly step they pertained to.
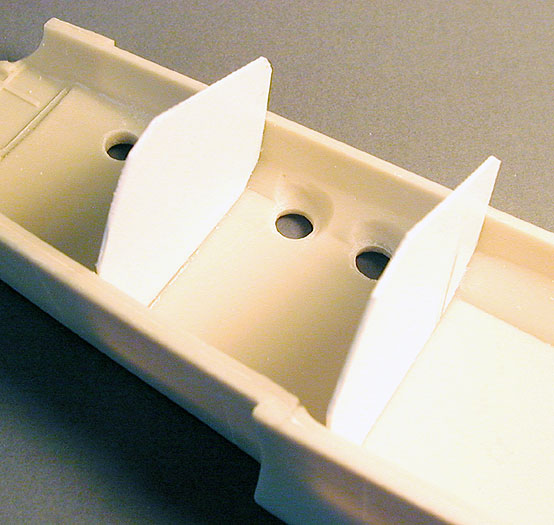
After studying the fuselage halves and test-fitting the cockpit
structure, I elected to scratchbuild bulkheads for the aft fuselage, to
avoid the 'see-through' effect through the portholes. These were made
from .040 styrene with the assistance of a contour gauge. Frankly, I
don't think anyone has ever noticed...
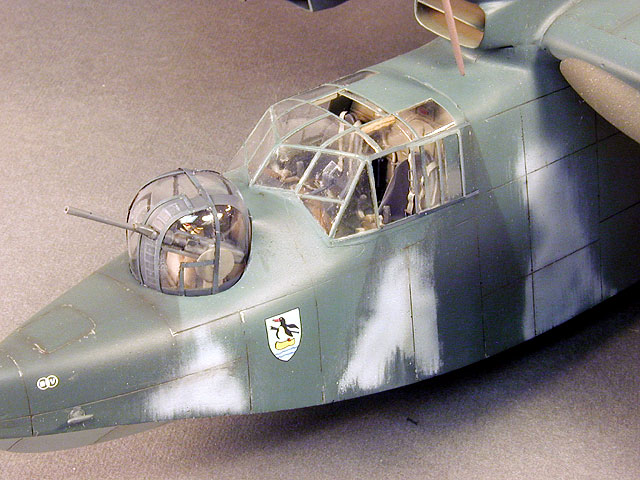
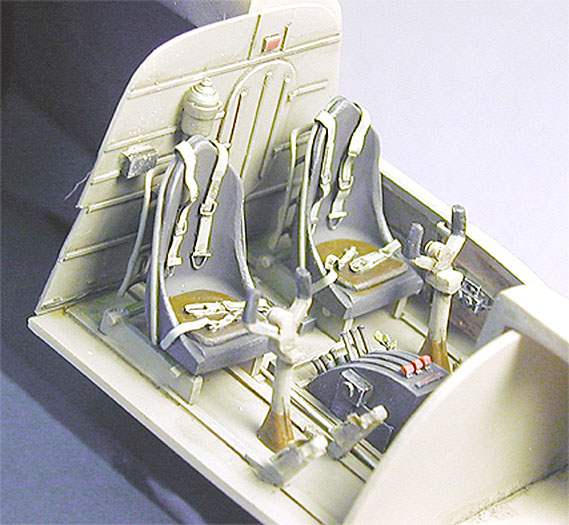
The cockpit is very nicely done, and fits well. I chose to make a new
instrument panel from .020 styrene, and used a punch and die set to make
the instrument holes. A Black-painted backer was scribed with the
instrument markings, then a drop of Future was placed in each hole. This
sandwich panel was then glued to the resin instrument panel/coaming.
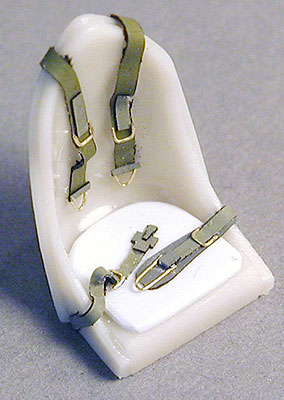
The seats are molded without seatbelts, so I cobbled up my own using
electrical tape strips and fine wire for the buckles. Once painted, they
were quite convincing.
The balance of the cockpit was assembled per the instructions. I added a
bit of detail to the dorsal gunner's interior, and opened the hatch on
the side of the fuselage. Both interior assemblies were installed before
joining the fuselage halves and top. The turrets were left for later, as
they could be installed after assembly was complete.
Click the thumbnails below to view larger images:
Before continuing assembly, I added brass mesh radiator
faces to the center and boom engines. Now came the fun! Common sense
advised me to build a jig to assemble the fuselage (hull?) and
wings/booms, but some perverse sense of adventure led me astray. The
constituent parts fit together with only a bit of sanding and tweaking,
but the things are heavy! It's amazing what gravity can to to skew
things when you're trying to assemble them. After a few false starts, I
did set up some supports for the tail booms and made a small jig to hold
the fuselage in the vertical position (recall that these flying boat
things have a double-concave bottom with a pronouced step - they don't
just sit on the workbench straight up-and-down). Once the booms and
horizontal stabilizer were aligned and glued into place, the major
battle was won. The solid outer wings are mere butt joints, but I felt
there was plenty of surface area, and didn't reinforce them
structurally.
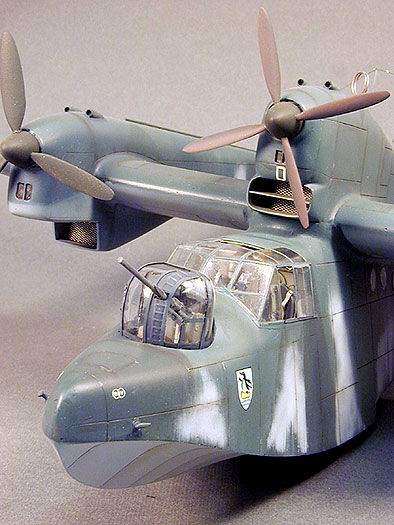 I
painted the model with PollyScale acrylics that I mixed to approximate
the maritime colors of RLM 72/73/65. I
painted the model with PollyScale acrylics that I mixed to approximate
the maritime colors of RLM 72/73/65.
The decals worked great, after cautiously applying lots
of water before positioning and floating them into place. After decaling
and clear-coating with Future, I lightly sprayed Badger Air-Opaque White
for the splotches, giving each a very quick and light wipe with a
dampened soft cloth to streak them a bit.
I applied a wash of artists' oil paints thinned with
mineral spirits, then a final coat of flat/satin PollyScale clear.
Weathering was completed with chalk pastels.
The floats were then painted and weathered before
attachment. The floats are each a three-piece affair that need some care
in aligning also as there are no positive locating guides - just scribed
lines showing the position.
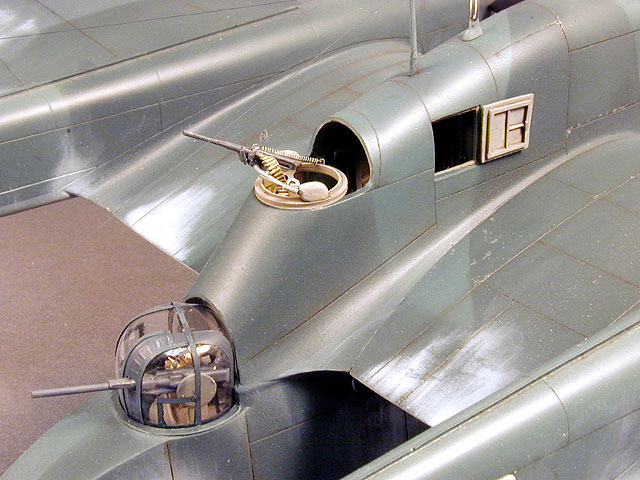
The turret assemblies consist of vacuformed front and back halves which
join on a frame line. After gluing the halves together, I framed the
turrets with strips of electrical tape painted the appropriate color.
The resin cannons are beautifully molded, but needed to be shortened at
the breech end to fit into the turrets. Likewise, I wound up replacing
some of the turret interior parts as the kit parts wind up being too
crowded for everything to fit. The turret interiors were glued into the
fuselage, then the transparencies were fitted and glued in place.
I elected to open the top hatch of the canopy, as well as the pilot's
side window. These sections were replaced with clear sheet styrene. I
used a sharpened brass tube to punch out the porthole windows from clear
acetate, and glued them into place with thinned white glue.
|
 Home
| What's New |
Features |
Gallery |
Reviews |
Reference |
Forum |
Search
Home
| What's New |
Features |
Gallery |
Reviews |
Reference |
Forum |
Search