|
1/72
High Planes
GAF Canberra Mk.20
by Mick Evans
|
 |
|
GAF Canberra
Mk.20 |

HyperScale is proudly supported by Squadron.com
Please refer to my
earlier
in-box review for comments on the detail and breakdown of parts.
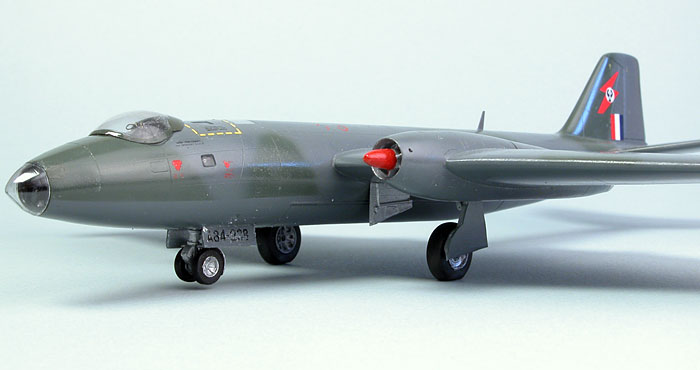
Construction started with the assembly of the cockpit parts and
painting. The cockpit in RAAF Canberras is black, so to allow some
detail relief I pained it in coal black then over sprayed in Extra Dark
Sea Grey, with a final wash of black acrylic. I need not have bothered
as the effort was not visible after the transparencies were fitted. The
pilot and navigators seats were painted and the ejection seat handles
fitted. The top of the pilot’s seat is highly visible so extra care and
detail was put into this area.
The fuselage halves were then sanded until the rudder was suitable
thickness and the nose bombardiers cut out matched the resin plug and a
correct diameter was achieved for the nose glazing. The cockpit area
required thinning to allow the cockpit assembly to fit. The3 navigator’s
windows were cut out as I intended to use crystal clear for the
transparencies after painting. At this point I diverged from the
instructions and did not fit the nose wheel well but made the cut out
large enough to slide the wheel well in later. This saved having to thin
down and square up the locating surfaces inside the fuselage. I finished
the wheel well walls flush with the outside surface, filled any gaps and
presto no gap between the fuselage and wheel well wall. At this stage I
realised I should have stashed some lead weight above the wheel well as
I could not get enough in around the cockpit area.
The wings and tailplanes were then thinned to achieve the correct
thickness for the control surfaces. The engine nacelles were cleaned up
until the resin parts were able to be fitted snugly. The wings and
tailplanes were then fitted and all seams and gaps filled and sanded.
There are 2 panels on the right hand side of the aircraft that required
filling as well, and these are annotated on the instruction sheet.
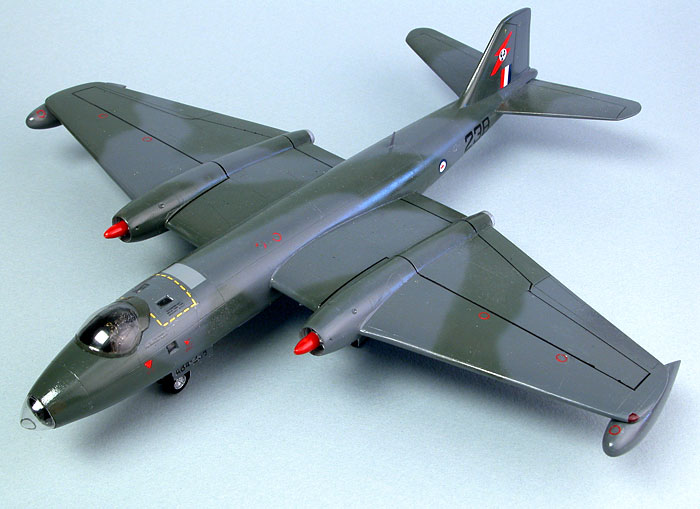
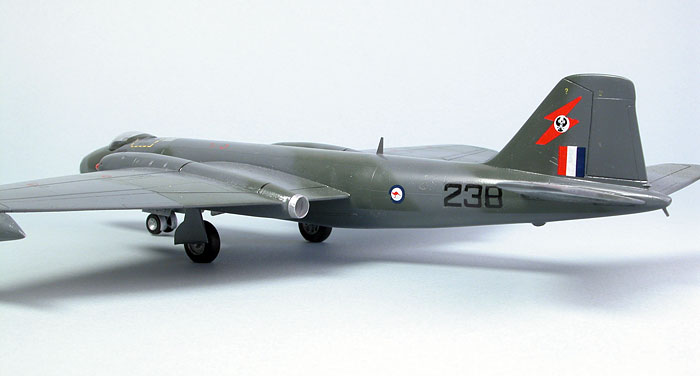
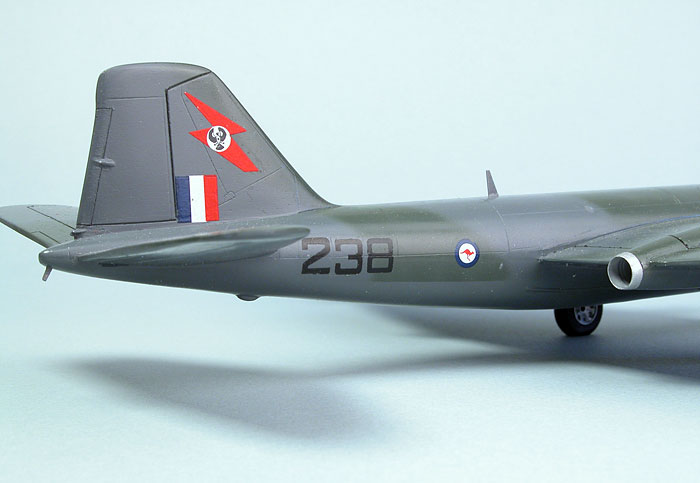
The aircraft was painted in Xtra Color Extra Dark Sea Grey/Dark
Green. The undercarriage was then fitted after flattening the main
wheels.
Up to this stage I was very impressed with the kit and the way it had
assembled and now looked. My horror story began with the decals which
looked great on the sheet. The decals are new process that has a
removable heavy carrier film. They are applied like normal decals,
allowed to dry for 24 hours and then the heavy carrier film is peeled
off and the decal looks like it was painted on with no visible carrier
film.
Great theory, poor practice.
I followed the instructions to the letter for the first 8 decals. The
carrier film came off, so did half the decal. Next I tried decal set as
per the instruction sheet, the result was the same. I tried burnishing
the decal before removing the film with no better results. At this point
I thought it was just my technique. High Planes sent me a new sheet
hoping that I just had a bad batch, the same result occurred. At this
point I had managed to get the major decals on with a small amount of
touchup required to the large serial codes. I found replacements for all
the others on an old Airfix Canberra sheet and various other spare
sheets.
The good news is High Planes had only intended to release the camouflage
markings for the kit; negotiating with Aussie Decals to release the
early silver schemes. I have seen the Aussie Decal sheet and it is
excellent and to the usual high standard that we have come to expect.
High Planes are negotiating printing of the camouflage schemes with
another decal printer so the decal problem may be soon resolved for
these schemes.
The kit was completed by adding the photo etched antenna’s for that
particular aircraft, and some subtle weathering before adding the
transparencies. The kit is finished as a 2 Sqn aircraft in the early
1980s.
High Planes’ 1/72 scale Canberra is a great looking kit when
finished, with very little build problems. The result is a model that is
far more accurate and realistic then the old Airfix offering or the many
conversions available for the Italeri kit.
The decal problem is my only criticism and this can be resolved with the
Aussie Decal set or the future High Planes set.
Wing tip bomb racks made by Pete’s Hanger are available from High Planes
or Pete’s Hanger/Aussie Decals to make the Vietnam based 2 Sqn aircraft.
Advantages
- Accurate and well detailed
- Easy to assemble once cleaned up
Disadvantages
- Limited run kit requires extensive prep work
- Poor decals
Click
the thumbnails below to view larger images:
Model and Text Copyright © 2004 by
Mick Evans
Page Created17 December, 2004
Last Updated
17 December, 2004
Back to
HyperScale Main Page
|
 Home
| What's New |
Features |
Gallery |
Reviews |
Reference |
Forum |
Search
Home
| What's New |
Features |
Gallery |
Reviews |
Reference |
Forum |
Search

