|
 Home |
What's New
| Features
| Gallery
| Reviews
|
Reference |
Forum
|
Search
Home |
What's New
| Features
| Gallery
| Reviews
|
Reference |
Forum
|
Search
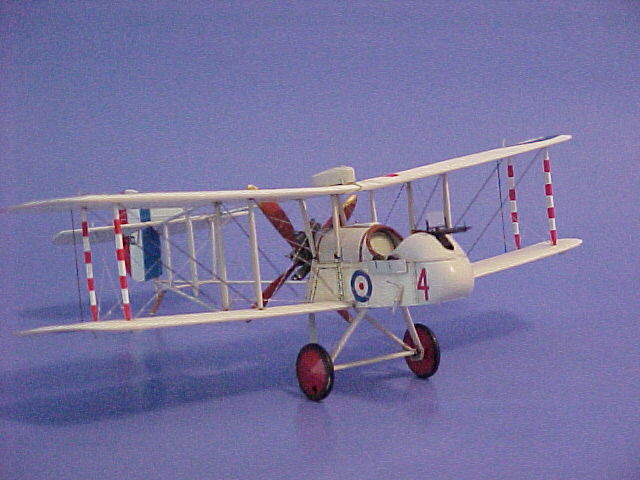
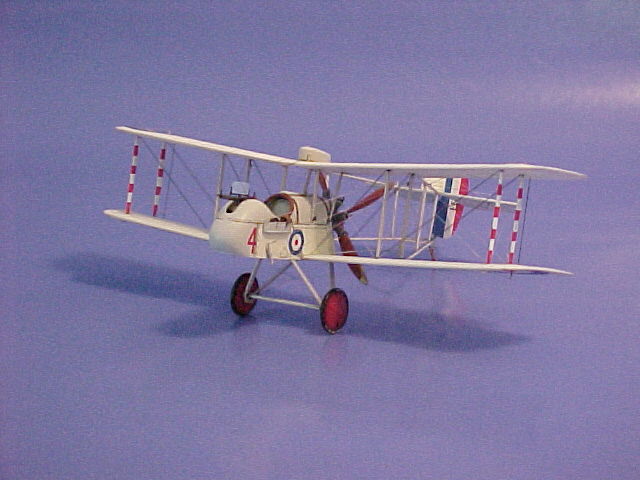
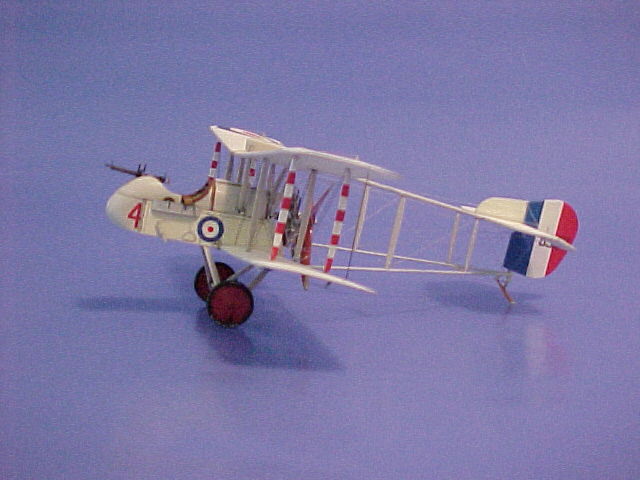
Eduard's 1/48
scale
De Havilland DH.2
by Jerry Creager
|
 |
|
De Havilland
DH.2 |

Eduard's 1/48 scale DH.2 Profipack is available online from
Squadron.com
When Eduard issued their new 1/48 scale de Havilland DH-2 I
could not wait to get started building this new creation. I have
been a WWI junkie for a long time and this was an aircraft for
which I had been waiting.
Eduard issues the DH-2 in both a Profipack and standard kits. I
recommend the Profipack version because there are a number if
fine photo etched parts that add a nice touch to the finished
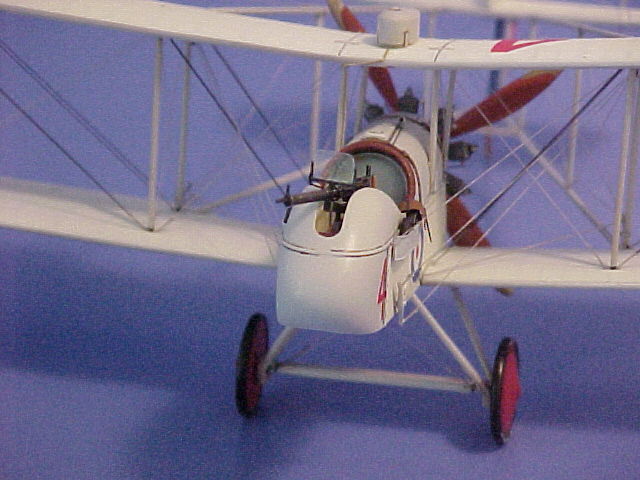
model. The cockpit features some nice photo etched instrument
bezels, seat and seatbelts as well as a frame for the windshield
which attaches to the machine gun. Eduard has provided a fine
assortment of instrument faces on the decal sheet which are more
than enough to do the instruments called for in the three
optional layouts.
The kit is well molded and has excellent detail. The trailing
edges of the wings are very thin and generally there is very
little flash, if any.
The construction of the kit is straight forward and is best
accomplished by working with sub assemblies. The fuselage is
made up or the cockpit and aft section to which the engine
mounts. This assembly mounts to the lower wing and fits nicely.
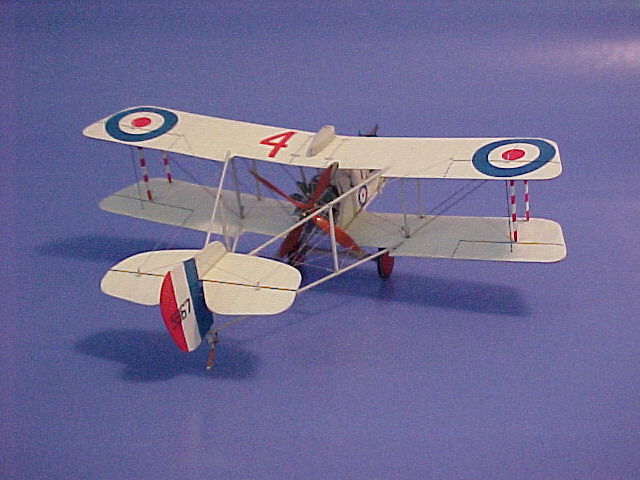
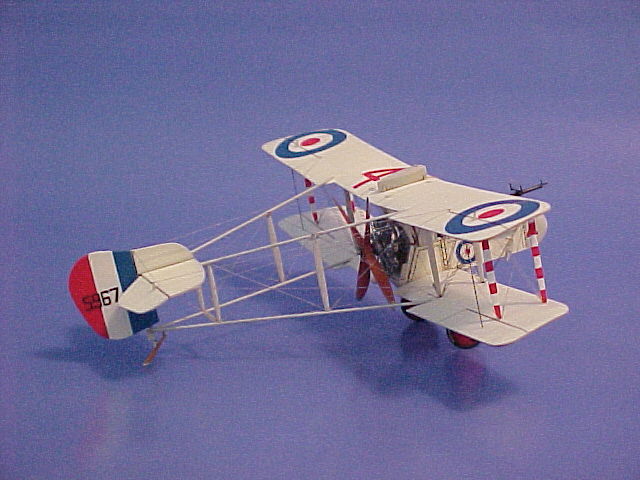
Once I had the lower wing and fuselage finished I pre drilled
all of the holes for the rigging in both the upper and lower
wings and installed the turnbuckles which I made from very fine
stainless wire. The real aircraft had a considerable amount of
rigging and the turnbuckles added a nice touch. The kit
instructions do a good job of showing where most of the rigging
goes but there are some missing details around the boom and wing
rigging. I highly recommend the Squadron/Signal publication for
the DH-2.
The struts fit well and the upper wing can be mounted without
too much trouble. I would recommend using a jig to help align
the wings to make sure the leading edges are square with one
another.
The next sub assembly is connection the twin booms to the
horizontal stabilizer and rudder. This is a critical stage for
correct alignment and it is essential that a jig be used to get
the alignment right. The twin booms mount to the upper and lower
wings and it doesn’t take much to get out of alignment. At this
point in my construction I found that the plastic in the booms
was too soft and flexible and this created a problem keeping the
booms straight and properly aligned. I further compounded the
problem when I started rigging because the tension on the
rigging was causing the boom to deflect just enough to be
noticeable. At this point I regrouped and made two new booms
using the kit boom struts and pieces of carbon fiber rod that
was the same diameter as the plastic. This was much stiffer and
held the alignment and rigging without any problems. I add
this note that the problems with the boom assembly may not be
attributed to the soft plastic but could be the experience of
the builder. Others may not have the same problem.
The last critical assembly is gluing the booms to the location
points on the upper and lower wings. Again, a jig is essential
to holding the correct alignment. Even when glued the whole
airframe is delicate. The fiber carbon rod added a lot to the
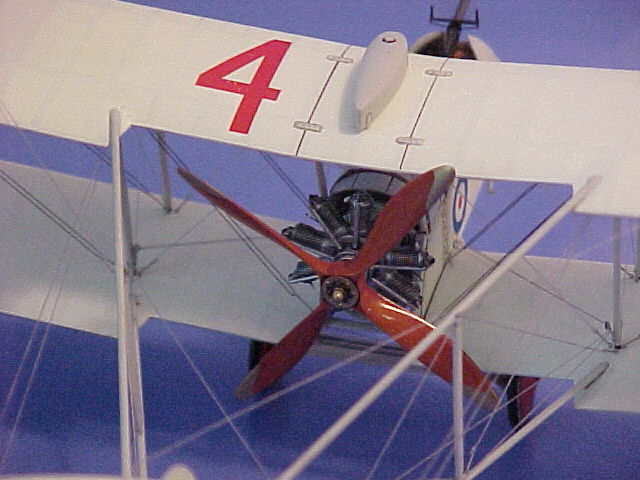
rigidity of the completed airframe. The last sub assembly to
install before rigging was the landing gear and the engine. Prop
being installed after the rigging was complete.
I chose one of the paint schemes using the decals included in
the Profipack kit which is the doped linen on all surfaces of
both wings and tail.
I highly recommend this kit to any WWI enthusiasts and this will
certainly not be my last DH-2.
Click on the thumbnails
below to view larger images:
Images Copyright © 2005 by
Jerry Creager
Page Created 27 June, 2005
Last Updated
27 June, 2005
Back to
HyperScale Main Page
Back to
Gallery Index |