|
ProModeler's 1/48 Scale
Dornier Do 217E-5
by Chip Jean
|
 |
|
Dornier Do 217E-5 |

Revell-Monogram's 1/48 scale Dornier Do 217E-5 is available online from Squadron
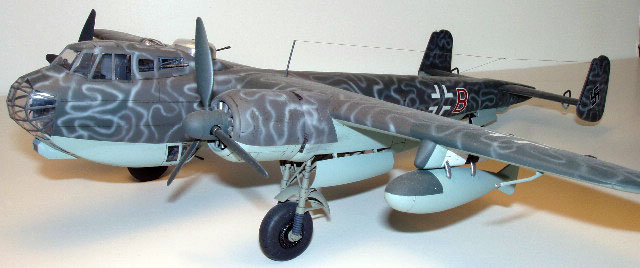
This is the Pro Modeler Do 217E-5, built out of the box, right down
to the kit decals. The kit has been out for several years, so I won’t go
into too much detail about it. It’s a gem, with fine, recessed surface
detail, a well detailed cockpit, and excellent fit throughout, except in
one area, which I’ll talk about later. For “things-under-wings”, you get
one external fuel tank and an HS 293A missile. Parts break out is
conventional except for the fuselage. You get left and right fuselages
pieces which comprise the sides and bottom of the fuselage, and you get
a fuselage top, which also contains the top, upper third of the wings
and the upper horizontal stablilizers. So, as long as your top fuselage
piece isn’t warped, wing and stabilizer alignment requires no effort and
not much more thought.
The cockpit was straightforward, painted RLM 66 with electronics
boxes painted black, some knobs and switches picked out in various
colors, and then the whole interior accentuated with a black/brown wash
and a silver pencil. The fuselage thirds went together with no problem
as did the wings and the horizontal and vertical stabilizers. Engine
nacelles were next. The tricky part here is remembering to install the
exhaust stubs from the inside before you glue the nacelle halves
together. The radial engines are decent enough, but are invisible to all
but the most piercing judge’s flashlight once the nacelle halves are
assembled and the cooling fan is installed.
And now, the only fit problem and a near disaster. I’ve never built an
aircraft with the engines in nacelles in which the nacelle-to-wing fit
wasn’t a problem. This kit was no exception. After several putty,
sanding and rescribing sessions, I reached a point were I could finish
off the gap with some Mr. Surfacer. After brushing some Mr. Surfacer
into the gap, I reached for my jar of denatured alcohol to wash off the
excess. I dipped a Q-tip into the jar and started rubbing. As I rubbed,
bits of gray stuff started coming loose and the Q-tip was starting to
stick. Easy enough solution….get the Q-tip wetter, right? Only now,
there’s more stuff coming up from the wing, and I realize it ain’t Mr.
Surfacer, it’s plastic!!! Oh you #$&*@# scurvy dog!!! I’d been dipping
into my lacquer thinner jar instead of the alcohol jar. Twenty-five
years of modeling and it’s the first time I’ve made that mistake. I
resisted the urge to try to fix it right then and there, and gave the
plastic several days to return to a solid state. Following that, some
putty and some sanding and it was fixed.
I installed the clear pieces next, using CA glue to blend them in and
then masked them off using EZ Masks.
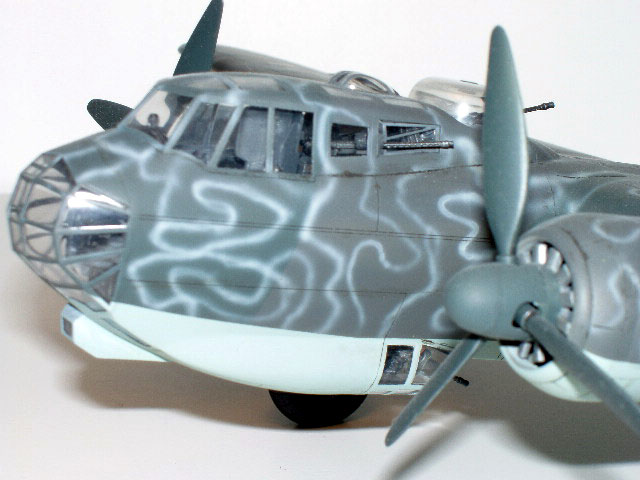
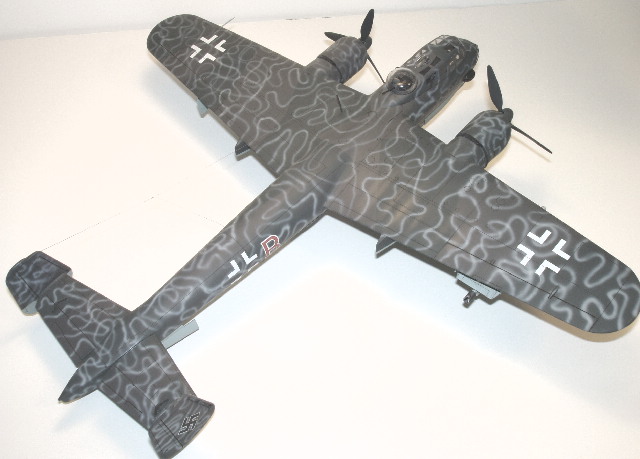
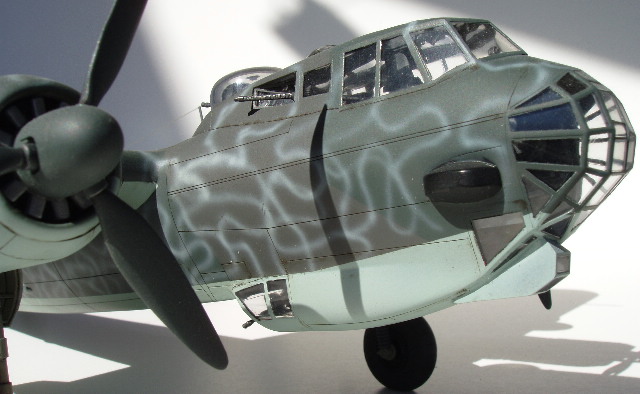
Now, onto the real fun. The kit comes with two markings options. One
with an RLM 72/73 splinter over RLM 65, and another which is the same
except with RLM 76 squiggles over the RLM 72/73 splinter. I had
originally planned on doing the plain splinter scheme, but the more I
looked at the squiggle scheme, the more I convinced myself I was a wimp
if I didn’t at least try it. Using Model Master RLM 72, RLM 73,
Aeromaster RLM 65, and Tamiya tape, the splinter scheme came out
perfect; no underspray. I love Tamiya tape. Since I started using it
several years ago, I don’t use regular masking tape for anything except
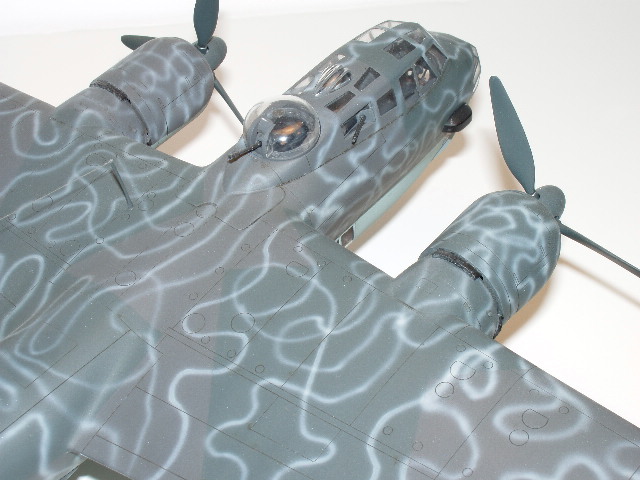
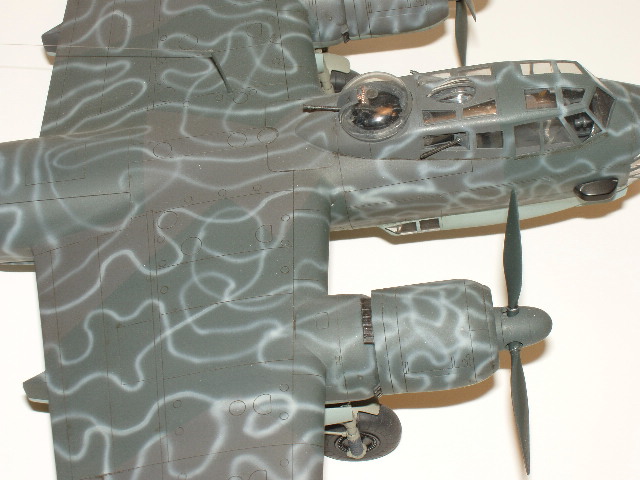
as filler. Now the hard part. I put the fine needle in my Badger 150,
mixed up a thin (50% paint /50%thinner) batch of Aeromaster RLM 76,
turned the air pressure on my compressor up all the way and went to
spraying squiggles. By spraying a small volume of very thin paint at a
high PSI, I get clean, narrow lines. I don’t have a regulator on my
compressor, just a needle valve, so I can control the air pressure, but
have no idea at what PSI I’m spraying. I did all the squiggles in one
sitting, focusing on spraying the narrowest, cleanest lines I could.
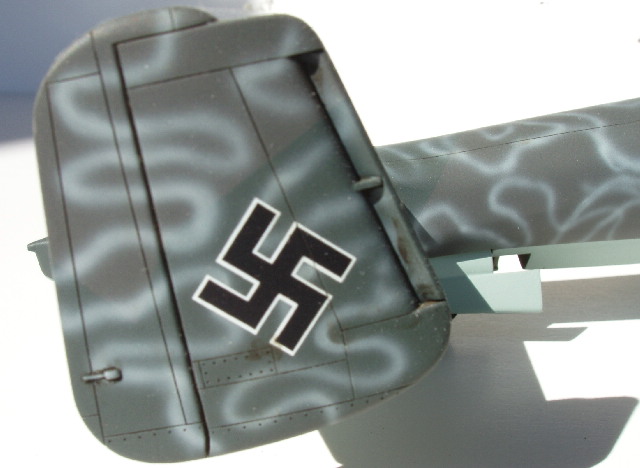
But then came a lesson in, “when it’s enough, just STOP!!” I looked the
model over, thinking to myself that it looked pretty good. Then I looked
a second time (big mistake), and decided one of the wingtips could use
just a few more squiggles, so back to spraying I went. BZZZZT. Wrong!!!
Overdone. Too much. I let the model sit overnight, hoping it would look
better in the morning, but no, that one section was definitely overdone.
So, out came the tape and I redid the splinter scheme on the outer half
of one wing, then redid the squiggles, this time stopping the first time
I told myself to.
Several coats of Future and it was time for decals. I used the kit
decals and they worked beautifully. The reacted predictably to the
setting solution and settled down with no silvering. I applied another
coat of gloss, and then applied a wash of turpenoid mixed with black and
burnt umper oil paints. I limited weathering to the just the wash.
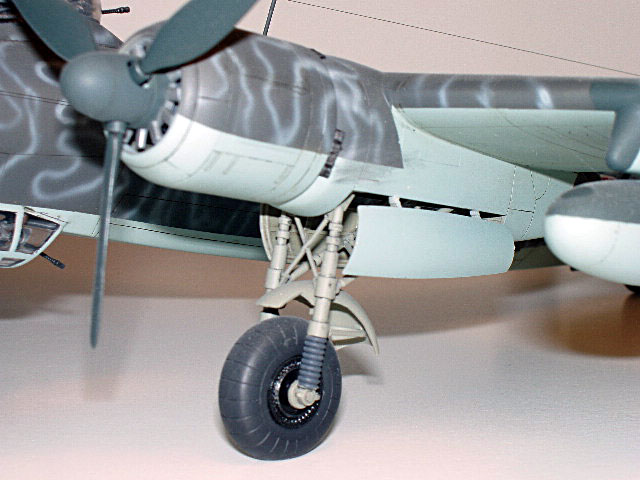
After the wash had dried, I shot the model with a coat of Testors
Dull Coat, and when that was dry, added those small parts that go on at
the end; landing gear and wheels, turret, missile, drop tank, the gun
barrels I’d cut off earlier, and pitot tube.
I then removed the EZ-Masks, polished the canopy with some Novus #1,
and finally added the antenna, strung with nylon thread.
Click on the thumbnails
below to view larger images:
Model, Images and Text Copyright ©
2004 by Chip Jean
Page Created 02 April, 2004
Last Updated 02 April, 2004
Back to HyperScale
Main Page
|
 Home
| What's New |
Features |
Gallery |
Reviews |
Reference |
Forum |
Search
Home
| What's New |
Features |
Gallery |
Reviews |
Reference |
Forum |
Search