|
Tamiya's 1/48 scale
Dornier Do 335A-0
by
Chris Wauchop
|
 |
|
Dornier Do 335A-0 |
images & text by Brett Green

Tamiya's
1/48 scale Dornier Do 335A-0/1 is available online from Squadron.com
Tamiya's 1/48 scale Do 335 in the box
Tamiya's
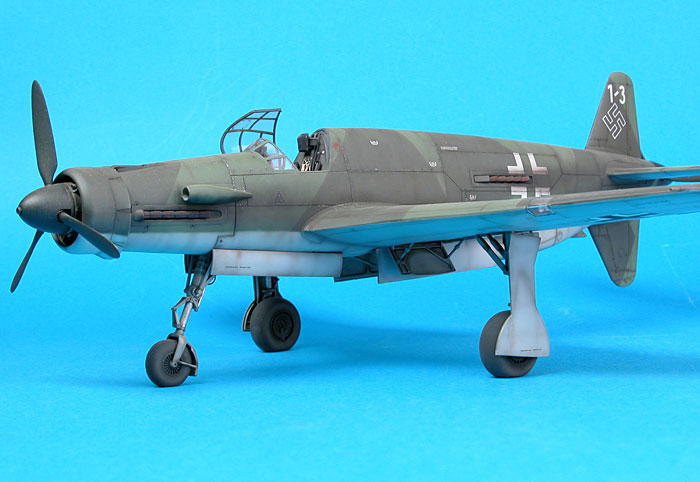
1/48 scale Dornier Do 335A is a big, impressive kit.
The model
is made up of 104 parts in grey styrene, 5 parts in clear, 2 poly caps
and a cylindrical metal nose weight. All major sprues are bagged
separately to limit scuffing of parts.
The relatively small number of parts permits rapid assembly but does not
detract from the detail of the kit.
All main components are free of imperfections, but the bomb bay ceiling,
undercarriage legs and a few other parts have ejector pin marks in
visible places. The insides of the gear doors also reveal the ghost of
ejector pin outlines in a few spots.
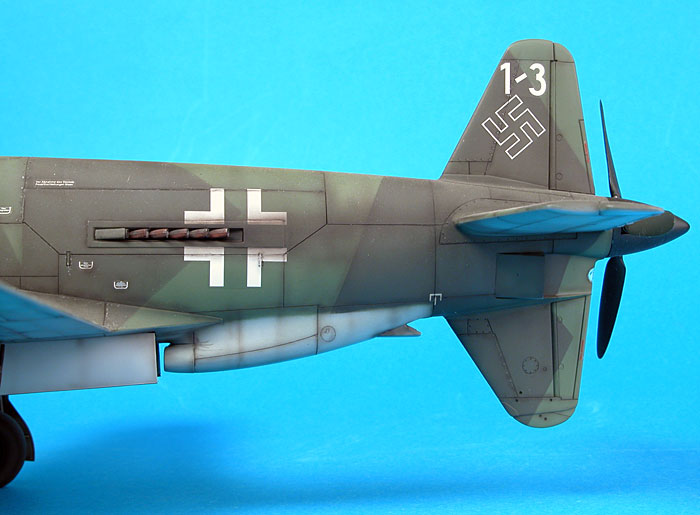
The kit fuselage features a detailed rear radiator, standard exhausts
(fitted from the outside to ease painting) and a cylindrical metal nose
weight. The mid-upper fuselage is an insert part, allowing for the Do
335A-12 two-seater that was released subsequently. The upper front
engine cowl is another insert part. These inserts maximise the possible
variants for Tamiya but they also minimise the need to fill and sand
centre seam lines. All the inserts join at natural panel lines. Another
nice touch is the separate forward cowl gun troughs.
The kit supplies optional open or closed cowl flaps. Radiator detail is
very fine, and even the back face of the radiator is represented on the
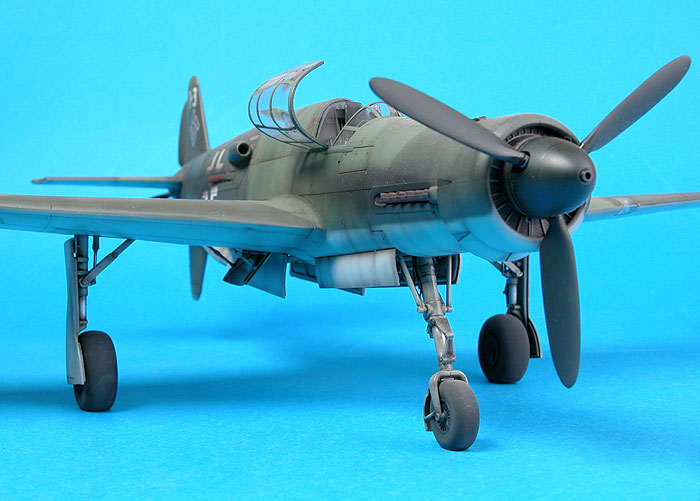
open cowl flap part. The propeller assemblies are fixed using poly caps.
This will simplify final painting and assembly.
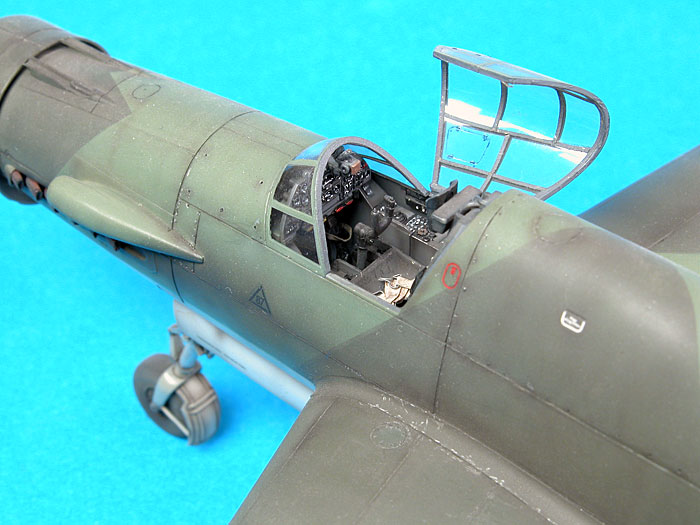
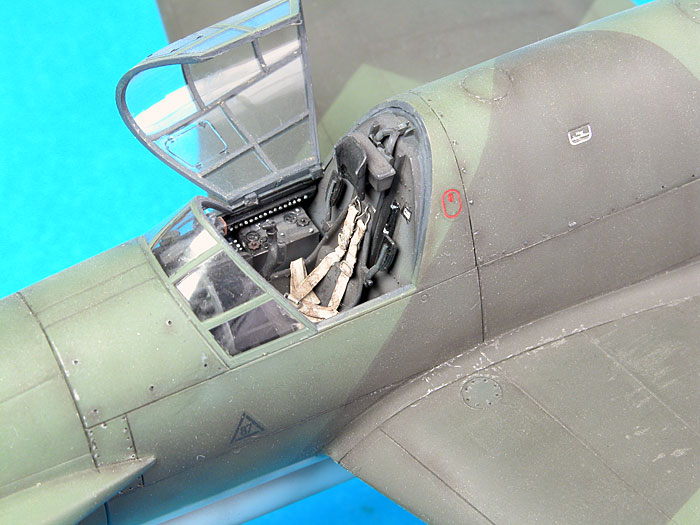
The kit
cockpit is nicely detailed. The main focus is a 4-piece ejector seat
plus a decal harness. The armrests are moulded as part of the main seat,
and are in the "up" position. The instrument panel will be familiar to
anyone who has bought a Tamiya kit recently. It has flat instrument
faces and an option to apply decals for dial detail.
The cockpit floor, with integrated side consoles, is moulded as the
forward section of the bomb bay ceiling. The bomb bay itself comprises
12 parts, including a 500 kg bomb and a substantial wing spar. Bomb bay
doors may be positioned opened or closed.
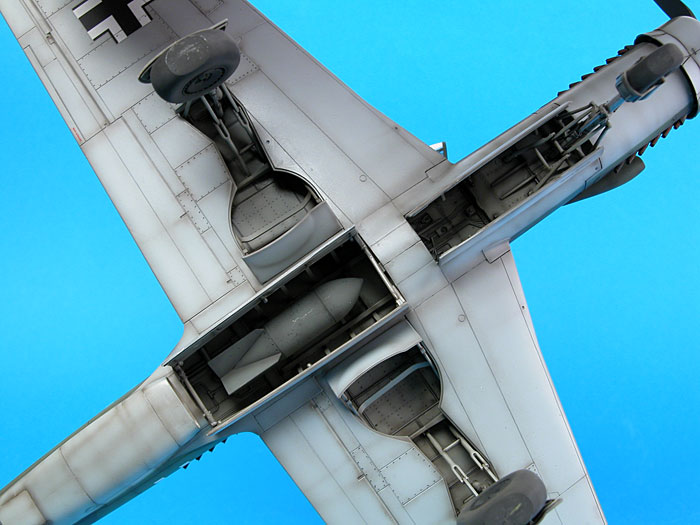
The wings are simple assemblies of two parts each. The wheel well walls
are moulded as part of each upper wing half, and structural detail is
included on the wing root of the fuselage to complete the wheel wells.
The wings locate onto the main box spar and a smaller spar moulded
toward the rear of the fuselage wing root. The spars feature a small
spur that effectively locks the wing in place when it is pushed home.
Keep this in mind when test fitting the wings to the fuselage - you
might wind up with a permanent connection!
Instructions are supplied on a ten-page, single sheet foldout.
Construction is called out over 12 steps with simple to follow diagrams
and comments where necessary. A 1/48 scale foldout sheet is also
included, showing the camouflage pattern on the upper surfaces and both
fuselage sides. This may be used as a guide, or may be cut out and used
as a camouflage template.
Decals are provided for three aircraft but colour instructions are
understandably vague. The painting guide discusses the RLM instructions
for colours 81 and 82 to be used after existing stocks were used up. In
the event, Tamiya seem to have settled on a scheme of 82 Light Green and
83 Dark Green. Lower surfaces are light blue - the choice between
colours 65 and 76 is up to you!
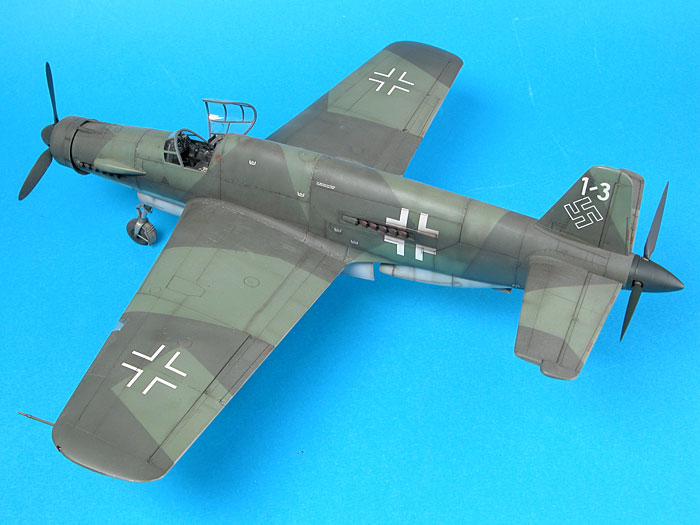
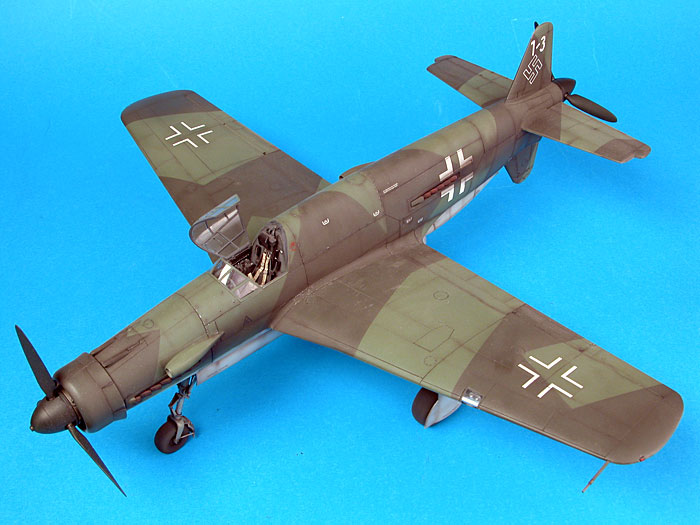
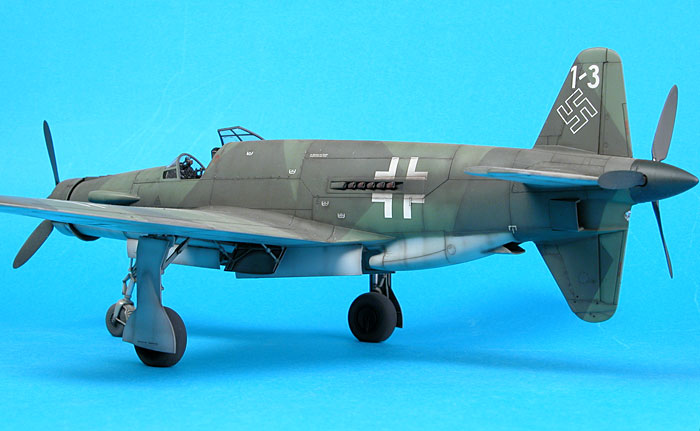
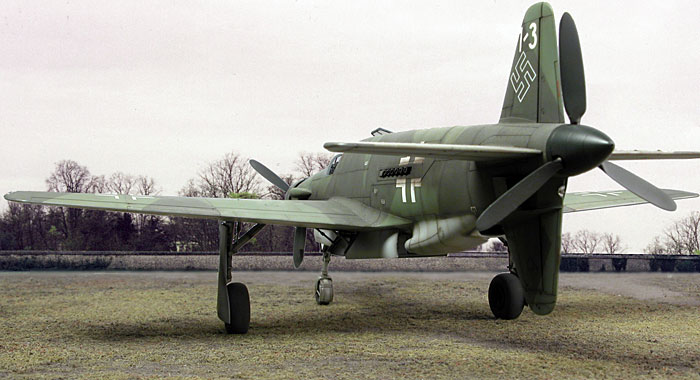
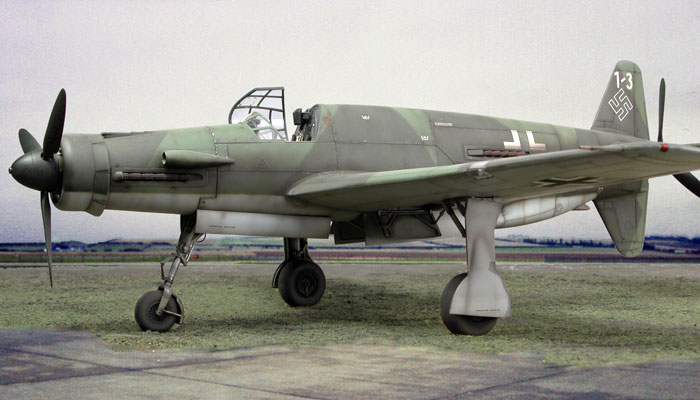
Chris Wauchop built Tamiya's 1/48 scale Dornier Do 335A-0 when the
kit was first released in 2000. However, he felt that because the model
received so much exposure in print and on the internet - and due to the
limited possibilities with colour schemes - that there was no real need
to post photos of his model on HyperScale.
Naturally I disagreed, and I am now pleased to be able to present
Chris's Pfeil, albeit four years after the model was finished!
Chris built the model with only minor modifications. These included:
-
seat harness from lead foil (for the
straps) and fine wire (for buckles and anchors)
-
foot straps for rudder pedals from
lead foil
-
interior framing for the canopy cut
from thin strips of painted Tamiya masking tape
-
gun muzzles and exhaust stacks
drilled out
-
tyres flattened
-
brake lines added using fine
soldering wire on the front gear leg only. There was no photographic
evidence of visible brake lines on the main gear.
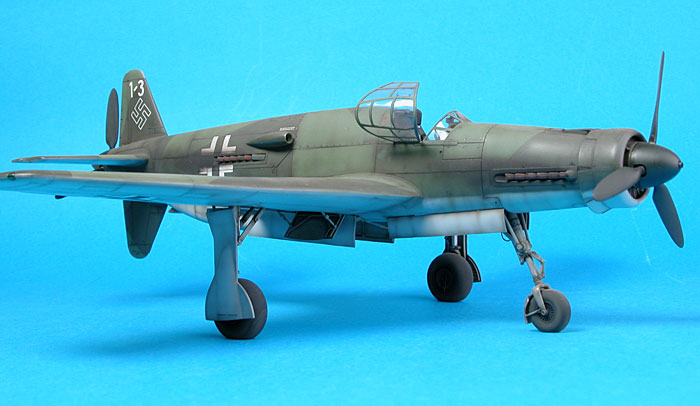
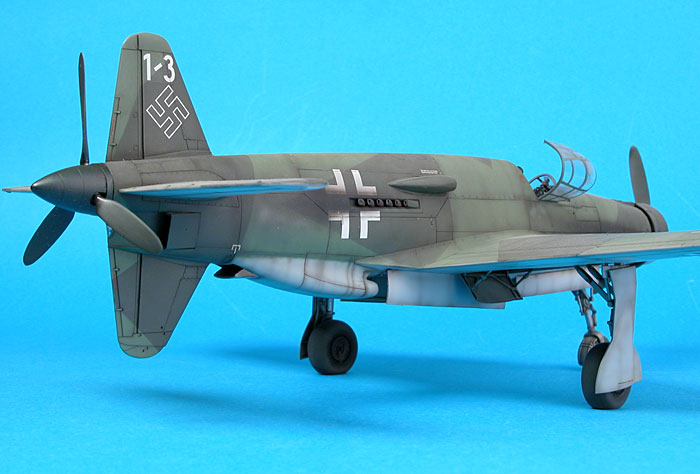
 Chris
painted his Do 335 using Gunze acrylic paints for RLM 81 Brown Violet,
RLM 82 Bright Green and RLM 76 Light Blue. Chris
painted his Do 335 using Gunze acrylic paints for RLM 81 Brown Violet,
RLM 82 Bright Green and RLM 76 Light Blue.
The paint was applied using the Testor Aztek airbrush
fitted with the tan coloured fine tip.
The upper surface camouflage pattern was masked using
Tamiya tape, but the low fuselage demarcation between upper and lower
surface colours was sprayed freehand.
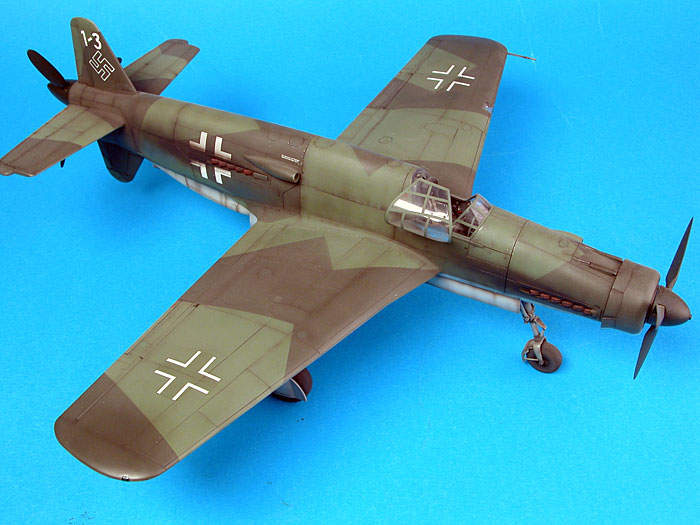
Kit decals were used. They behaved perfectly, and
responded well to a coat of Gunze Mr Mark Softer.
Chris next employed his usual method of post-shading the
panel lines for the model. This method comprises airbrushing a very thin
mix of brown and black along the panel lines. This is followed by a thin
semi-gloss black heavily thinned with water, applied directly to all
panel lines using a 10/0 brush.
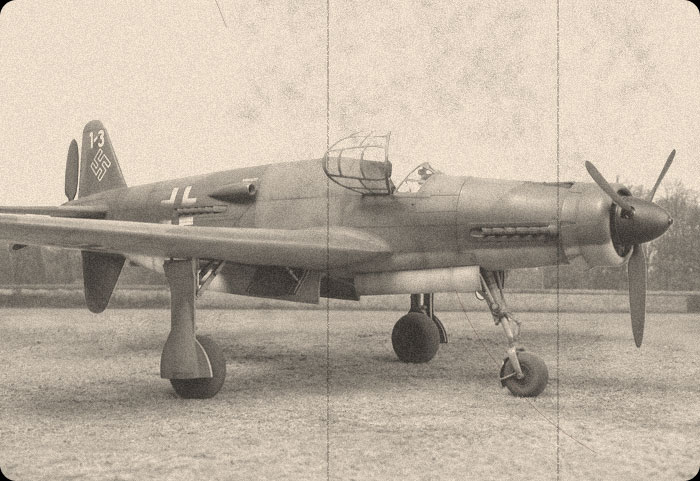
Photography
The composite images were created in Photoshop CS using
images of the model and of background photos taken by myself last year
at Duxford, and by George Pfromm in Germany and Belgium several years
ago.
The model was photographed on a base of artificial grass and dirt
against a plain grey background.
The backgrounds were modified by adjusting brightness, contrast, hue,
saturation, plus removing and relocating foliage and other features.
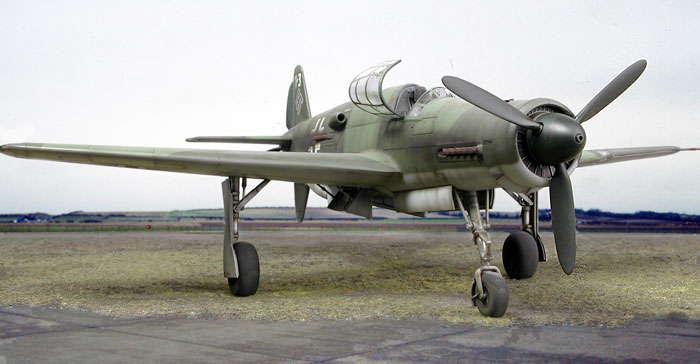
Returning to the Do 335 photo, the model and part of the grass base were
masked using Photoshop's Magic Wand and Lasso tools, then cut from the
original image.
The model was then pasted as a new layer onto the
modified background. Extra work was done merging the model photo with
the background, especially around the canopy (through which the
background was visible) and around the edges of the aircraft. Where the
outline of the model was stark against the background image, the Blur
and Gaussian Blur tools were used to blend it in.
The imported grass was highlighted using the Magic Wand
and Lasso tools. The colour, hue, saturation and brightness was then
modified to match the tone of the photo. The Clone Stamp and Healing
Brush tools were used in a few places to blend the the artificial grass
with the real concrete runway.
Finally, the composite images were cropped, resized to 700 pixels in
width, and saved as a .jpg file for posting on HyperScale.
All the photos were taken with my Nikon Coolpix 5700 digital camera.
Click the
thumbnails below to view larger images:
Model ©
2004 by Chris Wauchop
Images & Text Copyright © 2004 by
Brett Green
Page Created 22 August, 2004
Last Updated
22 August, 2004
Back to
HyperScale Main Page |
 Home
| What's New |
Features |
Gallery |
Reviews |
Reference |
Forum |
Search
Home
| What's New |
Features |
Gallery |
Reviews |
Reference |
Forum |
Search