|
Dornier Do 335
by Anthony Manzoli
|
|
|
Dornier Do 335 |

Tamiya's 1/48
scale Dornier Do 335A-0/1 kit is available online from Squadron.com
The Dornier Do 335 "Arrow" or Pfeil, as
the Germans called it, was arguably the best piston aircraft of the
time.
The man behind it was Claude Dornier who
took out a patent on his first push-pull design in 1937. Early in 1942
the German Army was doing well and the politicians felt no need for such
a radical airplane. By 1943 however, the tide was turning against the
German Army and the order was finally given to build the Arrow.
The Arrow had a number of unusual
distinctions. It was the only military aircraft of the time to have a
push-pull power plant/airframe. It was the only aircraft of WWII to have
an ejection seat. It was the only aircraft that had explosive bolts in
the rear fuselage designed to separate the tail section in order to
facilitate a successful bail-out if necessary. And It was also the
fastest piston powered aircraft, with a maximum speed of 417 mph at an
altitude of 26,000 feet.
In just nine months the first prototype
was built.

The first flight was in Autumn of 1943.
The flight testing phase went very well as the plane flew and handled
better than expected. There were no structural problems at all, and
only one crash occurred due to an overheated engine which caught fire.
The first production version, the A-1 was delivered in November 1944.
Luckily too few and too late to help the Third Reich. The Arrows
armament included two fuselage mounted 20mm cannons, two wing mounted
15mm cannons, and if that weren't enough a 30mm engine mounted cannon.
If production had been expedited from the start this heavily armed plane
might have played serious havoc with the Allied bombing missions.
A total of ninety aircraft were rolled
out including prototypes, test planes, and trainers. Due to critical
delays in materials a mere total of thirty-eight production Do-355's
were delivered to the Luftwaffe.
Nothing in the Allied inventory could
catch it.
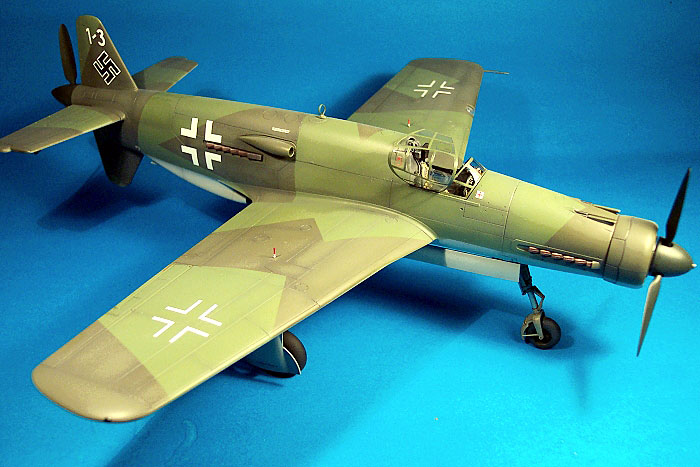
Tamiya's 1/48 scale Do 335
is one of the best kits I have ever built.
The
fit is perfect in all respects. Absolutely no filler was necessary and
very little sanding, mainly just polishing the seems with a soft nail
buffing stick.
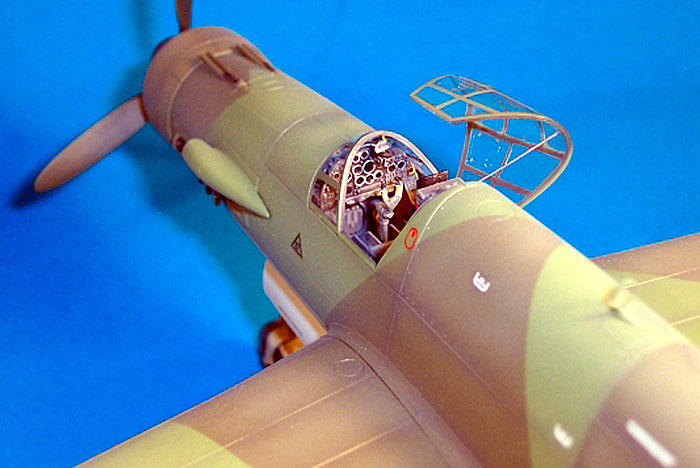
The kit was built
out of the box with the exceptions of adding seat belts from Extra Tech,
fuse wire for the back of the instrument panel and break lines, weighted
resin wheels by True Details, and a piece of photo etched metal for the
DF loop antennae.
I used Gunze
acrylics RLM 81/82 over 76.
The kit was
preshaded with Tamiya German Dark Grey and then followed with the RLM
76. When the RLM 76 was dry I masked and painted the RLM 82. I was
careful not to go too dark with the RLM 82 so that the preshading would
peak through still. Once this had dried, I followed the instructions
and masked the upper fuselage with Tamiya tape and painted the RLM 81 in
the same manner.
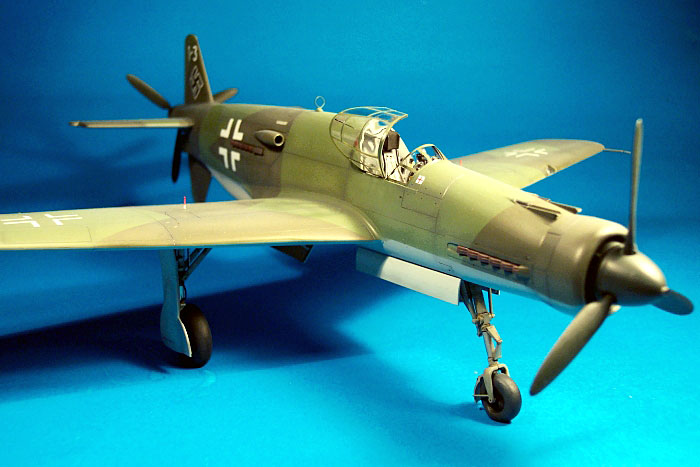
The last step was
to lighten the RLM 81 with a hint of the RLM 76 and lightly spray the
centres of the panels to give it a faded look. The landing gear,
inside of the wheel wells, and wheel well doors were all painted with
RLM 02 and weathered before attaching to the model. The model was left
to dry for a few days before gloss coating the areas which the decals
would be positioned on with Pascoes Long Life. I find this product goes
on really thin with a brush and is self levelling like Future. The kit
was left to dry over night before the decals were added. I used Micro
Scale "Micro Sol" to help them nestle down into the panel lines. The
final matte coat was done with Johnson's Shine Magic mixed with Tamiya
Flat Base.
A note on the
shading and fading techniques. Many people have heard of pre shading,
but post shading is taking things one more step.
Usually when pre
shading, unless you only apply a very thin layer of paint you lose the
effect, so post shading is applying a thinned darker colour usually
similar to the colour you are shading with a little brown mixed in along
panel lines and around hatches and such. Once this is done if it appears
too stark in contrast, it can be toned down by applying the base colour
again.
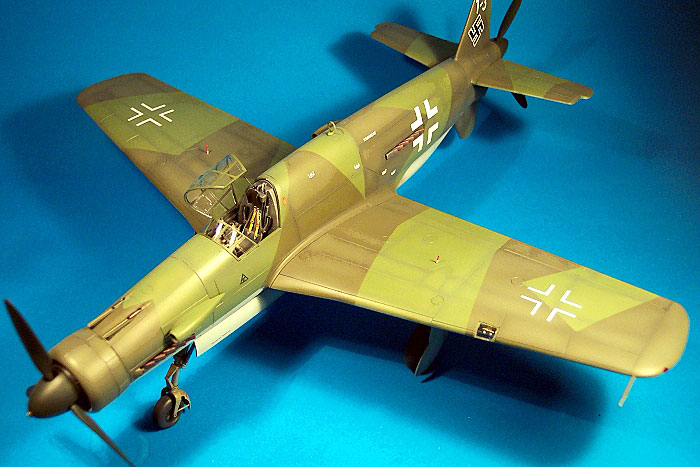
The fading
technique is simply applying a lighter colour such as white or light
grey to the base colour, and lightly painting the panels, mainly the
centre of them.
Model, Images and Text Copyright © 2004 by
Anthony Manzoli
Page Created 15 March, 2004
Last Updated 15 March, 2004
Back to
HyperScale Main Page
|
 Home
| What's New |
Features |
Gallery |
Reviews |
Reference |
Forum |
Search
Home
| What's New |
Features |
Gallery |
Reviews |
Reference |
Forum |
Search