|
Collect-Aire 1/48 Scale
EA-3B Skywarrior
by Gil
Hodges
|
 |
|
EA-3B Skywarrior |

HyperScale is proudly supported by
Squadron.com
For the few of you not familiar with the CollectAire company, they
make resin kits, primarily in 1/48 scale. You can check out their
selections at www.CollectAire.com. They have a wide range of subjects
that the mainstream injection molding companies have ignored either
because the subject was too obscure, or they just didn't think it would
be something that would sell well enough to justify the costs of making
it. The CollectAire kits are more expensive than the average model kit.
However, that's due to the limited numbers of kits molded per run
(hundreds instead of tens of thousands), the expense of the resin
(including the cost of decals, cast metal, and photo-etched parts); as
well as that "collectable" moniker!
I built the original issue of CA's 1/48 scale Skywarrior about ten years
ago. It built up into an impressive model.
But the newest issue of the EA-3B is an all new tooling. It puts the
original to shame!
To start with, the resin is a much higher quality. It
appears as smooth and shiney as plastic, and the engraved markings are
petite and well done. There was no evidence of warping on any of my kit
parts. The fuselage is hollow cast WITH the ECM consoles cast into the
inside of one of the halves. The cockpit interior is complete with
photo-etched consoles and main panels. The bottom crew access door is
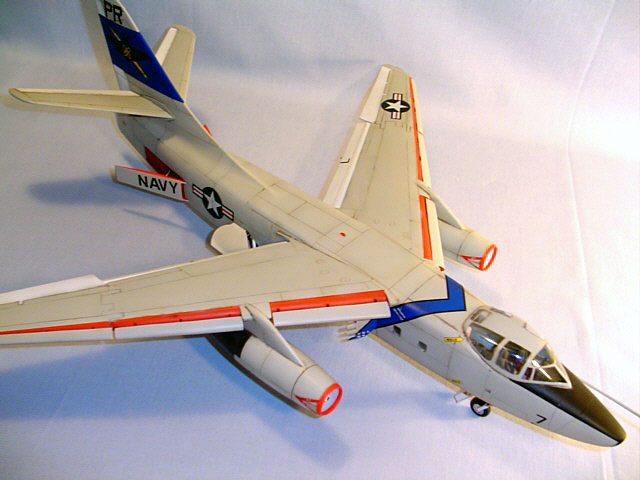
separate, as is the fuselage side door. The wings are cast in one piece
from fold-line to fold-line, with the outer panels cast separately.
Metal hardware is included to provide detail and strength if you choose
to show the wings folded. The flaps and slats are all separate. The main
gear well is correctly molded with the appropriate "see through" area.
The landing gear are cast metal. They're both well detailed and strong
enough to support the model. The speed brakes and tail bumper are also
separate items that can be displayed in the open position. Two vacuform
canopies are provided, as well as the side windows. All in all, this new
kit gives you a lot of building optons that the original issue didn't
have.
If there's a downfall to this kit, it would be the instructions. They
are adequate, but could be better detailed and more precise in some
areas (like adding the landing gear). I highly recommend that you have
some extra reference material to help flesh out the instructions. Also,
although the decals are well printed and go on the model superbly,
there's only one option. As much as this kit costs, one or two more
schemes would be a nice addition. After all, there aren't any
aftermarket 1/48 Skywarrior sheets around!
Modeling started with the "clean-up" of the resin parts. Unlike
regular kits, the resin kit parts have some flash on them that needs to
scraped and sanded off. This isn't difficult and takes little time.
Also, it was mostly the smaller parts that needed this. The larger parts
were more cleanly cast.
Once clean-up was accomplished , the next step was to test fit the parts
together. The test fitting revealed that the CA Skywarrior is one of
their better fitting kits. The fuselage interior parts all fit without
any adjustments, and the seams were no worse than a regular injection
molded kit. The slat slots in the wing leading edges need to be filed a
bit to open them up more and allow the slats to fall into place. The
wing to fuselage joint was a mixture of good and bad news. The wing fit
to the body well on the bottom and on the top in the front. However,
there was a significant step at the back on the top of the fuselage that
took some work to get everything flush. Also, the outer wing panels
took some filling and sanding. This isn't unusual for most folding wing
kits, and I'd rate these wing joints as "good" for a resin kit, and
"average" when compared to the regular injection kit.
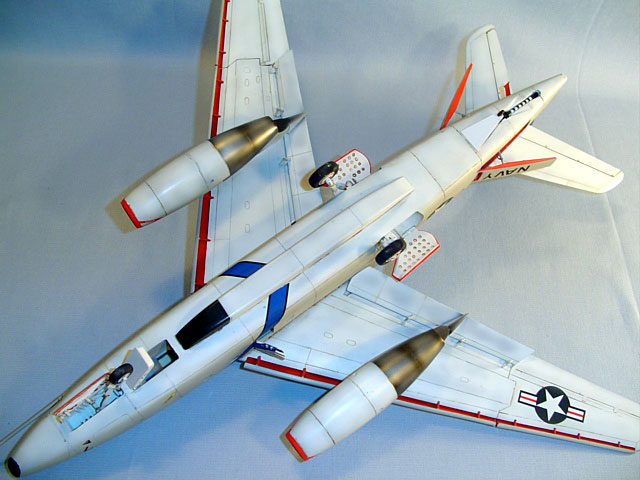
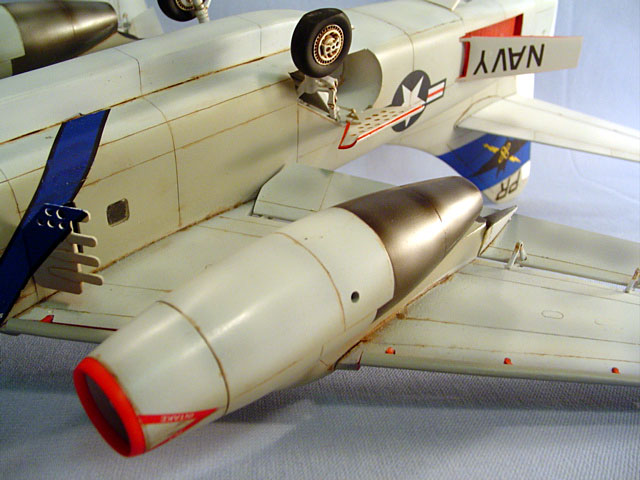
The kit engine pods are well cast and include turbine faces and
intake splitter vanes, as well as the "flame holder" exhuast plates. The
front of each intake is a separately cast cylinder. That allows you to
assemble the engine pod with NO seams inside the intakes! The fit of the
pods to the wings are pretty good too. Just be sure to get the right one
on the correct side; they are "handed".
Construction was straightforward with supeglue used throughout for
assembly. The interior was painted light gray with black consoles. The
PE parts for the panels in the cockpit are "blackened nickle-silver".
They can be glued in place without any painting needed! Don't forget to
add nose weight before closing up the fuselage. I used lead fishing
sinkers for this.
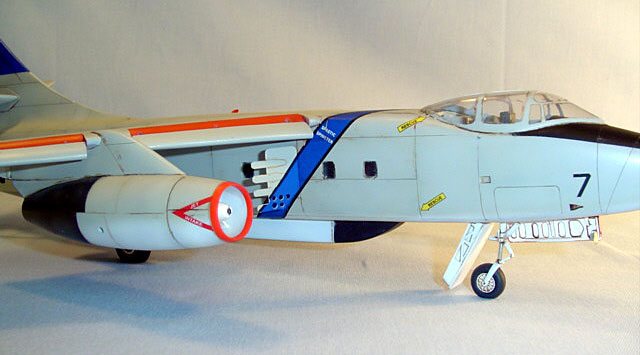
One of the trickier parts of "podded" engines is painting the red
intake lip. I did this by painting the red FIRST, and then masking it
off, inside and outside. Next, the interior was painted silver (to cover
the excess red) and then gloss white. The intake could then be glued in
place over the painted and assembled engine parts. The pods were filled
and sanded BEFORE they were added to the wings. In fact, next time I'll
even paint them before gluing them on!
I used the second canopy to make masks for the one on the model. I first
outlined all of the windows with a fine tipped black marker. Next, I
applied frosted Scotch tape to the canopy and cut the masks out. I then
carefully peeled off the Scotch tape masks and applied them to 3M Blue
masking tape (low-tack stuff) using them as patterns to cut the blue
tape masks for the canopy on the model.
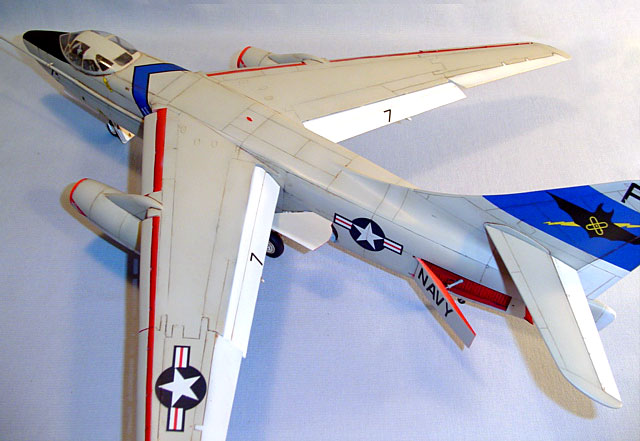
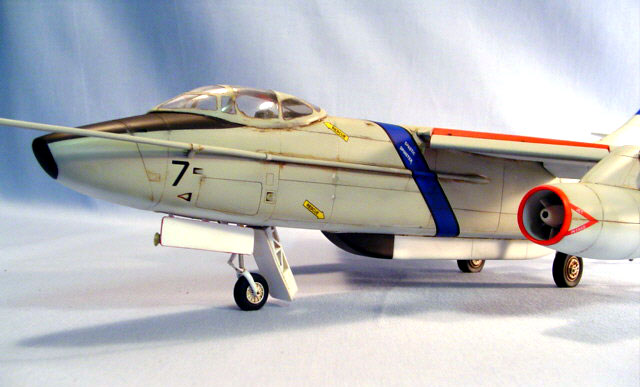
Paint
The model was painted in the USN scheme of gull gray over white.
Model Master gloss paints were used.
The metallic areas of the engine pods were painted with Aclad2 dark
aluminum and steel. That allowed me to keep them masked for most of the
painting steps. The gear doors were outlined with gloss red and a fine
pointed brush.
The interior of the slat beds and speed brake wells, as
well as the speed brake interiors were all painted red. That really adds
some color to the scheme! MM lacquer gloss was used for the gloss coat.
The model was given a wash of burnt-sienna oil paint, thinned with
turpentine (mixed up in a plastic soda bottle cap). The excess oil wash
was removed with an almost dry paper towel, that had a SMALL amount of
turpentine on it. Another gloss coat sealed the wash and prepared the
model for decals.
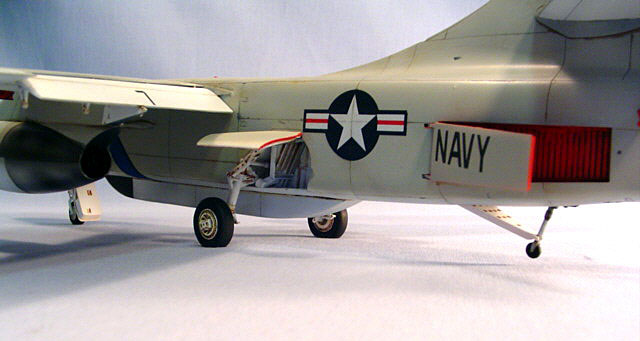
Decals
The decals went down well, but the fit of the fuselage stripes
weren't as precise as they could be. To compound that, there was no
allowance on the decals for displaying the side door open. That meant I
had to do some fancy cutting around the door frame to get a piece that I
could apply to the door! Also, the instructions are weak on where some
of the smaller stencils and rescue arrows go. One more gloss coat was
added to seal the decals, and allow me to add a wash in their panel
lines.
It was now time to add the final parts, and this is when I ran into
the only bug-a-boo on this kit. The main gear are well cast and
detailed. But, their engineering does't really allow for the "testing"
of the sit of the model. It was at this point that I found that one gear
was about 1/8" longer than the other! I had no choice but to snip off
one oleo, file it shorter, and then glue it back in place. That,
combined with a bit of differential sanding on the tires got the model
to sit level.
The rest of the gear parts all went on with little to no
problems. Flaps, slats, actuators, and all of the rest of the fiddy
parts were added to complete assembly. A final flat coat was sprayed on,
the clear parts unmasked, and the model was done!
I enjoyed building this kit. Since I have to give it to it's rightful
owner, I plan to get another one in the future for my own collection.
The CollectAire EA-3B Skywarrior isn't cheap. But, it is a fine kit of
an important US Navy plane; and you're not likely to see this one put
out by a major manufactutrer. I recommend it to anyone who has some
experience with resin kits and who also has access to some reference
materials on the Skywarrior. Happy modeling!
Click on the thumbnails
below to view larger images:
Model, Images and Text Copyright ©
2004 by Gil Hodges
Page Created 15 March, 2004
Last Updated
15 March, 2004
Back to
HyperScale Main Page |
 Home
| What's New |
Features |
Gallery |
Reviews |
Reference |
Forum |
Search
Home
| What's New |
Features |
Gallery |
Reviews |
Reference |
Forum |
Search