|
1/72 Academy Mustang
conversion
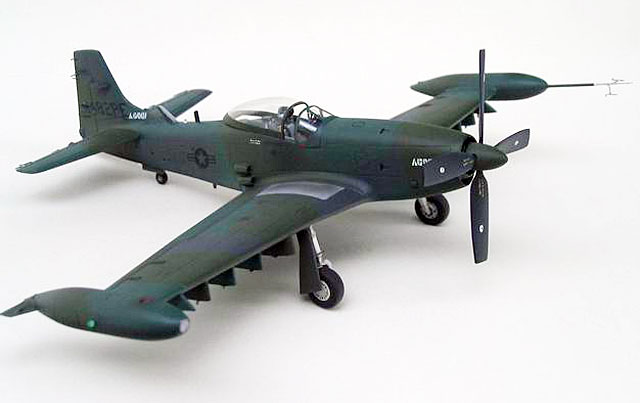
Piper PA-48
Enforcer
by Piotr Dmitruk
|
 |
|
Piper PA-48 Enforcer |

HyperScale is proudly supported by Squadron.com
The withdrawal of the P-51 Mustang from active duty
resulted in the appearance of many of these aircraft on the civilian
market. Cavalier Aircraft Corporation bought the rights to this famous
design from North American, and after remanufacturing delivered
“Mustangs” to many nations.
Cavalier believed that the Mustang still had
potential for further developement as a light and cheap COIN aircraft,
by fitting a turboprop engine. In 1968 the company fitted a Rolls-Royce
“Dart” engine, as it was the only powerplant available, with plans to
fit the more powerful Lycoming T-55. However Cavalier cancelled any work
on this, and decided to sell the rights to the Piper Aircraft
Corporation.
In 1970, the prototype Turbo Mustang III was
delivered to the Piper factory at Vero Beach. In pursuit of contracts
under the “Pave Coin” program, the Piper factory undertook a redesign of
the Turbo Mustang.

The first converted aircraft was tested by the USAF
in 1971 and fullfilled all expectations, but a production contract was
not granted.
In September 1981 the USAF, under pressure from the
US Congress, ordered two new aircraft. The fitting of the Lycoming T-55
engine and other modifications (lengthening of the fuselage by 19
inches, fitting of larger tail surfaces, removing of the ventral scoop,
fitting of the Yankee ejector seat, wingtip tanks, removing the wing
guns, and fitting ten underwing hardpoints) resulted in only 10% of
parts in common with the F-51 D, and produced a new aircraft named PA 48
“Enforcer”.
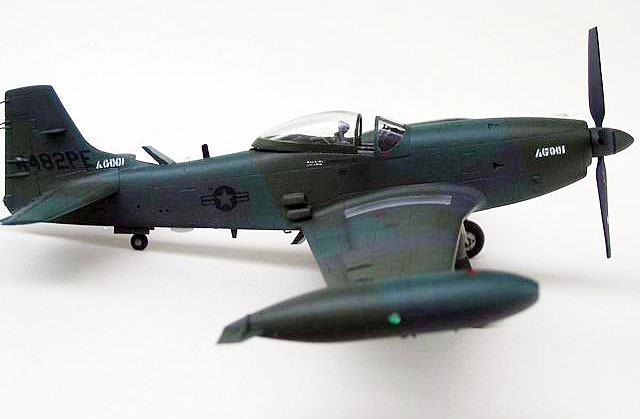
The two prototypes never given any military
designations, and were given civilian registrations: N481PE and N482PE.
First flights took place on April 9 and July 8 1983 respectively, and
evaluations were conducted at Elgin AFB and Edwards AFB during 1983/84.
Again no orders were obtained and both prototypes were put in storage in
late 1986.
Aircraft number N481PE is now on display at the
WPAFB Museum in Dayton, Ohio.
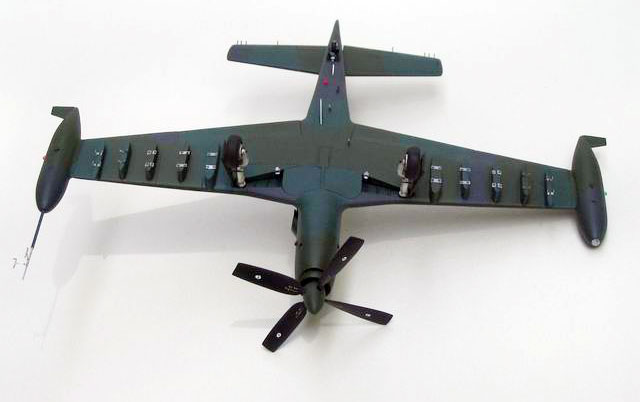
Analysis of the dimensions and shape of the
original Piper Enforcer (based on very useful site
http://s96920072.onlinehome.us/AWA1/101-200/walk170_Piper%20Enforcer/walk170.htm
) led to the conclusion, that all change in length of this aircraft took
place in rear part of the fuselage.
The front part remained unchanged in length and
general shape. Also the propeller spinner, despite this, that it is
narrower, kept the length of that from the Mustang. The horizontal
tail-planes were altered entirely, and the vertical stabilizer, although
it kept the outline of the prototype, had enlarged surface (in
different way than in P -51H), but with an unchanged rudder.
So the major plastic surgery comprised:
-
Changing of shape
of propeller spinner - I couldn’t change kit part because it was
empty inside. And so I made resin copy (full inside), glued both
parts of spinner, glued in injection needle as an axis, and having
placed her in Dremel tool, I grinded the spinner to desirable shape.
I also broadened four openings for propeller blades. I took these
from Martin "Mauler” kit from CMK and slightly changed
-
Making of round opening behind the propeller spinner - Precise
drilling with dental burrs, corrected with epoxy glue and abrasive
paper.
-
Making of small NACA openings in the cowling - Similarly drilled
with dental burrs
-
Drilling of exhaust pipe opening - Bored at an angle, with more and
more larger bit. I made exhaust pipe with suitable diameter drinking
straw. Her convex fairing was made with plasticard.
-
Lengthening of fuselage about 0,66 cm of (19 inches in original) -
Inserted two pieces of plastic about suitable thickness and
polished.
-
Removing of the ventral radiator scoop - Simply cut-off and blanked
off with plasticard and epoxy glue.
-
Making of air inlets on the right side and the outlet on the left
side. I made inlets with pieces of plastic . On the left side I made
opening in the fuselage, put two metal strips obliquely in it, and
covered with tear-shaped metal strip.
-
Removing the wing guns, their wing slots and armament covers - That
was easy.
-
Making of fuel tanks on the wing tips - I took suitable fuel tanks
from Airfix "Shooting star ” kit, made their resin copies, shortened
suitably, cut out slots for wing tips, I bored openings on Pitot
tube in port, and landing light in starboard, I added several panel
lines and trinkets, and also fins from strips of metal.
-
Change of shape of vertical stabilizer - I glued on the leading edge
the shaped piece of plasticard, serving as a template for later
grinding, covered with epoxy glue, and I shaped profile with file
and abrasive paper.
-
Making of horizontal tail-plane - Accidentally I saw, that similar
shape, even with suitably shaped movable surfaces, had the tips of
the longer wings from Me -209 kit from Huma. After cut-off and
several changes I had the finished tail-plane.
The making of flaps in
this kit should also belong to the “major plastic surgery” category.
There are separated flaps, assumed to be glued in lowered position. This
element does not fit nor to wings, nor to fuselage, but has big sink
marks and one millimeter thick trailing edges. I left them closed,
because it facilitated me the work.y I changed numerous panel lines, as
were on the pictures.
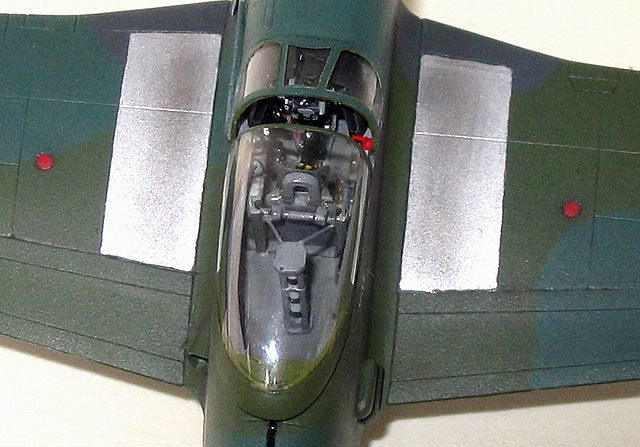
When the fuselage was
ready, there was a time for cockpit interior. This was easily to make
through wide cockpit opening. One cannot use here nor basic set, nor
resin, because interior of the "Enforcer ” differed considerably from
standard "Mustang ”. I made from scratch the whole interior, inclusive
of floor, internal structure, instrument panel, with sunscreen and
gunsight. The "Yankee extractor” was made from resin copy of Martin
"Mauler ”seat from CMK.
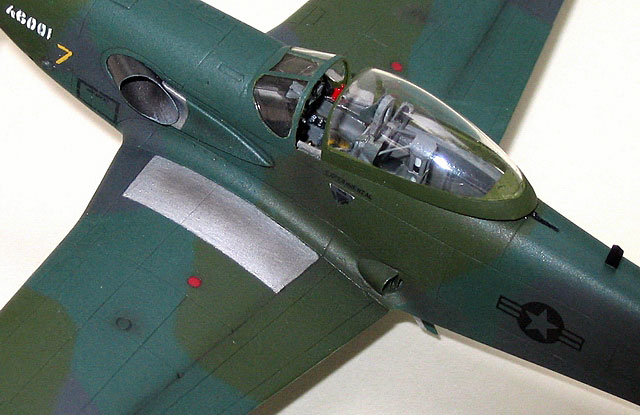
The canopy
offered by Academy seems to be “armoured”, and is also of variable
thickness. In original this would been about 12 cm thick on the right
side to 20 cm on the left side. So I must made new. Then the lower, tin
part of new canopy was to thin so I had thickened her with plasticard.
There was clearly visible shelf at the very end of this part from
inside- again done with plasticard.
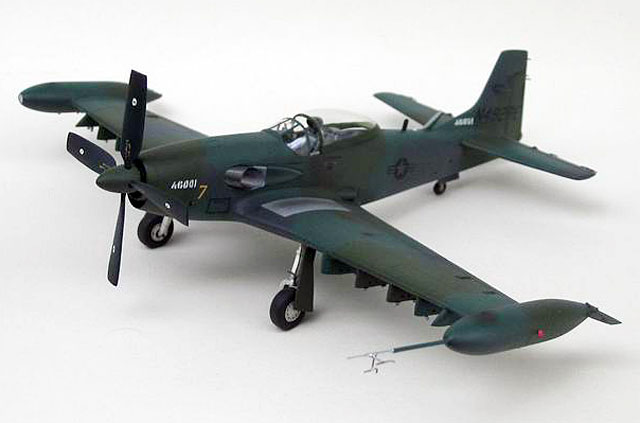
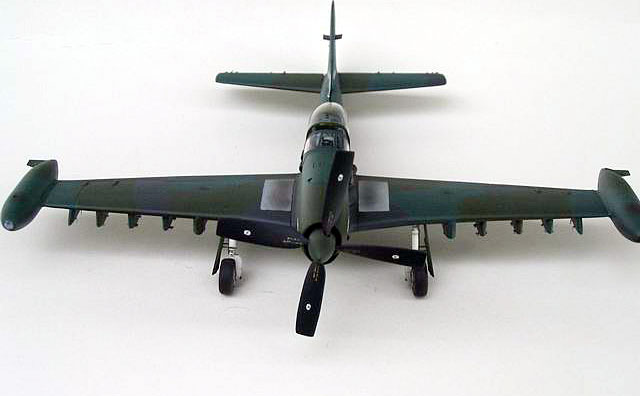
Last but not least -
the undercarriage. The wheel wells were poor, but mostly closed with
internal undercarriage covers (you can use resin aftermarket parts, if
you want), external covers were lousy too. The undercarriage legs
required some improvement, but wheels were to be changed. I added clamps
of disc brakes made from thin plasticard from inside, from outside I
covered with epoxy glue the whole rim and bored several holes of
suitable diameters.
I made from the
underwing armament pylons from scratch and glued on them bomb racks -
different on every pylon.
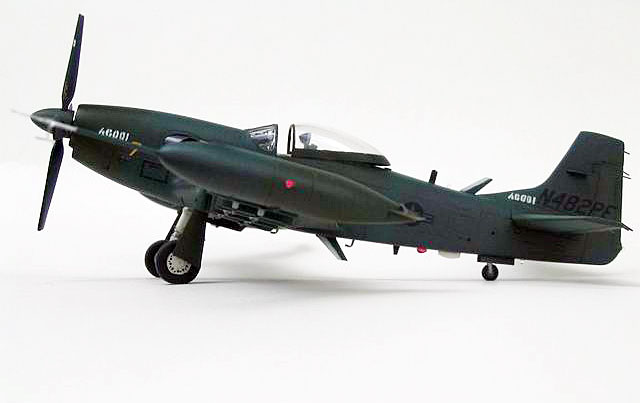
It was possible to
reproduce from pictures painting scheme on almost whole airplane, with
exception of parts of wing, horizontal tail-plane and fuselage lower
surfaces. Since it is "wrap around ” type of painting scheme, I assumed
similar pattern as on the upper surfaces.
The camouflage pattern
of another restored "Enforcer ”could be confusing- it differs from
N482PE, but it may be correct- I have only one picture of this airplane
before restoration, in addition in protective cocoon.

I painted my model
with Humbrol, Pactra, Tamiya, Model Master and Lifecolor paints. After
coat of Future I put on decals, partly from stash, partly myself
printed, and partly myself painted. After coat of dull varnish I stuck
the masses of antennae, Pitot tube made from injection needles and wire,
I made the landing light opening in right wingtip tank, lined with the
BMF foil and filled with Micro Kristal Klear, I saw off the landing
lights in the main wheel wells from old CD, similarly imitating the
glass with a dot of Micro Kristal Klear. I made numerous lights using
the warning lights set from CMK, putting under them tiny discs cut out
from BMF foil, making them shine. Weathering was made with Tamiya Smoke
and dry pastels.
As far as I know,
there is no Piper Enforcer kit. There are several resin conversion sets,
but they offer the only alteration of front part of the fuselage, and
this is far to little. If someone wants to follow in my steps, I
recommend choosing different kit. Taking under attention that a lot of
changes will be made, both with shape and with surface, I chose the
cheapest model.
However it turned out
that I had to put in a lot of additional work with flaps and cockpit
canopy, and the appearance of undercarriage leaves a lot to be desired.
Anyway, I have next original model on the shelf, with no more effort
than others put in improving of factory kits.
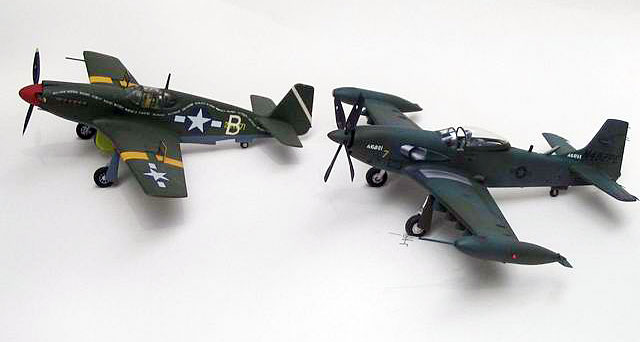
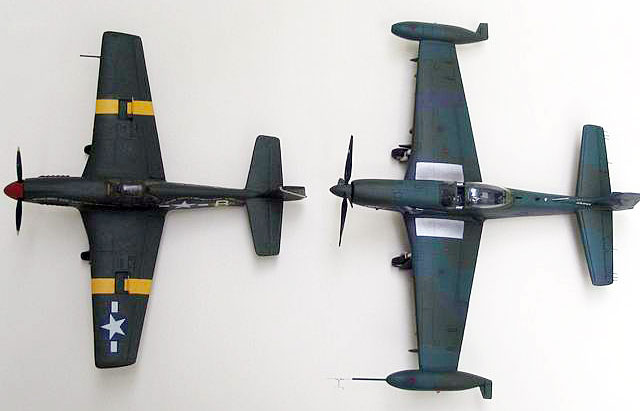
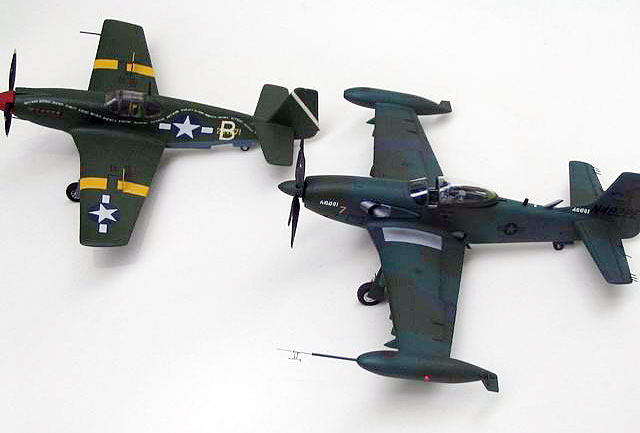
Alpha &
Omega - Mustang Comparison
|
Several later pictures
present the development of this type of airplane and my modelling skills
through the last 15 years. The other kit is the conversion of P- 51A kit
from Novo/Frog, on the A- 36 “Apache” type.
Click on the thumbnails
below to view larger images:
Click on the thumbnails
below to view larger images:
Model, Images and Text Copyright ©
2004 by Piotr Dmitruk
Page Created 06 July, 2004
Last Updated 06 July, 2004
Back to HyperScale
Main Page
|
 Home
| What's New |
Features |
Gallery |
Reviews |
Reference |
Forum |
Search
Home
| What's New |
Features |
Gallery |
Reviews |
Reference |
Forum |
Search