|
 Home |
What's New
| Features
| Gallery
| Reviews
|
Reference |
Forum
|
Search
Home |
What's New
| Features
| Gallery
| Reviews
|
Reference |
Forum
|
Search
Monogram's 1/48
scale
F-100D Super Sabre
by Jerry Creager
|
 |
|
F-100D Super
Sabre |

HyperScale is proudly supported by
Squadron.com
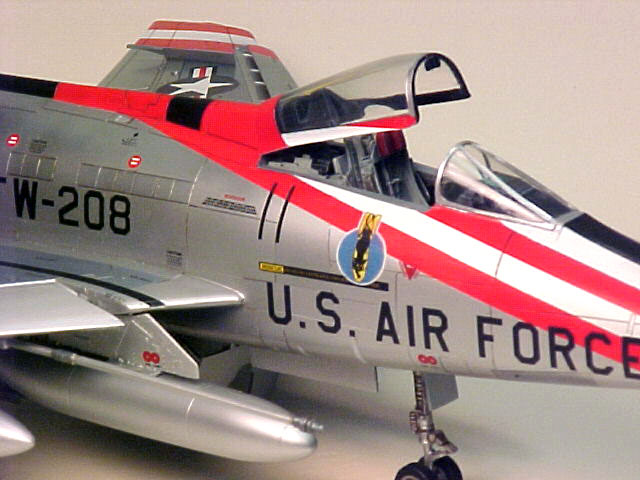
Here is Monogram's 1/48 scale F-100D Super
Sabre. This kit represents an aircraft from the 494th
Tactical Fighter Squadron.
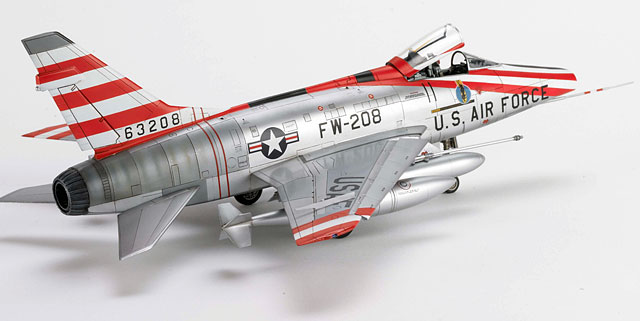
The raised panel lines found on the
Monogram kit were sanded off and completely re scribed. The
cockpit is detailed using the Black Box F-100 detail set. The
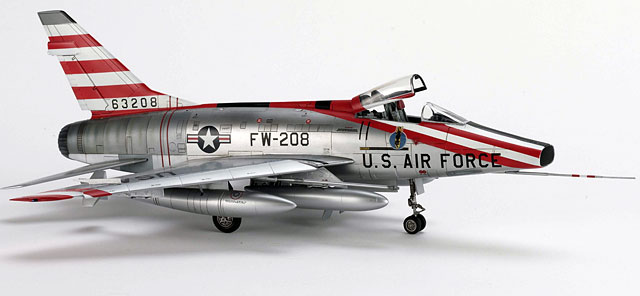
two inboard external fuel tanks are from another monogram kit
and are representative of the type found on this particular
aircraft.
The horizontal stabilizer which is molded
into the fuselage on the kit was cut and re positioned to the
position usually seen in photographs of F-100’s at rest.
 After
the kit was completely assembled it was given a coat of black
Tamiya high gloss acrylic paint mixed with Testors Metalizer
Thinner (70% thinner, 30% paint ) as a primer. This lays down a
hard very smooth high gloss finish. Since the metal finish will
show up the smallest flaws the gloss black highlights these
flaws and gives you and opportunity to correct them before the
final metal finish is applied. After
the kit was completely assembled it was given a coat of black
Tamiya high gloss acrylic paint mixed with Testors Metalizer
Thinner (70% thinner, 30% paint ) as a primer. This lays down a
hard very smooth high gloss finish. Since the metal finish will
show up the smallest flaws the gloss black highlights these
flaws and gives you and opportunity to correct them before the
final metal finish is applied.
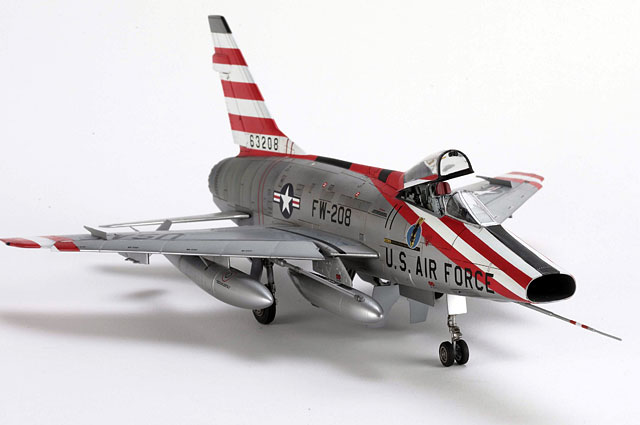
I used two coats of Flouquil Bright Silver
thinned to about 70% Testors Metalizer Thinner and about 30%
paint. I sprayed this at about 10 psi using a Pasche airbrush.
This combination of thinner and paint dries fast and will leave
a silver finish that can be handled and masked. After the final
finish was applied I gave the entire model a coat of Future and
allowed it to dry a good 24 hours. This will protect the finish
and provides a good surface for the decals.
As a follow up to the primer
method mentioned above I have since found that using high gloss
enamel thinned the same, 70/30, works better than the acrylic. I
had trouble getting the acrylic paint to “feather” at the points
where I had corrective work. If you looked carefully you could
see where the” touch up” left a faint line. This was difficult
to completely eliminate. I found that the enamel worked much
better, but it took longer to dry (about 24 hours). Touch up
over the enamel blended in and you could not find any trace of
the repair.
The red and white stripes were painted
last. The squadron insignia was scanned into a computer from a
book and reduced to the proper size. The image was then printed
on decal paper. This step was done by a friend. The rest of the
decals were taken from various F-100 decal sheets.
I would guess that this project took about
50 hours to complete.
Click on the thumbnails
below to view larger images:
Images Copyright © 2006 by
Jerry Creager
Page Created 03 February, 2006
Last Updated
21 February, 2007
Back to
HyperScale Main Page
Back to
Gallery Index |