|
Hasegawa's 1/48 scale
F-104J
Starfighter
by John Chung
|
 |
|
F-104 Starfighter |

Hasegawa's
1/48 scale F-104 Starfighter is available online from Squadron
First off, this will be a
short write up.
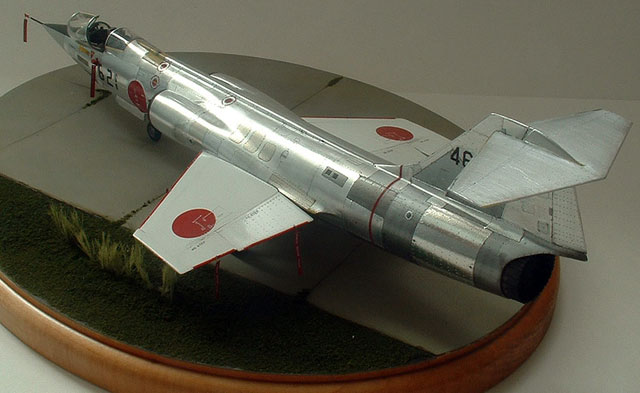
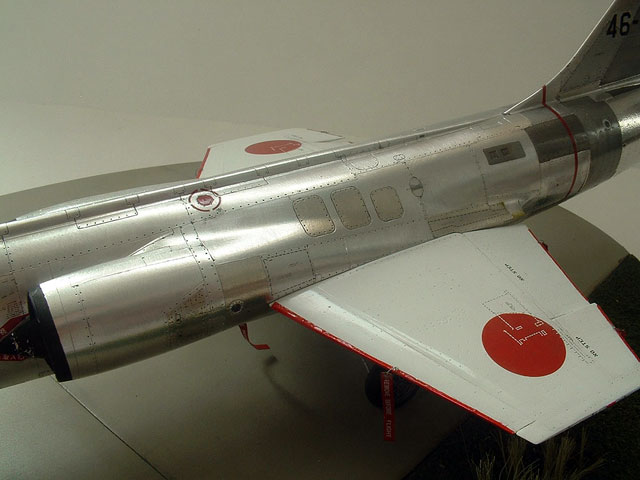
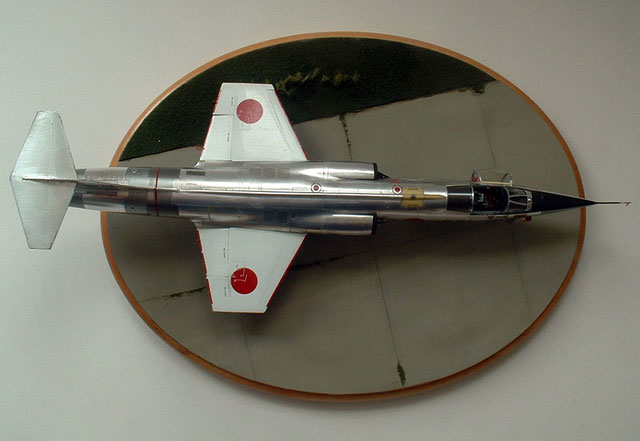
This is the 1/48 Hasegawa F-104J kit, which has been reviewed and
featured aplenty, so I shall not elaborate much. I will say that it
captures the general shape of the aircraft very well, and the fidelity
of the model is definitely Hasegawa. However, I also echo other
modeler’s sentiments about the overdone wing rivet details, the
sometimes inconsistent panel line depth, thickness and tidiness,
especially around the top and bottom of the fuselage.
Even with that said, it is
still a very decent model that will build into a respectable replica out
of the box. It also allows plenty of room for the braver modelers of the
rivet counter and super detailer kinds should they feel gung-ho at it.
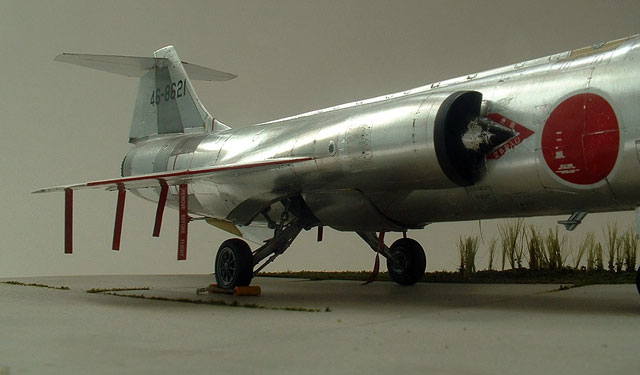
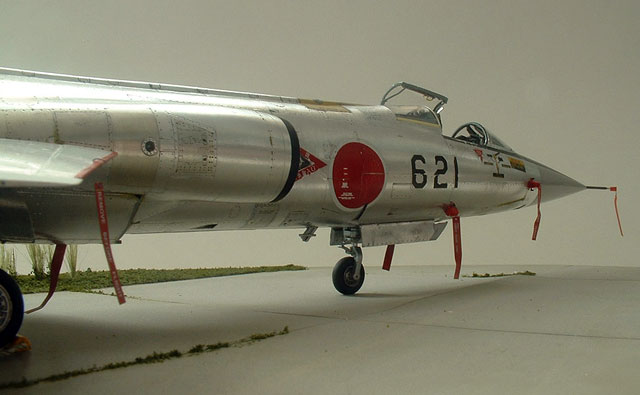
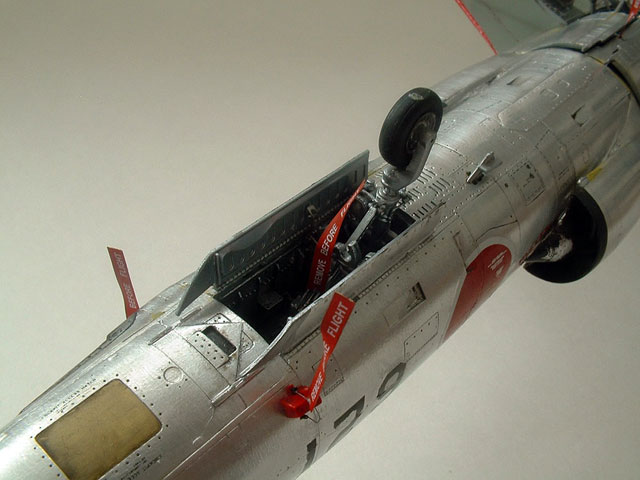
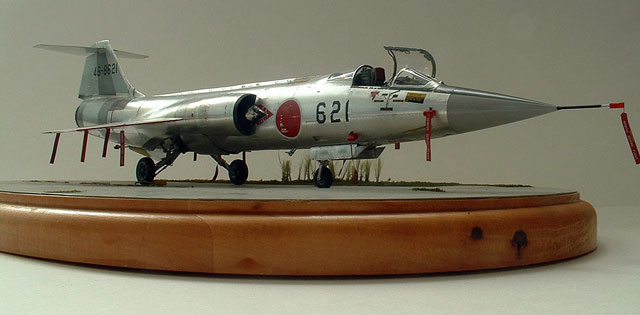
I’ve used a total of three
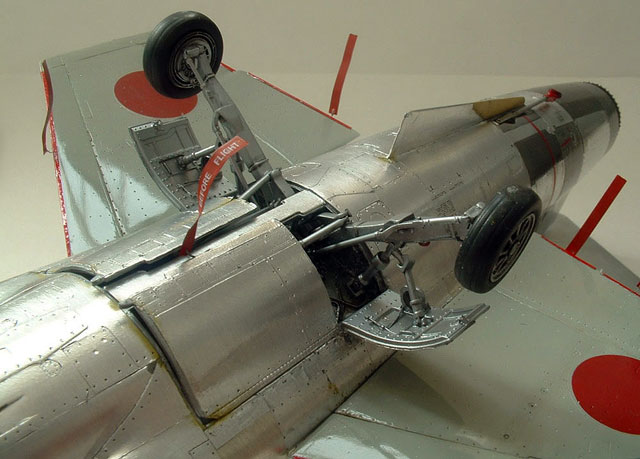
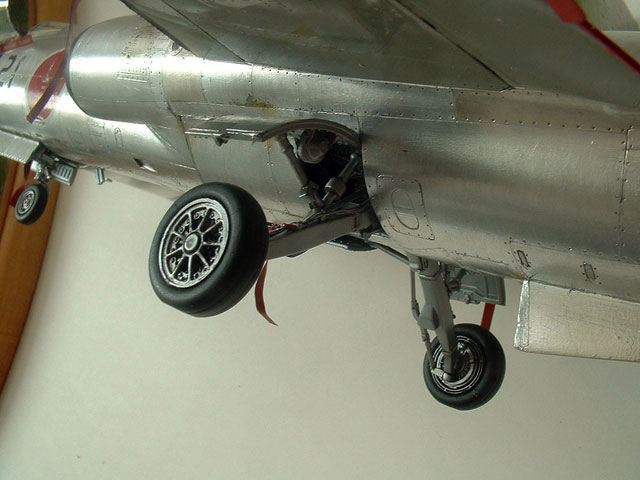
aftermarket resin detail sets on this model: Aires F-104C/J cockpit,
F-104 wheel bay, and F-104 exhaust set.
The general fit of the
cockpit and exhaust turned out to be quite decent, while I’ve had some
issue getting the main landing gear bay to fit right. I appreciate Aires
overall fineness and precision in their sets which are overall
consistent and accurate over their product range.
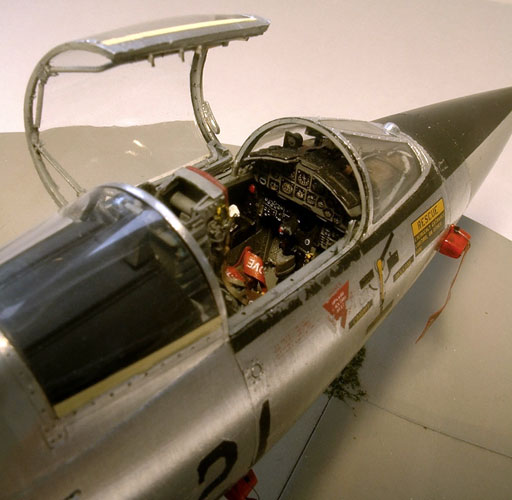
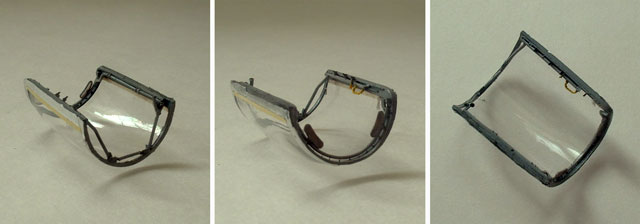
I’ve committed quite a bit of fine scratch building to this model. In
the cockpit this includes the cockpit framing detail for both the main
canopy and inside the windscreen, and various piping behind the seat and
under the rear windscreen.
The undercarriage legs and
doors were detailed with tie-down rings, wires, and cables, whereas area
that could have been better portrayed were removed and rebuilt, such as
the torque link and nose gear steering unit. The RBF covers for the
leading edge were built from cooking foil and the various RBF covers
from styrene with stretched sprue. RBF tags were from Eduard’s
pre-painted set.
Looking back there wasn’t very much that I’ve deviated from the kit or
the resin, but the build just seemed very long and tedious.
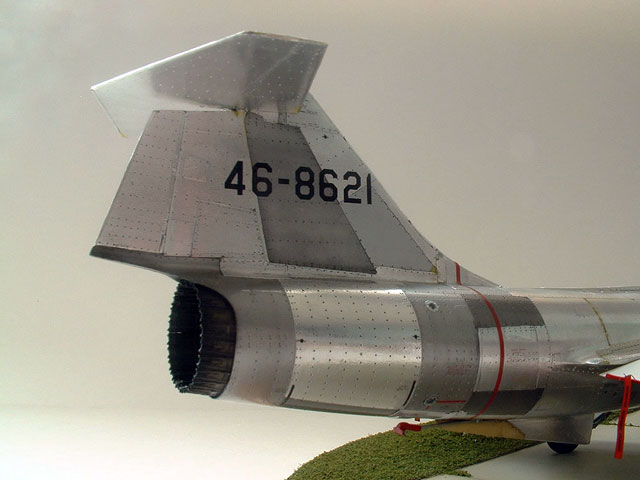
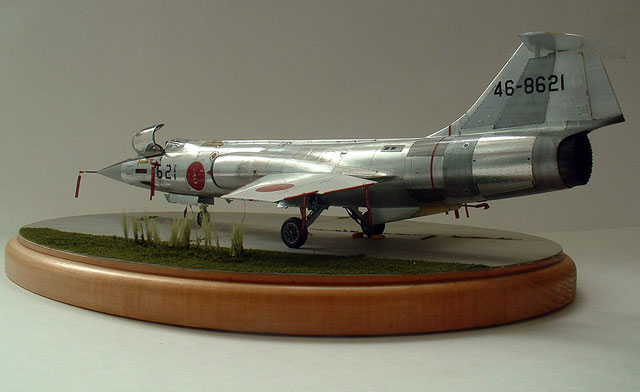
Probably the most
significant experimentation I’ve done on this model is my first use of
Bare Metal Foil to replicate the natural metal finish found on many
F-104s. The process was very difficult and in the process I’ve had to
redo a good number of panels. Foil lifting and tearing were my biggest
issues, and I either have to patch the tear with smaller foil sheets or
leave it as is. I found an image of a BMF A-4F jet with a lots of green
primers around the fuselage, and took the idea to touch up some of the
tear with green paints. Cheating? Yes, but it’s just too difficult to
fix all my botches.

Alclad II was used around the aft fuselage to simulate the different
panel shades, which were impossible to replicate with the limited shade
options offered by BMF. Vallejo, Gunze and Tamiya acrylics were used in
the non-BMF area. Oil wash was applied to the cockpit, exhaust, and
undercarriage area.
TwoBobs F-104J aggressor decal sheet was used. I did not choose to model
an aggressor aircraft, and even left the tail free of squadron markings.
The decals went on fine, though it’s difficult to adhere it to the foil.
I’ve also managed to chip the decal a bit too much during weathering.
This model was built about
a year before this article was written, so my memory is a little fuzzy
regarding the exact details of the build. All I remember was a lot of
frustration and patience and rebuilding to achieve the level of detail I
wanted. This was compounded by the various new modeling methods I’ve
experimented on this model, namely different scratch building techniques
and the amount of aftermarket details, as well as finishing techniques.
In retrospect, it was not
an easy project but I’m glad that it turned out as well as it did.
Click on the thumbnails
below to view larger images:
Model, Images and Text Copyright ©
2005 by John Chung
Page Created 29 September, 2005
Last Updated
29 September, 2005
Back to
HyperScale Main Page |
 Home
| What's New |
Features |
Gallery |
Reviews |
Reference |
Forum |
Search
Home
| What's New |
Features |
Gallery |
Reviews |
Reference |
Forum |
Search