|
1/48 scale Hasegawa &
Cutting Edge
F-104S ASA Starfighter
by Pierpaolo Maglio
|
 |
|
Lockheed F-104 Starfighter |

Hasegawa's 1/48 scale F-104S Starfighter is
available online from Squadron
This is the very last year of service for the F-104, after more than one
million flying hours over forty years the most representative fighter of
the Italian Air force (AMI) is being phased out, so as a modeller I want
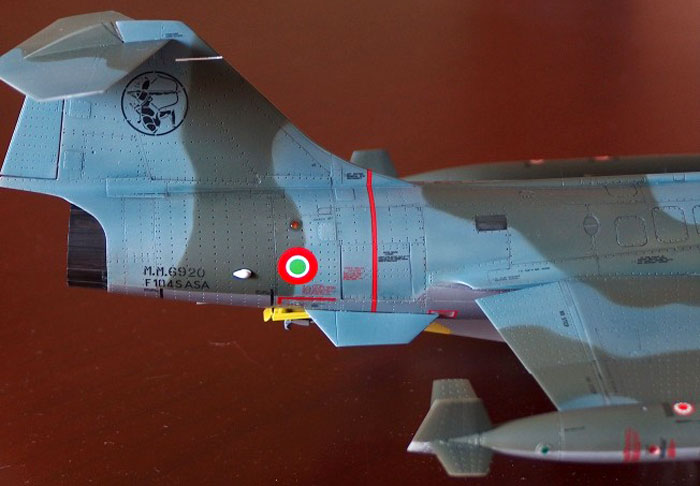
to celebrate this event my way. I had some photos of the Italian Air
Force F-104S-ASA coded 5-35, that I took in the Summer of 1994 at Rimini
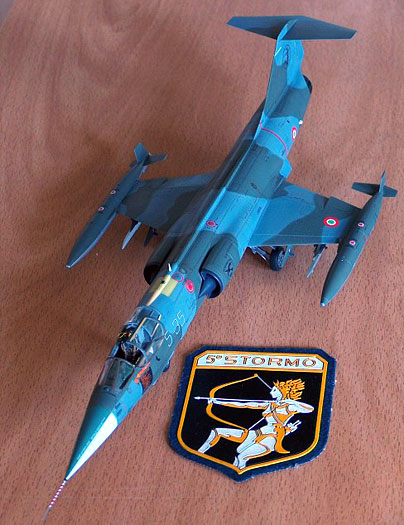
AFB. It was a fighter from the 5th Wing (Diana The Huntress on the
tail), 23rd C.I.O. All Weather Fighter-Interceptor Squadron (Greyhound
on the intakes) then based at Rimini AB near my home. Because of this
legacy I decided that 5-35 should be my next Starfighter.
The fighter had low-viz markings and small national insignia but
retained the NATO standard green/gray camouflage with flat aluminum
undersurfaces. Later it was repainted in air superiority gray overall.
This is Hasegawa's 1/48 scale F-104S with Cutting Edge's conversion and
detail set.
 It
was a big project for me, the Hasegawa kit in 1/48 is good but needs a
lot of work to become a real F-104“S”. Hasegawa just gives you the same
parts that you can find in the F-104G, a pair of additional ventral fins
and a decal to simulate the different panels on the “S” air intake.
Indeed, on the “G” model the air intakes had a trapezoidal panel on the
sides, while in the “S” model there are rectangular auxiliary air
intakes. These are always completely open during scramble take off
especially on hot Summer days. No wing pylons are given in the box and
this is really disappointing since Italian Starfighters always used them
and never used the ones under the air intakes. So I ordered the Cutting
Edge (48267) resin conversion set and it helped me a lot since it
contains full perfectly shaped air intakes, many pylons and RWR and ECM
antennae. However, it comes with insufficient and sometimes incorrect
instructions (for instance, the anti collision light behind the canopy
should be white not red) and the pictures of the real thing show that
some of the antennae and lights are located not in the same places as
indicated in the resin kit instructions, so always check your reference
before gluing those parts. It
was a big project for me, the Hasegawa kit in 1/48 is good but needs a
lot of work to become a real F-104“S”. Hasegawa just gives you the same
parts that you can find in the F-104G, a pair of additional ventral fins
and a decal to simulate the different panels on the “S” air intake.
Indeed, on the “G” model the air intakes had a trapezoidal panel on the
sides, while in the “S” model there are rectangular auxiliary air
intakes. These are always completely open during scramble take off
especially on hot Summer days. No wing pylons are given in the box and
this is really disappointing since Italian Starfighters always used them
and never used the ones under the air intakes. So I ordered the Cutting
Edge (48267) resin conversion set and it helped me a lot since it
contains full perfectly shaped air intakes, many pylons and RWR and ECM
antennae. However, it comes with insufficient and sometimes incorrect
instructions (for instance, the anti collision light behind the canopy
should be white not red) and the pictures of the real thing show that
some of the antennae and lights are located not in the same places as
indicated in the resin kit instructions, so always check your reference
before gluing those parts.
I have to say that the CE set fitted perfectly into Hasegawa plastic
parts with only minor trimming problems. What I really don’t like of the
Hasegawa kit are the rivets: there are too many of them (some are
located in parts where they shouldn’t, like the flaps) and they are too
deep and too large for 1/48 scale. So I tried to sand them down a
little, especially on the wings and flaps.
I cut out the brake chute compartment under the belly of the kit along
panel lines. This surgical operation was simplified by the unusual fact
that Hasegawa has made the F-104 kit in a softer plastic that their
standard. Once again I found out that the CE drogue chute door fitted
perfectly in the hole.
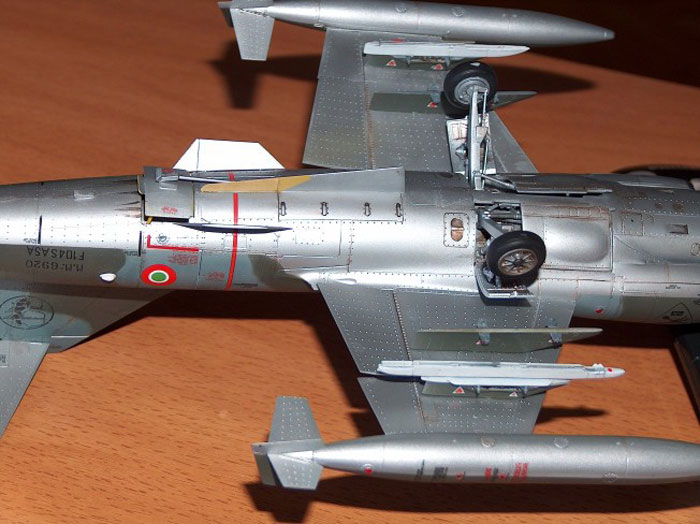
I would have liked my Starfighter to be fitted with underwing tanks,
Sidewinder tip launchers and Sparrow/Aspide launchers on underwings
outer pylons. Such configuration is the best one available on the
Italian Starfighters, because, as pilots use to say, it gives you the
best combination of fuel and armament. Not to mention that the aircraft
in my photos showed that configuration. By the way, the CE set doesn’t
include any underwing tanks and since it is almost impossible to convert
the tip tanks that come with the Hasegawa kit into underwing ones, I had
to choose a different combination, with tip tanks, a Sparrow launcher
under the right wing and a Sidewinder launcher under the left wing. At
that stage no missile was installed since I could not find a good pair
of them, but the CE launchers are so well detailed that I might never
put the missiles on. I did not use the centerline station rack under the
belly, as it was removed on Italian interceptors.
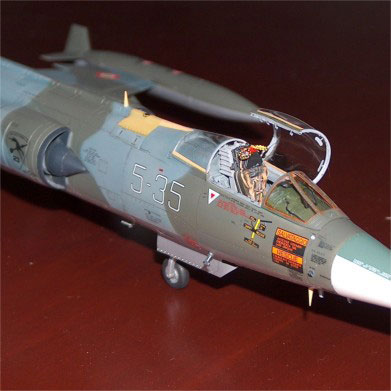
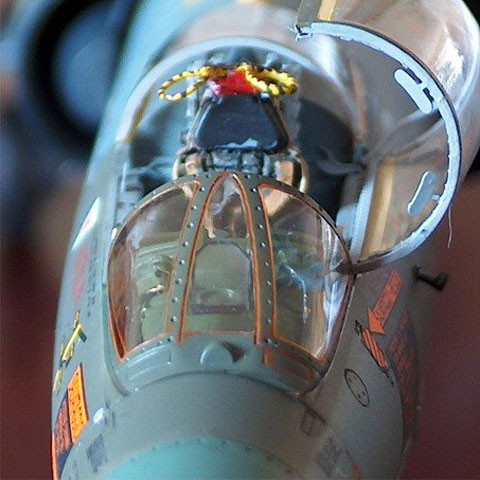
The Hasegawa ejection seat was also replaced by a Martin Baker by CE.
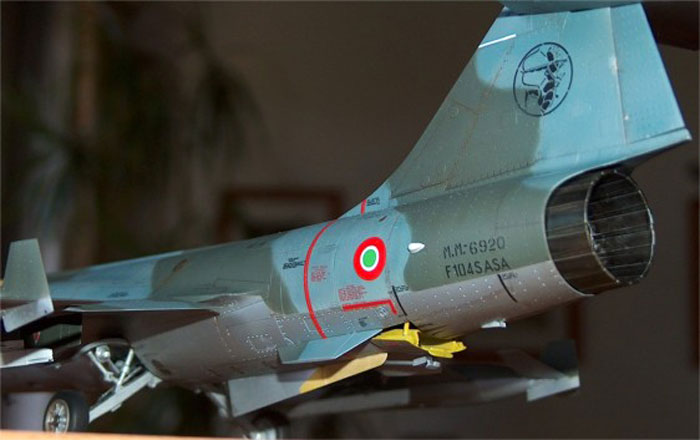
Painting was straightforward: Future on all plastic, Acald II White
Aluminum on undersurfaces and then some more Future to seal it off. I
used my personal mixes of Tamiya gray and Gunze green for the camouflage
and then ... some more Future. I also sprayed a little acrylic
translucent blue paint here and there on the gray surfaces just to get
to the bluish-gray shade you can see in real fighters with a little worn
camouflage.
I painted off the infra red seeker at the base of the windshield in the
same colour as the rest of the fuselage since the sensor was removed
from the whole F-104S-ASA fleet: it was useless as the IR seeker of an
AIM-9L is far better than the one on the fighter! To represent the
washer around the windshield I used orange ink from a Japanese
calligraphy brush pen, letting it leak along the panel lines.
The pitot tube I used is by Fine Molds and it is a real gem. It is made
of brass and perfectly lathe shaped. To paint it I first airbrushed it
in glossy white then used a micro tape of just 0,7mm to mask the part of
it that should stay white. A little Gunze insignia red was airbrushed on
it, so I got a perfect spiral.
The final problem was with decals. I used a sheet from SkyModels, the
decals were very good, thin and well printed but there was a big error I
couldn’t correct: in the real plane you can find that on the right
intake the Greyhound is running towards the back of the plane and on the
left intake it is running towards the front. In then decal sheet both
Greyhound go towards the front!!!! To correct this problem I would have
had to buy a Tauro sheet but I thought it was too expensive just for the
little insignia I needed.
At the end of this project I was left with many parts for another
F-104S, so I might make an F-104S-ASA.M featuring the air superiority
gray scheme later on.
Click the thumbnails below to view larger
images:
Images and Text
Copyright © 2004 by
Pierpaolo Maglio
Page Created 13 October, 2004
Last Updated
13 October, 2004
Back to
HyperScale Main Page |
 Home
| What's New |
Features |
Gallery |
Reviews |
Reference |
Forum |
Search
Home
| What's New |
Features |
Gallery |
Reviews |
Reference |
Forum |
Search