|
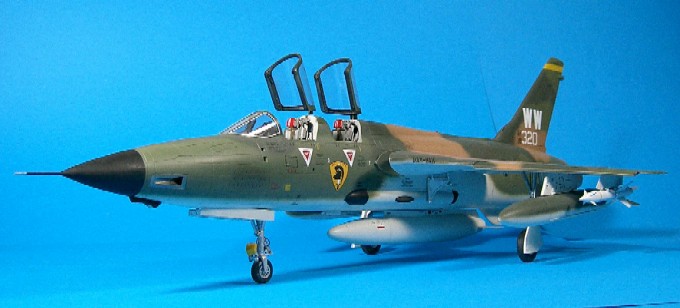
Trumpeter's 1/32
scale
F-105G Wild Weasel
by Frank Mitchell
|
 |
|
F-105G Wild
Weasel |

Trumpeter's 1/32 scale F-105G is available online from Squadron.com
An Exercise In Self-Flagellation...
Back in the 1970’s, I decided to do a really accurate 32nd Revell
109. I labored on that thing for ages with some major surgery and lots
of detail, both of which it sorely needed. When finished, I took it to a
DC IPMS event and, to a man, everyone took one quick look and said: “Oh,
a Revell 109”. That episode suggested to me that if one does a whole lot
of non-obvious work on a kit, don’t be surprised if not everyone (or
anyone, for that matter) really notices. It may also have planted the
seed for my interest in odd-ball and unusual aircraft.
A bit more history: In 1976, I had scratchbuilt a 32nd F-105D which had
some success at the Nationals, and eventually ended up in the National
Air and Space Museum. Because of that, I obviously had to do a Trumpeter
kit, but this time decided on a G model. I also made the very conscious
decision to do a “Revell 109” on this airplane, whether anyone (but me)
noticed it or not.
Construction / Correction
|
From the previous model, I had lots of information and drawings, and
therefore quickly discovered that there was lots of scope for
corrections and detailing, primarily in the fuselage. The following
annotated list covers the major corrections; most can be seen in the
photos.
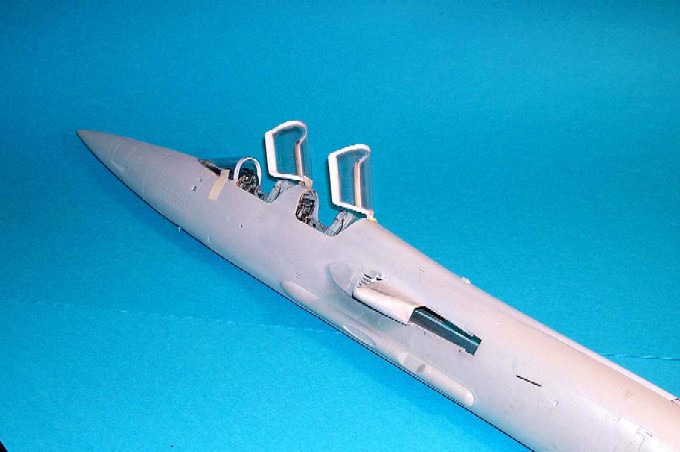
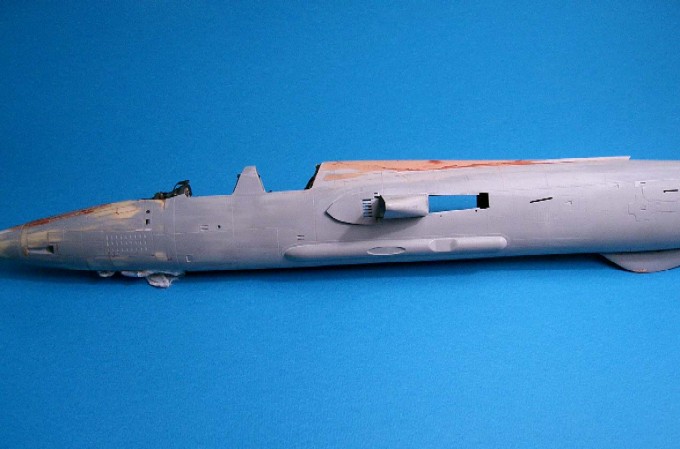
Nose
The entire shape is incorrect; instead of a smoothly flowing curve
from the middle of the windscreen forward, it is a straight line, making
the whole nose too thin and pointy from all angles. This was fixed by
replacing the entire nose from mid-windscreen to tip with one from a
Collectaire resin kit that I had gotten as a gift.
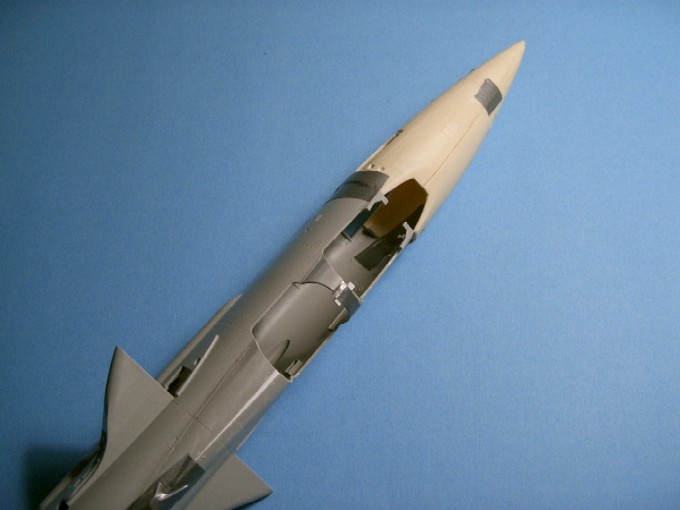
It had the correct shape both in plan and side views. Replacing just
the radome does not address the real problem.
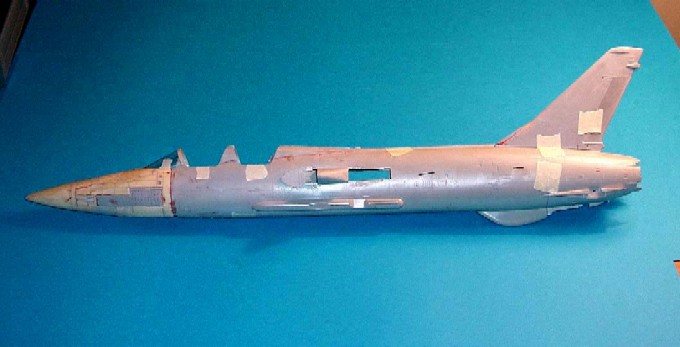
Spine/Canopies
Everything about these that can be wrong, is. They are too short in
height, with a totally incorrect cross-section. In the side view, the
spine dose not flow smoothly back from the canopies and is not nearly
long enough. After some thinking, I began to see that I could, with some
judicious cuts and a bending, modify the kit parts to the corrects
shape, with the addition of small wedges of plastic sheet to cover the
gap thus produced between the halves. Much cutting and re-shaping
therefore followed, along with a new windscreen (using the original 1975
mold) and two new canopies. Check the photos.
Interestingly, the Collectaire kit and the old Combat vac-form kit
(which I also had) are precise fits to each other, and to the Trumpeter
kit, each having the same incorrect shape of the canopy, spine, and
cross-section. Fascinating.
Click on the thumbnails
below to view larger images:
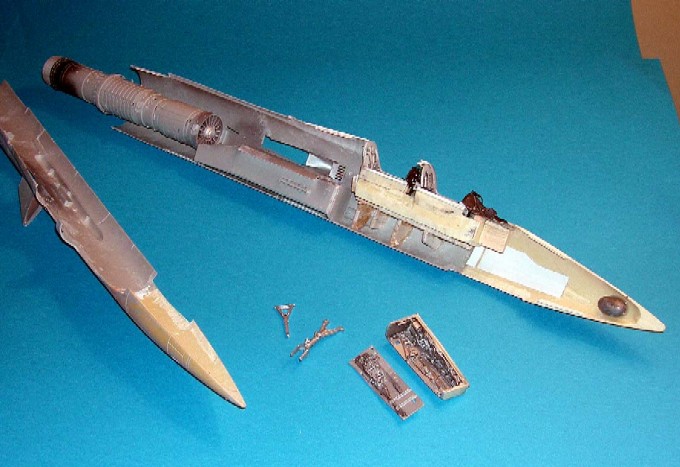
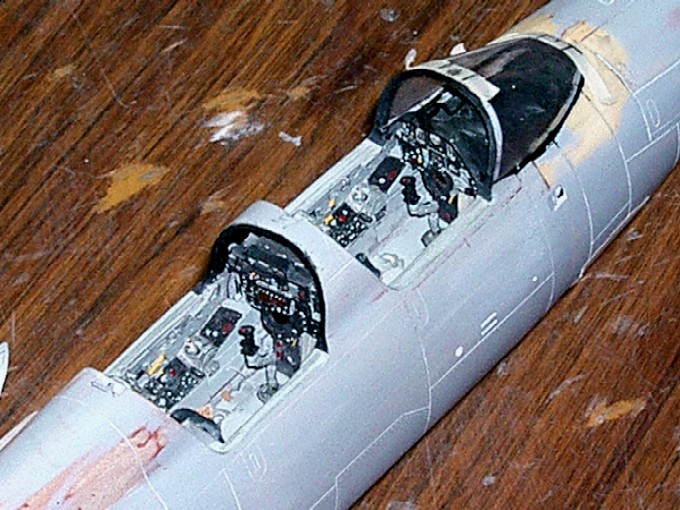
Interior
The Black Box interior set was used, but not without a lot of hassle.
It was not, after all, designed to fit in a Collectaire nose nor into a
fuselage that had been thoroughly modified). Grinding, some internal
balsa support, and general fiddling around was called for, but virtue
won out. The main problem was the far-too-tall forward instrument panel,
which was also present in the Black Box kit.
A lot of re-work was necessary to make sure that the glare shield
came out in the right place, and yet included all the proper dials and
switches. Work was also necessary to fit the very nice BB nose wheel
well into the resin nose.
Click on the thumbnails
below to view larger images:
Wings
The kit wings are pretty good, but the RC Resins seamless intakes
were grafted in. The BB wheel wells were a good fit, but the auxiliary
intakes were opened up.
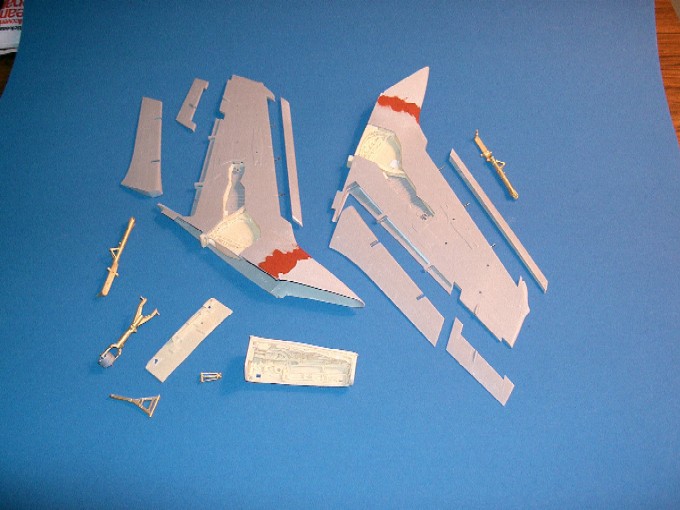
The slats were removed so they could be placed in the down position
(yes, I know, but they look cool that way). New Navigation lights were
added.
Tail
The Cutting Edge vertical tail was used after the duct area was
opened up. Horizontal surfaces were used as is.
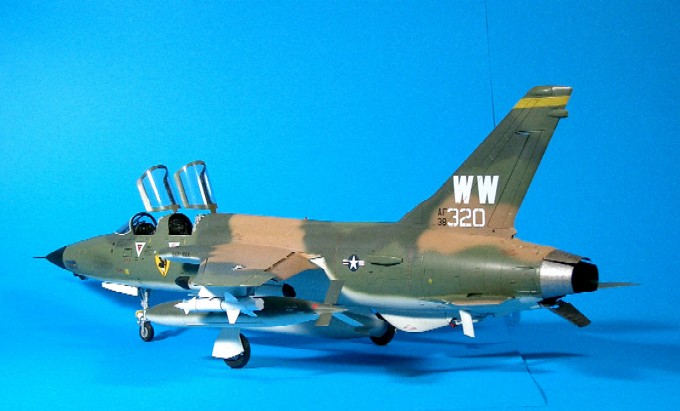
Miscellaneous
The shell of the engine was glued in place, as was the rear fuselage
section. With the resin nose, there was no problem of tail-sitting. The
kit exhaust petals were used. The gorgeous G-Force brass landing gear
were used, but the kit wheels were used after the holes were opened up.
The main gear doors need to be lowered on the strut; far too much wheel
and tire show otherwise. Kit armament was used, since I am no expert on
that; they looked fine to me. A lot of little changes and tweaks were
added all over the airframe, but that was more my compulsiveness than
any real need. Also, because of all the modifications, there was lots of
scribing, priming sanding, etc. required, which isn’t all that easy to
this big beast.
I decided on the kit markings since they were, after all, Two Bobs
products and you can’t do a whole lot better than that. Besides, I
really wanted an operational 105G, but did not want that stupid shark
mouth.
After being in progress for about a year and a half, and being back
in the box three times, I finally decided to declare it finished and get
on with the rest of my life. It was a fun, if sometimes annoying, build
of a favorite airplane, but I am not at all sure that there is a third
one in my future. Two Revell 109s are enough.
Click on the thumbnails
below to view larger images:
Model, Images and Text Copyright ©
2005 by Frank Mitchell
Page Created 31 August, 2005
Last Updated
30 August, 2005
Back to
HyperScale Main Page |
 Home
| What's New |
Features |
Gallery |
Reviews |
Reference |
Forum |
Search
Home
| What's New |
Features |
Gallery |
Reviews |
Reference |
Forum |
Search