|
Execuform's 1/72 scale
Hughes D 5, USAAF F-11
by
Tom Conte
|
 |
|
Hughes D 5, USAAF F-11 |

HyperScale is proudly supported by
Squadron
Considered to be the first purposed built aircraft for
photoreconnaissance, the F-11 quickly passed into history due to its
late arrival after WWII. Using speed and altitude as protection against
interception, the F-11 represented the peak of the piston engine
aircraft design. During testing, even contemporary jet fighters had
difficulty in getting a good shot at it.
The famous aviator, Howard Hughes was obsessed with speed and setting
records. He used a custom made single engine aircraft to capture US
speed and distance records and commercially built machines to win world
records. Not being satisfied with his record time around the world, he
had his engineers start on a twin engine project for his next attempt.
The beginning of WWII in Europe interfered with his plans because of
restrictions placed on high performance engines, which he needed to
complete the plane now called D-2. In order to obtain the engines he
wanted and try to recoup some of the cost in developing the D-2, he
offered it to the Army Air Force. The plane was too big for a fighter
and had inadequate capacity for a bomber therefore it was suggested to
be used as a dedicated reconnaissance aircraft. Most recon aircraft of
the time were modification of existing types. However, it was built out
of molded plywood; while this type of construction resulted in a smooth
surface required for high speed flight, the AAF did not want a wooden
combat aircraft. Hughes desired a military contract and after prolong
negations, his designers came up with the D 5 concept that finally
became the F-11, the F designation for photorecon.

The delay in being given a contact is not the main reason that the F-11
missed participating in WWII. The demand for the engine in other
aircraft already in production prevented any being delivered so that the
F-11 test flights could be completed in time. When the F-11 finally flew
in April 1946, the first flight ended in a crash with Hughes at the
controls. Two more F-11 were finished and delivered to the now US Air
Force. While it was a great performing aircraft, budget cuts and jet
aircraft prevented the F-11, later XR-11, from entering into productions
or operation.
Execuform's
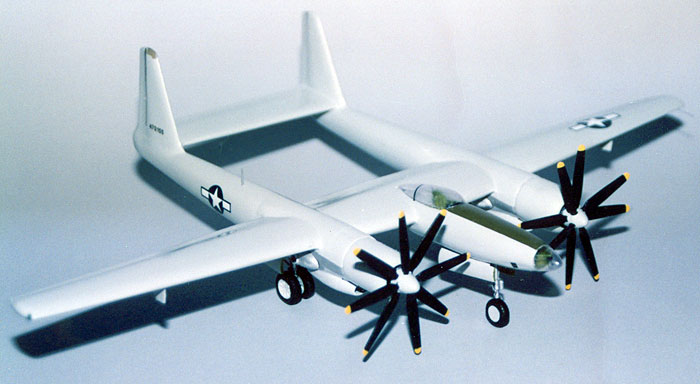
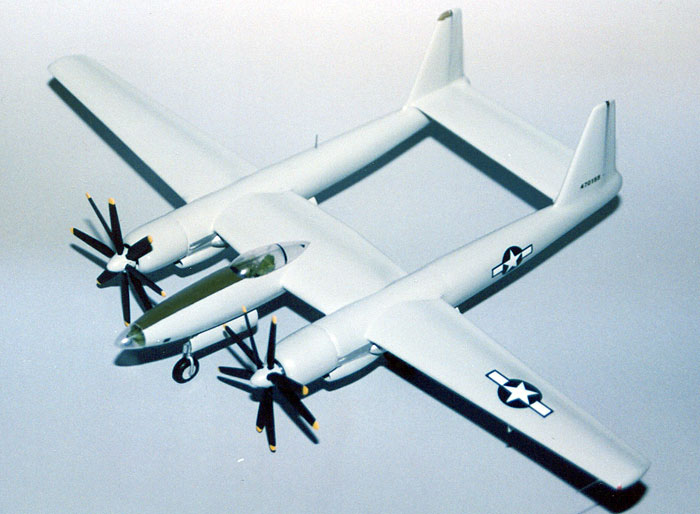
1/72 scale Vacform F-11
|
I came across the many F-11 years ago. My references date from the
1970ís. Running out of things to build, I was planning a scratchbuild
effort. Procrastinating again came to my rescue as Execuform offered the
F-11 as a vacuform kit in the late 80s. About a year ago I decided to
build the kit and started the process of freeing the molded parts from
the sheets. The pieces were waiting for some type of progress until last
month when I heard of a movie called the Aviator that was about Hughes.
I wasnít interested because there were other films made about him
before. But this one was different, while the other films used a P-38
Lighting to represent the F-11, this movie went to the trouble of
depicting the F-11. Hurray for big budgets and CGI technology. Of course
now I had to finish the F-11.
I donít want to say the Execuform kit is a difficult kit. Iím thankful
that it was available, However this project consumed a whole tube of
filler and six sheets of sanding paper. But it was complete with parts
for the counter-rotating props and landing gear made out white metal. It
also contained resin cast wheels as well as a nice set of drawings and
good instructions.

A big challenge in constructing any vacuform kit is sanding down the
shaped pieces after they are removed from the sheet. If you are not
careful, due to the unequal force of your fingers, the part may not come
out evenly sanded and the seam winds up not being a straight line. This
shows up as an irregular shape structure on the model. To avoid this, I
used a flat piece of wood taped to the top of the wings to apply even
pressure across them while sanding. This worked out great.
The tail booms were held by a piece of wood that was first cut and
sanded to conform with the pieces before they were removed from the
sheet, this also provided something easier to grip. Final results were a
straight edge between the tail boom halves.
Testorís liquid cement quickly joined the pieces and held the thin
trailing edges of the wings and tail together.
 Included
in the information was both interior and exterior color suggestions. I
felt that the recommended exterior gray was too dark based on the photos
I had and lighten it up a bit to match the gloss gray of the early P-80.
The model was finished with Testorís enamels. Included
in the information was both interior and exterior color suggestions. I
felt that the recommended exterior gray was too dark based on the photos
I had and lighten it up a bit to match the gloss gray of the early P-80.
The model was finished with Testorís enamels.
There were bare metal surfaces on the F-11 and these were depicted
using Bare Metal Foil.
Decals came from after market sheets.
To attach the white metal landing gear parts to the fuselage and the
wheels, super glue or CA was used. A minimal cockpit was created, and
finally the canopy was attached with canopy glue.

Two really trick tasks was mating the canopy and creating the props.
Only one canopy was provided with the kit and I wanted to avoid ruining
it. I poured resin inside the canopy after applying mold release and
once cured removed it and used that to cut and file to match the
cockpit. When I was satisfied with its fit, it was then used as a
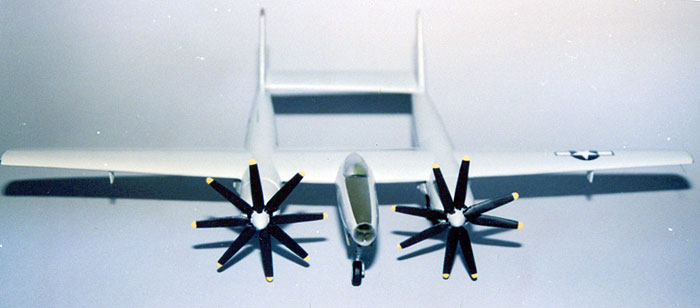
template to cut the canopy. Pour A Cast resin helped in making the props
too. I could not see an easy way to cut up the spinner to fit around the
eight props blades. The resin was again poured into the piece, but this
time I did not remove it. It provided a solid base to drill into and
firmly hold the blades. The weight of the metal props is needed to make
the model sit on its nose wheel.
The F-11 was a large aircraft. Its wingspan was only two feet shorter
than the span of a B-17! This results in a model with a nearly 17 inch
wingspan in 1/72 scale.
It is an impressive model and definitely belongs in a post WWII
collection; I hope I can enjoy the movie after spending so much time in
researching the project!
Model, Images and Text Copyright ©
2005 by Tom Conte
Page Created 18 January, 2005
Last Updated
17 January, 2005
Back to
HyperScale Main Page |
Home
| What's New |
Features |
Gallery |
Reviews |
Reference |
Forum |
Search