Lets take a trip on the "way back machine". This is one of the oldest
models still existing in my completed models collection. I finished this
model back in August of 1982, 22 years ago and long before I developed
many of the modeling techniques I regularly use today. It is only the
second model that I ever built with an air brush.
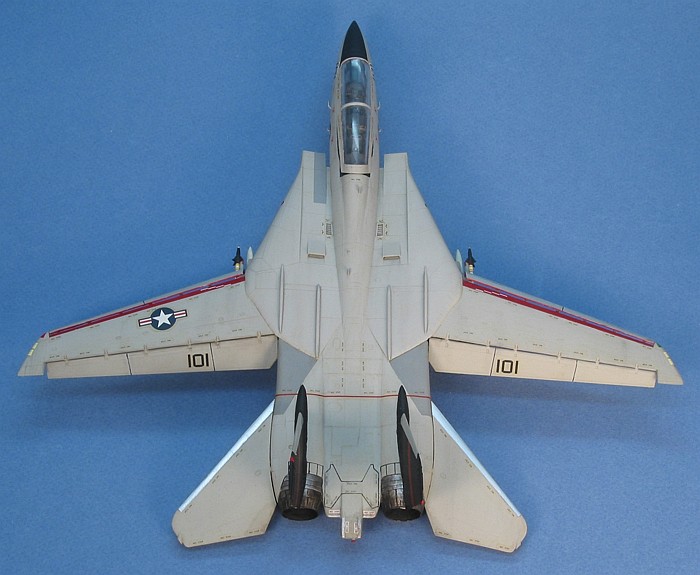
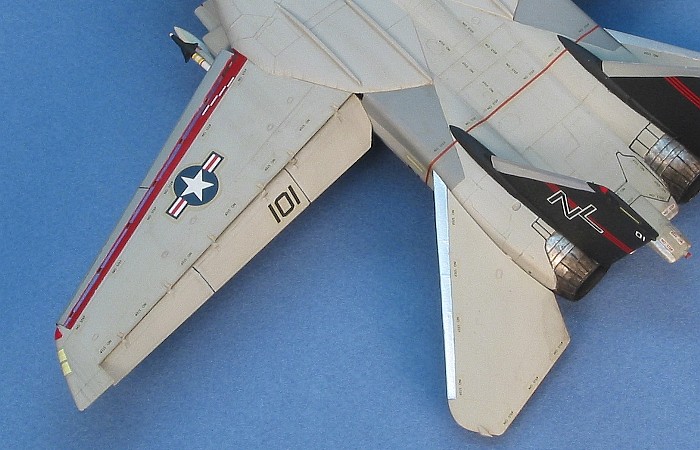
This is the original Hasegawa F-14 Tomcat in 1/72nd scale, raised panel
lines and all. Back when this kit was relatively new (it's only a
collector's item now), two US Navy Tomcats from VF-41 "Black Aces"
downed a pair of Libyan Su 22 "Fitters". This was "first blood" for the
Tomcat, which at that time had already been in Naval service for nearly
a decade.
When SuperScale released decals for building the two Tomcats that made
this historic event, a friend and I decided to each built one of the
Tomcats. We had tried on several occasions (to no avail) to build
complimentary models that we could display together. We thought this
time it might actually happen. In the end, it did not. My friend ended
up working an F-18 (that he never finished) and I changed the unit
markings of my Tomcat to be VF-51 "Screamin' Eagles".
Improvements
Even at this early stage in my model building, I recognized the
potential for some extra detailing to this otherwise ordinary kit.
Having just learned of Detail & Scale books and purchased the original
F-14 volume, I found the kit was quite lacking in some details - mainly
in the cockpit. I decided to fix the problems. I did the following to
the kit:
-
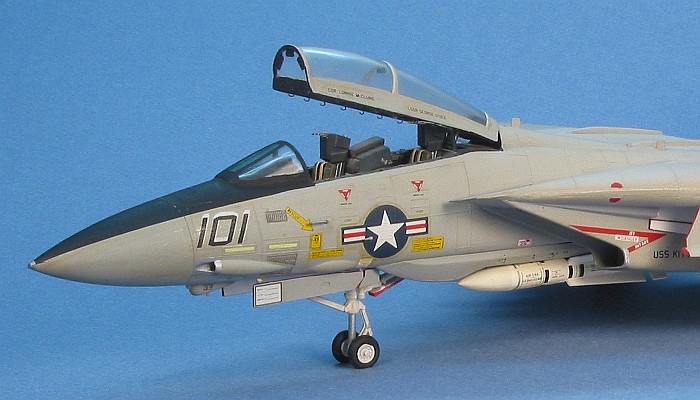
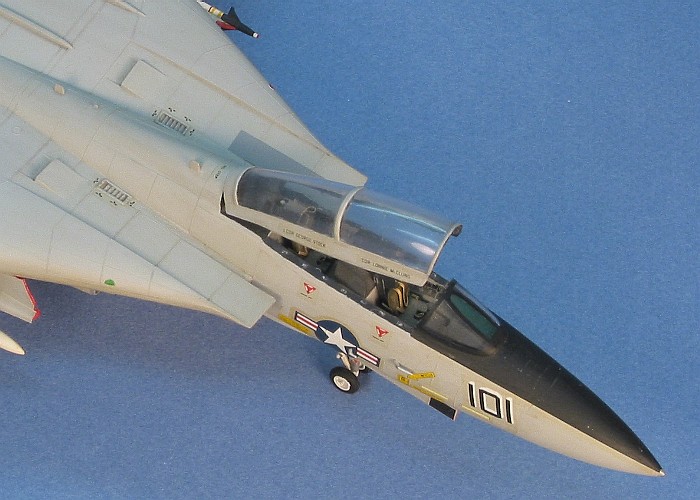
I scratch built a new cockpit
interior, including scratch building two ejection seats. The
instrument panels were then decaled using the kit decals (I was
ambitious, not masochistic).
-
I did not like the Hasegawa canopy as
it was shaped funny (in my opinion) and had the center framing
member too far forward. So, I replaced the Hasegawa canopy with one
stolen from an MPC kit. I maintained the Hasegawa windscreen,
though, as the MPC windscreen did not fit the Hasegawa kit fuselage
very well.
-
A added latching hooks and rear view
mirrors into the MPC canopy.
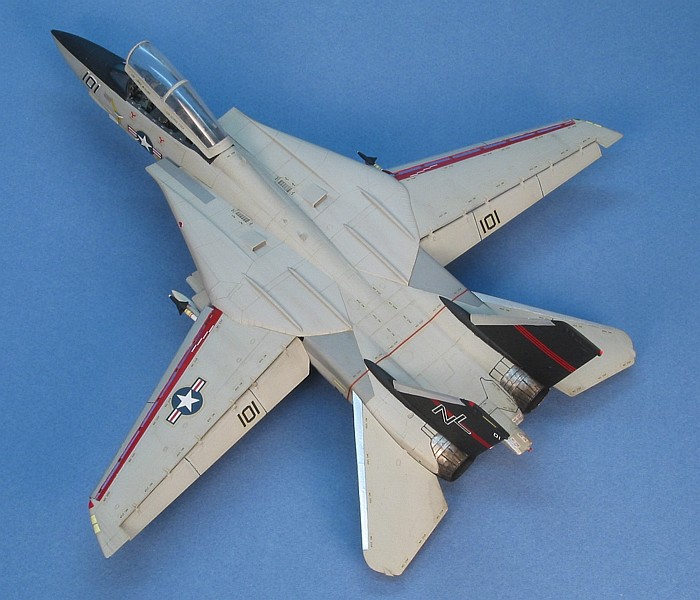
-
I cut and repositioned the wing flaps
in the lowered position. This "locked" the wings in the fully
un-swept position and forced me to build up the wing glove bladders
to fill the slot that the kit's moving wings slid into and out of.
-
Likewise, I cut and repositioned the
wing slats in the lowered position.
-
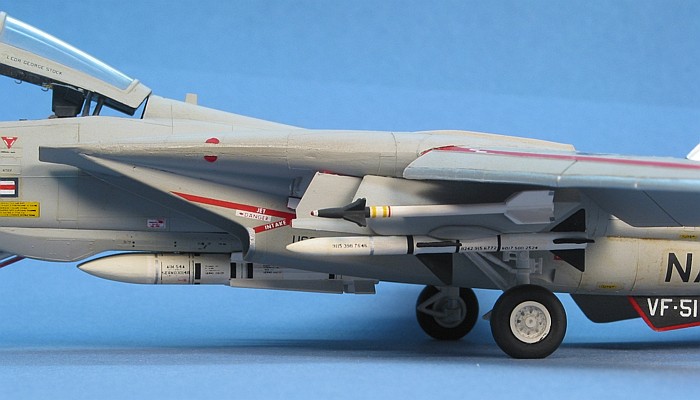
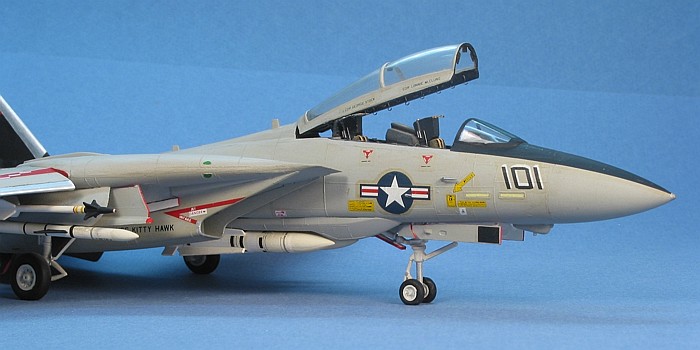
I modified the wing glove weapons
pylons from the kit provided style used on AIM-54 Phoenix missiles
to the style that is used for AIM-7 Sparrow missiles.
-
I further modified the wing glove
pylons to incorporate the shoulder mounted AIM-9 Sidewinder missile
rails.
I substituted replacement weapons taken from the (at that time) new
Hasegawa weapons sets. These included:
-
3 AIM-7F Sparrow missiles
-
2 AIM-9L Sidewinder missiles
-
2 AIM-54A Phoenix missiles
Several years after I did all the work to detail out this Tomcat
model, Hasegawa issued a new kit of the Tomcat in 1/72nd scale using all
new molds that provided every one of these details right in the box. I
guess I was just a little ahead of my time.
I used Polly-S acrylic and Testor's "Little Bottle" enamel paints to
finish the model. The camouflage is the overall Light Gull Gray
(F.S.36440) scheme. This was the standard camouflage for the Tomcat in
the period just before low-vis markings became vogue. For all the
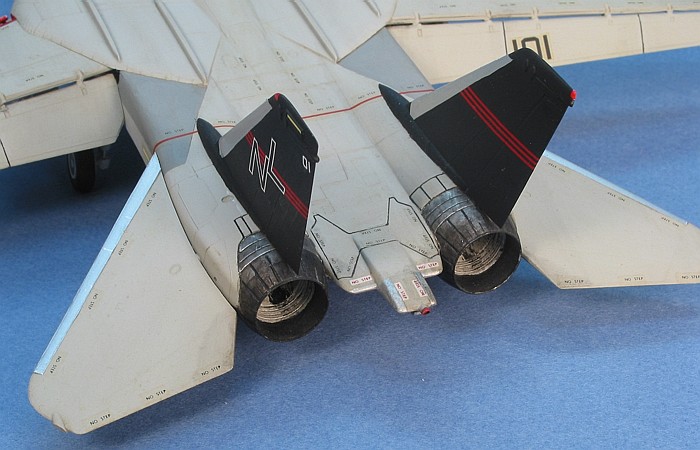
natural metal areas, I applied common household aluminum foil using foil
adhesive from MicroScale (now SuperScale). This includes the engine
exhaust areas as well as all the wing and tail leading edges.
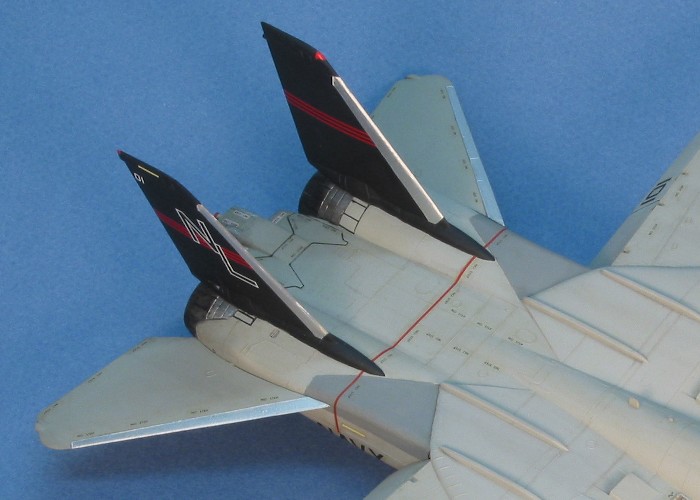
The decals come from two MicroScale decal sheets, 72-296 for the unit
markings of VF-51 "Screamin' Eagles" and 72-248 for the aircraft data
markings. Some are also the kit decals (printed by Scale Master), like
for the national insignia and NAVY titles. The kit decals have not
faired too well over the years with the clear film and decal adhesive
starting to turn a medium brown-ish color. The MicroScale decals have
faired much better with very little yellowing.
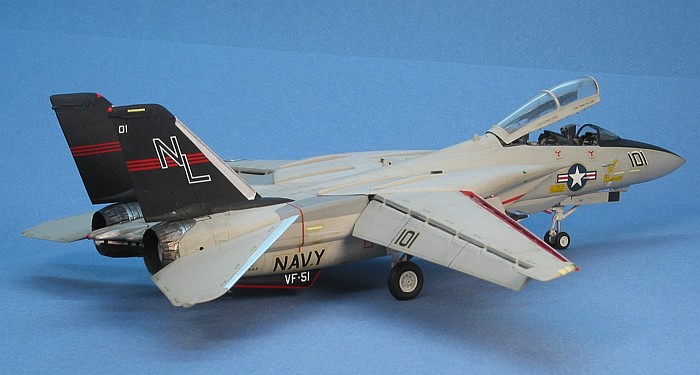
I had yet to develop any of the now standard weathering techniques
that I use today. I weathered the model mostly using children's
watercolor paints. I would swipe a wet finger over the watercolor brick,
then rub the model with my dirty finger. The process worked rather well
for being so low-tech. I also experimented with diluted enamel paint
washes. Since the base color was an acrylic, I felt safe applying the
enamel wash over it. I applied the washes over the flat paint and they
ran everywhere. I learned much later that gloss finishes are much easier
to control the washes. I completed the weathering with a little silver
dry-brushing to pop out the kit's detailing.
|
Additional Images and Project
Summary |
Click the
thumbnails below to view images full-sized.
Click the "Back" arrow on your browser to return to this page.
|
|
|
Project Statistics |
|
Completion Date: |
August, 1982 |
|
Total Building
Time: |
46 |
|
Research: |
2.0 |
|
Construction: |
12.0 |
|
Painting
(includes creation and printing of custom decals): |
15.0 |
|
Decals / Markings
(includes creating and printing custom decals): |
5.0 |
|
Extra Detailing /
Conversion: |
12.0 |
|
| |
Model, Description and Images Copyright © 2004 by
David Aungst
 Home
| What's New |
Features |
Gallery |
Reviews |
Reference |
Forum |
Search
Home
| What's New |
Features |
Gallery |
Reviews |
Reference |
Forum |
Search