|
Hasegawa & Academy 1/48
scale kitbash
Oh no, not another
Tomcat!
by
Fariborz “Fred” Shammas
|
 |
|
Grumman F-14A
Tomcat |

Hasegawa's
1/48 scale F-14A Tomcat is available online from Squadron.com
This is my first article submitting to HyperScale but I have been
posting my pictures on HyperScale’s Plastic Pix forum for some time,
featuring my Middle Eastern air force collection.
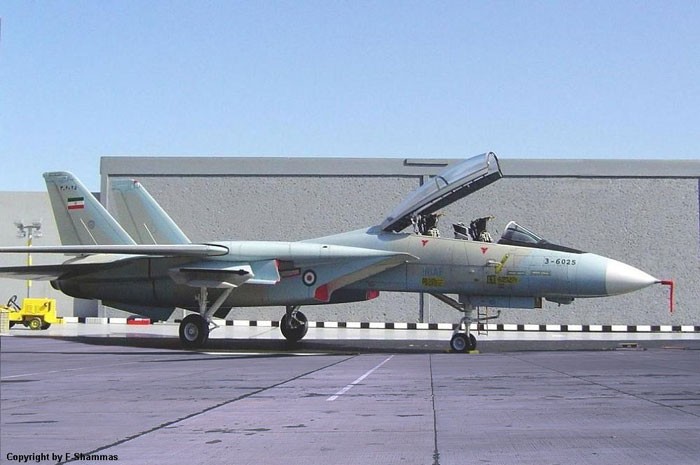
As a die-hard F-14 nut, I was thrilled to see the “new” IRIAF low
visibility gray scheme in Tom Cooper’s Osprey title, Iranian F-14 Tomcat
Units in Combat. Having burnt out on repeated iterations of the “Asia
Minor” scheme for this venerable blowtorch, I had to give this new look
a try.
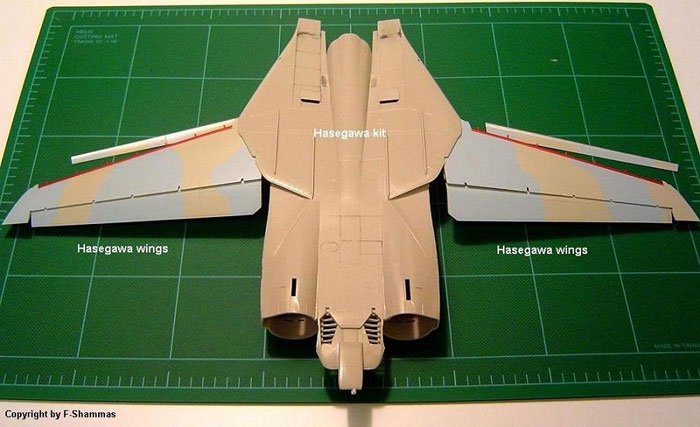
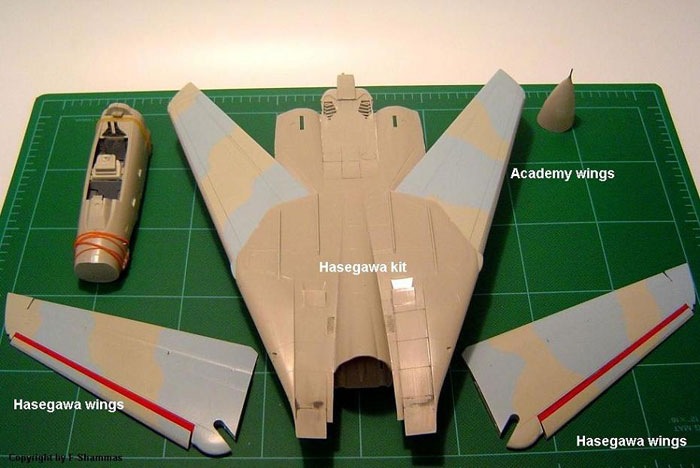
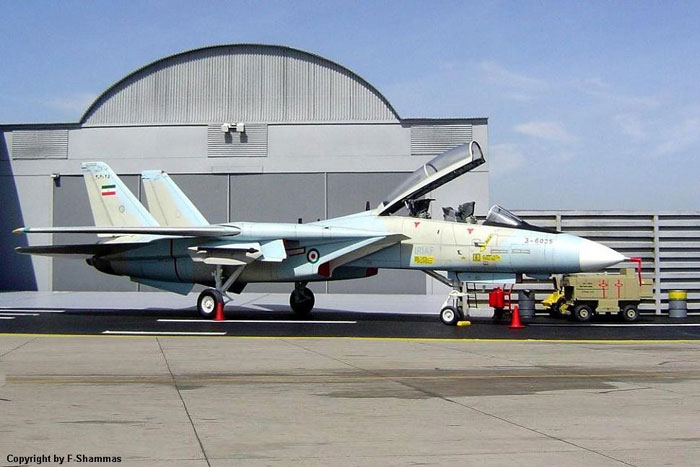
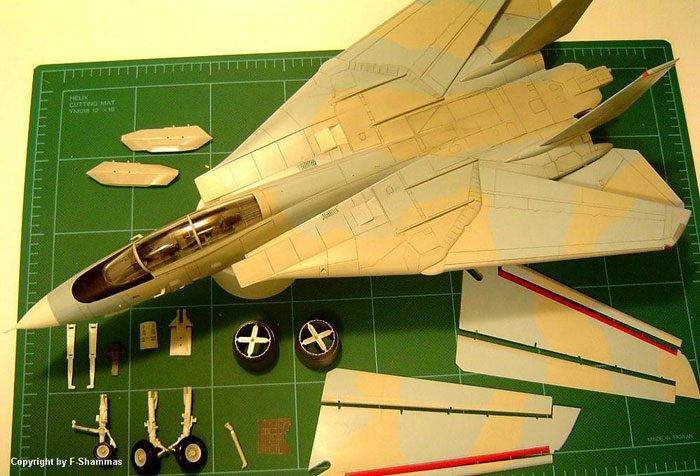
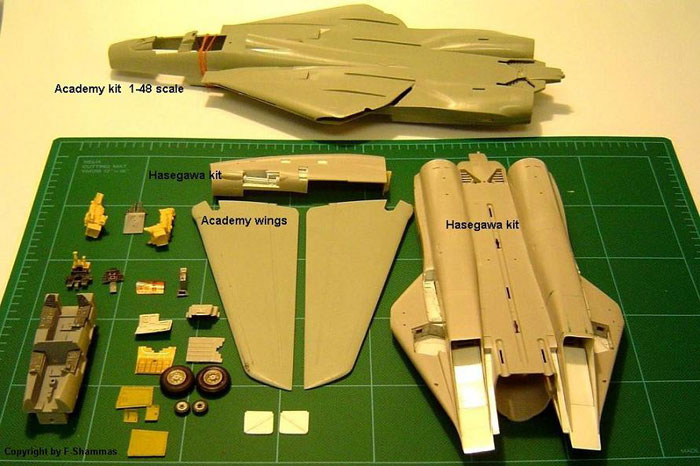
This model is a combination of the Hasegawa F-14A fuselage, and the
Academy/Minicraft F-14 wings.
Why do I combine these two kits?
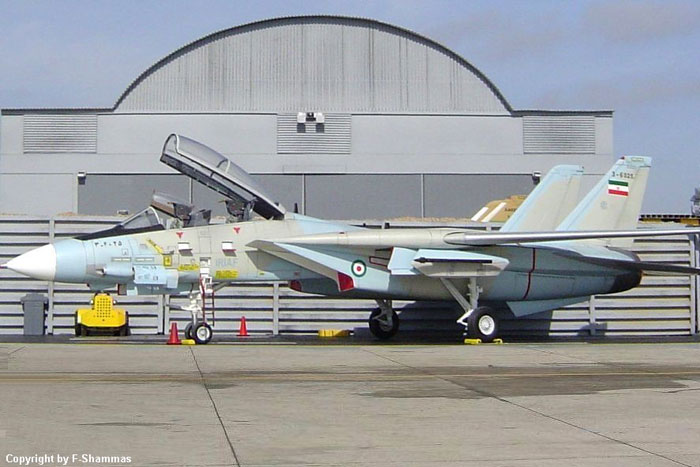
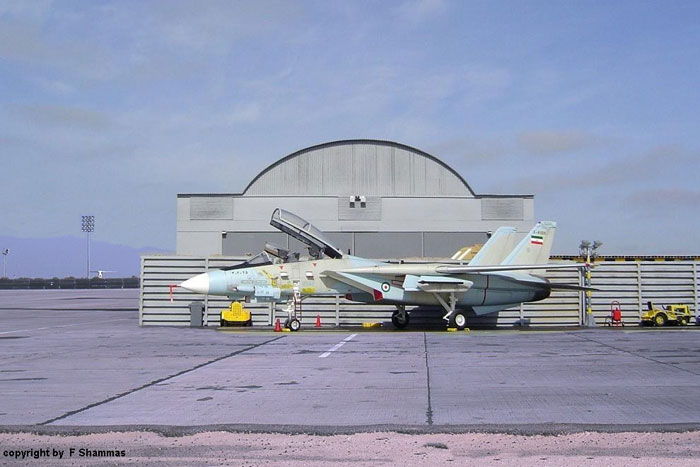
Because it offers me the flexibility to install the
wings in either the extended or fully swept positions, which comes in
handy when photographing my models.
All the pictures are taken by myself.
Construction
I will keep this to a minimum.
I built both the Hasegawa and Academy wings up separate from the
fuselage, and they are easily interchangeable as seen in the photos.
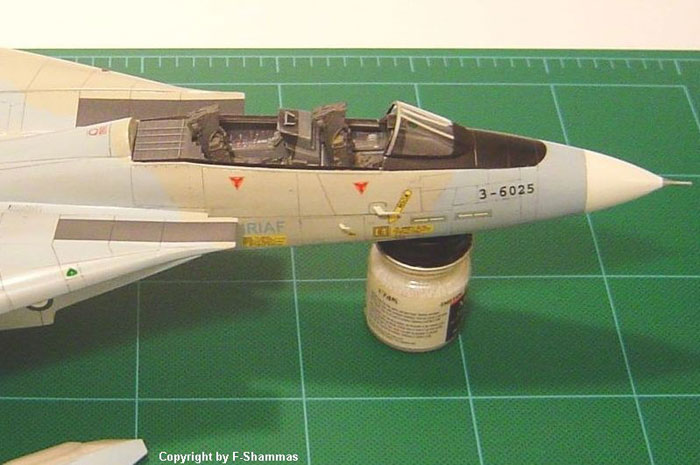
Most readers know that the Hasegawa F-14 is not the most user-friendly
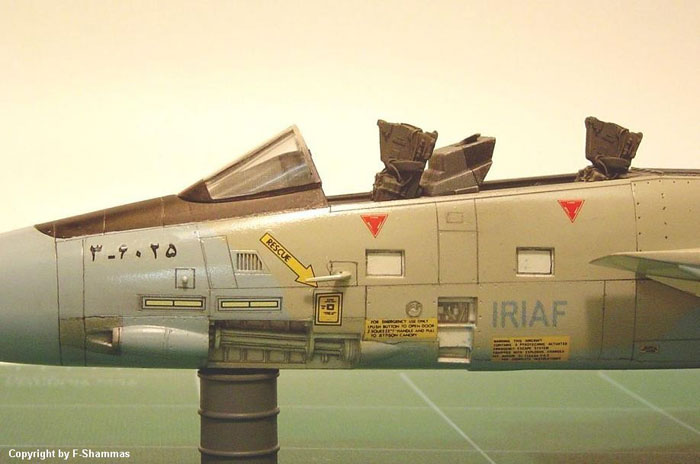
kit, but it is the most accurate. I also used some Verlinden accessories
for the ejection seats, as well as the gun gas vent door on the left
side of the nose.
Click the
thumbnails below to view images full-sized:
Most difficulties in construction were with the engine
intakes and mating them with the lower fuselage. Much adjustment was
required. The rest of the nose/fuselage/empennage construction was
trouble-free, with the usual amount of tweaking and minor adjustment.
Painting
 Using
the multi-view illustrations on page 56 of Tom Cooper’s book as a guide,
as well as the photos taken from the left and right sides, I started by
painting the fuselage assembly and wings with Model Master “Russian
Fulcrum Grey”. Using
the multi-view illustrations on page 56 of Tom Cooper’s book as a guide,
as well as the photos taken from the left and right sides, I started by
painting the fuselage assembly and wings with Model Master “Russian
Fulcrum Grey”.
After allowing this to dry for a couple of days, I then
applied Model Master “Flanker Medium Blue”.
As usual, I thinned my paints with Testor’s liquid
cement. Suffice to say, the paint has sufficient ‘Bite” to stay anchored
to the plastic…
Decals
I started by spraying the model overall with Testor’s
Glosscoat. After that, I applied the “IRIAF” markings, which were made
by my friend Let.
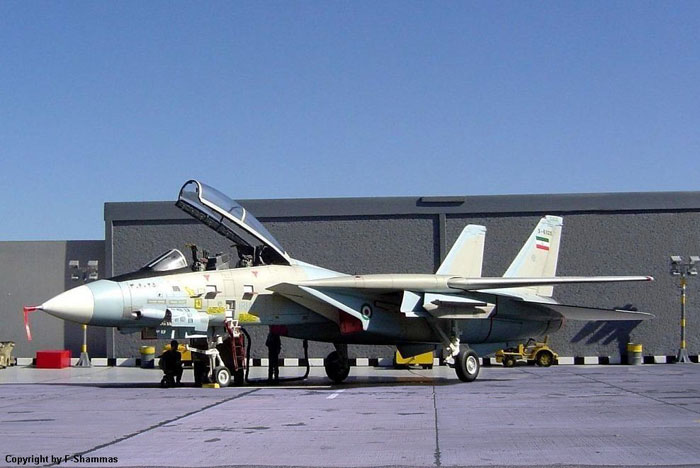
Then came the Iranian flags and national insignia. I had some of these
printed onto clear decal paper, but since the white was not printed, I
had to lay down a white background for the white areas first. Once that
was done, I laid down the flag and roundel insignias. Once decaling was
complete, I applied another gloss coat to seal the decals, and then I
followed that with a coat of clear flat. I used a pencil to highlight
the recessed panel lines prior to decaling, which is a little different
from how most people do things.
The rest of construction was uneventful.
Hope you like it!
Click the
thumbnails below to view images full-sized.
Click the "Back" arrow on your browser to return to this page:
Text, Models and Images Copyright © 2005 by
Fariborz “Fred” Shammas
Page Created 27 May, 2005
Last Updated
27 May, 2005
Back to
HyperScale Main Page |
 Home
| What's New |
Features |
Gallery |
Reviews |
Reference |
Forum |
Search
Home
| What's New |
Features |
Gallery |
Reviews |
Reference |
Forum |
Search