|
Hasegawa's
1/48 scale
F-14A Tomcat
by Hubert Ortinger
|
 |
|
Grumman F-14A Tomcat |

Hasegawa's 1/48 scale F-14A Tomcat is
available online from Squadron
The development of the F-14 as "Fleet Defenders" began end of the
1960s as replacement for the F-4 Phantom. The Tomcat now represents the
oldest combat aircraft of the armed forces of the USA. All samples
possess a wing unit on variable-sweep technology, which should optimize
the flight behavior in different speed ranges. All versions are two
seaters, whereby the pilot sit in front and the "radar intercepting
officer” in the back . The mostly carrier supported employment as air
superiority fighters with large range serves primarily the spacious air
isolation for which the airplane is equipped with a highly developed
fire control system.
The superiority of the F-14 is based less on their agility than on their
ability owing to their high performance radar to already seize and fight
with long-range air-to-air guided missiles airborne targets at large
distance. The development potential of the F-14 was limited, so the
different versions were only limited to detail improvements, in
particular stronger drive and more modern radar.
Since to the fleet introduction in 1972, the Tomcat lead the role of air
defense of the American fleet and is being replaced in service right
now, primarily by the newest F/A-18 F Super Hornet.
This Hasegawa's 1/48 scale F-14A Tomcat. Like the original the kit
also has already some years on the market, however it gives no abort
to the quality. The weaknesses of the kit lie in the detail, which can
be avoid by Aires (cockpit, wheel pits, engine discharge opening)
without too major expense. For my project I ordered still
Cutting Edge (wheels), Verlinden (weapon pit, avionics, ascent leader),
Aeromaster (Decals, Stencils) and CMK (figures).
The fun begins...
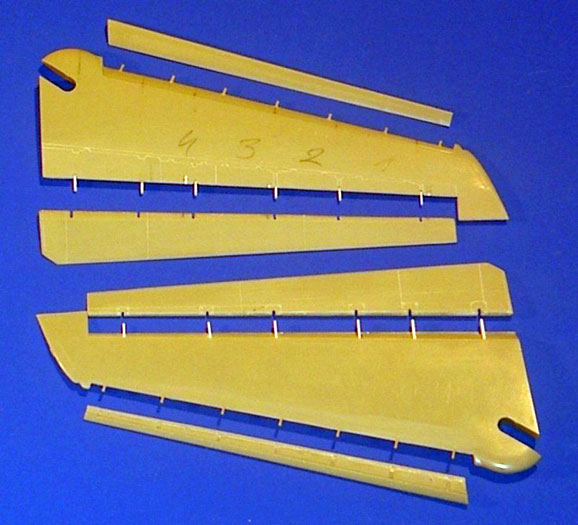
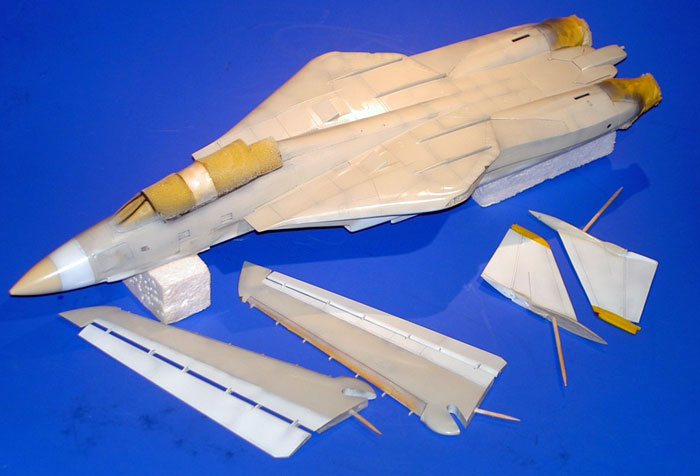
I began with the wings, and decided to represent these spread – witch
means slat and landing flaps driven out. Hasegawa plans this option,
however very simplified so the five triangular linking for the flaps had
to be carved from plastic card. The mechanism, which moves the flaps
should naturally also suggested. The position of the anchorages and the
situation of the spoilers on the top sides does not agree afterwards and
one are forced to be primed these to a large extent and then engraved
again. The slats however fit perfectly. The wings themselves, are put in
only later at the flanks.
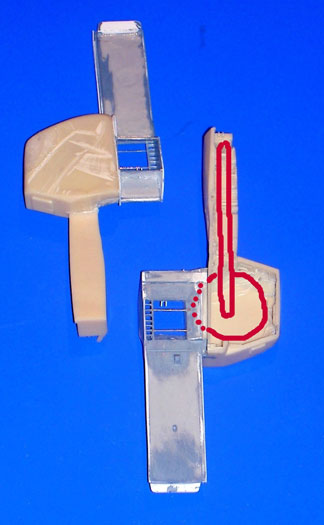
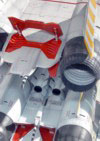
With many models one often sees a protective cover over the air intakes
of the engines, and I checked fast firmly why: The complicated
mechanism, which regulates the air flow into the engines, is not loved
by everyone to represent in detail. Original in each case two guide
plates direct the necessary amount of air to the engines or to an
opening in the pit upward by the trunk back in the free. I placed myself
to the challenge which required much improvisation in view of the Aires
landing gear wells, which were appropriate directly beside it . The
drying adaptation of the glued constructions from sheet did not want to
take an end, because the air ducts had to agree with the upper trunk
half were the output flaps was saw out and replaced from brass ones.
Still at the same time also the Intakes should be fit in.
Because for injection moulding-technically these are naturally
two-pieces and when sticking together a difficult accessible seam
develops. After complex sanding and a sumptuous color order I polished
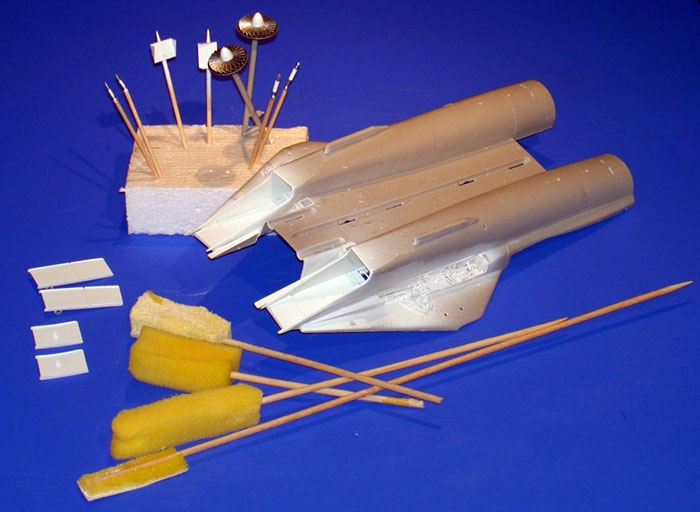
the channels with lapping compound and car polish on high gloss.
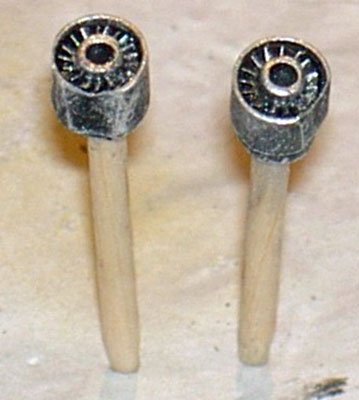
For this I stuck foam material bits on toothpicks.
After joining the upper and lower intake trunk you can see now downward
from above by the risers in the free. As conclusion still the hydraulic
cylinders are fit in. For me the design of the body did not promise
sufficient stability so I glued suitable columns between them which I
fumbled from the rear and in front in the inside.
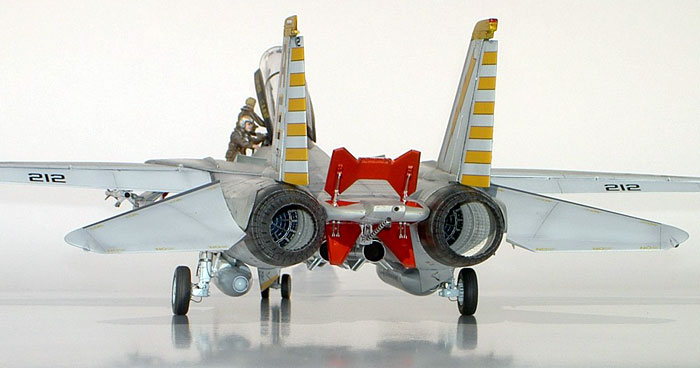
For finishing this section, only the engine discharge openings were
missing. The resin part of Aires is perfect, because smoothly and can
immediately painted after cleaning. To paint a formed pipe is not
straight easily! With well diluted white, shining color I brushed first
and then airbrushed to imitate the ceramic structure. A difficult
washing represents soot deposits. The engine shovels and the discharge
opening are painted and/or dry-brushed in different metal shades on
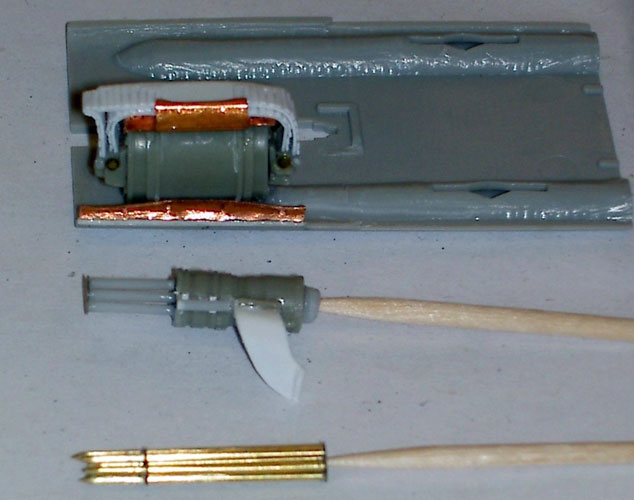
black undercoat. Quickly assigned the etched parts for the afterburner,
everything glued together and bonded into the tail.
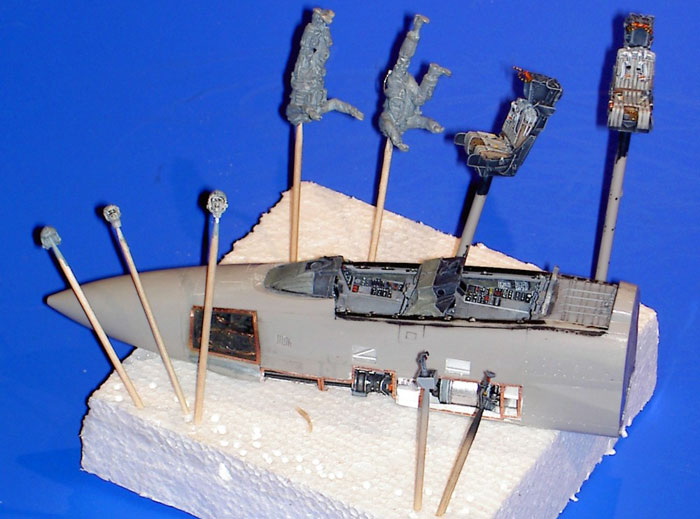
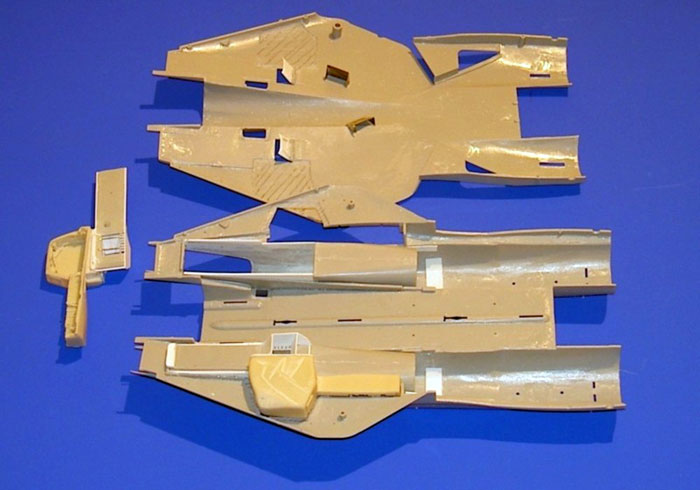
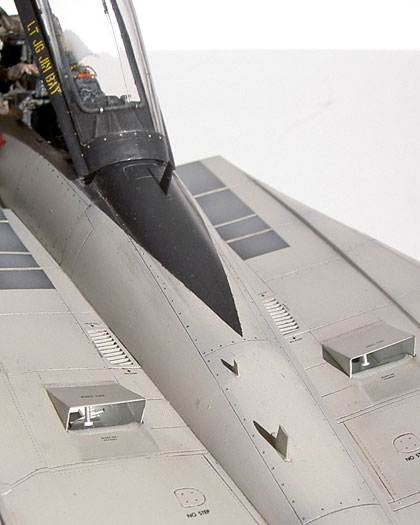
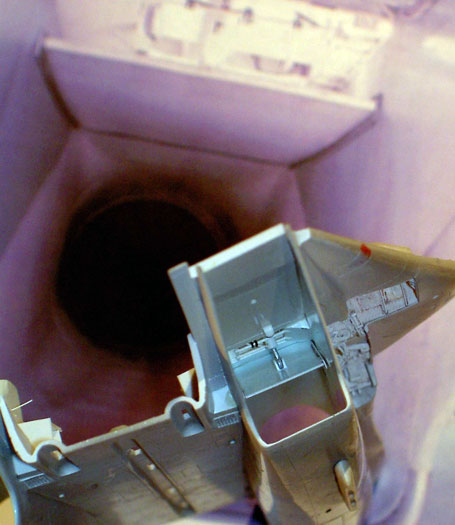
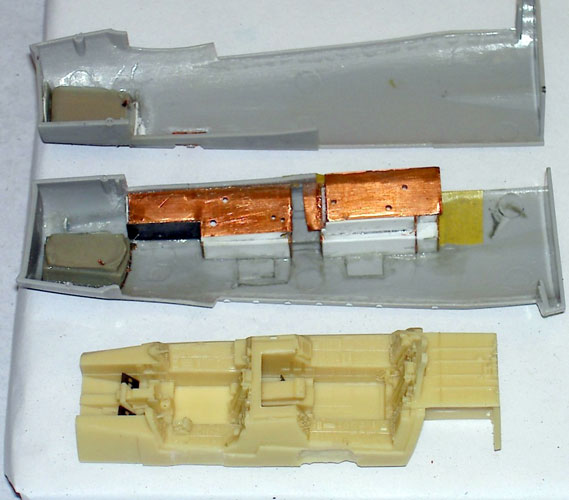
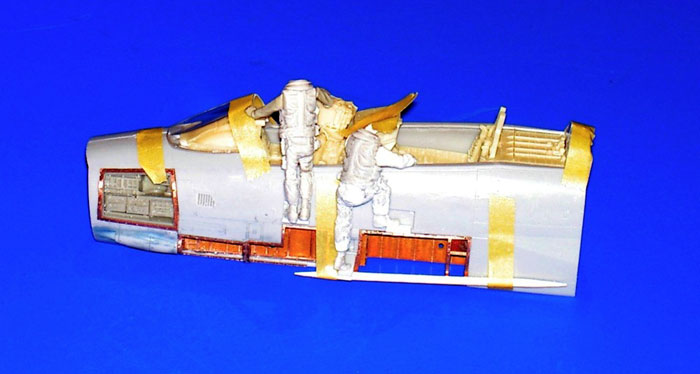
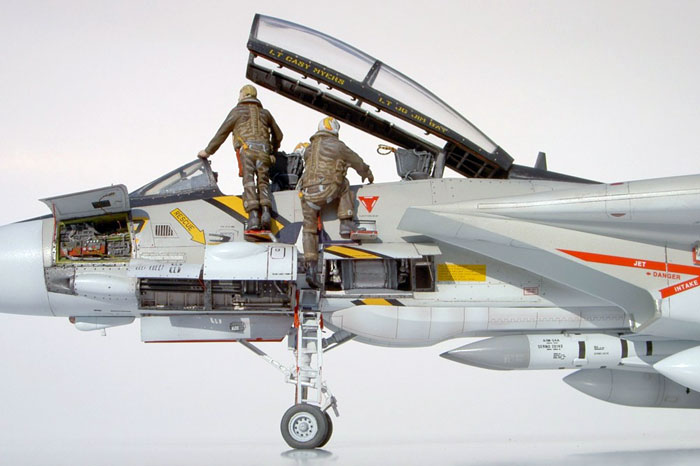
Cockpit
That the nose part is separate from the trunk turns out for the
forthcoming work as large advantage. The resin parts for the
installation are from different manufacturers, so they are not co-ordinated
and I had to work with mini milling cutter and the saw to granted each
detail its necessary place. Also here again some drying adaptation and
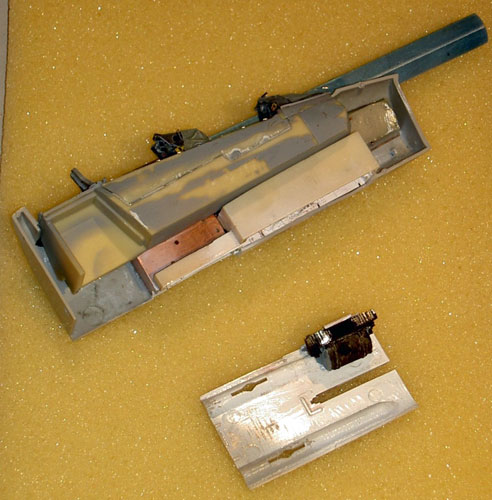
provisional building of the forward fuselage bowls up. In particular
with Verlinden the weapon pit needs a new rear wall and top side had to
be designed, since for this normally the Hasegawa forward wheel well
and/or the lower surface of the cockpit tub would have hold. Finally
everything joined itself and also the complexity of the ammunition belt
of the MK volcano was to manage with plastic profile bits into the
grasp.
The cockpit of Aires is top, only the hand grip of the "Rio" was lifted
out and set in easily modified with a new handlebar again. For the
cockpit framework I shifted new air supply pipes, which I bent from
plastic round bars over a source of fire after intensive detailed
studies. For the flanges I warmed up the ends and flatted them on a
knife blade. The bolting device mechanism also was partly refined
scratch and with help of the Eduard etchedset. I had a good idea with
the rear view mirrors with the etched pulpit struts, I take thin strips
of double-sided tape and fixed them to the transparent part so I did not
risk to crab the transparent parts!
Before painting, I stuck the ascending steps provisional on and began to
change and adapt the floats of the figures.
From the beginning I had a clear conception like it should look
afterwards because in the Squadron "Walk Around" were sufficient
suggestions. I amputated the legs and feet, and/or cut at the joints so
far with the saw, until they could be bent according to my desire
without changing the proportions too much. In my "figure remainder
crate" I still found enough useful arms and hands of different
manufacturers which I carved up and built up again form a natural body
attitude in accordance with my desire. Any columns and gaps were locked
generously with Milliput compound and after drying I carved dress folds
and missing details in again.
Especially the copilot's design was complicated and had to be developed
and modelled from milliput very trcky! Owing to its position some
remains hidden for the viewer. Head and helmet are optimal and must only
be painted. In addition I used oil and Enamel colors which I mixed also
among themselves.
At the same time I dedicated myself painting the cockpit (SM grey), the
ejection seats and avionics pits (SM black, zinc chromate) as well as
the wheel wells and weapon chamber (SM light-grey). After a unobtrusive
wash all components received a spraying veil again with lightened basic
colour, and/or with light-grey on white gloss. Here and there, to a
large extent naturally to the electronics still some cables with
thinnest wire were supplemented, the belts at the seats were completed
and the automatic cannon were rigged. The detail painting of the whole
one is not difficult actually, you only needs time, a calm hand and a
solvent that the color drying retarded. For gluing the nose part to the
trunk section I would have already wished myself a few taps, for better
embodying and aligning.
To the details...
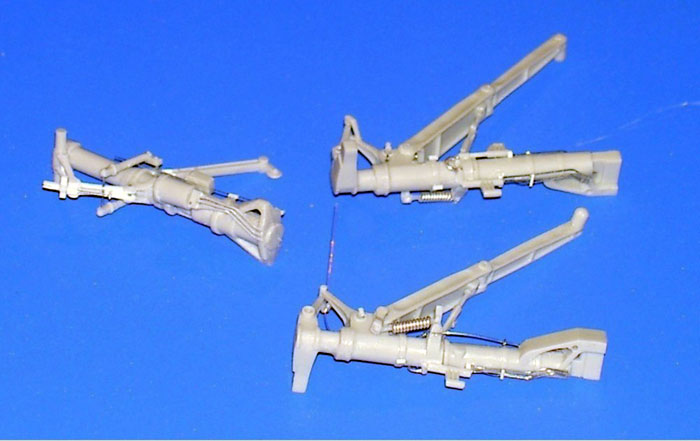
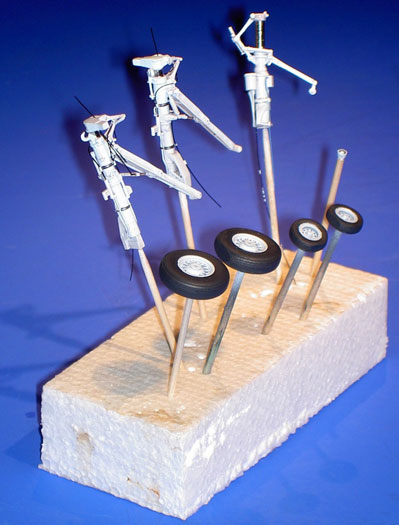
The cast-on stowing rings at the chassis legs were cleared away and
exchanged against home-made out of rod. I have tried to represent the
tangle of the hydraulic and brake hoses with stretched sprue and fishing
line. The device for hanging up into the catapult carriage were carved
away and designed again more explicit completely from profiles - the
same act to
the joint of the landing hook.
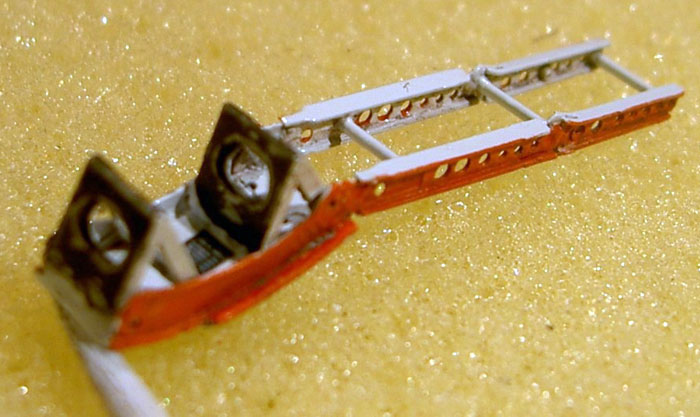
The embarking ladder from Verlinden looks pretty good, primarily if you
break through the plastic stages like the original. All maintenance
openings from brass (lime trees) shall bent realistically, the solid
buckles will better exchanged against punched.
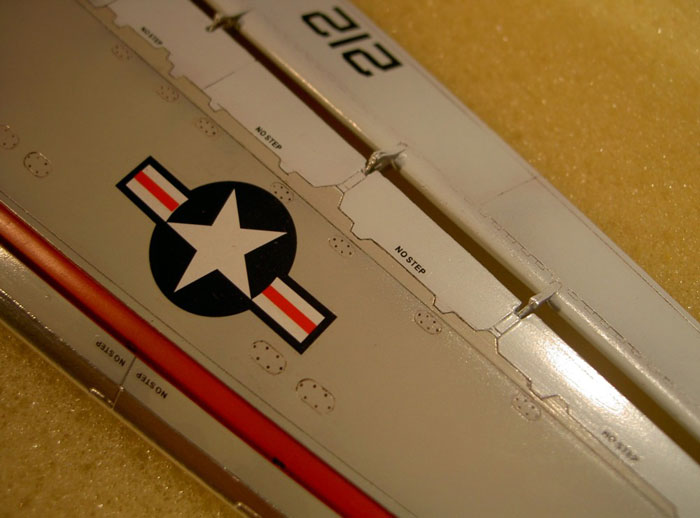
Which was noticeable to me more frequent with F-14 models , were
unpleasant columns at the transition, where the wings are slid into the
trunk. I took in the wings and lined the columns with normal paper. Into
the gaps on the exterior I strewed baking powder and trickled superglue
on it. Wing fast out and after drying everything sanded smooth. So I
achieved a perfect transition. To saw out the rudders now it depended
not more . It provoked me to represent the small flap on the right side
bent. Fixing the tail units themselves should wait until the lacquer
finish up, but before the Decals take place to be able to accomplish
possible repairs better.
To laminate the columns near the engines, the Beaver Tail had to widened
a minimum with sheet and putty. The airbrakes themselves became new
hinges and hydraulic pistons.
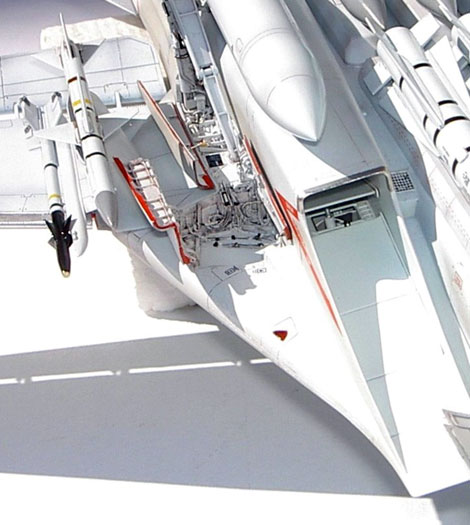
External Stores
If deciding for the combination of short distance (Sparrow,
Sidewinder) with long distace (AIM 54), and you still had nothing
accumulated, you are forced to buy all two weapon set's from Hasegawa .
For the “A”-version only tanks are attached to the kit. The rockets
stucks quickly and were placed aside on toothpicks to be painted. For
the later optical revaluation enough Decals are attached.
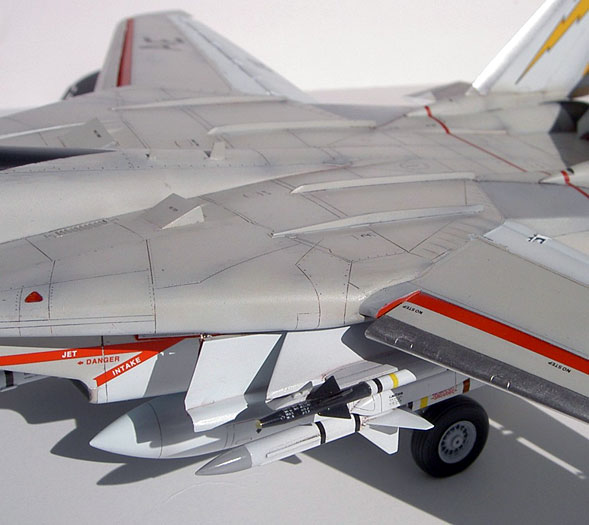
I did not want the weapons to stick flat on the Pylons so I tinkered
suitable Sway Braces and/or held her on distance with thin wire. That
looks substantially better!
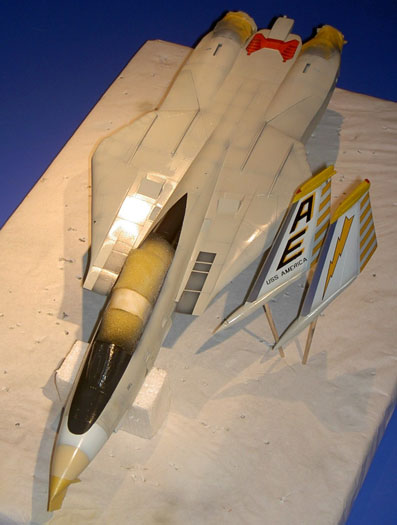
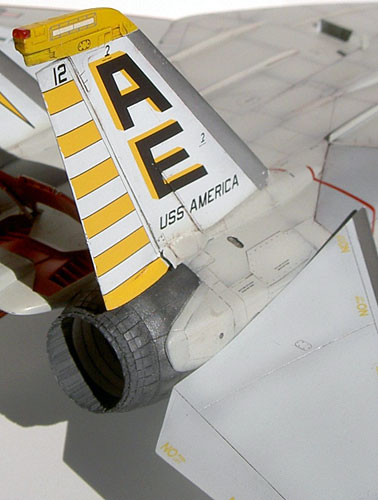
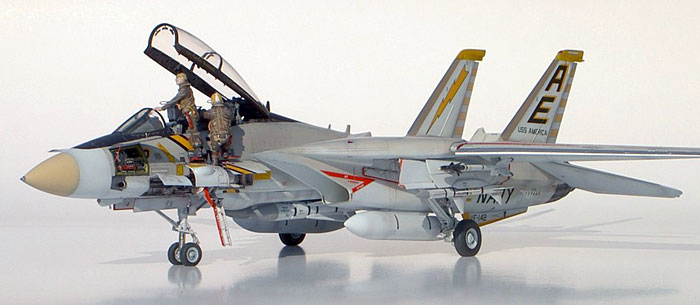
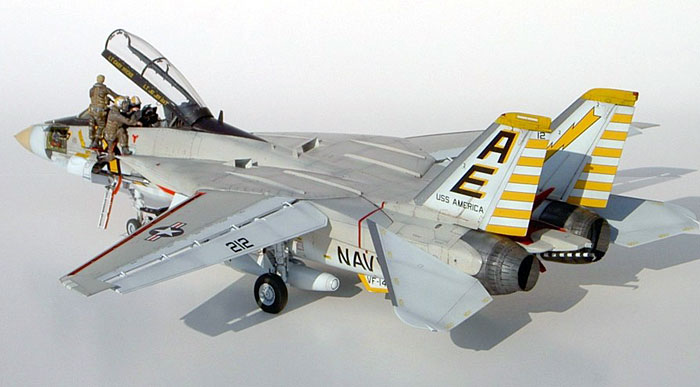
On the search for an obliging/pleasing marking I found it by "Aeromaster".
The F-14 A of the Vf-142 Ghost Riders of the aircraft carrier USS
America with it´s yellow strips and lightnings can really call "High
Visibility". For the lacquer finish first complex and extensive
pre-working were necessary. The open cockpit, all pits, the engine in
and discharge openings as well as the wheel housings were already
painted and had to be masked and taken off now, this was very
time-consuming.
Since I did not choose a too dark grey for the preshading , I wanted to
bring out strongly the engravings with Vandikbraun wash. Everything,
commenced with the chassis, over the lower surface up to the external
loads including Pylons ,that later should be white was primed with a
thin layer Revell light-grey semigloss. The top side in the same manner
in Revell grey semigloss. For the wavy dividing line I used a shape-cut
foam material fleece. After I airbrushed the "nose" in radome Tan,
masked it and the flexible trunk back segments for the bearing areas , I
lightened up the individual surface with the main colors Light Gull Grey
and white. For the white I set still traces from blue to intensify the
signal effect - in addition it should prevent yellowing. I advise
against a purely black glare shield. Anthracite coal, lightened with
tank-grey is better suitable for a realistic rendition in 1:48 scale.
When I installed the rudders I muffed the De-icer-edges so I provided
her with bare metal foil "flat aluminum", also the edges of the slats.
That worked out well, so that I directly disguised to do the edges of
the air intake thereby. The absorber pistons of the undercarriage
anyway! Off course in "chrome". The quality of the kits decals quality
are as good as those from Aeromaster so I foraged it and looked out the
best for my purposes. For the optimal processing I used SET and SOL from
Micro-Products. A renewed partial whash with artist oils imitated the
contamination of a Jet's in the employment.
Still a few manual repairs with basic colour and some engravings of
pasted oints with a needle , as well as a locking over loops with finest
Micro Mesh prepares all components for the final sealing. Trying to
underline a realistic appearance, I sprayed the tanks and rockets
shining, the lower surface semi gloss and the top side not too flat, as
I could present it to me also in reality. Since naturally the dust does
not stop before the finish I finally polished again everything with
finest sharpening fleece. That breaks the all too shining places and
lends to the flat ranges a silk- glow. After installing all components I
still brought the formation light/strips to shine with Humbrol “crystal
clear”.
Hasegawa's 1/48 scale F-14A Tomcat is still an awesome kit of an awesome aircraft, which can impress even
built out of the box.
However, finally everyone must decide, how much time, expenditure and
money he invest into its projects. I wanted to draw all registers and
receive few compromises. Another one builds three, four or still more
models in the same time, which possibly diminishes the purse at least
exactly the same.
The main thing is to have fun like the slogan: The journey is the
reward!
Click
the thumbnails below to view larger images:
Model, Images and Text Copyright ©
2006 by Hubert Ortinger
Page Created 29 Sepetmber, 2006
Last Updated
21 February, 2007
Back to
HyperScale Main Page |
 Home
| What's New |
Features |
Gallery |
Reviews |
Reference |
Forum |
Search
Home
| What's New |
Features |
Gallery |
Reviews |
Reference |
Forum |
Search