|
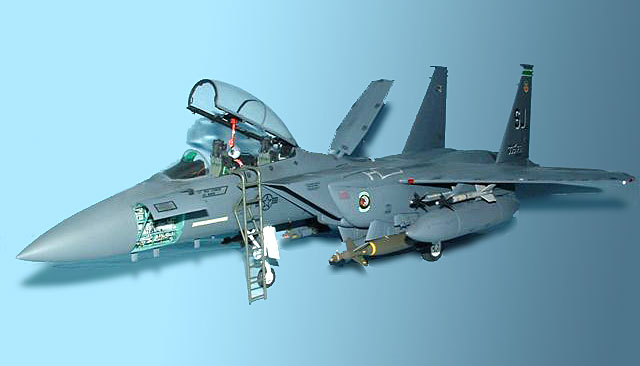
Tamiya's 1/32 scale
F-15E Strike Eagle
by Keith "Ghostmech" Pardini
|
 |
|
F-15E Strike Eagle |

Tamiya's
1/32 scale F-15E "Bunker Buster" is available online from
Squadron
Well, I finally did it! I built a plastic model from start to finish.
After collecting large scale kits here and there, for past several
years, I finally got up the nerve to tear into all that plastic, try new
techniques, and give one of them a chance to actually become a whole
aircraft. I, like most kids of my generation, built models the old
fashioned way. As I remember, it was a simple four step process.
-
Tear the part from the sprue tree (no
Exacto knives needed here as it came off, didn't it?)
-
Run a bead of tube glue along the
area the two parts meet (hopefully, not too much will ooze out).
-
Barring any leftover 'Paint by
Numbers' paints availability (to which I would hand paint the tires,
cockpit parts, or whatever else I felt like doing), I would soak the
decal sheet in water, then hurry to get all the decals on the
aircraft before they came floating to the top of the bowl, deciding
to "mate" in a useless mess.
-
This is probably the most merciful
step of this process, play with it until parts started to fall off
then throw it in a final flight of desperation to which the
imaginary pilot had no chance of survival
Fortunately (or unfortunately), girls, cars, girls, sports, music,
and girls became the focus of my later youth, so my interest in modeling
went by the way-side. Even though, building models lost out to career,
family, and cars, I never lost the desire to eventually get back into
it. Hence, I would buy a large scale (mostly Tamiya) car or aircraft
whenever I saw one that interested me.
After I retired from the Air Force in 2001, I figured it was a good time
to get back into modeling. I started searching the web to see what
modeling sites were out there, and that's where I came across HyperScale,
ARC, and Model Madness among others. The quality and detail of the
feature articles got me jazzed. The products, ideas, and techniques
others described were still foreign to me, so researching and asking
questions was a must. One negative aspect of seeing all those beautiful
models by the likes of Scott Murphy, Rodney Williams, and many others
was a feeling of inferiority. Seeing those highly detailed replicas had
me doubting I would never do one of my big (and fairly expensive) Tamiya
jets or race cars justice and thus, I was still a collector.
As time went on, I corresponded and read the HyperScale forum nearly
every day, eventually coming to the conclusion that many of the practices
and techniques were within my reach. I have an acquaintance, Capt. Dana
Vermeer (USAF Reserve) who is now an airline pilot, but had been an
F-15E driver in the 90's. I also had purchased an original Tamiya F-15E
years ago and now thought, what better imputes for a first project than
to build a plane that someone I knew had flown. The Tamiya kit already
had the correct decals (Seymour Johnson, 335th FS), so all I had to do
is change the pilots name and build it. It was also a perfect excuse to
try some of the add-on parts and techniques I’ve been reading about.
Needless to say, being my first model build, I had to buy a lot of
equipment and supplies that the experienced modeler takes for granted
(airbrush, paints, etc.).
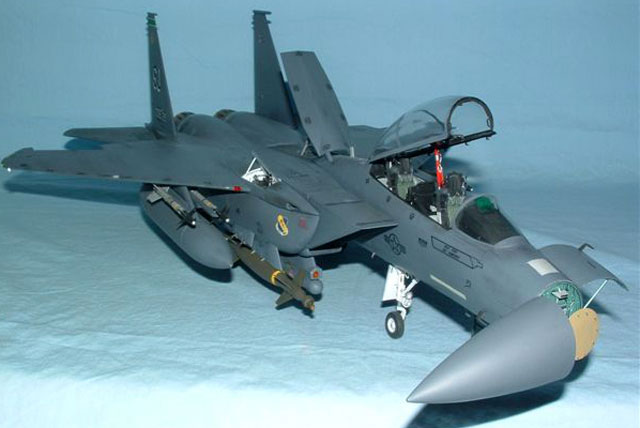
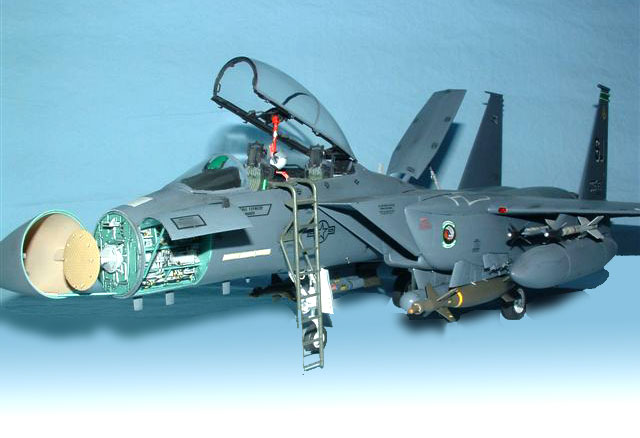
The Tamiya (60302) 1/32 F-15E Strike Eagle is a terrific kit,
undoubtedly the class of the field for all Strike Eagle models, even
now. I built it pretty much in-line with the instructions except where I
realized following the instructions would interfere with achieving the
correct look, like the intakes and exhausts.
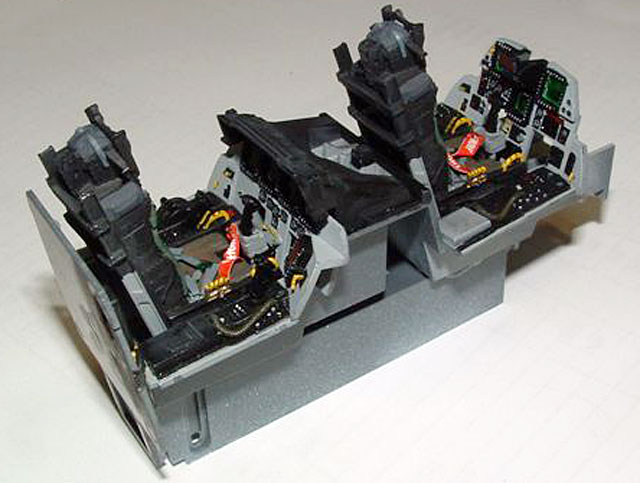
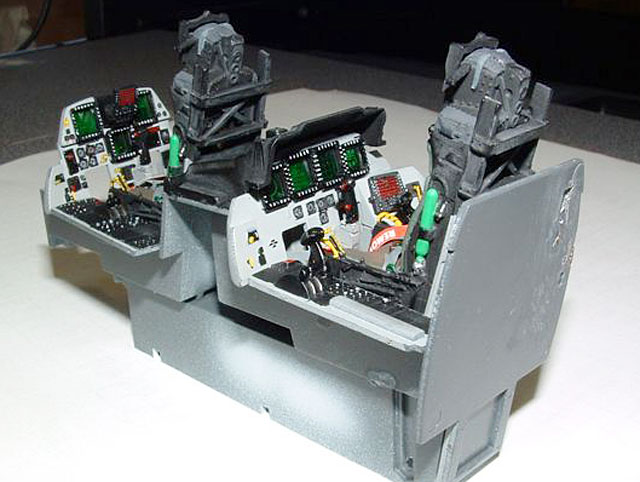
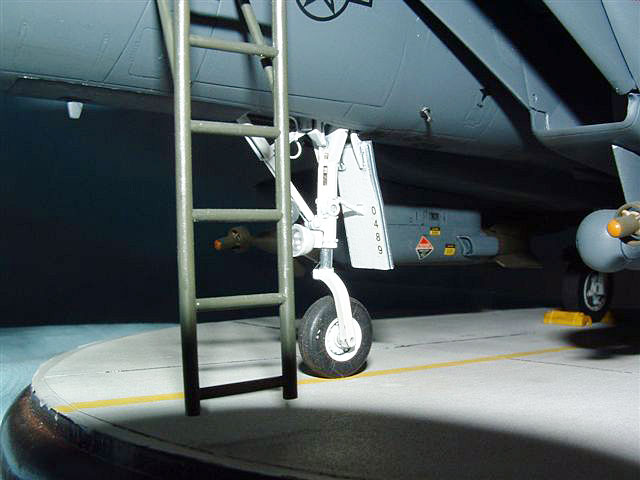
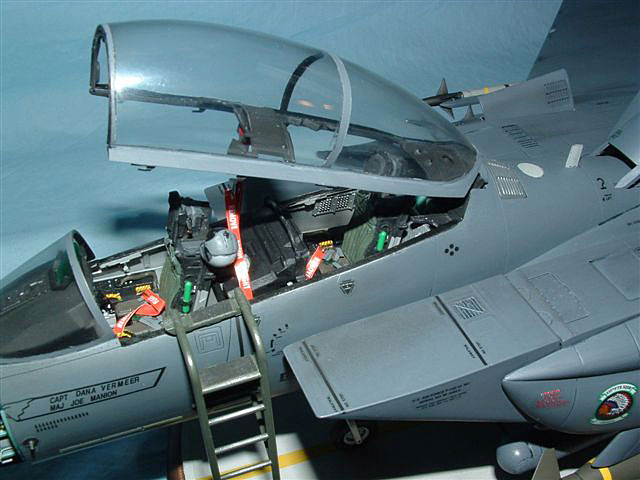
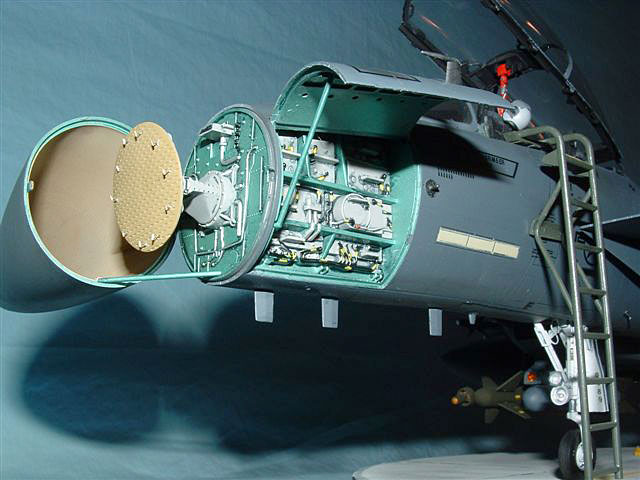
Construction started with the cockpit, which was enhanced with Cutting
Edge’s (CE) ejection seats and Eduard’s F-15E set. The seat rails and
rear bracing were from the kit seats as the CE seats don't come with
any. I added some Eduard PE parts, a little wiring to the back wall, and
a missing panel/handle to the rear seater’s right side panel. I don’t
know what this panel is for, but it appears to be some kind of release
handle.
Click the
thumbnails below to view larger images:
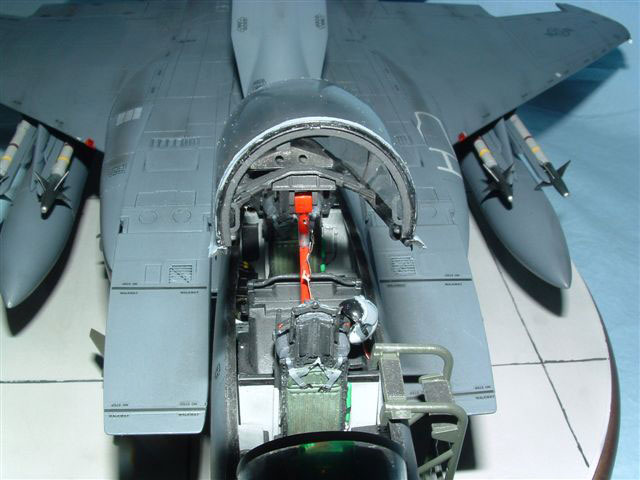
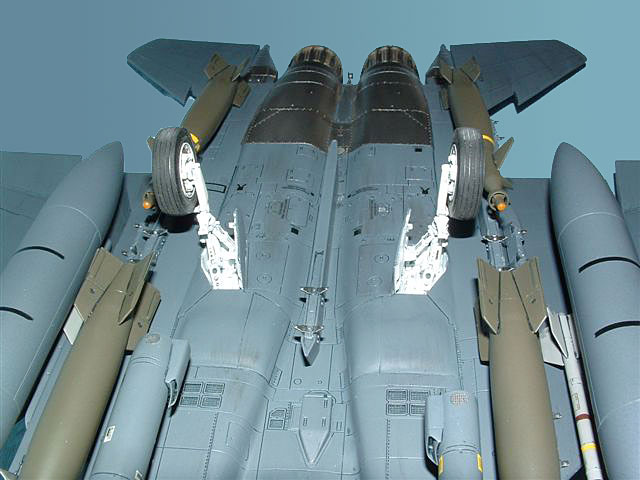
One area that became troublesome to me was the parting seams and
ejector pin marks in the intake trunks and exhaust tubes. I’m not sure
how they could have done things any different but in the future, I think
I would cut the intake in two, just behind the back wall of the main
landing gear wheel wells to aid in working the seams, then putting the
two parts back together and eliminate the splice seam. I would also
splice the exhaust tubes at their demarcation areas, working and
painting the sections by themselves and then putting them back together
later.
Anyway, I worked on those intake seams over and over again, feeling like
I was in the movie, Groundhog Day (with Bill Murray), but FINALLY
eliminated most of the seam line evidence.
A seamless aftermarket intake might be helpful but I don't think
there are any available for this application.
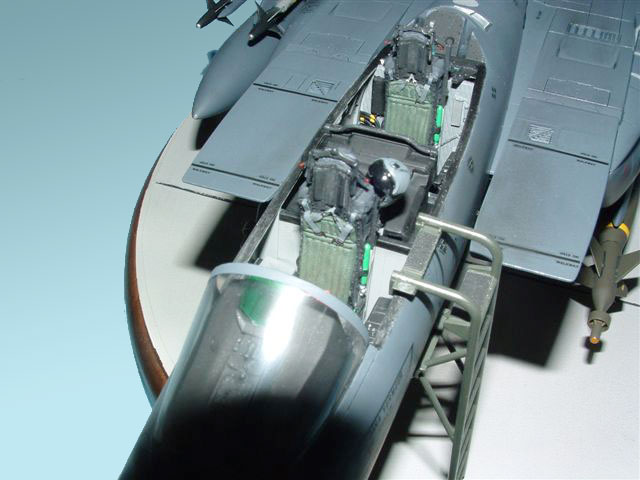
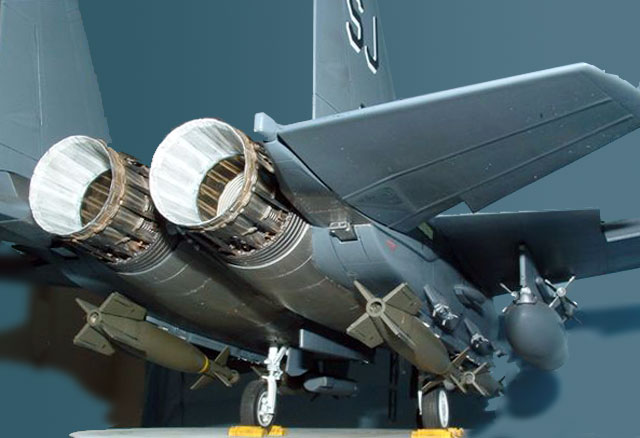
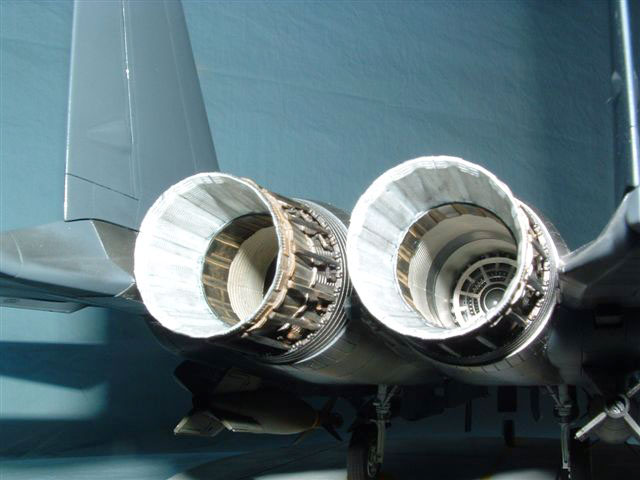
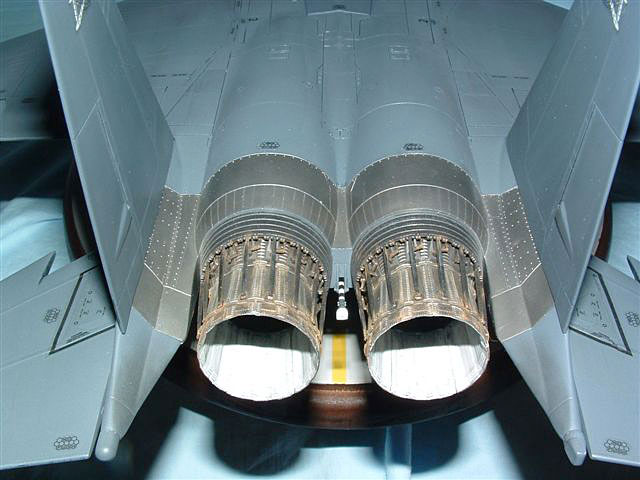
The exhausts were a pain as well and nearly impossible to eliminate seam
evidence due to the molded internal baffling. I used an idea someone
gave me on HS of applying putty and wiping it with fingernail polish
remover. Even though it still wasn't perfect, it was the best I could do
and still keep the molding intact. Other than the areas pointed out, the
majority of the assembly was trouble free.
The following additional aftermarket sets were used in the construction
of this model:
-
Eduard 32031 Photo Etched Detail Set
(for use with Tamiya 1/32 F-15E kit)
-
Eduard 32056 Photo Etched Detail Set
(for use with Tamiya 1/32 F-15C kit)
-
Cutting Edge 32018 F-15 High Speed
600 Gallon Tanks (2)
-
Cutting Edge 32056 ACES II Ejection
Seat WITHOUT Belts (2)
-
Cutting Edge 32086 F-15E Update Set
(Aux Air Inlets only)
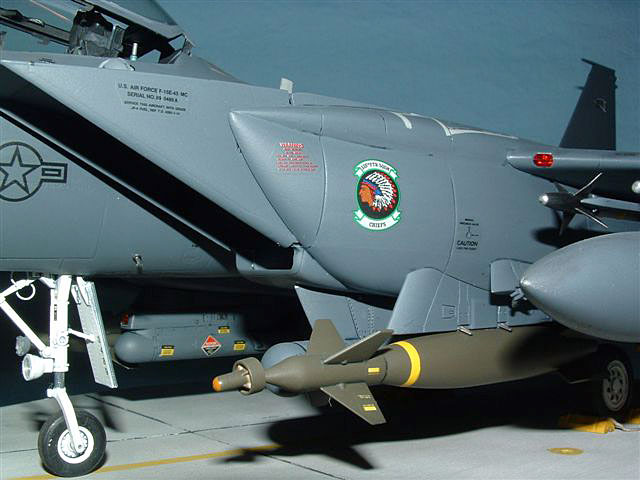
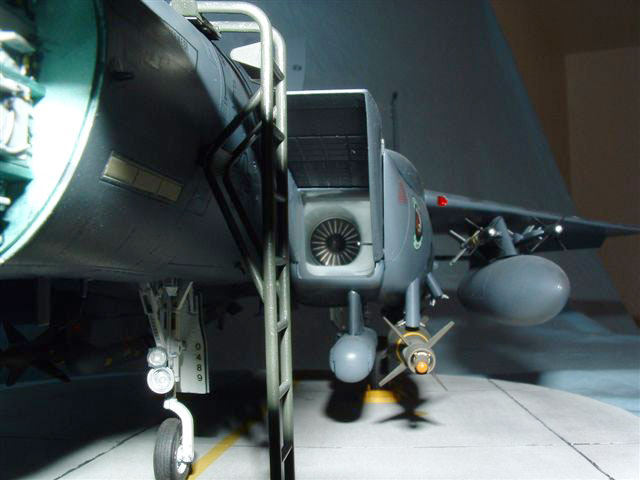
Weapons and Stores
I wanted to represent missions over Iraq
around the time of the first Gulf War or the period soon afterwards. I
again, asked a lot of questions of the HS community and researched
weapons load outs, finally figuring on the following weapons load out:
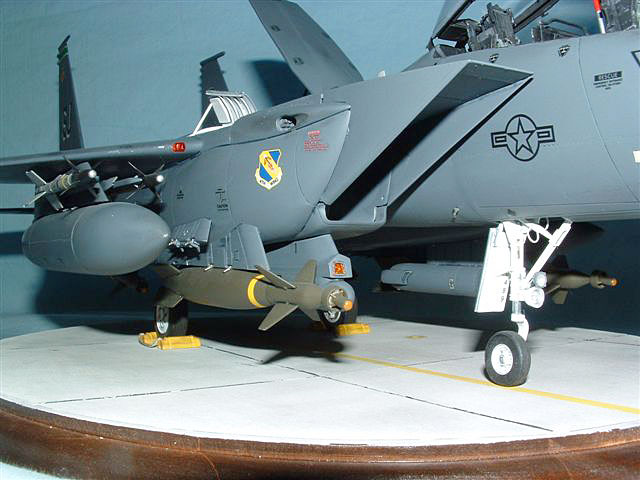
*Because the kit only had one fuel tank that looked too skinny (as
far as I was concerned), I used 2 aftermarket CE tanks. It’s obvious
these tanks are resin copies of another model maker’s fuel tanks (Revell
F-4 I'm told) and it took A LOT of work to hide the seams and get the
halves to fit right. I know CE makes some nice stuff, but these aren't
one of them.
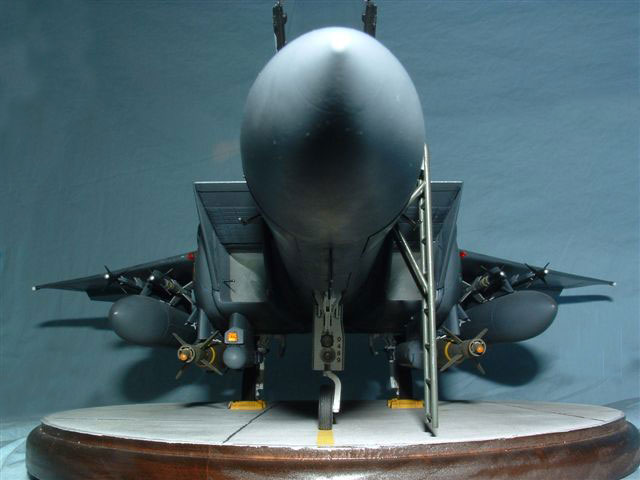
 I
painted the model using a variety of paints including Tamiya, Model
Master, and Xtracolour, with the main color being applied with Model
Master Gunship Gray (FS36118) spray cans. I used the cans for two
reasons; (1) this is a big model and (2) most USAF fighters are kept
relatively clean and have a pretty uniform look. Maybe I’ll try my hand
with preshading on my second model build (which will be a Tamiya F-14A). I
painted the model using a variety of paints including Tamiya, Model
Master, and Xtracolour, with the main color being applied with Model
Master Gunship Gray (FS36118) spray cans. I used the cans for two
reasons; (1) this is a big model and (2) most USAF fighters are kept
relatively clean and have a pretty uniform look. Maybe I’ll try my hand
with preshading on my second model build (which will be a Tamiya F-14A).
The exhaust area actually came out better than I thought it would and
compared with the reference photos I had. I used MM Buffing Metalizer in
a couple different shades and followed the parts up with a buff of SNJ
powder. I do plan to “dirty” up the interior of the exhaust cans a
little more with pastels.
I coated it with Future (brushed on) and then applied the decals with
MicroSol/Set. The kit came with markings for the 4th Fighter Wing, 335th
Fighter Squadron "Chiefs” , The pilot I modeled this after had been in
the 335th, but I decided to fudged a little and give him the Squadron
Commander's airship so I could 'color' things up a little.
Another coat of Future, then “The Detailer” black wash to bring out the
panel lines.
I applied a final sealing coat of MM Dullcoat and used a little bit of
pastels and silver pencil for weathering.
This is by no means a comparative to what many of the ‘old pros’ of
the HyperScale modeling community accomplish. I made a lot of mistakes,
had a lot of “do-overs”, and learned much.
I need to reiterate that if it wasn’t for the many folks who post on
HyperScale, I probably would have not had the co hones to build this
rather expensive model, or if I did, be happy with its outcome. I
instead, would have probably continued to be a collector. The HyperScale
community gave me the desire by their examples and provided a learning
environment to the various skills, techniques, and ideas needed to forge
ahead.
A special thanks to Brett Green for giving newcomers like me a place to
share the hobby and learn.
Click the
thumbnails below to view larger images:
F-15C/E Eagle Units
of Operation Iraqi Freedom
Combat
Aircraft 47 |
|
|
|
|
Author: Steve Davies
Illustrator: Chris Davey
US Price: $19.95
UK Price: £12.99
Publisher:
Osprey Publishing
Publish Date:
May
25, 2004
Details: 96 pages; ISBN: 1841768022 |
|
|
Model, Images and Text Copyright ©
2004 by Keith Pardini
Page Created 15 June, 2004
Last Updated
15 June, 2004
Back to
HyperScale Main Page |
 Home
| What's New |
Features |
Gallery |
Reviews |
Reference |
Forum |
Search
Home
| What's New |
Features |
Gallery |
Reviews |
Reference |
Forum |
Search