|
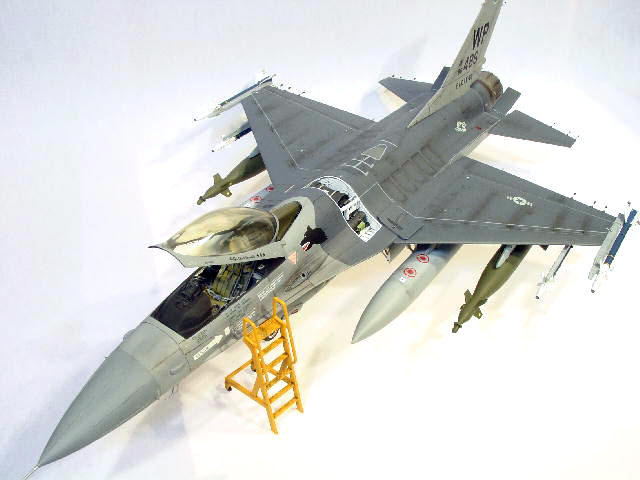
I like to start with a part of the kit that I can
finish fast (including painting and weathering it!). The ladder seemed a
natural choice. So, here I was with a finished ladder and nothing else…
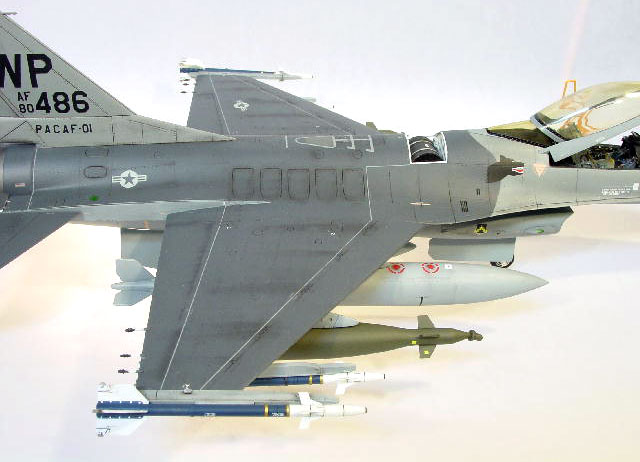
The armament and fuel tanks followed. I did not
want to spend too much time and energy on it so, I went just for the
GBUs and all four AIM missiles. One note, the GBUs are quite basic.
Almost no detail is present. I swapped the kit supply of AIMs for the
BlackBox ones. Also, Greif plastic lenses (GF214) came in handy. I cut
the very top of the missiles and glued the lenses. Their bluish hue
gives a nice touch to the overall missile.

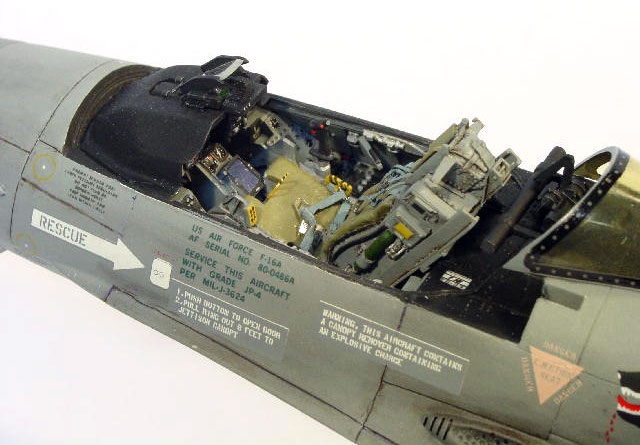
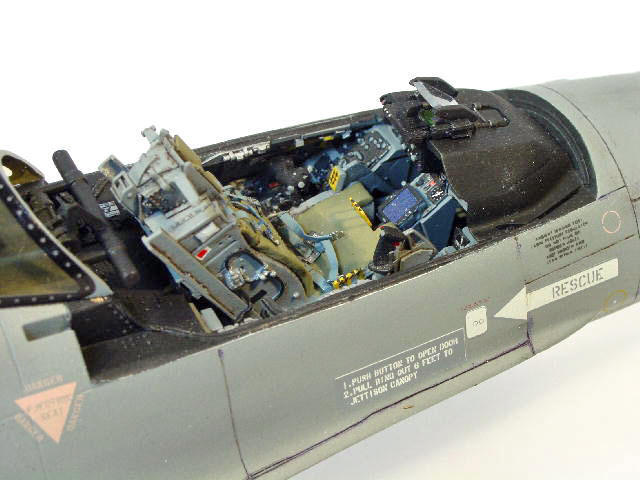
I like to detail the cockpits, so I chose the resin
one from CAM as well as the Eduard photo-etch (used just for the front
instruments panel). It took a while to put all the little parts
together. Fitting the cockpit tub between the two halves of the fuselage
required some heavy filling of the bottom of the cockpit tub.
Without any specific indication in the kit, it
looked like 10grams of extra weight are required in the nose. Probably
it’s not necessary. A serious downside is that the model turned out just
a bit heavier than the landing gear could bear. A had to reinforce both
wheels with pieces of steel paper clips. The front gear is still okay.
I started on the body by fitting the seamless
intake from CuttingEdge. It looks much better than the kit supplied one.
I continued with the wheel bays. I finished them
completely (glued, painted, weathered, and applied a couple of placards
from Eduard). Then, I glued to the upper and the lower parts of the
fuselage with the cockpit in between. From this moment on it was pretty
much routine.
The finishing required the usual steps: painting,
gloss finish, decal application, decal setting with MicroSet and
MicroSol, another gloss finish, weathering and finally the dull coating.
The painting scheme and decals represent the 35th TFS 8th
TFW (Wolf Pack) stationed at Kunsan AFB, Korea. The painting scheme ia
as follows:
- radome: FS36231
- top half: FS36118 (dark gray) and FS36270
(light gray)
- bottom half: FS36270
- the jet nozzle: Burnt Metal Buffing Metalizer
The weathering was done with “Raw umber” and
mineral spirits. The decals were a mixture of mostly DACO and kit
supplied decals.
One interesting issue: I wanted to tint the canopy.
It took me a while to figure this one out. On Aircraftresourcecenter a
possible solution was presented (it looked like the solution has not
been tried ). Well, I tried it and it works fine. So, after spending
some time buffing the canopy, it is time to do the following:
- mix Tamiya Smoke, Tamiya Clear Yellow and
Tamiya gloss Clear (X-24, X-19, X-26) in equal parts.
- add 50% thinner (X-20A).
- Using the airbrush, apply coat after coat of
this concoction until you think its thick enough. It has to be thick
to allow for serious polishing with Tamiya Polishing Compound
(fine). I had to do the polishing twice: once after I applied the
tinting on the canopy. The second time was after I removed the
Cutting Edge canopy masking. I did not expect this to happen, but I
could remove all residues with the same polishing compound.
It took almost 7 months to finish this project,
working mostly on week-ends. I enjoyed every moment of it. Okay, maybe
the rescribing was not that much fun...
One final note. Once I finished the model, I heard
word that Tamiya is ready to release an F-16C block 50. My paramount
rule is to never build a plane of certain type twice. Well, I might just
have to pass an internal resolution to abolish this rule…
Enjoy the pictures
Regarding bibliography and pictures, there are many
useful titles. I used primarily, the F-16 “bible” from DACO, Lock On No.
2, as well as Squadron’s F-16 Fighting Falcon Walk Around.
Click the thumbnails below to view larger
images:
Images and Text Copyright ©
2005 by Ion C. Tesu
Page Created 08 February, 2005
Last Updated
08 February, 2005
Back to
HyperScale Main Page |
 Home
| What's New |
Features |
Gallery |
Reviews |
Reference |
Forum |
Search
Home
| What's New |
Features |
Gallery |
Reviews |
Reference |
Forum |
Search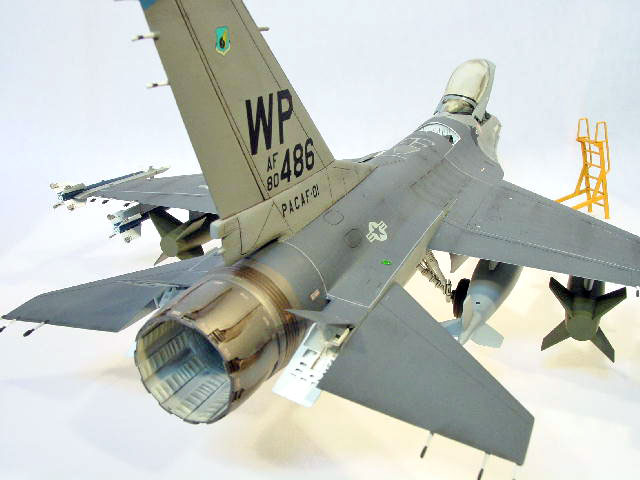

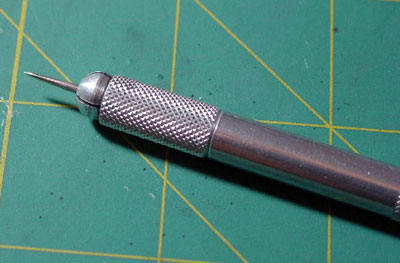 Going
back to the scribing procedure: I did not sand off the entire surface of
the model. I just used a scribing tool and positioned it against a
flexible sheet of metal such that in the first pass the raised panel
line was gone. It took a strong hand and equally strong resolve, but it worked
pretty nice.
Going
back to the scribing procedure: I did not sand off the entire surface of
the model. I just used a scribing tool and positioned it against a
flexible sheet of metal such that in the first pass the raised panel
line was gone. It took a strong hand and equally strong resolve, but it worked
pretty nice.