|
Monogram's 1/72 scale
F-16C
A Tale of Two
Falcons
by
Rafe Morrisey
|
 |
|
General Dynamics F-16C |

HyperScale is proudly supported by
Squadron
At the beginning of the
year I took my first foray into the realm of professional model making
by accepting a commission to build a Monogram 1/72 scale F-16C.
Since I wanted to do a
good job and had wanted an F-16 in my own collection I decided to build
two kits at the same time using the first to identify problems and
determine solutions that could be applied to the customer’s model. I
will dispense with the usual historical overview of the aircraft and
simply refer you to the multitude of other articles on this site and
others that cover the development of the airplane in great detail.
With respect to the
Monogram kit, let me say that the kit represents great value for the
money combining numerous options to build a well-detailed model of most
variants of the F-16 with a very complete selection of under-wing
stores.
At the same time, the
model contains some peculiar design elements and inconsistent quality
control that make for some extremely frustrating moments during
construction. Ultimately, the model builds into a fine replica of the
prototype and will make a worthy addition to the display shelf.
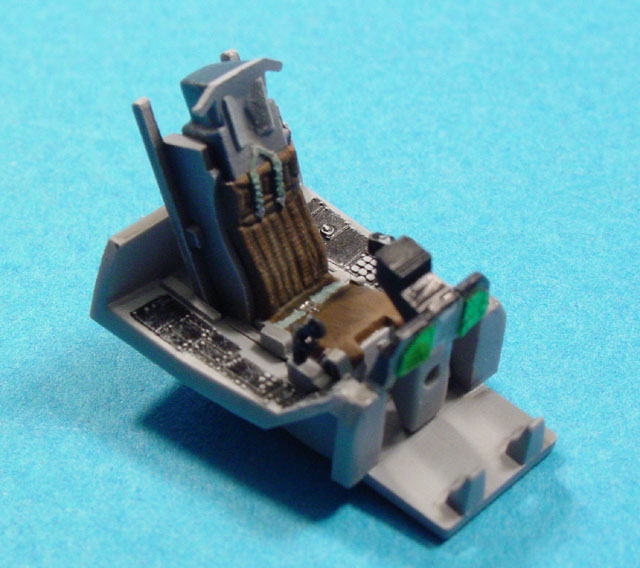
Cockpit
As with most airplane
models, construction began with the cockpit. Since I was working under a
deadline, I elected to use the kit cockpit and it turned out to be very
nice indeed. Actually, the hardest part was determining which parts to
use since there are no fewer than three instrument panels on the sprues.
I’m not an F-16 expert but it looks like to me that the builder could
make almost any production model of the Falcon including some export
variants from the parts contained in this kit. Both standard and
wide-mouth intake configurations are provided along with different
tails, engine nozzles and the aforementioned cockpit options.
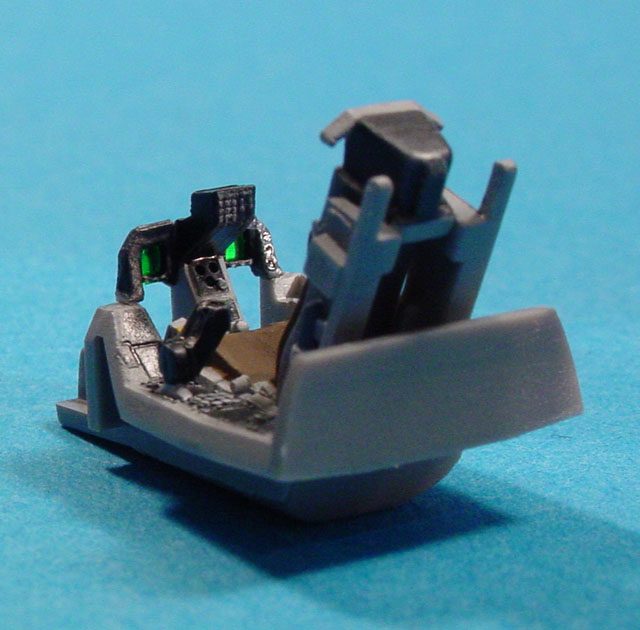
The only enhancement I
elected to make was to carve out the CRT screens and replace them with
bits of green plastic confetti. This is a technique I picked up here on
Hyperscale and it greatly improved the appearance of the cockpit. The
remaining parts were painted and dry brushed to bring out the excellent
molded detail. I encountered the first of the design quirks I mentioned
at this stage, however. The ejection seat is an extremely tight fit and
the throttle assembly hangs over the seat preventing installation after
painting. Since the seat fit so tight I inserted it without glue and
left it tipped forward to aid in masking the cockpit.
Click the thumbnails below to view larger
images:
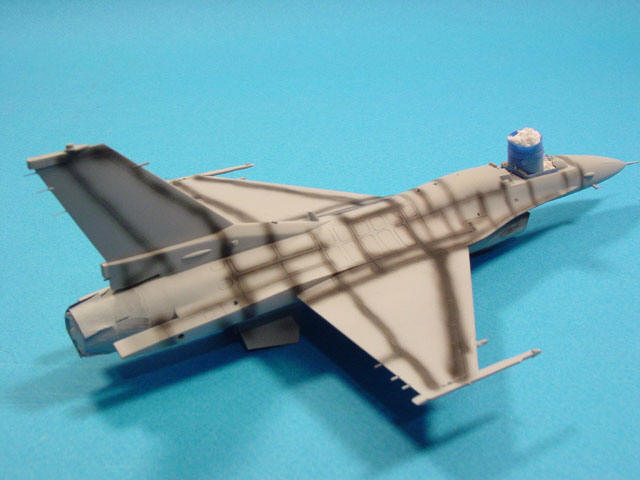
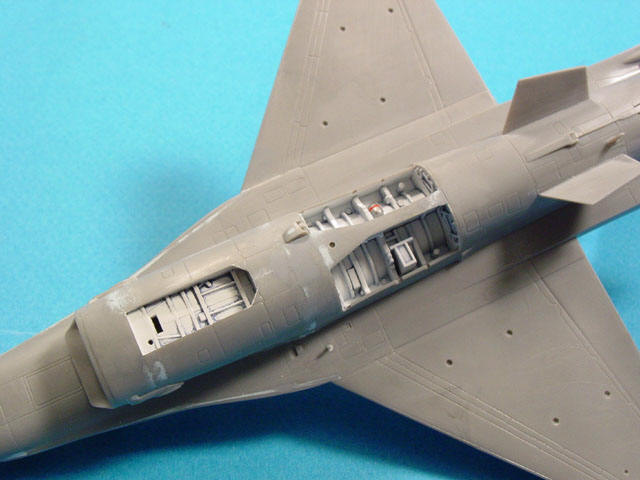
Airframe
I proceeded to assemble
the rest of the airframe and encountered some issues in fitting the
intake pieces. Modern aircraft have very complex forms and they present
major design hurdles for model makers. In this case the fit of the
intake underneath the fuselage was not great and it was very difficult
to fill and sand the seam between the top of the intake and the bottom
of the fuselage. I applied 3M Acryl Blue putty as neatly as possible and
used q-tips dipped in nail polish remover to wipe away most of the putty
from the surfaces around the seam. This minimized the sanding that was
required. I also used tissue paper coated with diluted white glue to
form FOD covers over the intakes. These were removed when dry for
painting and installation at the end.
It was at this stage that
I faced probably the most frustrating design element (dare I say flaw)
of the kit. Rather than mold the exhaust cone for the engine as a
separate piece, the kit designer elected to mold it to a section of the
rear fuselage. This made it impossible to paint and weather the exhaust
cone later in the assembly sequence. Instead, I had to paint and finish
the exhaust cone and then mask it. The fit of the rear fuselage/exhaust
assembly was not great requiring a good deal of filling and sanding near
the finished exhaust cone. This is one area I wish had been engineered
differently but in the end it worked out all right.
Landing Gear
The kit landing gear is
very detailed but the parts are extremely small. A lot of tedious
scraping was needed to remove mold-parting lines and manipulating the
gear assembly with my big fingers was tricky. It looks convincing once
installed, though. The kit wheels are very nice but quality control was
an issue since the main wheels in one of the kits had severe sink marks
rendering them useless. Each kit comes with two types of wheels,
however, so I used the alternate set for my Falcon.
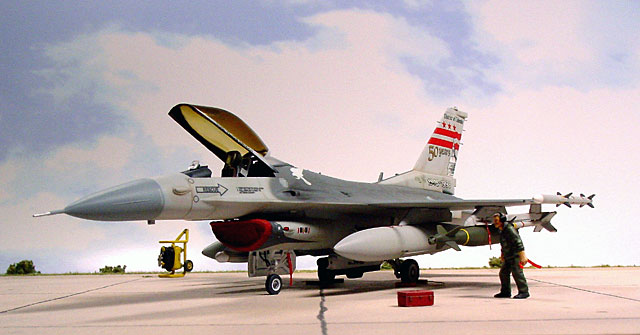
Painting,
Markings and Weathering
|
Painting
I used this model as an
opportunity to try pre-shading since I would not have a lot of time for
weathering the customer’s model due to the deadline I had been given. I
sprayed a dark gray color along the panel lines over a light gray
primer. I like to mix my own colors so I then mixed and applied the
necessary tactical grays beginning by filling in the center of the
panels and working outwards. I finished with a light over spray over the
panel lines to tone them down to a realistic level. I was quite pleased
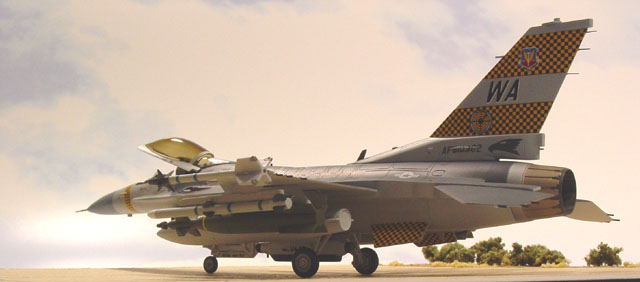
with the ultimate effect. You will notice that the top color is
different between the two models. This is because the customer had
specified Nellis AFB markings for his aircraft.
I found a TwoBobs “Taxi
Cab Vipers” sheet on sale and knew it must be fate. The markings on the
TwoBobs sheet were quite dark, however, requiring a dark base color in
order to show up. I checked the reference pictures on the instruction
sheet and some photos reflected a darker color than I’ve seen in most
photos, so I did what I had to do.
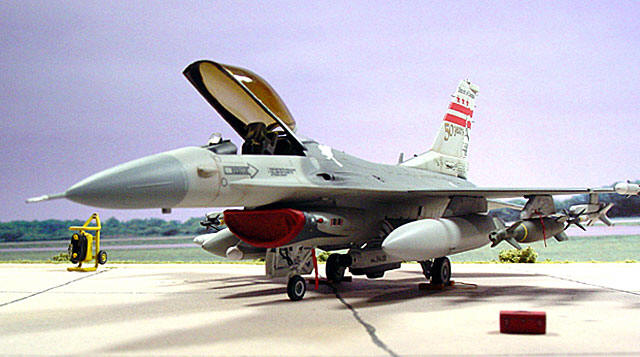
On my F-16, I used a
lighter gray for the top color in keeping with most of my other
reference photos.
Decals
As mentioned above, the
TwoBobs “Taxi Cab Vipers” sheet was used for the customer’s F-16. At
first I was very concerned about how it would turn out since TwoBobs
uses multiple layers for complex designs to ensure accurate
registration. The small school badge was comprised of four separate
layers including a decal no bigger than a pencil point. My fears were
unfounded, however, as the decals performed flawlessly. I allowed ample
time for each layer to dry and used Micro Set and a touch of Solvaset
here and there. The decals even conformed over several antenna bulges on
the nose and base of the tail that thought would cause big problems. I
also made a custom decal for the nose reflecting the customer’s name as
the crew chief per his request. One of my good friends, Mike Teel,
helped me design the decal in Photoshop.
For the airplane I was to
keep I decided to try the kit decals since I live in the Washington, DC
area and the sheet included markings for one of our ANG units. Again
quality control seems to vary between kits as the clear film on one of
the decal sheets had yellowed. Using the good sheet, I pressed on and
was very pleased with how they performed. Though much thicker than the
aftermarket sheet, the kit decals conformed to all the bumps and bulges.
I did have one mini disaster in that the Solvaset reacted with one of
the kit decals causing it to leach out a green stain. I think this is
because the markings were metallic and the acid in the solvent caused
the brass particles in the ink to corrode producing the green color. I
was able to remove the affected decals and replace them with ones from
the other kit sheet. I only used Micro Sol on the substitutes and had no
other problems.
Weathering
 On
both models I applied a diluted wash of Payne’s Gray oil paint thinned
with Testor’s enamel thinner to the gear bays and landing gear following
a gloss coat. On
both models I applied a diluted wash of Payne’s Gray oil paint thinned
with Testor’s enamel thinner to the gear bays and landing gear following
a gloss coat.
On my model I also applied
a light wash of Raw Umber oil paint in the panel lines over the
pre-shaded paint finish. I applied a pastel sludge wash to the various
vents and control surfaces removing the excess with a damp Q-tip.
Pastels were also lightly
applied to the drop tanks of my model to represent grime from fuel
spills. Everything was sealed in with an over spray of Testor’s Acryl
clear flat.
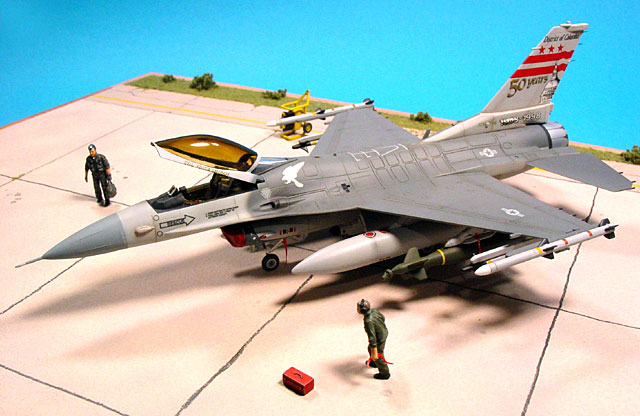
Base and Figures
The customer had requested
a base for his model so I pulled out an old copy of Air and Space
Magazine with a picture of airplanes sitting on the runway at Edwards
AFB. Assuming the landscape at Nellis would look fairly similar, I did
my best to match the tarmac and ground colors. Matt board was used to
replicate the tarmac. I t has the right texture and came in a nice tan
color. I over sprayed it with light mixtures of tan and light gray in a
random pattern to match the photos and added cracks and expansion joints
with different artists pencils. The groundwork consisted of tile grout
that was painted a desert tan after drying. I added some dark washes and
dry brushing and then applied a few random foliage bits from Woodland
Scenics.
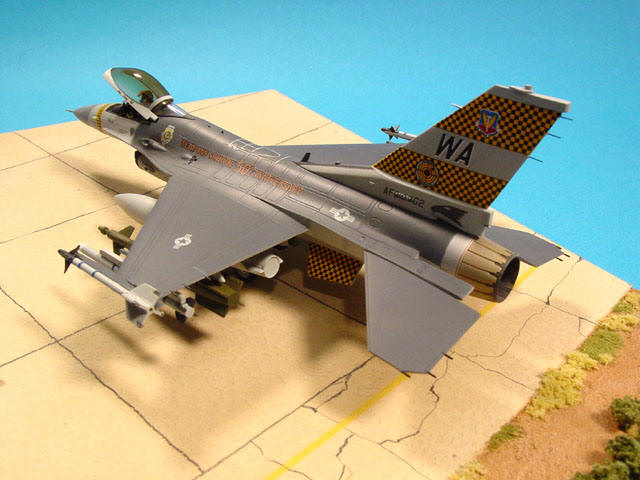
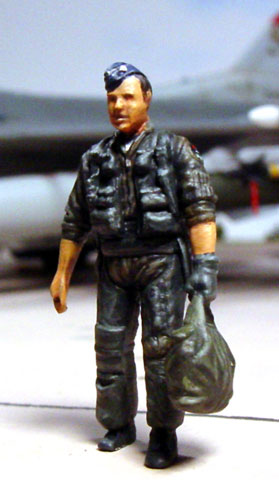
The figures and
accessories in the shots of my F-16 came from a Hasegawa ground support
set.
Images were taken with a
Sony DSC-85 digital camera. I used a piece of cloud pattern poster board
from Office Depot for the backdrop. The camera was set in manual mode
with the maximum f-stop setting of f.8, film speed of ISO 200 and preset
focal distance of 20 centimeters. The photos were cropped and lightened
as necessary in Photoshop.
My thanks go out to Ian
Robertson for helping me learn to use my camera.
Click the thumbnails below to view larger
images:
Images and Text Copyright ©
2004 by Rafe Morrisey
Page Created 03 September, 2004
Last Updated
04 September, 2004
Back to
HyperScale Main Page |
 Home
| What's New |
Features |
Gallery |
Reviews |
Reference |
Forum |
Search
Home
| What's New |
Features |
Gallery |
Reviews |
Reference |
Forum |
Search