|
A Hypothetical Gunfighter in
1/48
McDonnell F3H-G
Spectre
by Tory Mucaro
|
|
|
McDonnell F3H-G Spectre |

HyperScale is proudly supported by
Squadron.com
In September of 1952, the US Navy issued a Request For Proposals for a
new carrier based day fighter to all the major aircraft producers. Of
those designs submitted, the most viable were the Grumman XF11F-2, the
Vought XF8U-1, the North American “Super Fury” and the McDonnell F3H-G.
Of these, the Navy selected the XF8U-1 and the F3H-G to proceed to the
design mock-up phase.
In May of 1953, the Navy selected the F3H-G as the winner of the
competition and the prototype first took to the air in February of 1955.
Powered by two Wright J-65 engines and armed with four 20 mm cannons,
the F3H-G was destined to become the Navy’s last gunfighter.
Performance figures exceeded the Navy’s requirements with a top speed
of mach 1.5 at 30,000 feet and mach 1.2 at sea level. It had a rate of
climb of 28,000 feet per minute and a landing speed of only 100 knots.
Dubbed the Spectre in keeping with McDonnell’s tradition of naming their
aircraft after supernatural beings, F3H-Gs entered squadron service in
December 1956 with VF-84, which was later deployed aboard the USS
Forestall in July of 1957.
Okay, so that’s not how it really happened, but it makes for some
interesting conjecture.
The F3H-G did exist as an actual aircraft proposal however, and went
as far as a full size wood mock-up. But the XF8U-1 eventually won out
over it and went on to become the Navy’s last gunfighter. As for the
F3H-G proposal, it directly led to the design of the XF4H-1, which went
on to become an aviation legend, the F4 Phantom II.
So why not build a model of what the F3H-G might have looked like had it
gone into production, I thought. After all, it is a significant part of
the development of the F-4 Phantom. And more importantly, my model club
had decided to do a Phantom group build, so in a way it would qualify.
And I hadn’t done a major conversion since the last model I finished, so
I was due!
I decided to start with the Aurora Phantom kit, as it is probably the
closest thing in 1/48 scale to the XF4H. And besides, what else could
you do with an Aurora Phantom, honestly? I found a line profile as well
as a couple of photos of the F3H-G mock-up in the Squadron book on the
F3H Demon and based my model on that. Some of the major changes that
need to be made:
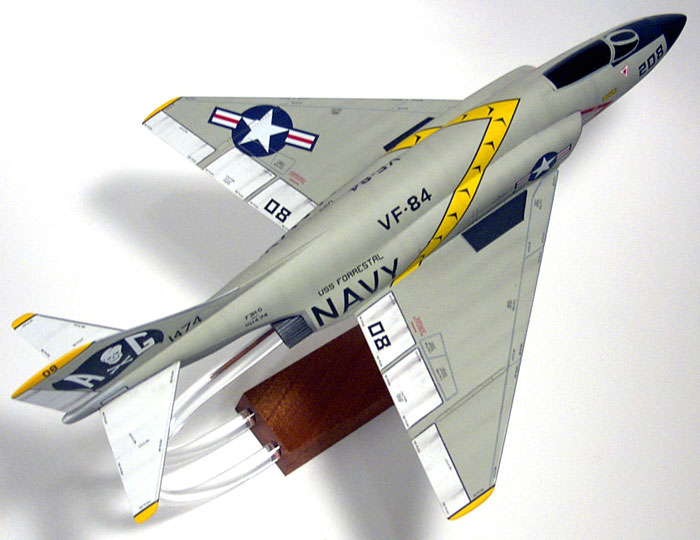
-
The fuselage needed to be extended
behind the wing, and shortened ahead of the wing.
-
The intakes needed to smaller.
-
The cockpit needed to be converted to
a single seat layout and the canopy needed to be shortened.
-
20mm canon openings needed to be
added to the forward fuselage.
-
The vertical stabilizer needed to be
completely scratch built, as it was just too different to modify the
kit part.
-
The horizontal stabilizers needed to
be re-shaped and mounted flat, without the anhedral typical of F-4s.
-
Wing tip dihedral needed to be
eliminated.
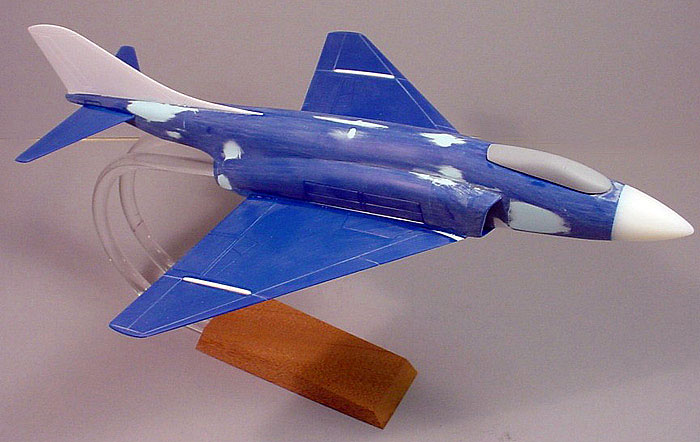
As I was working towards a deadline for the group build, I decided to
dispense with a cockpit interior and black out the canopy. I also
decided to build the model in flight so as to avoid having to deal with
landing gear (and besides, it looks better that way, as do most aircraft
models!). The photo of the model taken prior to paint shows to good
effect most of the modifications.
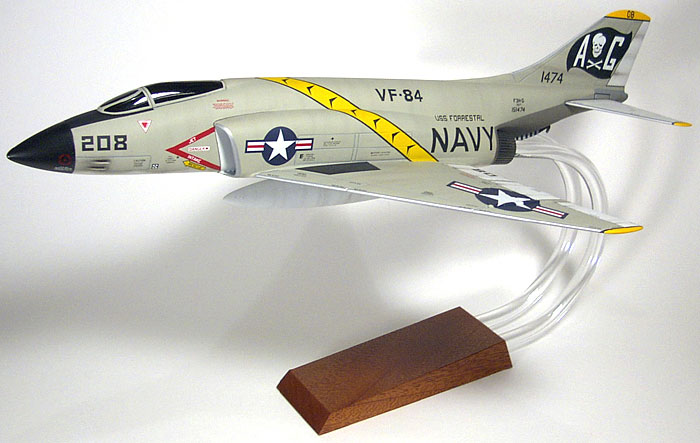
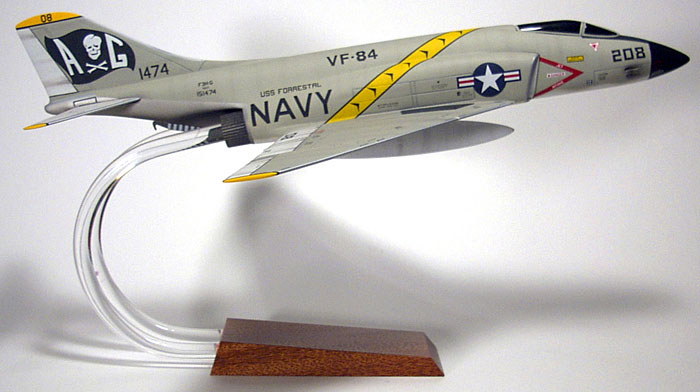
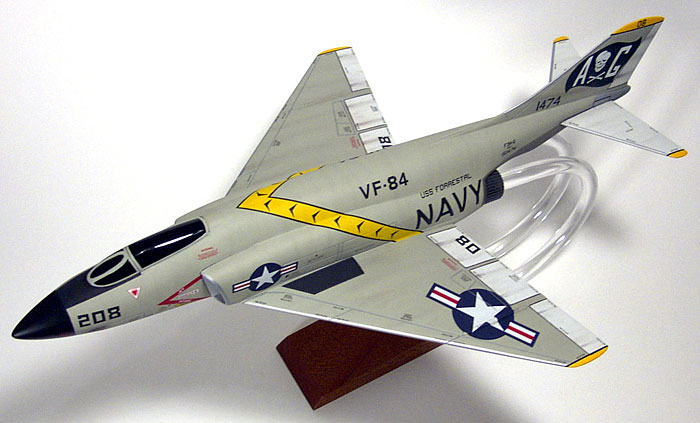
The model was finished with Krylon (yes, that’s right, Krylon) flat
white for the undersides, Model Master Gull Gray for the uppers. The
natural metal surfaces are Model Master Jet Exhaust, Krylon (there it is
again!) Bright Silver, and Tamiya Gun Metal. The Canopy is finished in
Odds N Ends brand Gloss Black. The nose and anti glare panel are Krylon
(what does this guy have stock in that company?) Ultra Flat Black. The
silver leading edges were done with a Tamiya Silver paint marker, a very
easy way to do this I might add. The model was then coated with Testors
Gloss Coat in preparation of the decals.
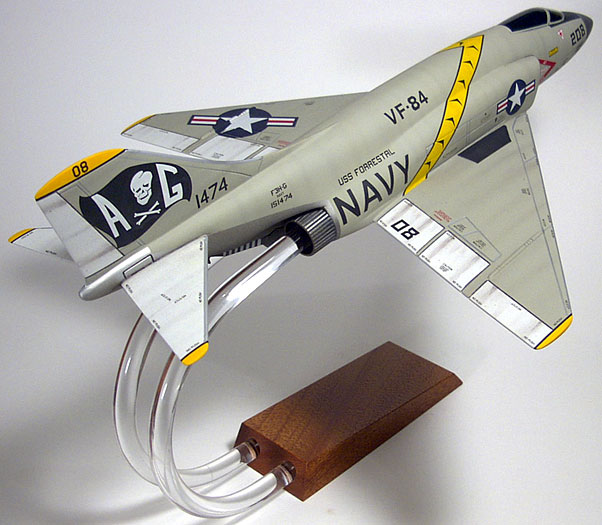
The markings were generously supplied by my good friend Pat Hawkey, who
incidentally seems to just love to contribute to my off-balance modeling
adventures.
The early VF-84 markings were chosen as it seemed likely that this
aircraft, had it actually existed, might have worn them. They are a
combination of Microscale and Aeromaster sheets.
After the decals were applied, the model was given a final coat of
Polly Scale Flat. The radome was then shined up a little with a coat of
Future. The weathering was done with various shades of gray colored
pencils and Floquil Grimy Black airbrushed. It should be noted that no
pre- or post-shading of any kind were applied.
The display stand is Philippine mahogany with clear acrylic rods heated
and bent over a form for uniformity.
So that’s it. And now that I went through all this trouble of scratch
building one of these, it’s just a matter of time before one of the
major kit companies issues an injection-molded kit.
Yeah, right!
Click on the thumbnails
below to view larger images:
Model, Images and Text Copyright © 2005 by
Tory Mucaro
Page Created 17 February, 2005
Last Updated 17 February, 2005
Back to HyperScale
Main Page
|
 Home
| What's New |
Features |
Gallery |
Reviews |
Reference |
Forum |
Search
Home
| What's New |
Features |
Gallery |
Reviews |
Reference |
Forum |
Search