|
Grumman F4F-4
Widcat
by Toby Nelson
|
 |
|
Grumman F4F-4 Widcat |

Tamiya's
1/48 scale F4F-4 Wildcat is available online from Squadron
The Wildcat has been covered in many different sources, so I won't go
into it's history here. I will, however, recommend Rich Dann's excellent
book "F4F Wildcat in Action."
Tamiya's 1/48 Wildcat is an excellent model--simple, easy to assemble,
and easy to paint. The only real inaccuracy, as others have pointed out,
is that the cockpit floor is solid, representing a later Wildcat. Also,
the canopy is too thick to pose in the open position.
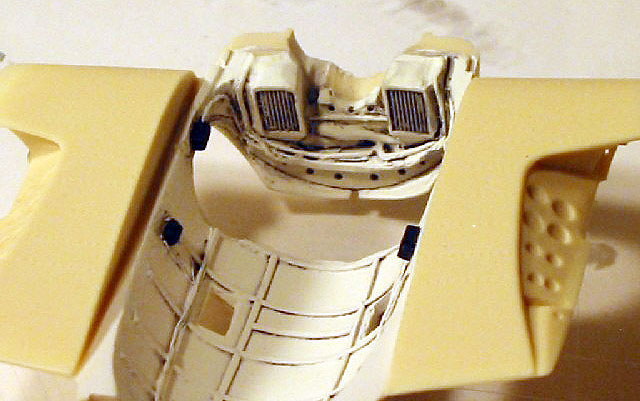
With this model I decided to use the Dangerboy Wildcat wing fold set.
This set replaces the entire wing, and is really simple to use and
strong when finished. Lone Star Models issued the set for a while; last
I heard, Mike West was selling the molds, so hopefully it will be
available again soon.
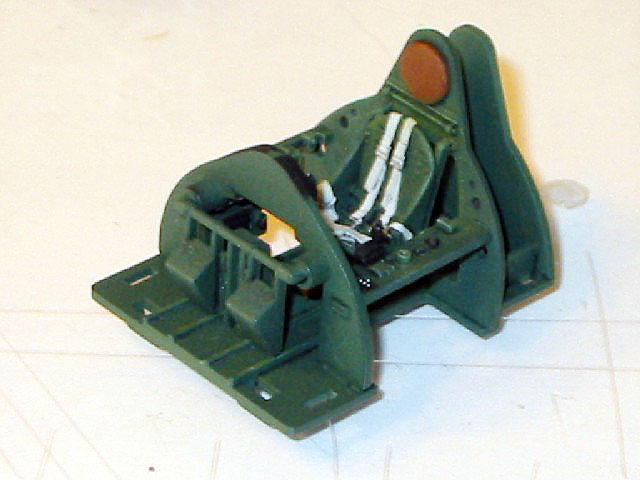
I started with the cockpit. I cut away the sides of the cockpit floor
so you can see through the belly windows. I also used an Ultracast resin
seat. The rest of the cockpit was box stock, as the kit's cockpit has
excellent detail.
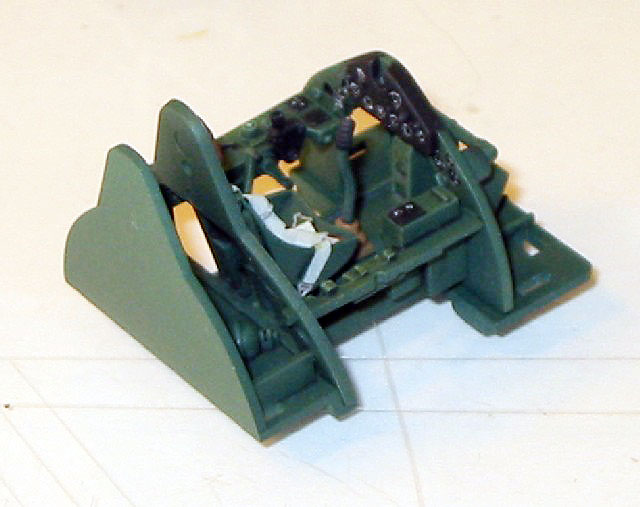
I painted the cockpit with Testor's Model Master Acryl Dark Green
(FS34096)--supposedly this is close to the "Bronze Green" used in the
Wildcat's cockpit. I then airbrushed a coat of Future floor wax, let
that dry 48 hours, then applied a Payne's Gray and Ivory Black oil wash.
I usually don't like to use straight black as a wash, as it's pretty
harsh, but the green was dark to begin with.
I wiped off the excess wash with a q-tip soaked with turpentine. The
cockpit was dry brushed with light green. The raised dial detail was
brought out with a white Prismacolor pencil. A couple of coats of Polly
Scale clear flat finished the cockpit.
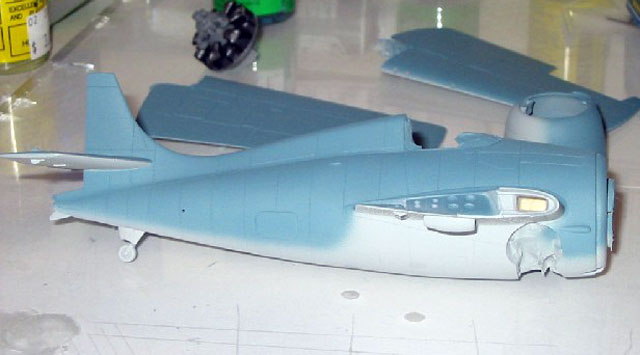
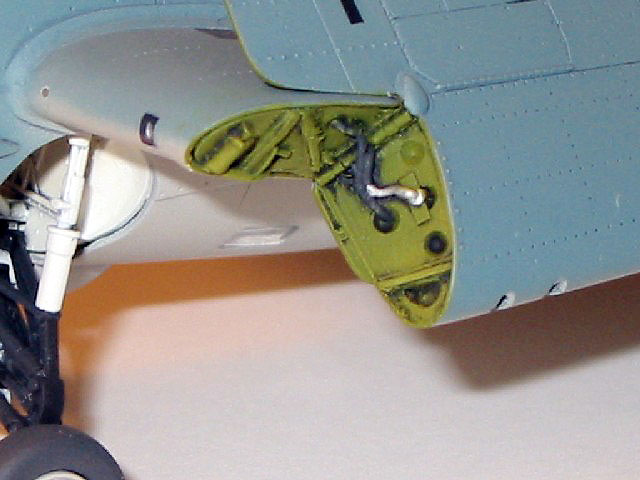
After gluing the fuselage together, I started to work on the wheel
wells. The kit wheel well is pretty bare, so I made some engine mounts
with styrene rod. I scratch built a oil tank for the top of the wheel
well from sheet styrene and tubing. The oil tank hides the fuselage seam
very nicely!
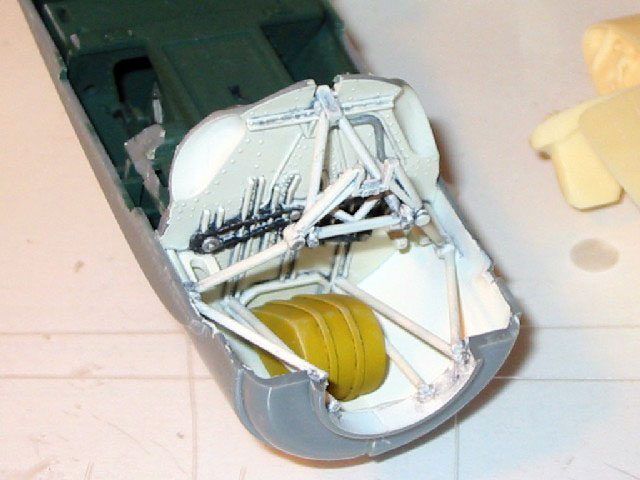
I then started the resin wing center section. This cleaned up easily; it
really is a beautiful casting. Some carving work was needed around the
front of the wheel well area to make everything fit. The inside of the
wheel well was painted white and weathered with a Payne's Gray wash like
the cockpit (Rich Dann thinks the wheel wells were Light Gray, but the
white with Payne's Gray wash looks pretty close).
I glued the wing to the fuselage using 5-minute epoxy. The
wing/fuselage fit was really good. I filled in a small gap on the upper
side of the wing/fuselage joint using Milliput. Milliput is nice because
you can wipe away the excess with a wet Q-tip before it dries, ensuring
that the surface detail remains intact.
The panel lines around the lower fuselage were rescribed. The tail
was glued on, a couple of bumps were added, and the model was ready for
primer and paint!
 The
model was washed with soap and water, and the wheel wells and cockpit
were masked off with masking tape sealed with white glue. The model was
primed with Floquil Gray Primer. When the primer was dry, the model was
rubbed down with fine steel wool. The
model was washed with soap and water, and the wheel wells and cockpit
were masked off with masking tape sealed with white glue. The model was
primed with Floquil Gray Primer. When the primer was dry, the model was
rubbed down with fine steel wool.
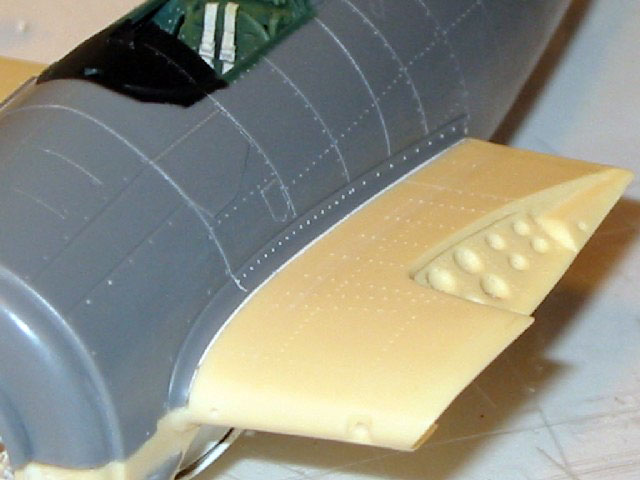
I used Polly Scale acrylics for the color coats. I tacked on the cowl
with white glue while painting to ensure that the blue/gray demarcation
would be consistent. I used a Vega 2000 airbrush with the pressure set
to 20-25 psi.
I then masked off the exposed wing structure in the wing fold and
painted it Polly Scale interior green (not sure what the correct color
would be, but I think it looks good).
The model was coated with Future, and left to dry 48 hours. Some
Superscale decals were used (I had a bad experience with Tamiya decals a
couple of years back and swore never to use them again). Another coat of
Future, and a Payne's Gray wash was used for the panel lines. The wash
looks a little more prominent in the pictures than it does in person.
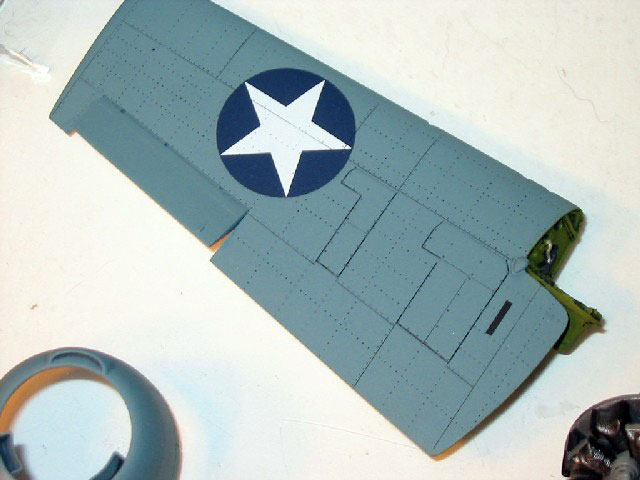
The model was then coated with several light coats of Polly Scale
flat, resulting in a nice dead-flat finish.
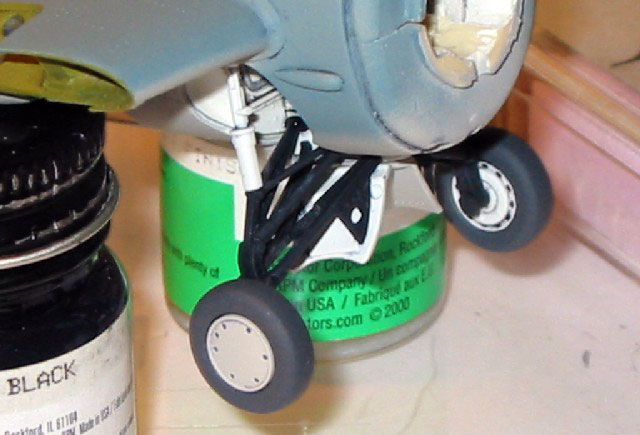
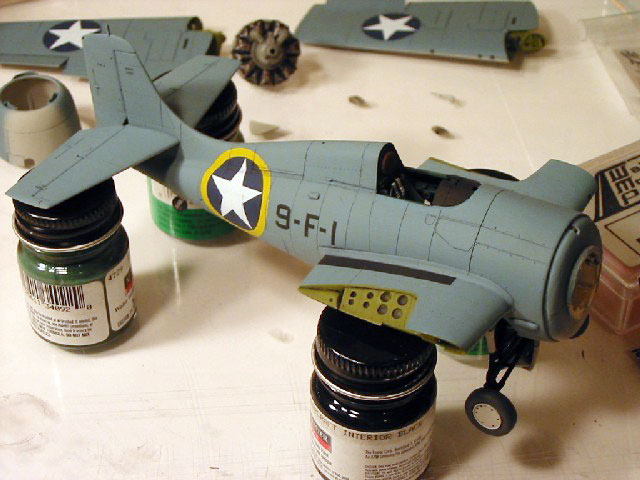
The landing dear was assembled and glued on the model using 5-minute
epoxy. The epoxy is strong and allows time to adjust the landing gear.
Much care was taken to ensure proper alignment; the wheels of the
Wildcat are real close together, so any misalignment really throws the
whole airplane off.
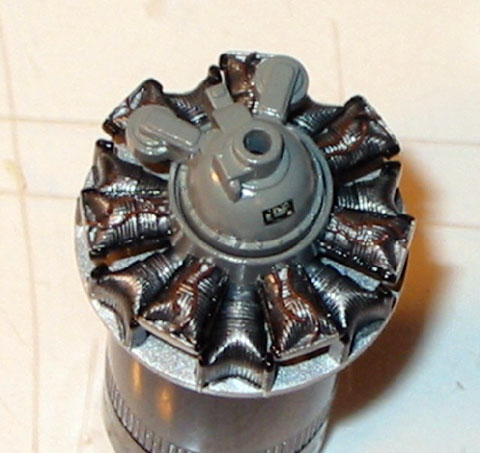
I painted and assembled the engine earlier, while I was waiting for
one of the paint coats to dry. The kit engine is really great out of the
box, and only requires careful painting and weathering (look at those
little ignition wires!).
The engine and cowl were glued on. A Squadron canopy was used for the
sliding section, but the kit's windshield was used.
I used a MV lens for the landing light, and some CMK resin lights for
the wing tip and fuselage lights. These look really great, and I feel
help set the model apart.
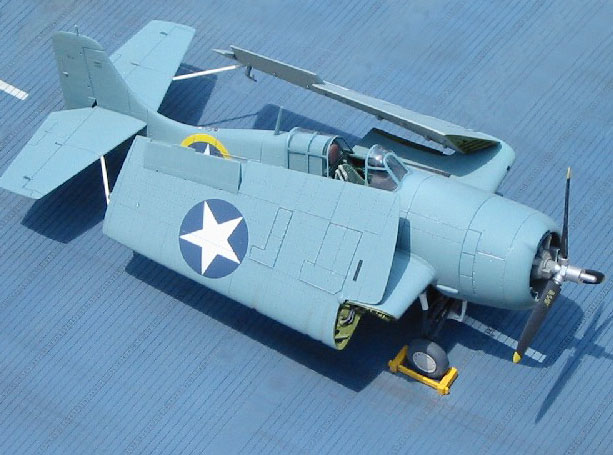
The outboard wing sections were glued using epoxy. The outboard wings
pretty much self-align, but there are a couple of degrees that they can
be moved around. The little stabilizing bars for the wingtips were made
with brass wire.
I made a base using an Eduard carrier deck section. It was a lot of
fun painting and weathering the carrier deck. I made a frame for the
deck out of basswood. I used some KMC wheel chocks (long out of
production).
Although the wing fold is pretty sturdy, I didn't want to take any
chances, so I glued the model to the carrier deck. There aren't many
places to pick up the model otherwise, and attaching it to the base
really simplifies transportation.
A couple of months after I finished this model I took it to the IPMS
Nationals in Oklahoma City. Unfortunately it didn't place (it was
competing against approximately 40 gazillion other models in the "1/48
single engine prop" category--that's the last time I enter in that
category!).
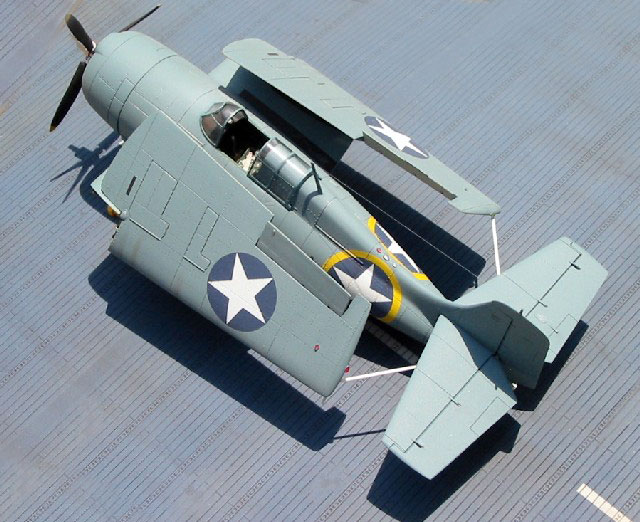
After the contest I was talking with someone and he said, "Toby, you're
Wildcat looked great but you need to fix the ailerons." I had glued both
ailerons in the up position. Well, I know that usually one aileron is up
and one is down, but in the case of the Wildcat when the wings were
folded both ailerons were up. The Wildcat at the Lone Star Flight Museum
in Galveston, Texas shows this, as well as numerous pictures. I probably
should have mentioned that on the card next to the model...
Regardless, I was happy with the model, especially since it took me only
about a month to make it. It is on display at Hobby Island in Houston.
Click the thumbnails below to view larger images:
Model, Images and Text Copyright © 2004
by Toby Nelson
Page Created 19 May, 2004
Last Updated
19 May, 2004
Back to
HyperScale Main Page
|
 Home
| What's New |
Features |
Gallery |
Reviews |
Reference |
Forum |
Search
Home
| What's New |
Features |
Gallery |
Reviews |
Reference |
Forum |
Search