|
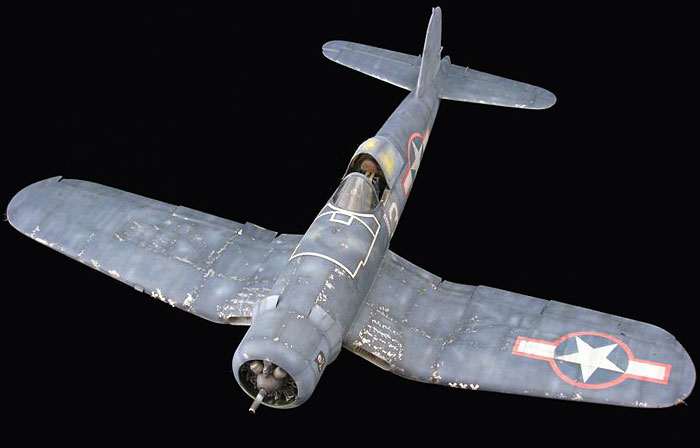
Trumpeter's 1/32 scale
kit backdated
F4U-1A Corsair
by Jamie Haggo
|
 |
|
Vought F4U-1 Corsair |

Trumpeter's 1/32 scale F4U-1D Corsair is available online from
Squadron
I had always fancied doing a Corsair with the red outlines to the
national markings so purchased Trumpeter’s F4U-1D as this made the
conversion to the -1A fairly simple.
After a plea on LSP I received a Verlinden cockpit but this was
designed for the Revell kit. I also had in mind a monster weathering
job so decided to get hold of some of Eduard national markings to
make it easy to do.
There are some nigh on impossible to remove pin marks in the
wheel bay so I went out and bought the Aires set, (more of these
later.
By this stage I was suffering pretty badly with AMS so it was out
with the wallet again to get the Moskit exhaust set with the resin
insert. The kit here is pretty poor; the exhausts are way too thin
and the openings much too large.
I decided to start with the cockpit but after a base coat and a wash
I had quite a few models for a magazine to do so the project was put
on the back burner for a while. When the urge came to pick it up
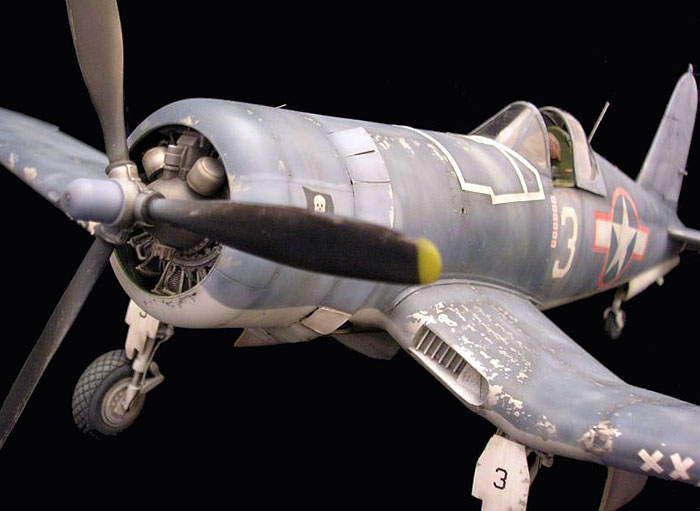
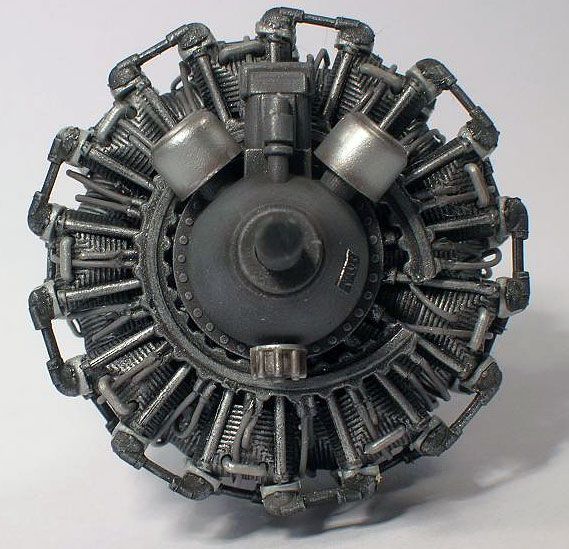
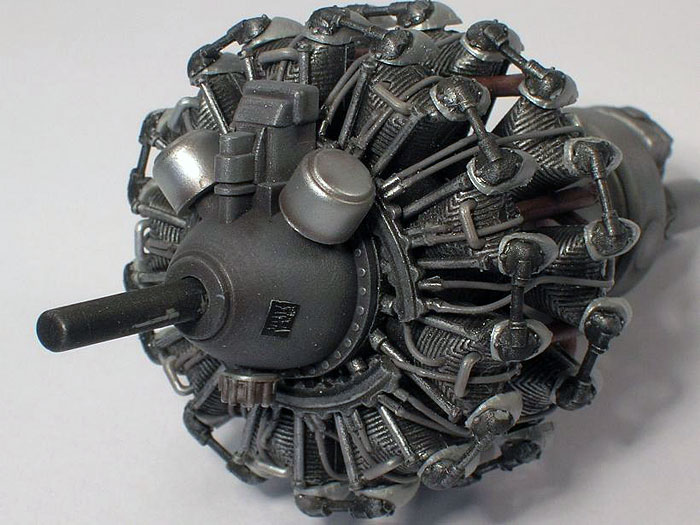
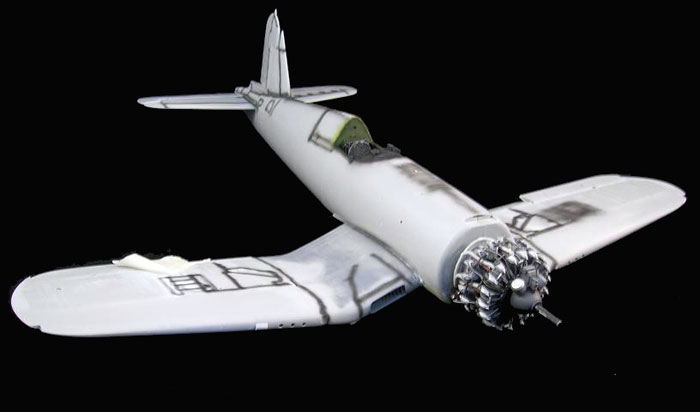
again I decided to do the engine, I don’t really enjoy construction
too much, I’m more of a painting kind of chap and the engine looked
awfully tedious which it proved to be. Most parts were painted and
weathered on the sprue before gluing with superglue. I am fairly
rubbish when it comes to washes so the cylinders were painted black
and then given a heavy dry brush with Humbrol silver, this worked
out quite neat. To finish off the motor, I added an ignition harness
from wire from the Little-Cars range, if you haven’t got any yet I
thoroughly recommend them.
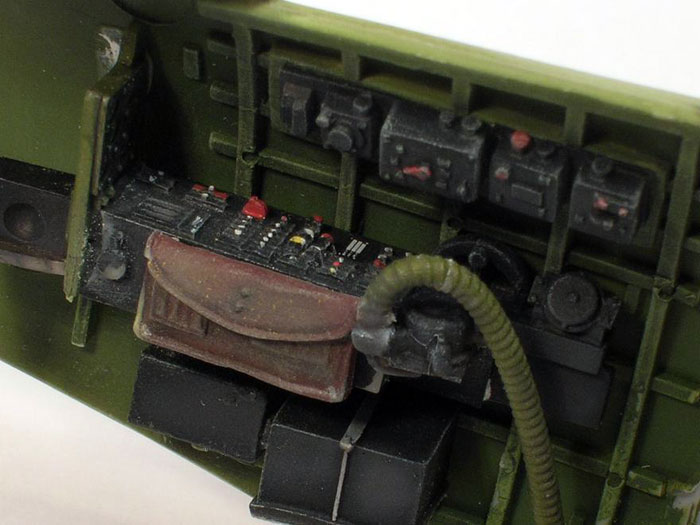
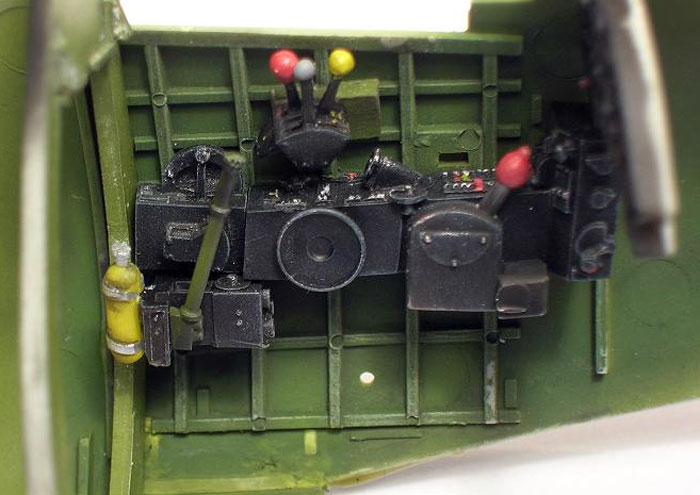
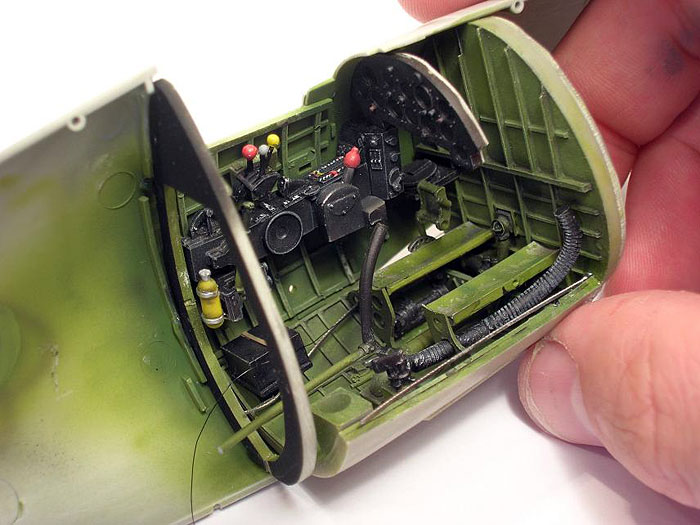
With the engine done it was onto the cockpit, I decided against
using the Verlinden side walls as I suspected that the contours were
different. Brett Green, in his Osprey book "Modelling the F4U
Corsair", scratch built his but I used the kit stringers/formers
with the Verlinden details. The interior was sprayed with Tamiya
XF-5 light green, washed with Humbrol black and then this was
blended in with a light mist of the base colour. The green was
further shaded with the base colour lightened with yellow and white
and then it was post shaded with Tamiya black and red brown. To
finish off a dry brush of yellow was applied then all the detail
bits picked out.
Click the thumbnails below to view larger images:
This process was repeated in the tail wheel bay then the fuselage
halves were closed up. The cockpit coaming was detailed with scrap
plastic and wire and painted black.
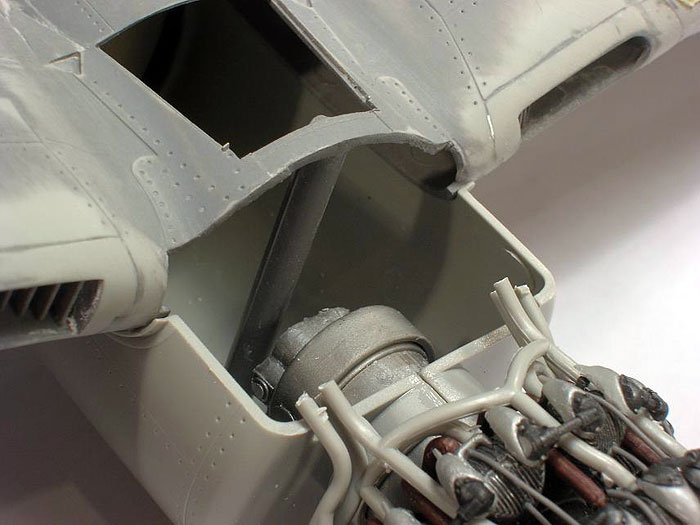
The wings were next. I don’t like folded wings on naval aircraft as
I think it spoils the lines, therefore this model was to have its
wings spread. As mention I had bought the Aires wheel bay, these
have wonderful detail moulded but there is a major snag. They just
don’t fit, after painting and weathering I dry fitted them and was
horrified to discover a 5mm gap at the trailing edge. Out with the
Dremel! The upper wing was ground and sanded wafer thin and the
wheel bay roofs the same. I even had to reduce the height of the
walls to shoe horn them in, after much swearing and cussing they
were in but if I were you I’d save your money and put up with the
wheel bays as they are. The rest of the airframe went together
fairly well.
The flaps were a bit of a pain being very fiddly. I followed Brett’s
advice and used a blob of blue tac as a third hand. After they were
attached a couple of the flaps suffered some damage from handling so
be careful.
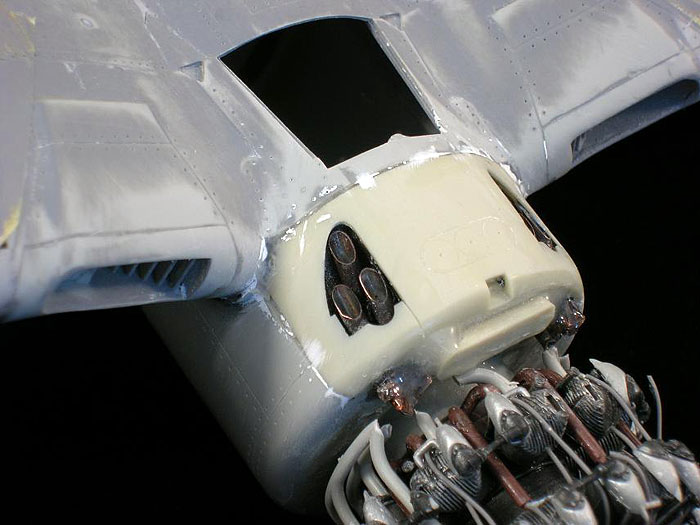
The next job was to fit the Moskit exhaust panel. The inside was
sprayed black and pipes assembled before removing the section of
plastic on the wing centre section, unfortunately I over did it
somewhat so had some gaps which required filling with thick
superglue. Although expensive (around £25), the Moskit set really
does make a big difference to the look of the kit in this area and I
thoroughly recommend it.
The rest of the airframe was assembled with no real fuss, the fit
being very good. The cowl flaps are quite odd looking being gap
toothed. These were replaced with sheet metal cut from a Coke can.
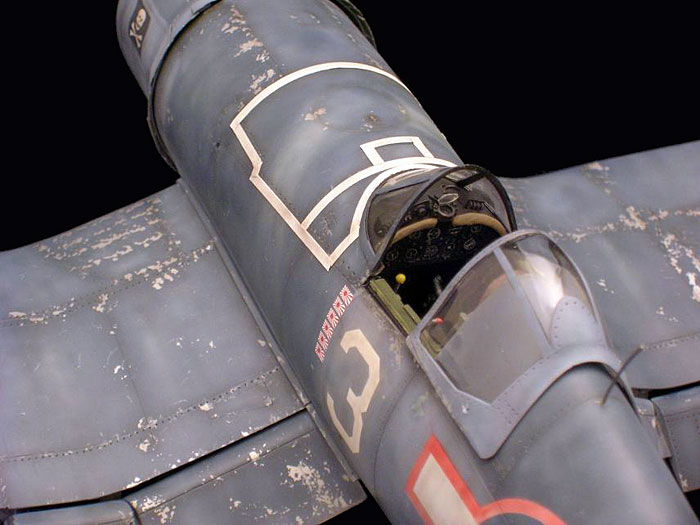
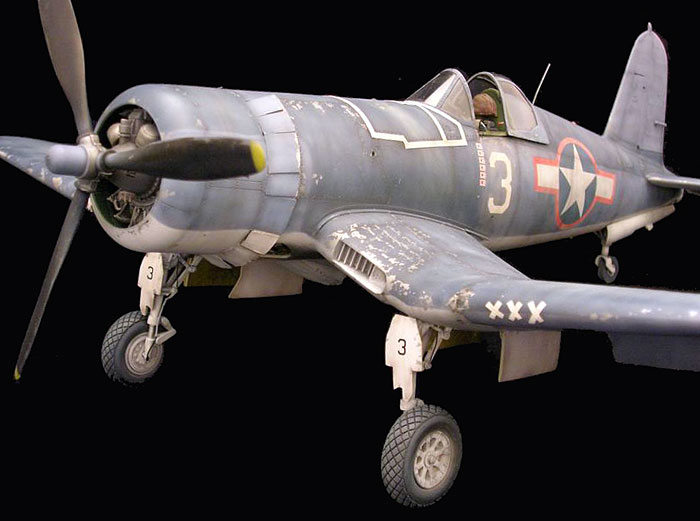
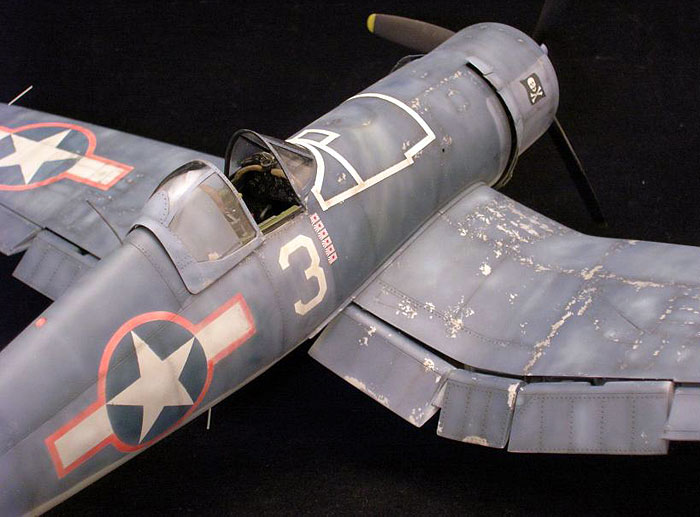
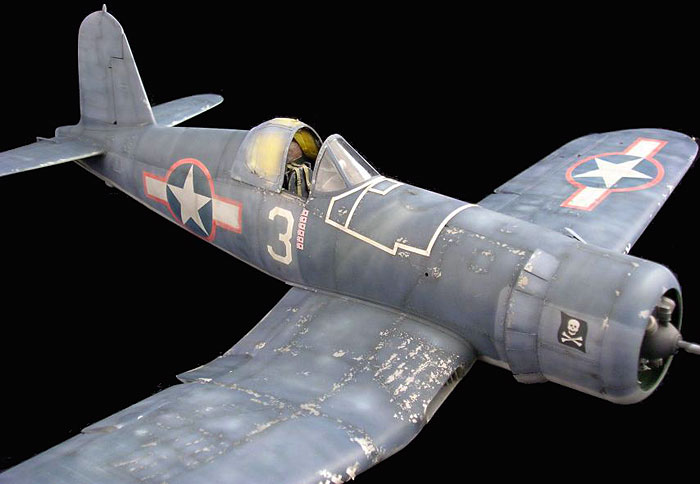
Ah, my favourite bit. I wanted to do a VF-17 machine with the red
borders to the national markings so purchased the Eagle Cals sheet
EAG 3220 and picked the aircraft of Lt JG “Big” Jim Streig. This
would allow me to weather the aircraft to destruction, lovely.
The first step was to mask the engine and wheel wells with blue tac.
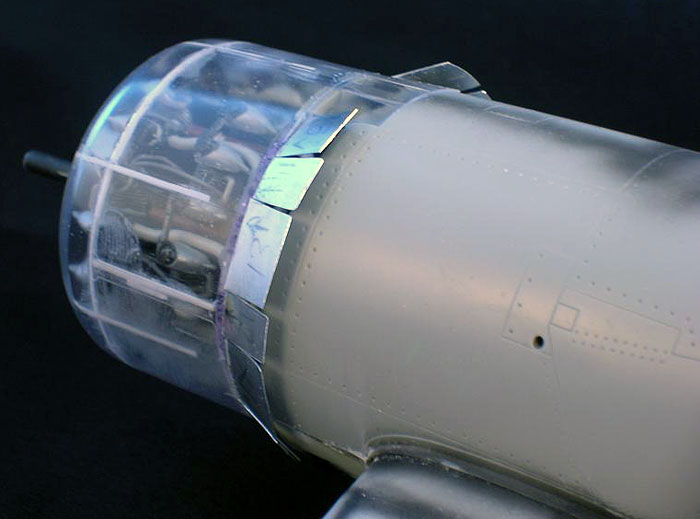
Then I masked the canopy using the Eduard Kabuki masks but modified
the sliding portion to represent the extra bracing strip of the 1A.
With all that done I sprayed Alclad Aluminium over the entire
airframe. I didn’t prime because I wasn’t after a pukka metal finish
and I have not had a problem before, as long as the coat is a thin
one there is no problem. With the aluminium dry (after about 5
minutes) I applied Humbrol Maskol with a sponge where I wanted the
paint chips to go. With that done I could start on the camouflage.
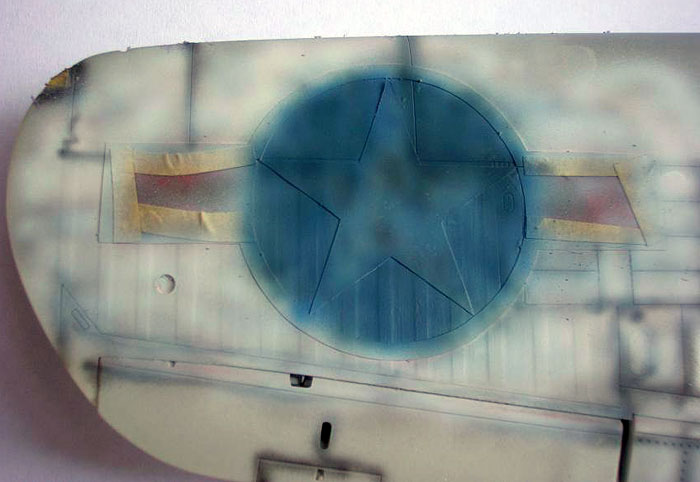
When I paint aeroplanes I do not apply a base colour and then
weather it, I apply the paint in layers, weathering as I go. The
first stage is a pre-shade with black, my idea is not to leave the
pre-shade showing through but it helps to darken the panel line
itself, sometimes on a deeper line you do not have to run a wash
into it.
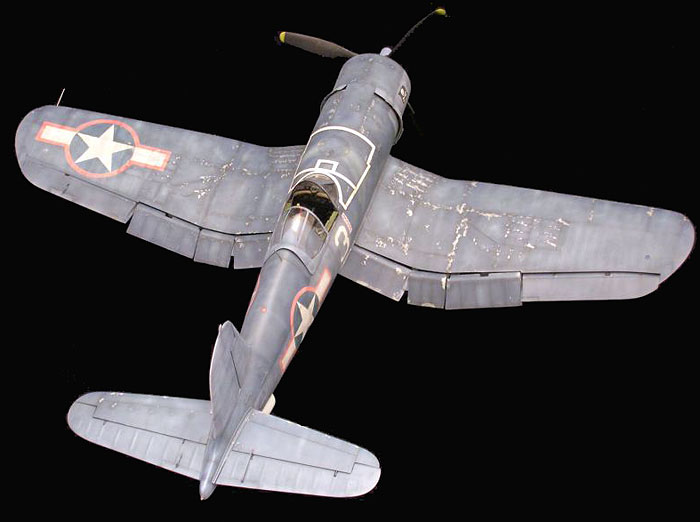
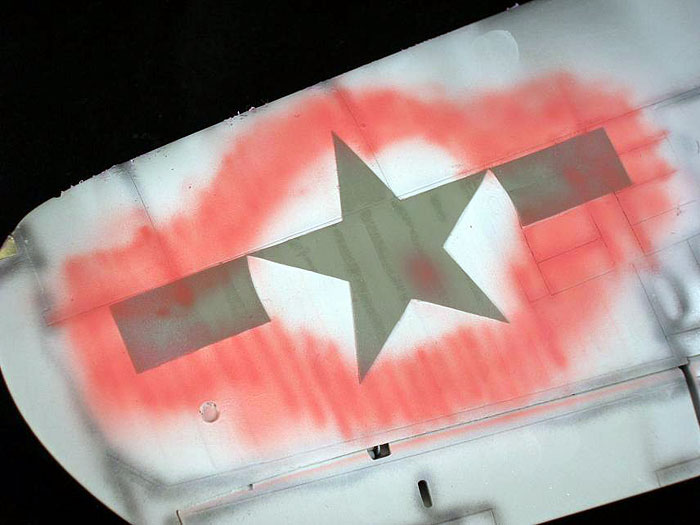
For the underside I used a base colour of Tamiya flat white which
was shaded with clack and grey as I went along. I don’t lighten the
centre of panels, what I do is spray the tinted paint in a random
fashion which is more prototypical. I also used this technique in
the areas of the national markings. With the white done I applied
the Eduard masks and sprayed the red portion, fading and tinting the
paint as I went. With the red portions masked the blue was painted,
faded and tinted and masked. Now I was ready to tackle the blue
bits.
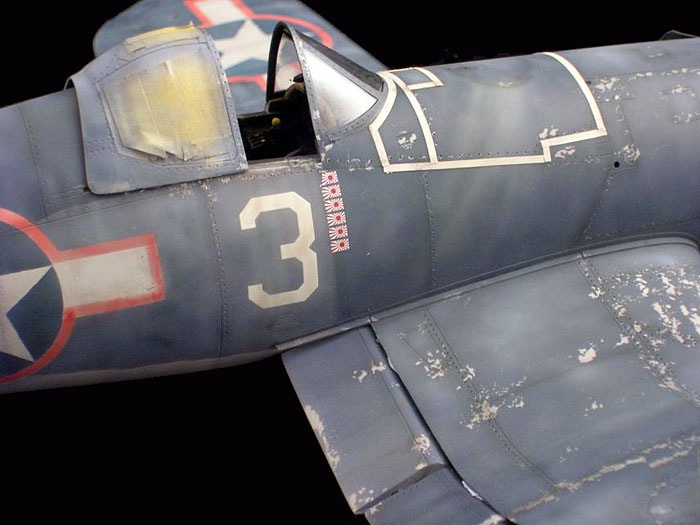
I used a mix of blues from the Tamiya and Gunze range, the paint was
built up in layers. I tinted the paints with white, tan, black and a
tiny bit of yellow, be careful with that as you don’t what it
turning too green!
The areas where there were decals were buffed with a ladies nail
buffer and applied then the whole model was sealed with Xtracrylics
matt varnish, even that was tinted with light grey.
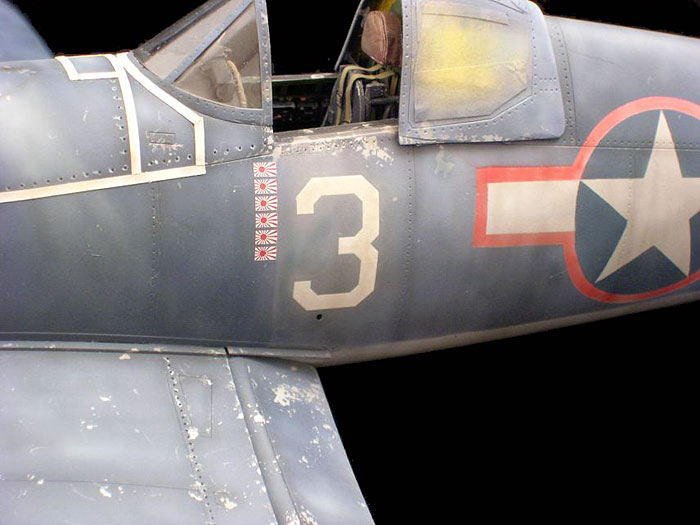
The decals were weathered as well. A very thin wash was flowed
into the panel lines and scratches and chips added with a silver
pencil.
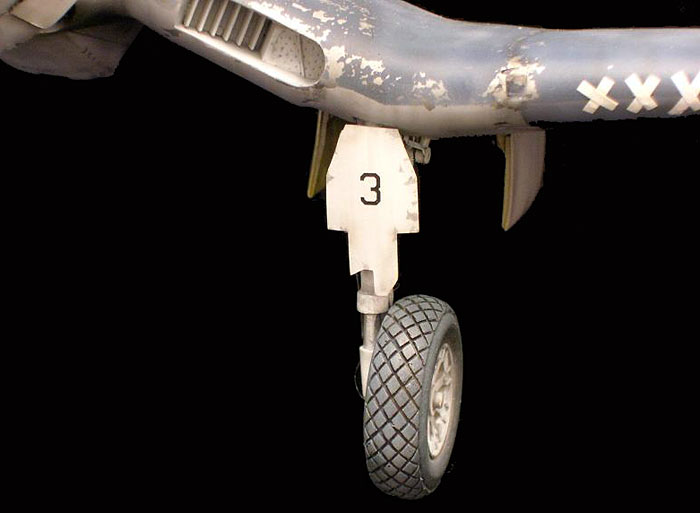
The undercarriage was painted weathered and attached, the Aires gear
doors were initially added on upside down but this was spotted by an
eagle eyed LSP’er and sorted out. The final job was to add the
Contact Resine wheels, the Revell -1A prop and the whip aerial.
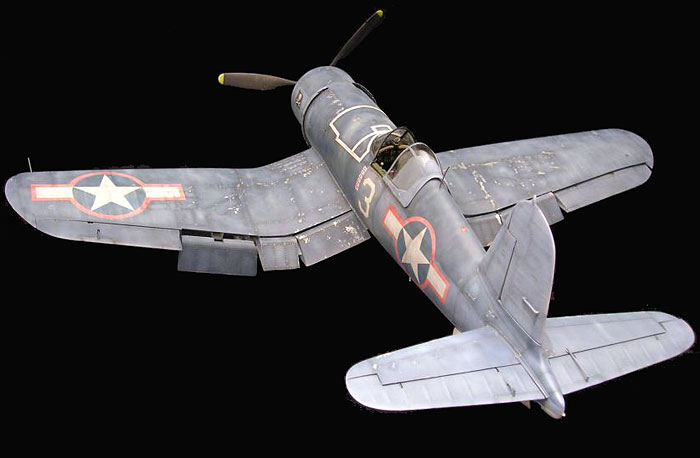
Phew, she was finally done and I am pleased with how she has turned
out. I found the construction a bit of a chore but then I always do
but the scope to weather these land based Corsairs more than made up
for it.
The Trumpeter kit can be a bit tricky and fiddly in places and
there are some accuracy issues but over all it is a good kit and
looks really neat next to my Hasegawa Hayate on my shelf.
Accessories Used
-
Verlinden cockpit - thanks to the
LSP’er who sent it to me (sorry I forgot who you are)
-
Aires Wheel bay
-
Contact Resine wheels - Thanks to
Franck Oudin
-
Revell Prop - Thanks to Ross at
LSP
-
Eagle Cals Decals - EAG 3220
-
Moskit Exhaust and panel
-
Little Cars wire (ignition
harness)
Click the thumbnails below to view larger images:
Modelling the F4U
Corsair
Osprey Modelling 24 |
|
|
|
|
Author: Brett Green
US Price: $17.99
UK Price: £12.99
Publisher:
Osprey Publishing
Publish Date: October 10, 2005
Details: 80 pages; ISBN: 1841768804 |
|
|
Model,
Images and Text Copyright © 2006 by Jamie Haggo
Page Created 23 August, 2006
Last Updated
22 August, 2006
Back to
HyperScale Main Page |
 Home
| What's New |
Features |
Gallery |
Reviews |
Reference |
Forum |
Search
Home
| What's New |
Features |
Gallery |
Reviews |
Reference |
Forum |
Search