|
Tamiya's 1/72 scale
F4U-1D Corsair
by Roger Fabrocini
|
 |
|
Chance-Vought F4U-1D
Corsair |

Tamiya's 1/72 scale F4U-1D Corsair
is available online from
Squadron
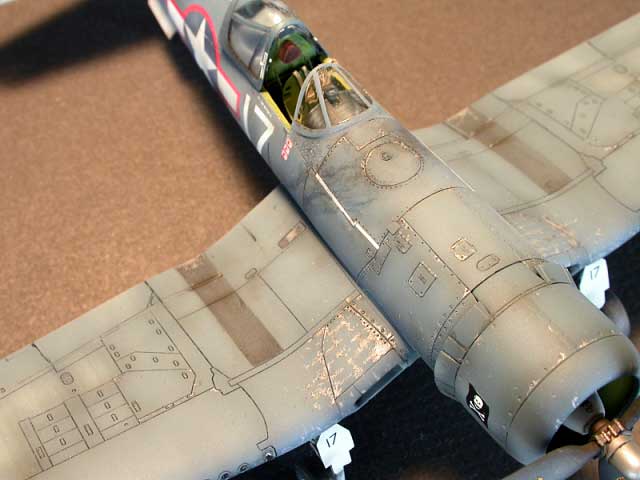
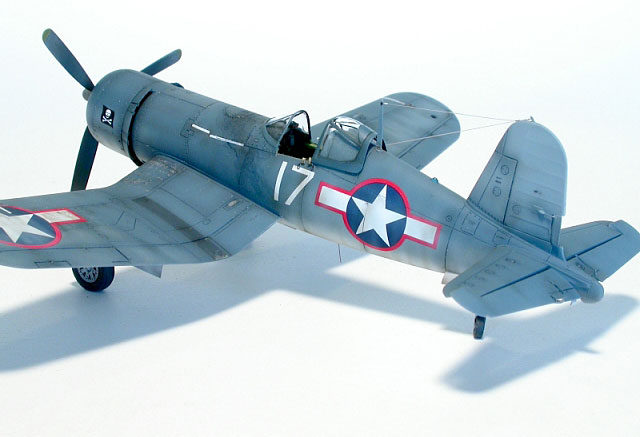
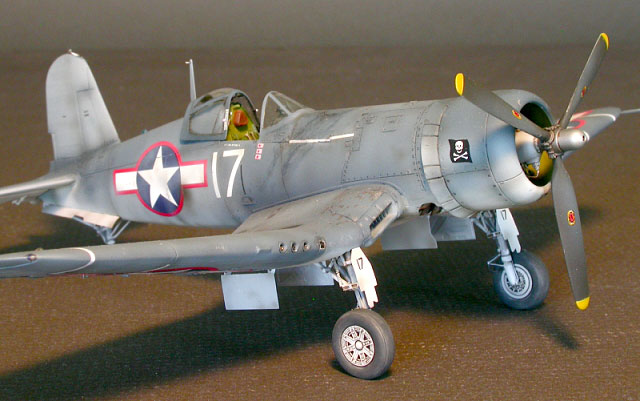
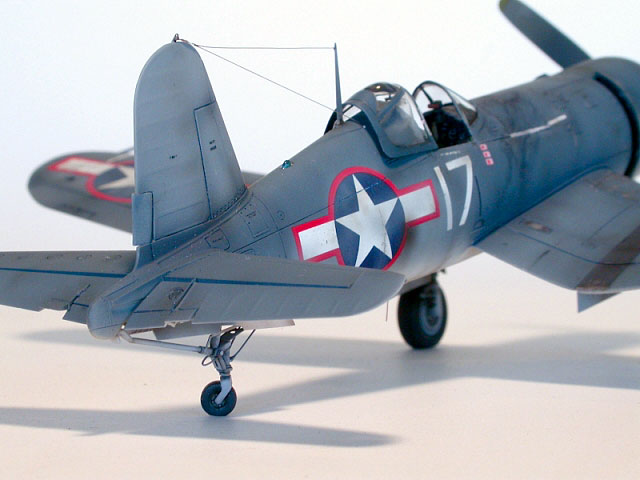
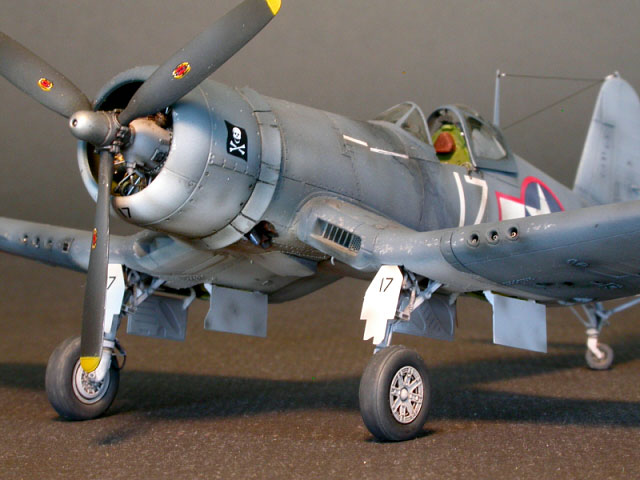
Here is Tamiya’s 1/72 scale F4U-1D Corsair, kit #60752, finished as
Lt. Cmdr. R.R. Hedrick’s F4u-1a #17 of VF-17 based on Ondongo, New
Georgia, November 1943.
Never one to be accused of taking the road less traveled I continue my
endeavor to deplete my inventory of unbuilt Tamiya 1/72 scale Warbirds.
Tamiya’s subject choices may be considered pedestrian, but for this
modeler’s money they are the best 72nd scale aircraft on the market.
:
I added a number of details and made some additional “tweaks”.
I added many detail parts for aftermarket sources, scratch-built some
and performed some tweaks (i.e.: modified existing kit parts).
Aftermarket Parts
Aftermarket parts are as follows:
-
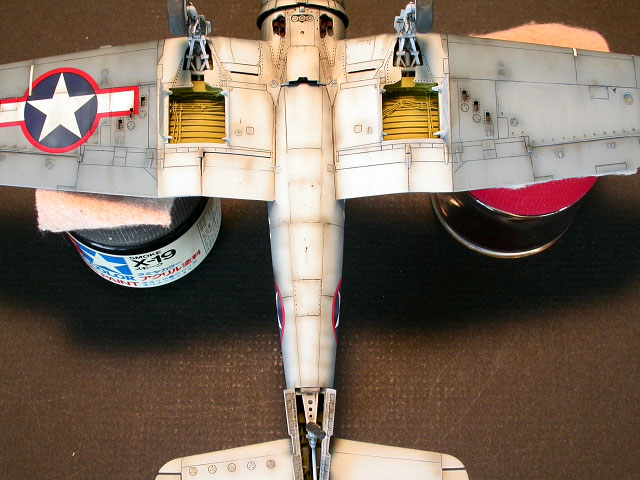
Eduard P.E. sets #73-215 (color) &
72-049 supplied most of the detail for the gear legs, gear wells,
well doors, seat and belt buckles. Straps are lead foil.
-
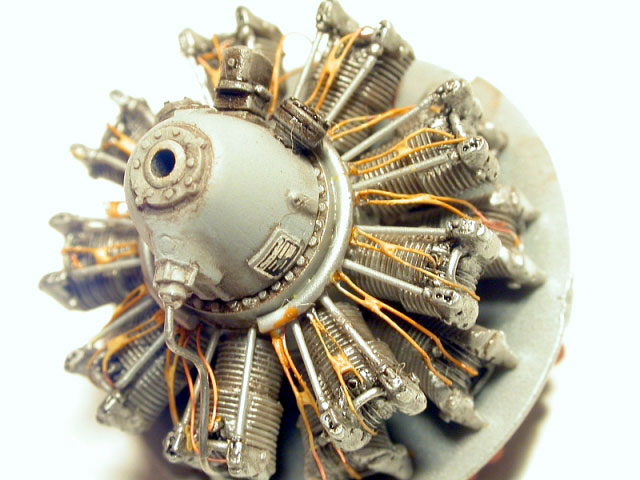
Aries resin cockpit #7048 (for the
Academy kit) considering my past, um...., experiences fitting Aries
detail sets I thought, how much harder could it be fitting it into
another kit?
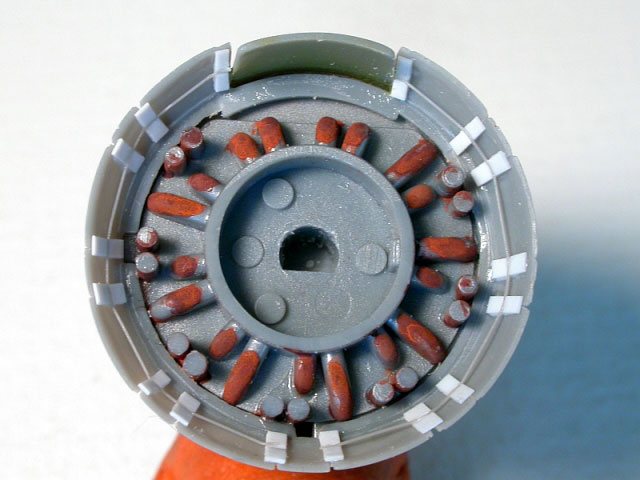
-
Moskit exhaust #72-20 (these are too
easy, it’s like cheating)
-
CMK #7031 navigation lights.
-
scratch built detail:
-
.50 cal. gun tubes made from
stainless steel tubing mounted in a block of plastic glued behind
the wing openings.
-
wing tank drains made from hypo
needles.
-
main gear legs detailed with solder
wire and return springs fashioned from .004 stainless steel wire.
-
wing tip position lights built by
cutting a notch into the wing tip, filling with CA glue, and sanding
to shape.
-
recessed position lights built by
drilling out the lights, backing with foil tape and filling the hole
with colored Testor’s Window maker cement .
Tweaks
First tweak was to reposition elevators and trim tabs. Actuators are
from the Eduard fret, rudder tab is from air foil shaped stock.
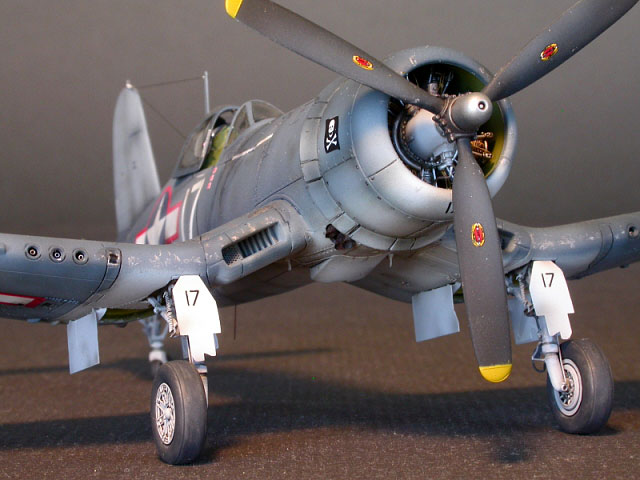
The second tweak was to reposition the engine cowling flaps to a more
neutral position and add detail to the inside surface.
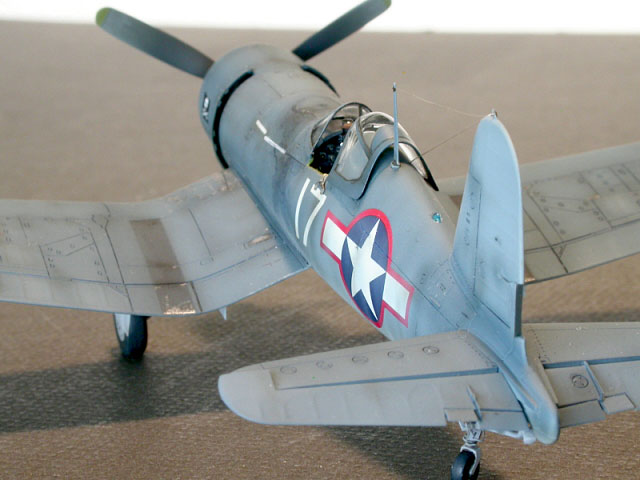
The last tweak was to thin the kit windscreen and canopy to a more scale
thickness. After what i can only describe as a disastrous attempt to cut
and fit a vac-u-form replacement, i thought I’d experiment with thinning
the kit parts. A metal cone shaped cutting bit was used in my dremel
tool to thin the edge of the windscreen and the insides of the canopy.
Micro-mesh pads were then used to polish out the clear parts. Worked
like a charm
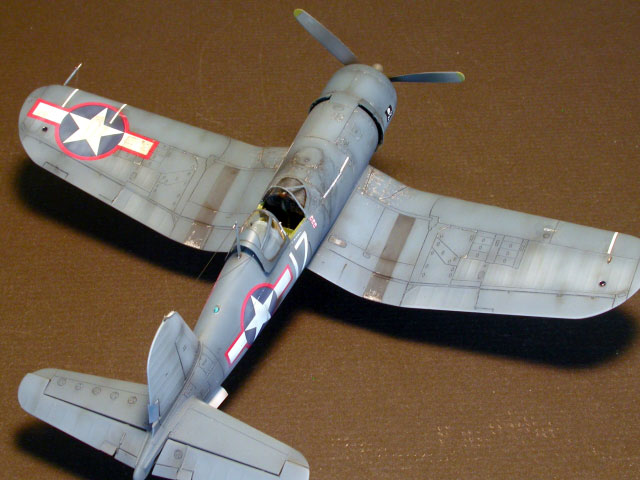
Painting
VF-17’s Corsairs fought in the US Navy tri-color scheme of non-spec.
sea blue and non-spec. intermediate blue upper surfaces and non-spec.
white lowers.
Mr. Color white + a drop of sail color was sprayed over preshaded
lower surfaces. Mr. Color Sea Blue +Navy Blue, mixed with various
amounts of white and Intermediate blue were used on the upper surfaces.
Mr. Color intermediate Blue + white was used for fuselage sides,
vertical tail and lower outer wing panels.
Weathering
Lightened and darkened shades of the base colors were used to obtain
the heavy weathered effect worn by almost all Corsairs that operated in
the Pacific theater during WWII.
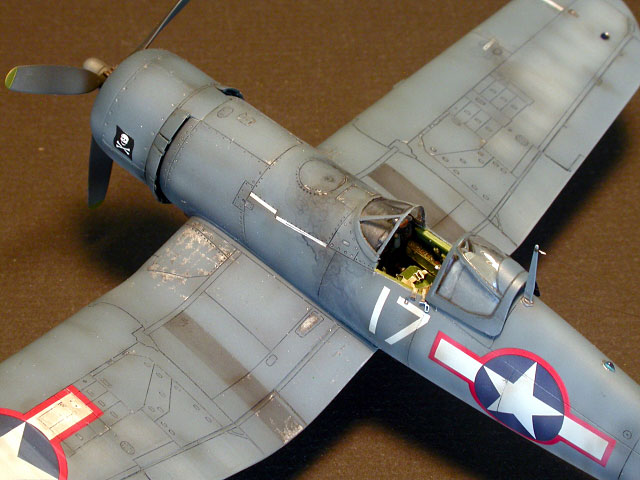
Paynes gray artist oils was used to accent to upper’s panel lines and
replicate fuel stains, etc. Raw Umber+black artist oils was used for
heavier stain areas. Markings were toned down with a very thin over
spray of the base colors.

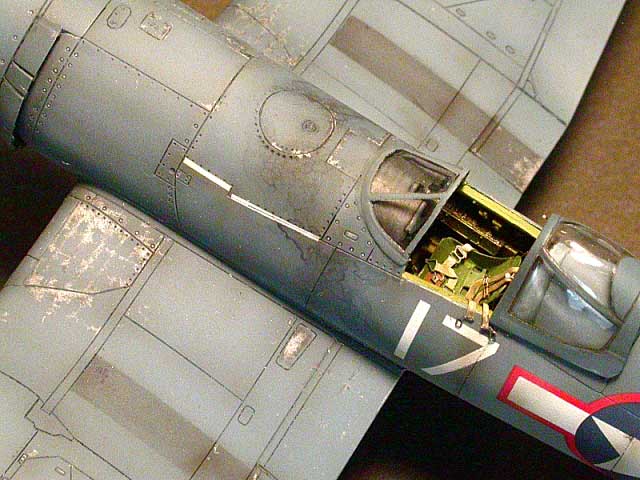
Final weathering was obtained with a thin mix of Tamiya Red brown +
Black sprayed along panel lines, in recessed areas and streaked onto the
wings and fuselage. Subtle paint chipping was achieved using a
Prismacolor silver pencil. Wing walks were added using Mig Productions
pigments over the final flat coat. Soot black and gray were used
Markings
Lt. Cmdr. Roger R. Hedrick flew three F4u-1a Corsairs while assigned
to VF-17. I wanted to model his first #17, Bu.No.17659. I used Eagle Cal
sheet #72-20 though it supplies markings for his last a/c #18005. I
believe that the his name on the canopy rail should read Hedrick R.R.
(page 41 of Lee Cook’s “The Skull & Crossbones Squadron”) for his first
#17.
I pore over hundreds of pictures to help detail and weather a model,
but always turn to the HyperScale community for help with
interpretation, and guidance.
As always, I like to thank all for their direct and indirect help and
inspiration.
Click the
thumbnails below to view larger images:
Modelling the F4U
Corsair
Osprey Modelling 24 |
|
|
|
|
Author: Brett Green
US Price: $17.99
UK Price: £12.99
Publisher:
Osprey Publishing
Publish Date: October 10, 2005
Details: 80 pages; ISBN: 1841768804 |
|
|
Model, Images and Text Copyright © 2005
by Roger Fabrocini
Page Created 01 August, 2005
Last Updated
01 August, 2005
Back to
HyperScale Main Page |
 Home
| What's New |
Features |
Gallery |
Reviews |
Reference |
Forum |
Search
Home
| What's New |
Features |
Gallery |
Reviews |
Reference |
Forum |
Search