|
Kiwi
Corsair in 1/48
Tamiya's F4U-ID
by Peter Mossong
|
|
|
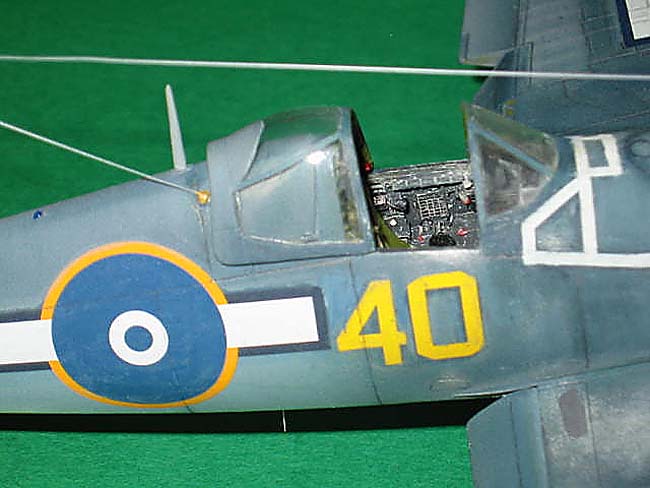
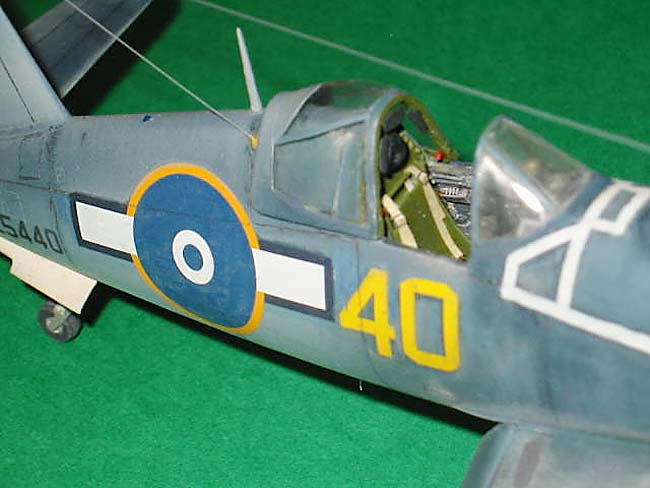
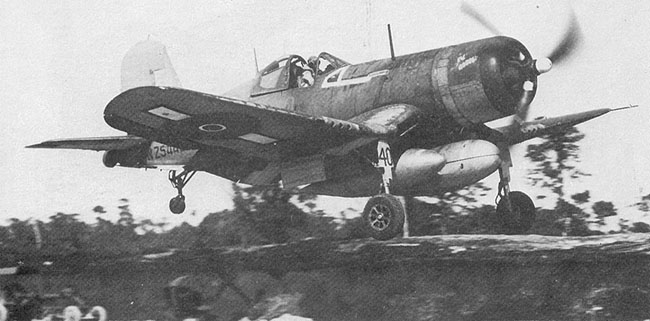
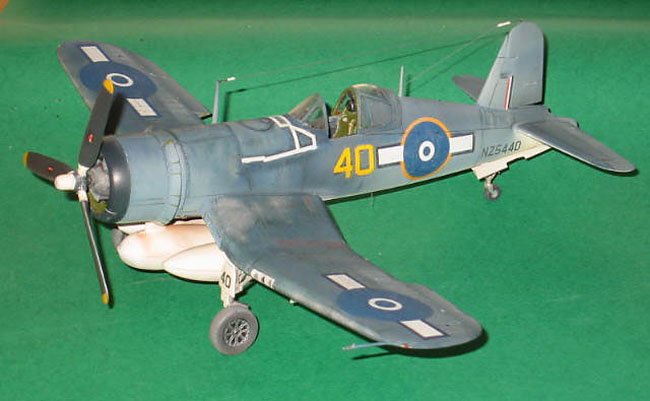
NZ5440 'Lil Audrey' landing at
Jaquinot Bay, New Britain. May 20th, 1945 |

Tamiya's 1/48 scale F4U-ID Corsair
is available online from Squadron
The aircraft in the
title photo, NZ5440 was an F4U-ID (Bu.No. 50459), and was flown at this
time by 24 Squadron, Royal New Zealand Air Force. It has the distinctive
markings of 3 Servicing Unit (SU) who 'owned' it.
It survived the war
only to be melted down for scrap in 1948 along with most of its
brothers.
As the Corsair is
one of my favourite aircraft, I decided that this kit would be a good
return to 'active' model making after a non-productive period of several
years.

The picture is I
feel, a good example to show the heavy weathering and staining of the
Corsairs operated by the RNZAF in the Pacific, and as I prefer to model
'active' service aircraft, would be a good exercise in polishing up my
long dormant weathering techniques!
When I began, little
did I know how much grief I was going to experience with this build!
Several years ago, I
had purchased the Aires Corsair superdetail set (No.4070) and rather
than do one fully detailed aircraft, had decided to split it over
several kits. All I used for the construction of NZ5440 was the cockpit,
and this was to prove the beginnings of my problems with this build! I
also used some of the Eduard etch set for the Corsair, and the front
half from an 'Engines and Things' R2800-8W as I felt that both the kit
and the Aires R2800's were a bit anaemic in their representation of the
reduction gearbox.
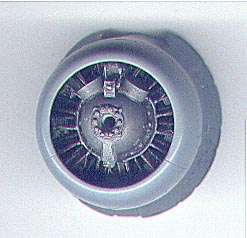
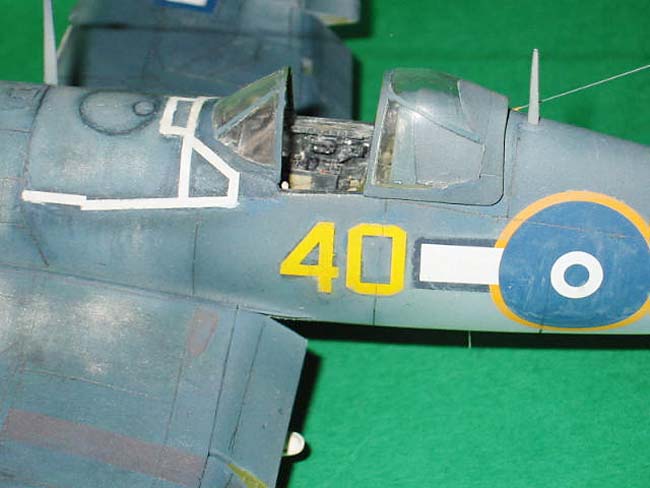
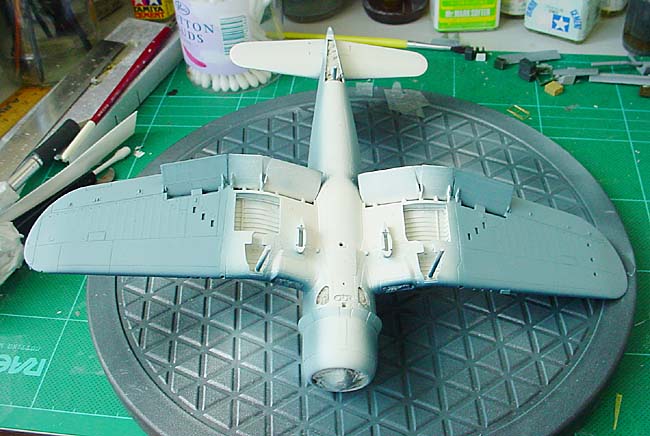
Cockpit
This set (along with
other Aires sets I have) is probably some of the crispest resin I have
ever seen, and is very accurate. I painted and detailed the sections as
separate items, before joining together as a 'tub'. Most of my research
had shown that the lower sections of the 'pit' of early production -ID's
were Interior Green, and the side consoles and above were Black. One of
the CO2 tanks from the port side was removed, as the -ID (and later -IA's)
did not have the leading edge fuel tanks, and this second tank was
therefore deleted. I then detailed the consoles and Instrument Panel
with brass strip, HSP, Waldron placards, and homemade decals.
I was not happy
about the shape of the Aires rear bulkhead, so detailed the one from the
kit by adding the noticeable bolt heads, and built a new seat mounting
frame from rod and HSP.
I then offered up
the 'tub' to the fuselage to check for fit, and then began to grind away
the plastic with my trusty Dremel set at a slow speed. When these
became very translucent, and the tub still wouldn't fit, it became
obvious that I was also going to have to attack the resin as well.
After much swearing and cursing, I had both to the point where the
fuselage halves would close up, but was still going to be left with a
slight gap at the rear of the front upper cowling.
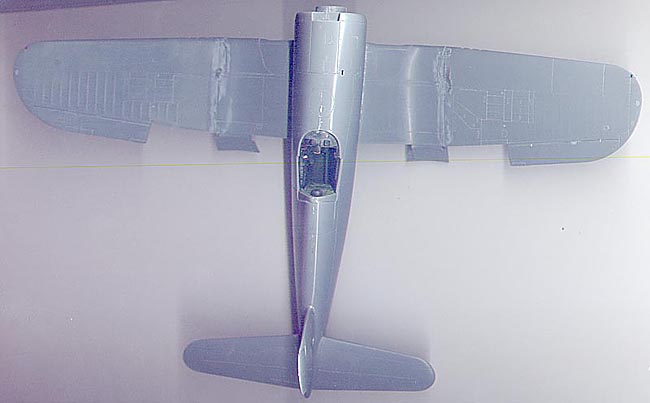
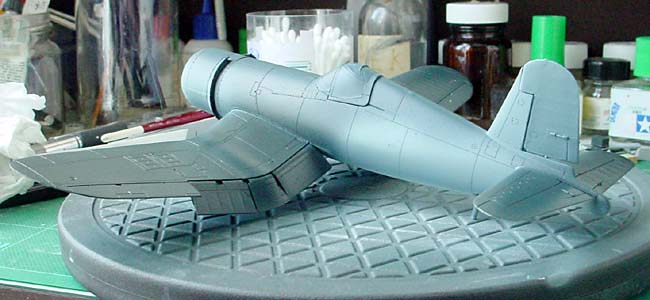
Wings and Fuselage
After
gluing scrap sheet into the inner surfaces of the wing halves to blank
off the shell ejector ports, my next problem arose when I joined the
wing halves together. Whatever I had done, I couldn't get a good match,
and had to resort to Milliput and lots of sanding, polishing and
re-scribing. (Since starting this build, I have seen several build
reports suggesting joining the upper halves together, then the lowers
before joining the wings).
I also
filled in the depressions Tamiya had moulded into the wing tips, filled
in the leading edge wing tank fillers and drains, and cut out the nav
lights from the tips. I then inserted red and green HSP (overpainted with
a light coat of Tamiya clear red and blue) into the cut-outs, and built
them up with superglue, allowing it to go off normally, then adding
another layer until I had built it up slightly larger than the area
required. These were then shaped and polished to match the wing
section.

The wheel bays were detailed with
strip; HSP and fine solder to duplicate the hydraulic tubes and wiring.
I then detailed the tailwheel bay with strip and rod, and made up a
forward bulkhead from 20 thou card detailed with strip and rod. This
was all painted interior green with a light drybrushing to bring out the
detail. The fuselage halves were then joined, and the seams dealt to
with Milliput, cleaned up and polished with various Micro Cloth sheets.
After much cleaning
up and rescribing, the wings were joined to the fuselage, and the lower
joint filled and cleaned up. I cleaned up the flaps, and filled in the
step Tamiya have moulded into the starboard inner (-4 and post war
only). The flaps were then fitted to the wings in a fully dropped
position, and the operating rods added.
The fuselage was
tidied up, and several inspection hatches (one for the oil tank filler,
and one for the water injection tank) Tamiya had missed were scribed
into the upper cowl. Tamiya had also added an extra ring of screw heads
around the outside of the fuel tank cover plate that do not exist, and
these were filled.
The tailplanes were
then added and checked for alignment (something commonly missed that
shows up in contests!). I cut off the moulded trim tab actuating rods,
and added new ones from HSP.
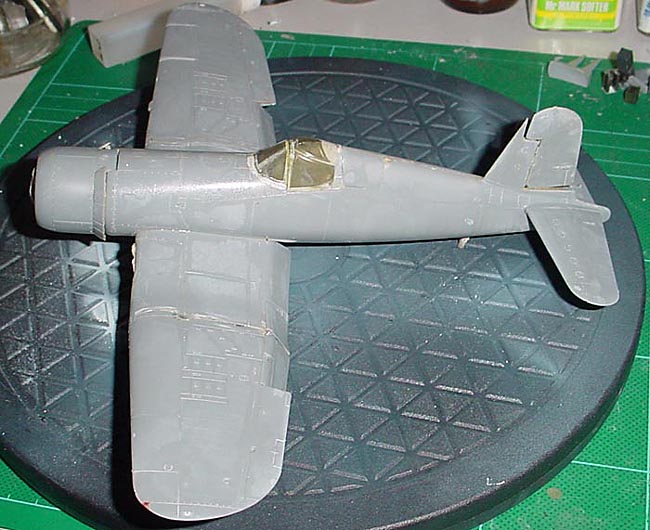
The windscreen was
then fitted and faired into the fuselage with Milliput. This was masked
with Scotch tape, and the cockpit filled with damp tissue. I then glued
the cockpit canopy on with some small dabs of white glue after masking
it.
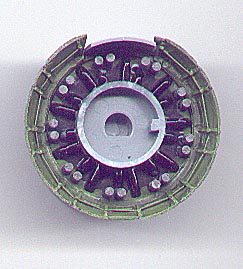
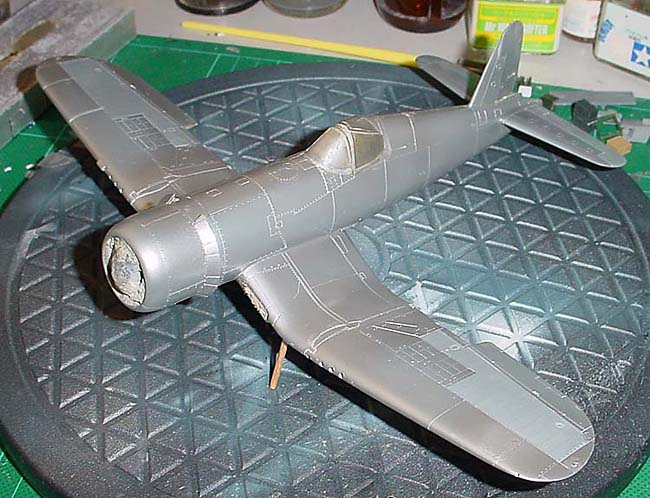
Engine and Nose Cowl
As mentioned in my introduction, I
felt that the kit supplied engine, and the Aires R2800 both have
undersized reduction casings. I had a couple of 'Engines and Things'
R2800's that I had been sent by Dave Wadman (thanks mate), so I used the
front cylinder bank and reduction casing from one of these resin engines
mated to the rear half of the kit engine.
The pushrods were cut off, and
replaced with black plastic rod, and the ignition harness was detailed
with HSP. The leads were then fitted using tan coloured HSP touched up
with copper paint. I then detailed the magneto and distributors, and
added some further detailing to the prop governor.
The crankcase was
painted in a medium grey, and the cylinders and heads painted with
Floquil's Weathered Black then drybrushed with Testors Gunmetal to pop
out the detail.
The nose cowl
interior was detailed with an inner ring, and stiffeners added from
plastic card. The rear section was detailed with strip and HSP to add
the cowl flap operating cables after thinning down the flaps. I then
masked off this area ready for painting.
Having found that my
local model shop still had a small stash of the Aeromaster Enamels,
I purchased most of the colours they had left, and decided to try them
out on this project.
After masking off
the fabric areas of the wings, tailplanes and the rudder, I gave the
entire airframe a light coat of Floquil Old Silver as a base, and to
check for seams and construction marks. It's amazing what the silver
will show up! These imperfections were dealt to with Mr Surfacer, and I
was ready to start the topcoats.
I began by painting
the lower surfaces and sides of the fuselage with a 50/50 mix of Humbrol
Sail White and 22 White, which I feel, is a good match for the wartime
Insignia White.
I then mixed up a
batch of 50/50 Humbrol and Aeromaster Intermediate Blue (I felt that the
Aeromaster tone was too grey), and this was applied to the outer
sections of the underside of the wings, the fuselage sides, and the fin
and rudder. Next was a 50/50 mix of Aeromaster N.s Sea Blue and Glossy
Sea Blue to replicate the Semi-Gloss Sea Blue on the upper wings and the
tailplanes. Last applied was straight Aeromaster N.s Sea Blue on the
upper fuselage and the wing and tailplane leading edges. This was all
done freehand.
After leaving the
paint do cure for a week. I then brushed on a coat of Johnson’s Klear
and left this to cure.
Decals
The decals used were
a mixed bag. The roundels were from the Aeromaster RNZAF SP48-10 sheet,
the serials, fuselage numbers and stencils were made on my ALPS MD1000,
and the fin flashes were from an old RooDecals sheet. These were
applied using all manner of decal solvents to get the Aeromaster
roundels to 'suck' down. I added (NZ) Roundel Blue borders to
the starboard upper and port undersides to match the RNZAF applied
roundels, then after cleaning up, the whole aircraft was given another
brushed coat of Klear and left to cure. The final coat was misted on
Microscale Flat.
Disaster Strikes!
Imagine my horror
when getting the model out to continue several days later, I found that
the roundels had all begun to crack and craze! The paintwork was
perfect, with no signs of crazing, but would have to come off! Out with
the Zippy oven cleaner, and within ten minutes, I had a bare plastic
Corsair again. The hardest parts to remove were the Aeromaster
roundels! $%@@@#@@!!***
My next job was to
repeat all of the previous section, but I didn't give it the upper
overcoat of Klear after decaling. I instead gave it a lightly sprayed
coat of Wattyl Matt Polyurethane varnish, a locally produced paint that
dries absolutely dead flat, does not yellow, and is hard as 'the hobs of
hell' when cured. I then left it for several weeks to see if the decals
would craze again. Success!
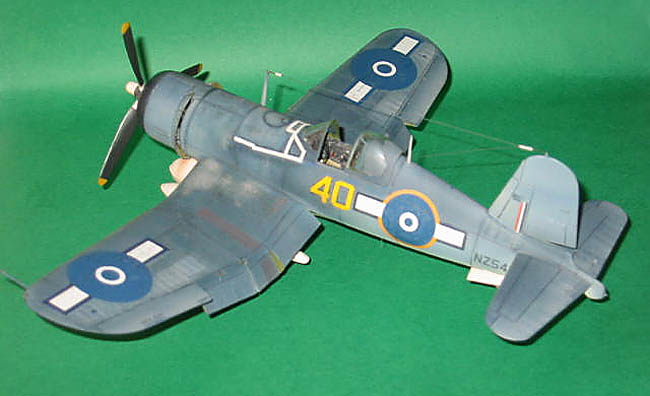
Weathering and Finishing
Weathering
was carried out using a 90/10 mix of thinners and light grey very
lightly misted on. I then went over the main panel edges with the
original colours drybrushed in to post shade it. Stains and fuel spills
were added with ground pastels.
The leading
edges of the wings, the walkway areas, and the sections of the cowl
normally subjected to wear, were then rubbed with a piece of a 3M
scouring pad until the Old Silver undercoat began to show through in
patches. The cowl was then masked off, and the front cowl ring was
sprayed with Aeromaster Glossy Sea Blue mixed with a little clear flat
to knock back the shine.
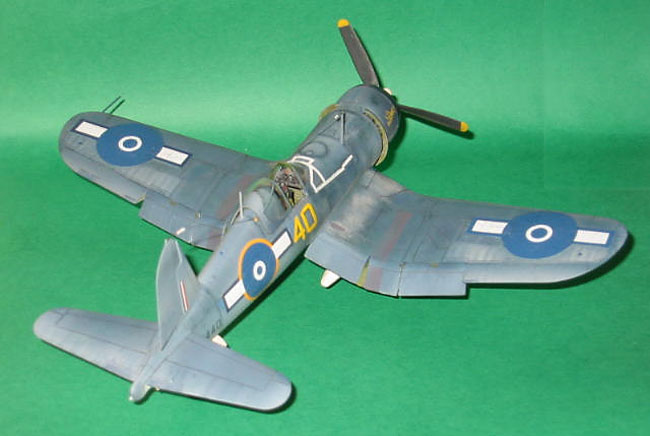
I built up and
detailed the main landing gear and added the brake lines from thin
solder and the oleo retraction rods from HSP. The assemblies were then
painted, weathered, and fitted to the wings.
The underside
recognition lights were firstly painted with silver, then when dry,
drops of Tamiya’s' Clear Red, Green and Yellow were built up into the
holes. A final coat of Klear was added to seal them.
I detailed the
tailwheel assembly with one or two parts from the Eduard etch set, and
made up the damper spring from rod with HSP wound around it. This
assembly was then securely superglued into the tailwheel bay after
painting. Being a land based aircraft, no hook was added.
Moskits' absolutely
fabulous exhaust stubs were superglued into position, and detailed with
various Floquil paints.
With the model now
sitting on its own 'feet', I then added the seat from the Aires resin
set to which I had fitted seatbelts made from masking tape and Eduard US
buckles and catches. The rear cockpit canopy was detailed with catches
and mirrors, and fixed on with PVA glue.
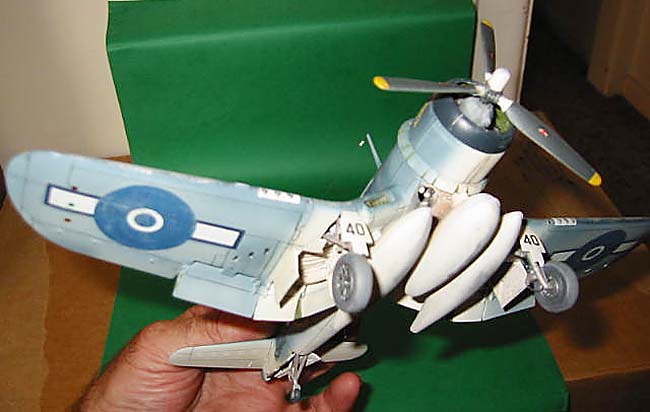
I added the .50 cal
barrels from cut off fine steel tube, and the three auxiliary fuel
tanks, which were weathered with pastels and drybrushing, were attached
with PVA.
The blue upper wing
formation lights and the rear upper fuselage formation light were added
using the same technique I used for the recognition lights.
The camera gun port,
and the landing lamp port in the wing leading edges were filled in with
clear PVA. The clear lamp on the tail cone was shaped from some clear
sprue held in a pin vice, then fixed on with PVA.
The aerial leads
were added from freshly stretched silver sprue, and the insulators added
from carefully applied dabs of PVA which when dry, were painted
off-white.
The final act was to
paint and detail the prop, the hardest part of which I found to be was
masking the cuffs and hub to add the white areas.
Other than the disaster with the
decals, and the problems I had with the wing joins, I eventually enjoyed
this build as it has managed to hone up some of the skills I hadn't
practiced for some time.
As for the Corsair,
this won't be the last I will build!
Click the thumbnails below to view larger images:
-
N.Z.P.A.F. *
R.N.Z.A.F. AIRCRAFT COLOUR SCHEMES VOL. 3 By Warren Russell.
-
RNZAF The
First Decade 1937 - 1946: By Charles Darby.
-
RNZAF Museum,
Wigram.
-
Hyperscale:
Various articles and reviews.
Model, Images and Text Copyright © 2004
by Peter Mossong
Page Created 22 March, 2004
Last Updated
22 March, 2004
Back to
HyperScale Main Page
|
 Home
| What's New |
Features |
Gallery |
Reviews |
Reference |
Forum |
Search
Home
| What's New |
Features |
Gallery |
Reviews |
Reference |
Forum |
Search