|
Classic
Airframes new 1/48 scale
F-5A Freedom Fighter
by Fotios Rouch
|
 |
|
Northrop F-5A Freedom Fighter |

Classic
Airframes' 1/48 scale F-5A Freedom Fighter may be ordered online
from Squadron
The Northrop F-5A Freedom Fighter was a small, and inexpensive
supersonic fighter that was very easy to maintain and could be operated
from unimproved airfields. It was originally offered to the USAF as a
lightweight fighter, but really found its calling overseas through the
Military Assistance Program (MAP). Iran was the first nation to fly the
F-5 under this program in 1965.
The F-5 prototype flew on July 31, 1959. The first two production
F-5As joined the test program at the end of 1963. They had minimal
fighter capability but in 1964 two internal Colt-Browning M-39 20-mm
cannons were added in the nose to answer the new Secretary of Defense
requirements. The F-5A was optimized for the air-to-ground role and had
a limited air-to-air capability. To keep it inexpensive the F-5A had a
simple optical sight and no fire-control radar. There were 5 hard points
between the fuselage and the wings.
The F-5A had very docile handling attributes and was hard to stall!
The two General Electric J85-GE-13J85 engines were very close together
and this reduced greatly the effects engine-out asymmetric
characteristics. The F-5A could reach Mach1.4 and cruise at Mach .85.
Northrop built 879 F-5A/Bs, while Canadair and Spain's CASA built 320
F-5A variants. Over twenty countries have flown the different F-5 types.
Production of the F-5A by Northrop ended in June of 1972.
The countries that used the F-5 A/B included the USA, Norway, Greece,
Turkey, South Korea, Brazil, Morocco, Philippines, Thailand, Saudi
Arabia, Spain, Venezuela, etc.
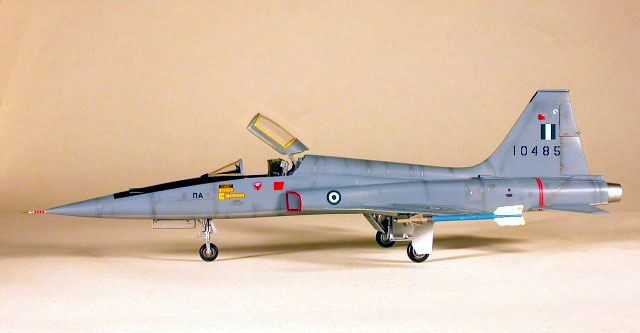
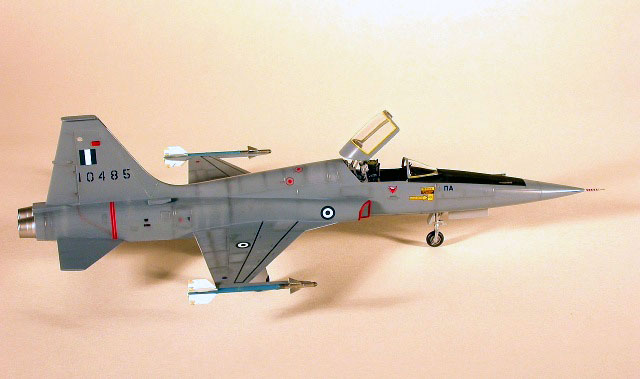
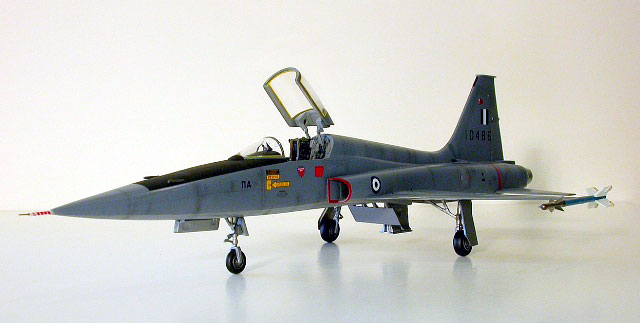
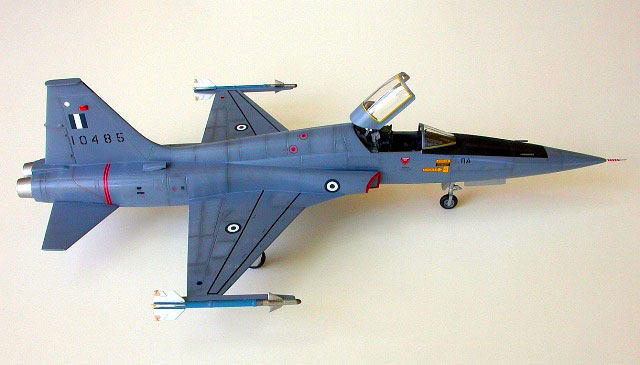
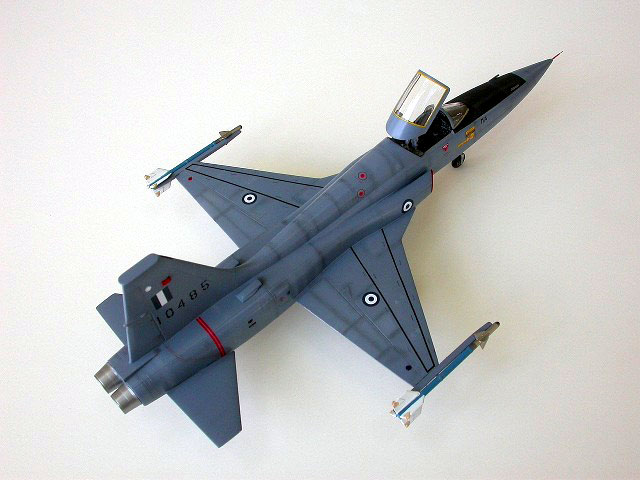
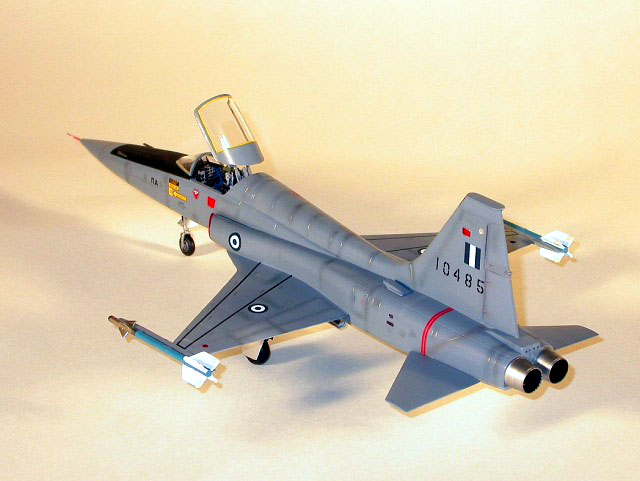
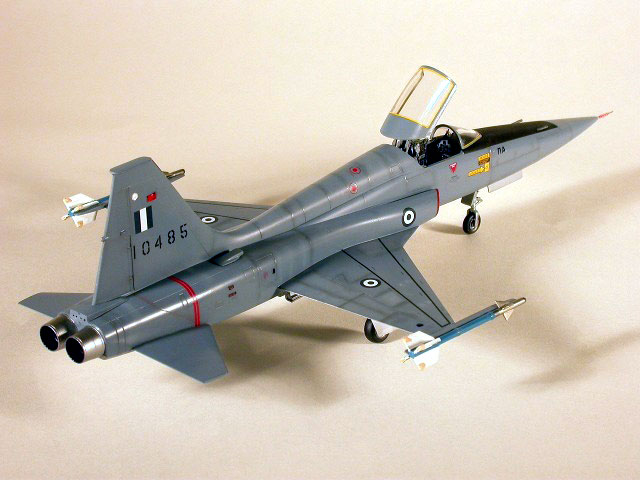
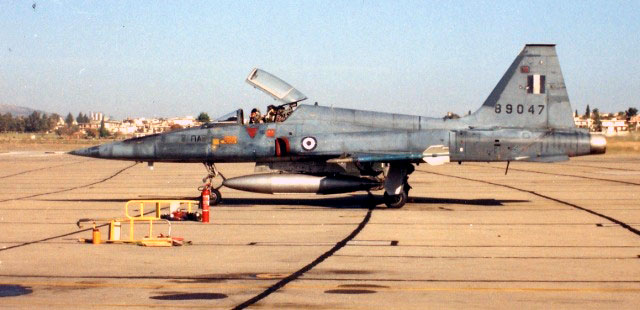
The F-5A equipped 4 squadrons for the Hellenic Air Force. Greece was one
of the first European countries that used the Freedom Fighter (F-5A,
F-5B, RF-A). It is worth noting that Greece also received used F-5s from
many different countries. This resulted in a huge variety of different
camo schemes. Add to that the fact that the Hellenic Air Force
experimented with a few great looking schemes of their own and then you
understand why there so many more F-5s that I would like to add to my
collection!
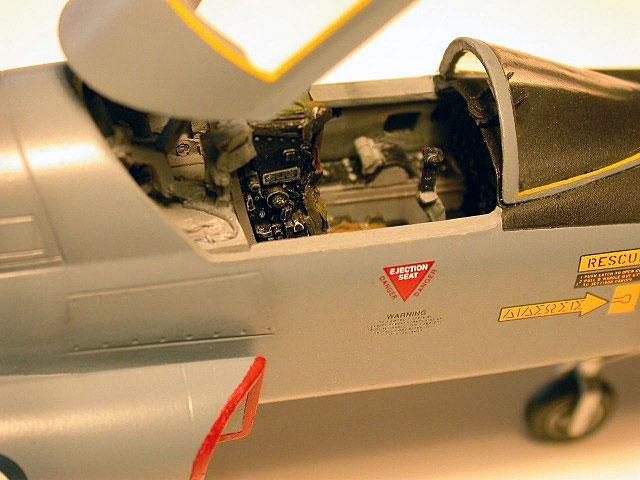
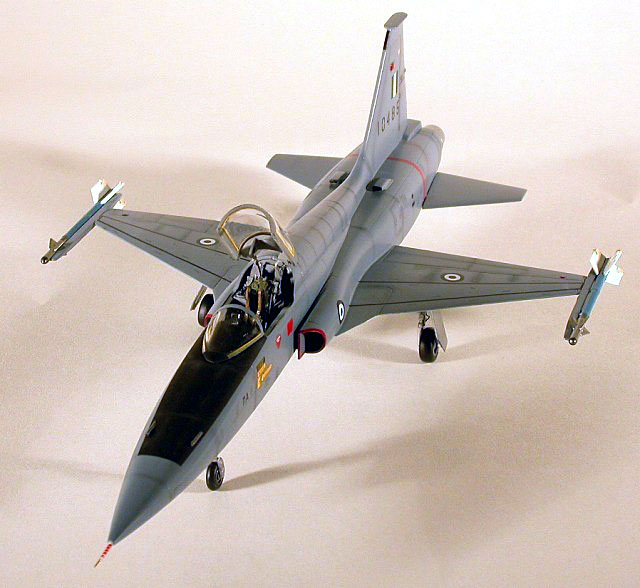
I wanted to make a Hellenic Air Force F-5A from the get go. I had
built a model of one many years ago using the Fujimi kit. The only item I
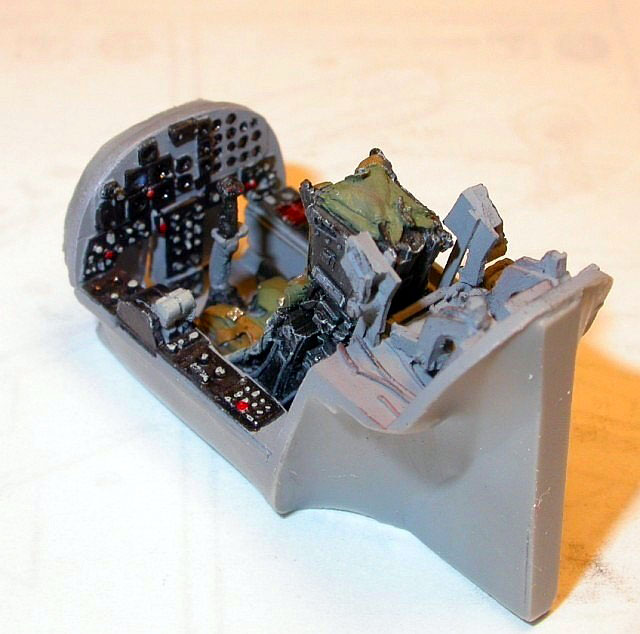
needed to start the project was a Martin Baker Mk10L from the Mirage
2000. The Mk10A from the Tornado looks close too but at least in 1:48th
scale we have the Mirage 2000 set from Black Box. So out the resin mix
came and a copy was made from the Black Box Mirage ejection seat. The
kit was supposed to be built straight out of the box. Eventually, I will
go hog wild on one of these beauties but not with this one and not this
time.
Dimensions:
Length 47 ft 2 in (14.38 m)
Wingspan 25 ft 3 in ( 7.70 m) or 25ft 10in (7.87m) depending on
different sources
Classic Airframes
1/48 Scale F-5A Freedom Fighter Kit #486
The first impression was very good. Classic Airframes has come a long
way. They are firmly sitting at the top of the limited production run
companies.
Their newest kits are ample evidence of that fact. Look at the
Meteors for example.
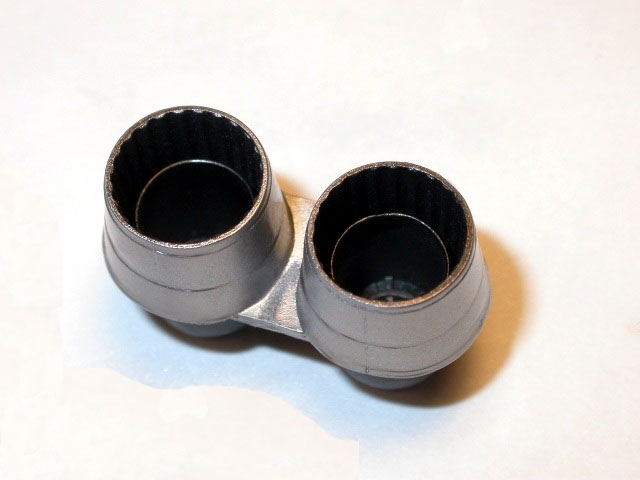
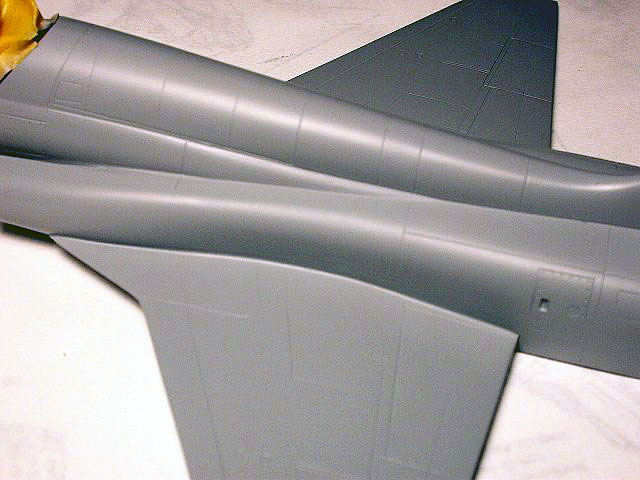
The F-5A has a very nice and shiny plastic with nicely engraved panel
lines and very useful alignment tabs along the fuselage to ease with
construction.
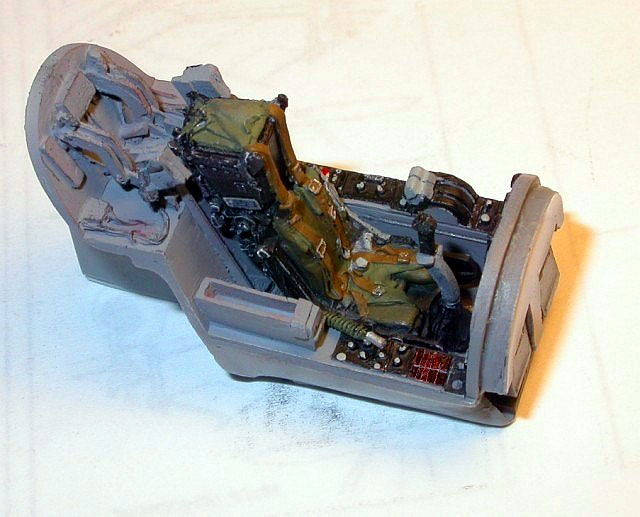
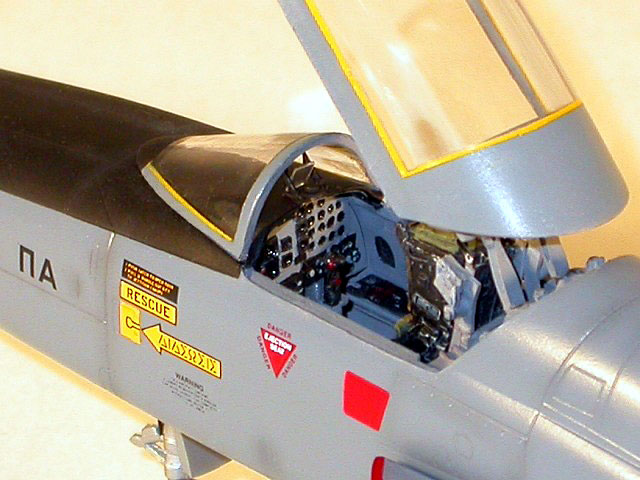
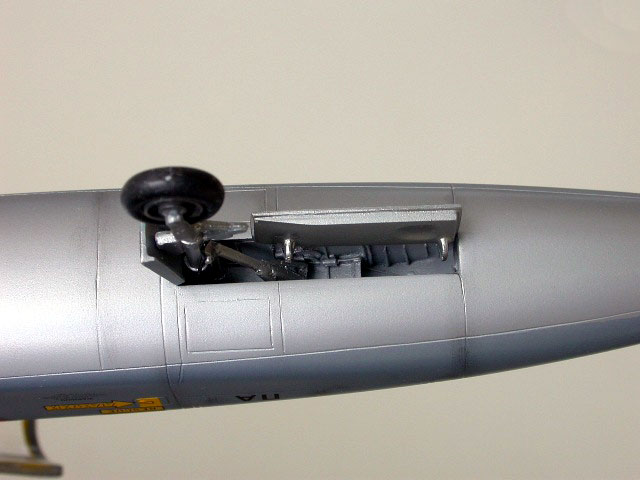
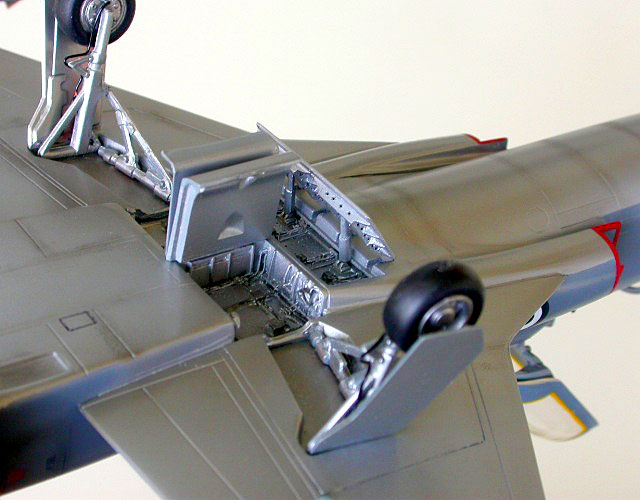
The resin parts were quite nice and include the cockpit, the front
wheel well, the main wheel well and the speed brakes. The canopy is made
of clear plastic. There were two sprues of plastic parts, one contained
the airframe parts and the other contained all the stores and tanks. The
decals are very nicely printed by Microscale and of very good color
rendition.
Preparation
The parts were washed in warm soapy water and were left to dry. I
elected to cut all the parts out of the sprues and clean them up first.
Since this is reasonably simple kit I had no worries of mixing up parts.
The only thing to watch was the intakes and their splitter plates. If
you spend the time to cut the parts carefully, trim them and polish
them, the rest of the assembly will take an evening o two and the result
will be very good.
Test fitting of the fuselage parts showed not problems. Nice thing to
note are the alignment tabs that helped with putting the fuselage
together.
Resin
The resin parts fit beautifully and for the first time in my modeling
experience I did not have to do any trimming or fine tuning of the resin
to make it fit in the fuselage.
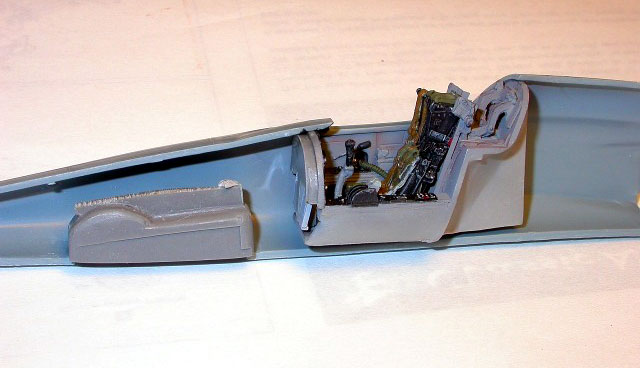
The cockpit details look good and the instrument panel is a close
representation of the original.
Click the thumbnails below to view larger images:
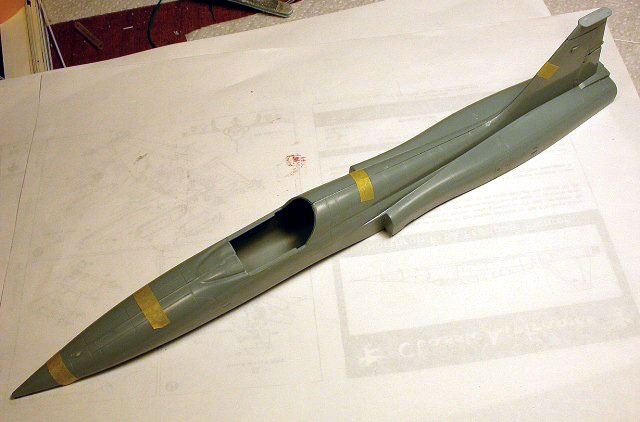
Main Construction
The fuselage was glued and was left to dry while other parts were
attended to. Some seams were filled here and there and then sanded and
polished off.
After all was cleaned up a coat of Mr. Surfacer primer was airbrushed.
No major faults were found. If you take your time and have all the parts
align well (intakes to splitter plates / intakes to fuselage / fuselage
to resin wheel well insert) you will end up having the wings fit really
great.
The construction process took me about four evenings and a total of
10 hours.
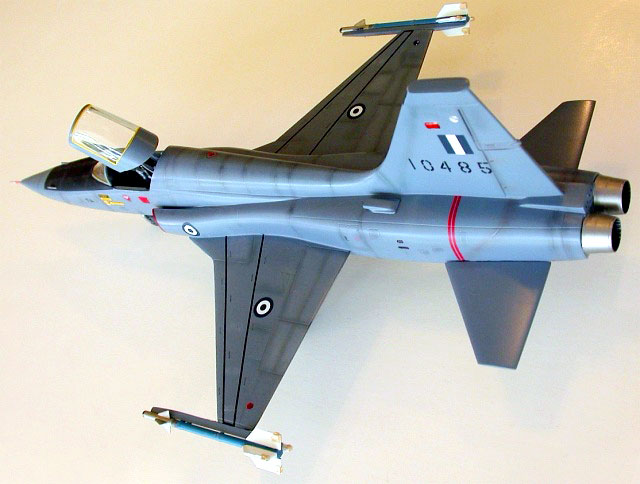
With the construction behind me the next thing was to choose the
appropriate color for the FS35164. For a while now I have been favoring
the Xtracolor shade that looks just right to my eyes. For the bottom
silver finish I chose the Alclad Dull Aluminum shade. Both colors dry
nice and shiny and decals can go straight on with no need of Future or
any other gloss coat. The model was left to dry in front of the fan
overnight. The decals went on carefully and with no problems. They are
very nice looking and the color tones look great. They are thin so be
careful with them.
When the decals were dry and the model was cleaned up, a coat of
Testors Semi-Gloss was applied. Weathering was done with pastels as
usual and sealed with another coat of Testors Semi-Gloss.
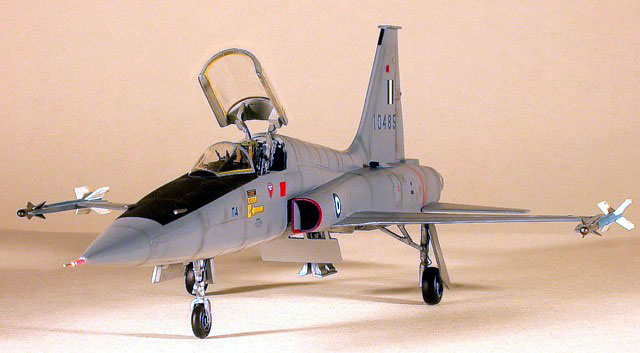
One week and 15 hours of total effort gave me a very nice looking F-5A.
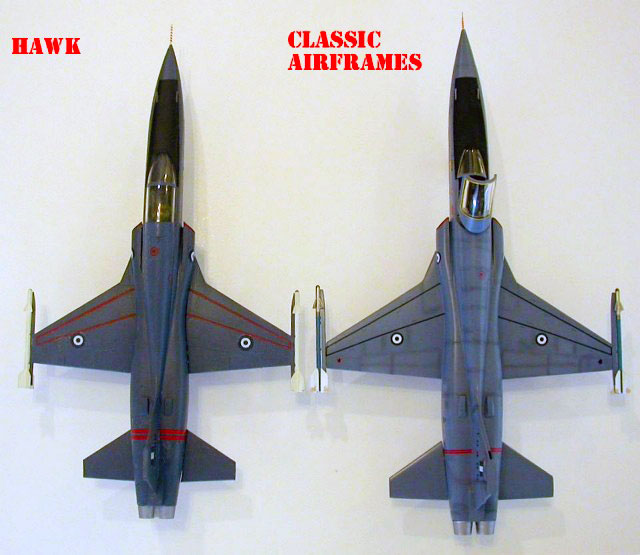
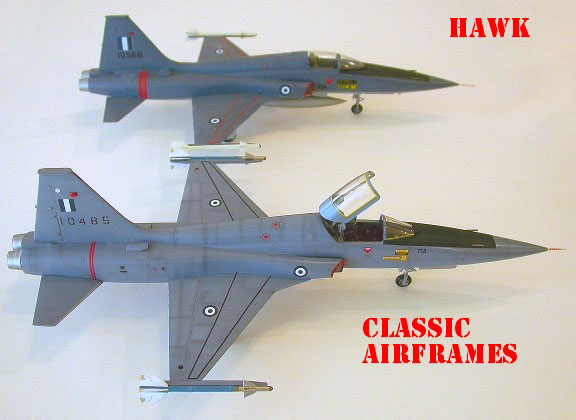
For comparison purposes I am including some pictures of the new
Classic Airframes F-5A next to my Fujimi 1:50 kit. The
size difference is obvious as well as the shape differences especially
around the hump behind the cockpit.
I feel ready for the rest of the releases of the F-5 family.
I would like to thank my good buddies from Greece George Papadimitriou
and Alexandros Anestes that provided literally hundreds of photos of all
the F-5 variants.
A great reference for the Hellenic Air Force F-5s found in the Greek
magazine "Modelling".
Many thanks go to Classic Airframes for the review sample and the
hours of fun it provided.
Click the thumbnails below to view larger images:
Model, Images and Text Copyright © 2004
by Fotios Rouch
Page Created 20 April, 2004
Last Updated
21 April, 2004
Back to
HyperScale Main Page
|
 Home
| What's New |
Features |
Gallery |
Reviews |
Reference |
Forum |
Search
Home
| What's New |
Features |
Gallery |
Reviews |
Reference |
Forum |
Search