|
Classic
Airframes new 1/48 scale
F-5A/C Skoshi Tiger
by
Phil Hale
|
 |
|
Northrop F-5A Freedom Fighter -
USAF |

Classic
Airframes' 1/48 scale F-5A USAF Freedom Fighter
is available online from Squadron
Only a true F-5 fan would recognize the words Skoshi Tiger. This is
the cover name given to the F-5A/C combat evaluation program in Vietnam.
 The
4503rd Tactical Fighter Squadron (provisional) was activated at Williams
AFB in Arizona in July 1965. It was an all volunteer group with pilots
and ground crew selected from Project Sparrow Hawk at Eglin AFB,
Florida. Sparrow Hawk had proven that the F-5 was a capable
fighter-bomber and it was on to Vietnam to prove it’s combat worth. The
4503rd Tactical Fighter Squadron (provisional) was activated at Williams
AFB in Arizona in July 1965. It was an all volunteer group with pilots
and ground crew selected from Project Sparrow Hawk at Eglin AFB,
Florida. Sparrow Hawk had proven that the F-5 was a capable
fighter-bomber and it was on to Vietnam to prove it’s combat worth.
Twelve F-5A’s were assigned to the program but were so highly
modified that the US Air Force re-designated them as F-5C’s. Refueling
probes, additional avionics, belly armor, camouflage paint and various
other combat necessary equipment were added. After an intense stateside
work-up program, the unit departed for Vietnam and combat. The F-5 was
cleared to carry most of the most common weapons used in Vietnam.
After six months of combat the Air Force brass determined that the
F-5 was very capable and requested that they remain in Vietnam as part
of the build-up in 1966. The 4503rd TFS(P) was disbanded and
re-organized as the 10th Fighter Commando Squadron. The F-5’s had done
so well in combat that the Air Force delayed conversion of the F-5 into
the South Vietnamese Air Force.
In combat, the F-5 delivered thousands of tons of ordnance and
rockets plus fired over 1.5 million rounds of 20mm ammunition. When
compared to it’s closest rival, the F-100, the F-5 was found to be just
as capable.
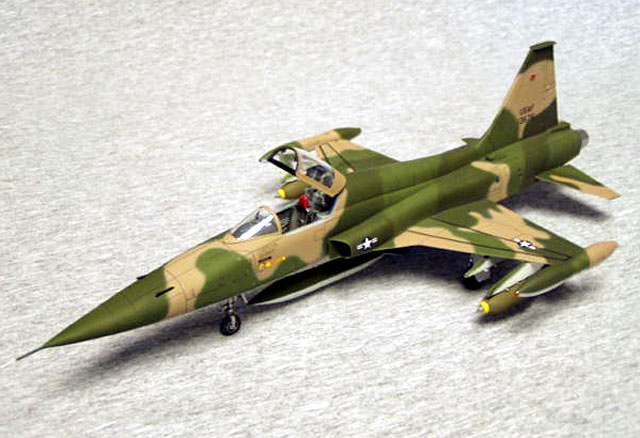
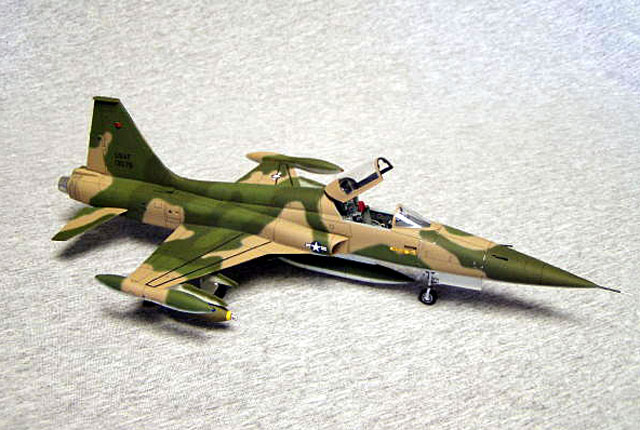
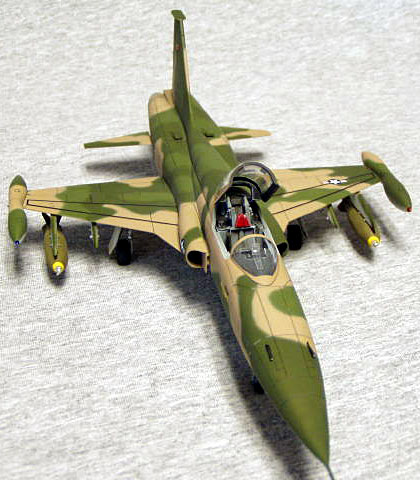
Classic Airframes have just released their excellent F-5 kit, and I
was fortunate enough to build one of the first kits. Let me say up
front, that this is a limited run kit and as such requires a little
extra attention in cleanup but builds into a fine representation of the
real thing.
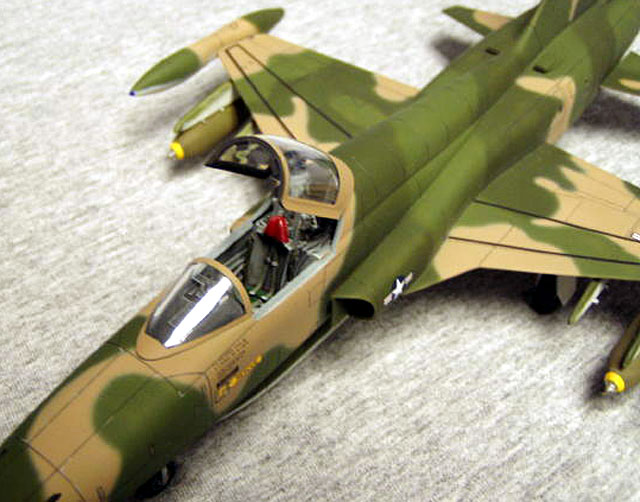
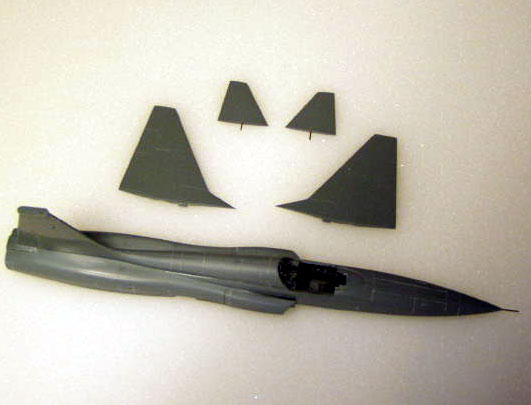
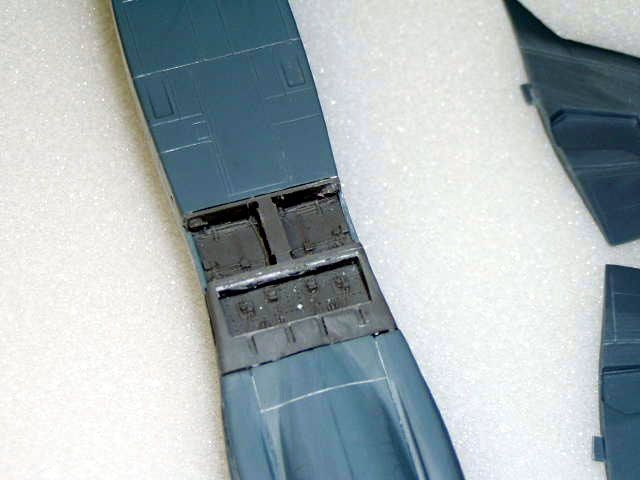
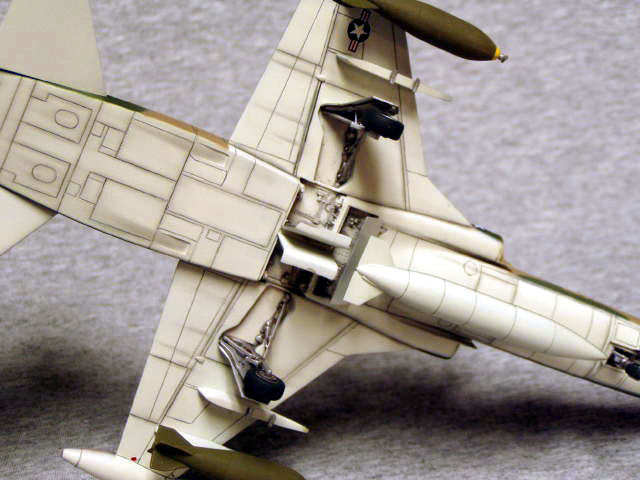
Resin parts make up the cockpit, wheel/speed brake wells, nose wheel
well, after burner area, and speed brakes. The remainder of the kit is
injection molded gray and clear plastic.
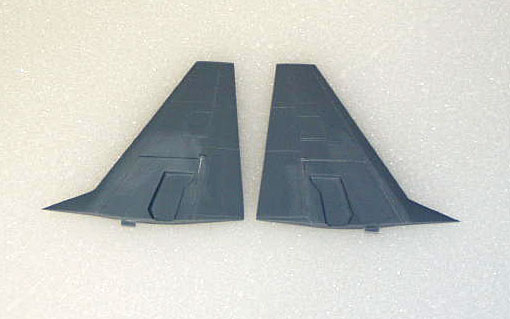
The engraved panel lines are crisp and sharp with thin leading and
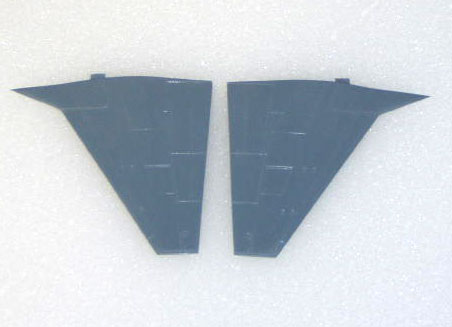
trailing edges. Several options are given in the kit. These include, tip
tanks, missile rails, centerline drop tanks, napalm canisters, and 750lb
bombs.
Correct weapons pylons and even sway braces are provided in the kit.
AIM-9B Sidewinders are provided and yes the F-5 did fly some Combat Air
Patrol missions.
No refueling probe is provided but after some research, the F-5’s in
Nam flew missions both with and without the refueling probe. The probes
were attached primarily to assist in the overseas flight from the States
to Southeast Asia.
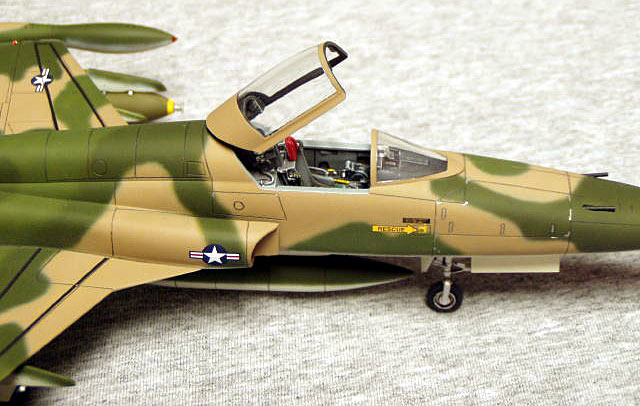
The cockpit tub is nicely done but the ejection seat has the wrong
headrest however this is easily corrected by cutting away the parachute
pack container. The cockpit tub (part R2) also contains the canopy
raising gear and is nicely represented.
The instrument panel (part 1) and internal canopy framing (part R5)
is well represented. The internal canopy framing is a little too big to
fit inside the canopy and should be sanded and test fit. It can be
attached to the raising gear first and then the canopy attached to the
framework. This will allow you to properly position the framework and
make attaching the canopy very easy.
Everything fit very well. The fuselage is in four main pieces. The
fuselage halves (parts 1 & 2) fit very well and the underside rear
section (part 30) fits well, however I had to fill the gaps left between
the wing and the resin wheel/speed brake well piece (part R10). This fit
to the fuselage well but it left a slight gap between the wing and the
fuselage. This was the only area that required any large amounts of
filler to make sure of a smooth blended fit. I put about a half an ounce
of lead shot in the nose to make the model set well on its nose gear.
Care must be taken in attaching the nose gear well (part R6) and making
sure that it is centered. The intake trunks (parts 4,5,6,7) fit well
together and then fit to the fuselage just as good. Little filler was
needed to blend these into the fuselage.
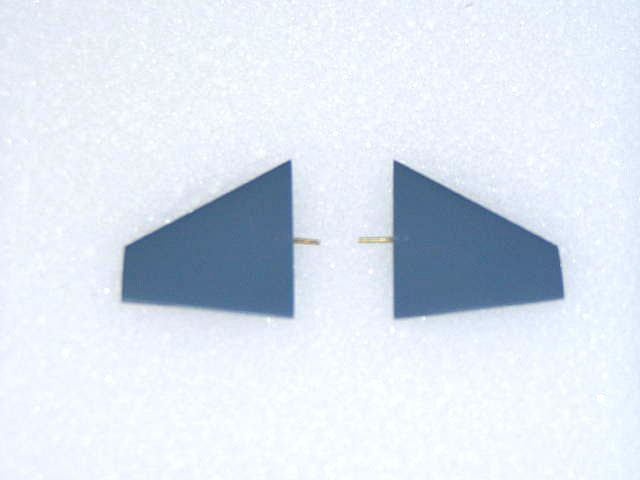
You will have to locate and drill the holes for the horizontal
stabilizers (parts 28, 29). I cut the plastic pins off the stabilizers
and replaced them with brass pins for strength. Refer to drawings for
the proper placement. I did have to make a cover for the parabrake
housing. This is the area between the burner cans. I replaced the pitot
tube and the cannon barrels but not out of necessity. The landing gear
and wheels are nicely molded and clean up very well.
Care must be taken in assembling the nose gear (parts 19, 23) to
prevent the nose wheel from being misaligned.
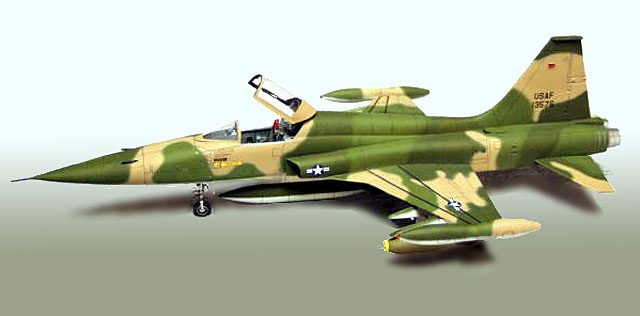
I painted my F-5 with Testor’s Model Master Vietnam colors and then
highlighted the panel lines with a drafters lead. I then weathered the
underside with pastels.
I am pleased with the results of the finished model and I am looking
forward to building more F-5s.
The decal options given in the kit are for a USAF F-5C, a South
Vietnamese 522 FS F-5A and a Spanish 211 Squadron silver F-5A. The
decals are custom printed by Micro Scale and work very well.
In summary, this is an excellent offering and builds very well even
for a limited run kit.
I would like to say this about limited run kits. They are not
Hasegawa or Tamiya and require extra attention in clean up and building
but I find the results are more than worth the extra effort. We are
fortunate that these limited run cottage industry companies provide us
these kits. Most of them do it for the love of the hobby with no designs
of getting rich.
I would like to express my thanks to Classic Airframes for producing
the F-5 series, it has long been one of my favorite airplanes. My good
friend Walt Holmes helped to take the photos of the finished model.
Thanks to
Classic Airframes for the sample
Click the thumbnails below to view larger images:
Model, Images and Text Copyright © 2004
by Phil Hale
Page Created 22 April, 2004
Last Updated
21 April, 2004
Back to
HyperScale Main Page
|
 Home
| What's New |
Features |
Gallery |
Reviews |
Reference |
Forum |
Search
Home
| What's New |
Features |
Gallery |
Reviews |
Reference |
Forum |
Search