|
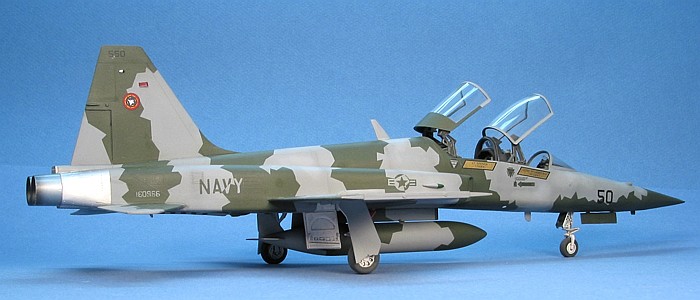
Monogram's 1/48 scale F-5F
Tiger-Striped
Tiger II
by
David W. Aungst
|
 |
|
F-5F Tiger II |

HyperScale is proudly supported by
Squadron
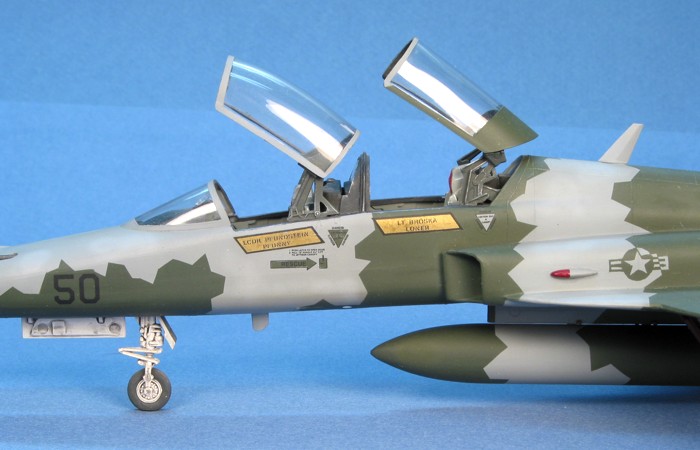
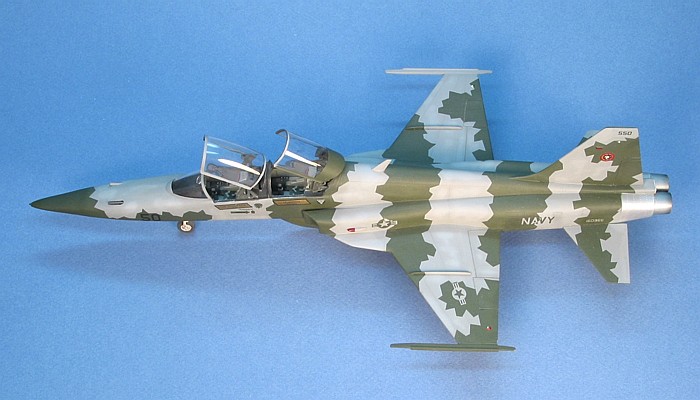
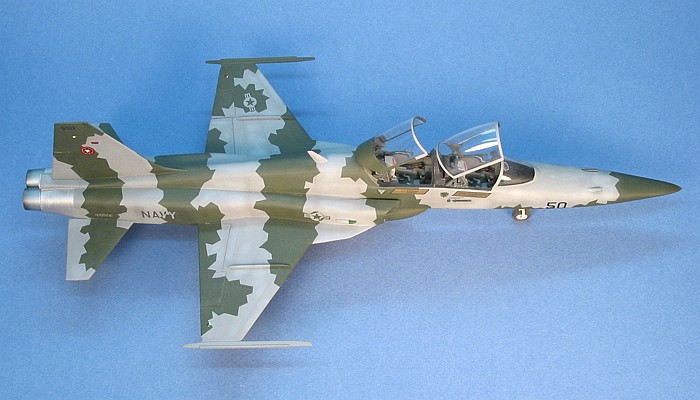
Top Gun is famous for creating some distinctive
camouflages representing enemy aircraft paint schemes, but every so
often they do something just because it looks good. This Tiger II is an
example of the "looks good" practice. I always liked this camouflage
scheme, but lacked the ambition to attempt the positive / negative
markings.
Finally, my desire to have the model sitting on my
shelves overruled my fears and I dived in. The markings proved to be
easier than I had always thought they would be.
Before I could paint, though, I needed to build. The Monogram
F-5F kit is not bad by the standards of its day, but it does need some
help. I did not do anything extraordinary, just some basic improvements
to the kit. The modifications I made to the kit were as follows:
- The Monogram kit is of an Air Force F-5F. When the Navy
got a hold of the aircraft, they modified them for better ACM
performance. I made the same changes to the kit. These include:
- Reshaping the nose cone into a "shark's nose".
- Removing the radar scopes from the main instrument panels
(Naval F-5's do not carry radar).
- I should have also enlarged the leading edge extensions on
the wings, but I learned of this modification too late to
incorporate them into the kit.
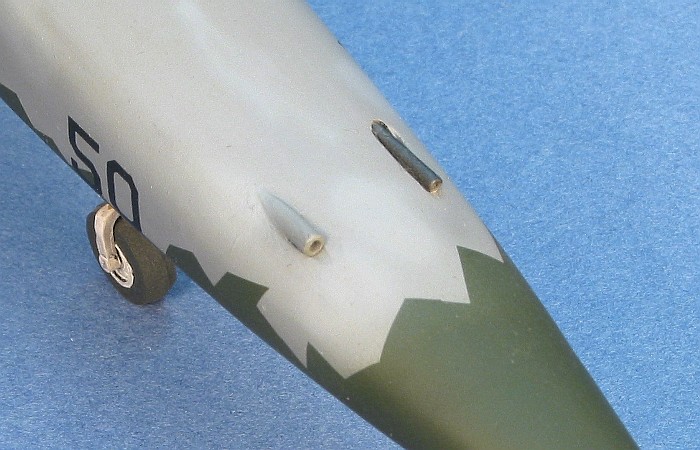
-
I drilled-out the left nose cannon
barrel.
-
On F-5F's, the right nose "cannon
barrel" is actually an avionics intake. I replaced the gun barrel
provided in the kit with a small diameter plastic tube and faired
this into the nose without leaving a gap around it.
-
I added the angle-of-attack vane on
the right side of the nose using the etchings provided in the
Monogram "high-tech" release of the F-5E.
-
I blocked the engine intakes so you
could not see through the model.
-
I added afterburner interiors to the
engine exhausts using plastic tube and the etchings provided in the
Monogram "high-tech" release of the F-5E.
-
I added anti-sway braces to the
centerline weapons pylon.
-
I replaced the fins on the centerline
fuel tank with .015" sheet styrene. This is still too thick, I know,
but any thinner just looked as wrong as the two foot thick fins that
come in the kit.
Before I go on, I have to warn you that the markings on the model are
not authentic. I guess you can call this an "inspired what-if"
scheme.
I wanted to have some more interesting markings than what the real
aircraft actually wore, so I fudged some stuff. I also lacked concrete
information on the full details of the aircraft when I built the model.
The fudging allowed me to move forward on the model and have fun in the
process. I will accept full blame for any misleading information that my
images create.
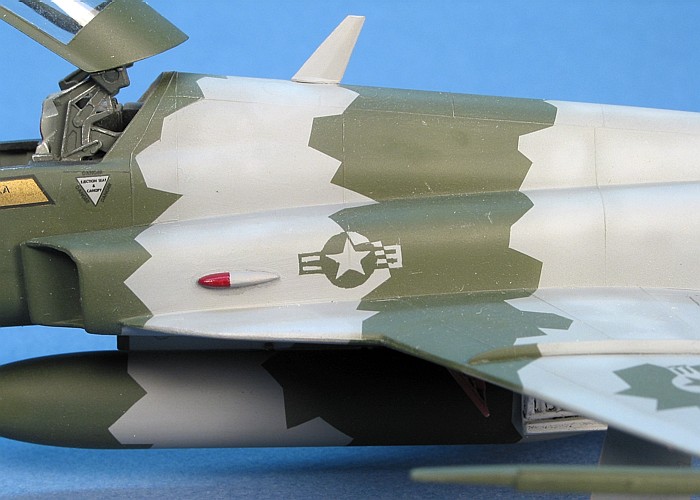
Compared to the real aircraft, I changed the following during the
painting and finishing process.
-
First, while the green and gray areas
are roughly in the right places, I ignored the exact demarcations on
the real aircraft. I just winged it with scotch tape to define the
splinter pattern. The effect of this is that the model has quite a
bit more of a zig-zag to the demarcation lines.
-
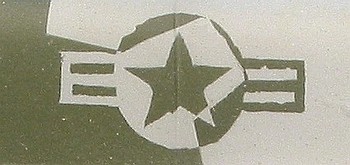
I went on to add national insignia
where none existed on the real aircraft and I fudged the camouflage
lines to make them run through the national insignia at all four
locations.
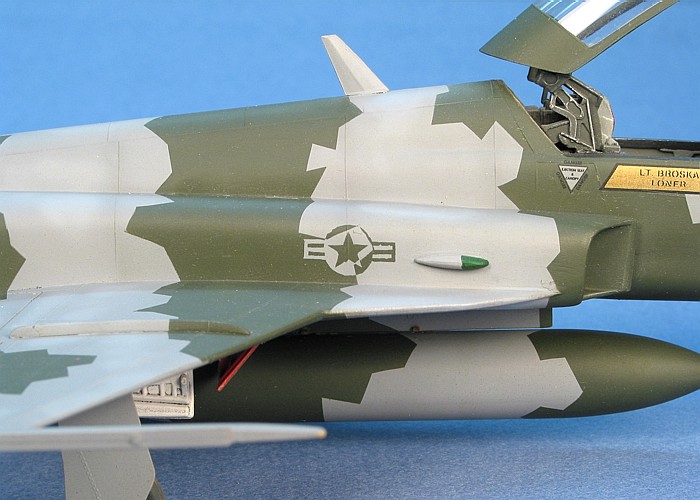
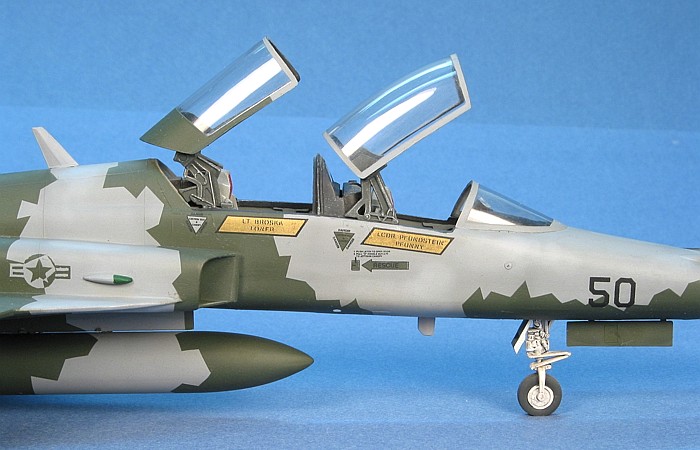
-
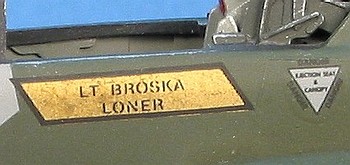
I added positive / negative painted
NAVY titles where the real aircraft wore only black.
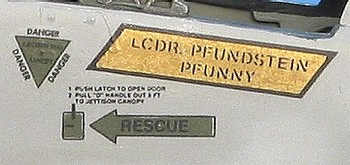
-
Lastly, I modified the danger
markings around the cockpit to be positive / negative and added more
data markings than the real aircraft actually had.
 For
paints, I used all Testors Model Master enamels. The camouflage
is made up of Dark Ghost Gray (F.S.36320) and Dark Green (F.S.34079). For
paints, I used all Testors Model Master enamels. The camouflage
is made up of Dark Ghost Gray (F.S.36320) and Dark Green (F.S.34079).
Before painting the camouflage, though, I determined all the
locations of the markings where I was going to do positive / negative
masking and painted those areas in the colors of the markings. Then I
masked off the markings and painted the actual camouflage. I used rub
down transfers to mask the lettering and Scotch brand Magic Transparent
tape for all the other markings. The national insignia were the hardest
to do. When I unmasked everything, the results were what you see in the
pictures. This is a simplistic description, but it conveys the idea of
how I did it.
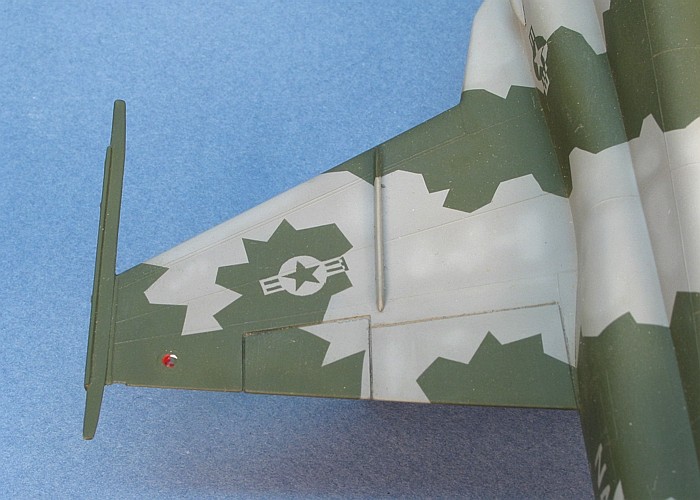
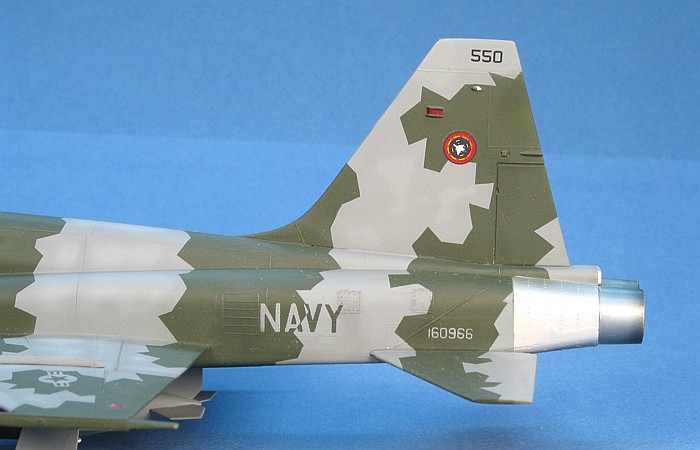
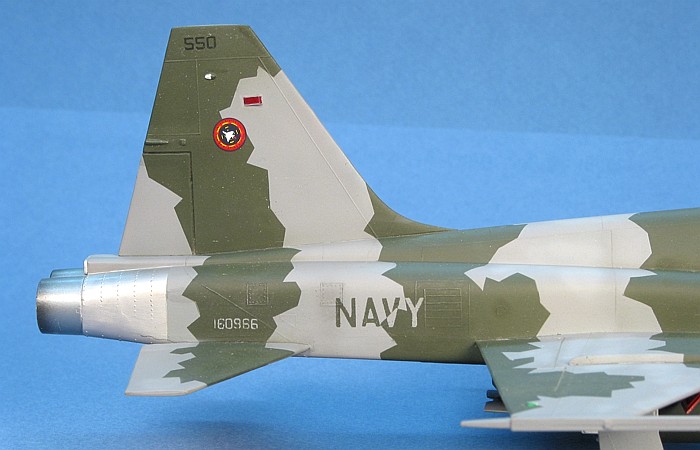
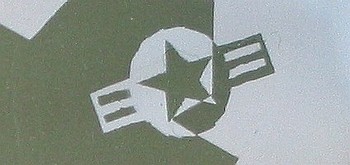
I chose to include some extreme close-ups of th emarkings so you
could see their designs. At these magnifications, the flaws in the
proportions and irregularities in the tape cuts, especially on the
national insignia, are rather apparent. It is funny how when viewing the
model overall you do not detect all these proportional issues without
specifically looking for them.

Left Fuselage |
Right Fuselage |
|
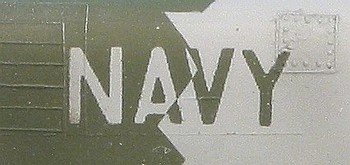
Left NAVY |
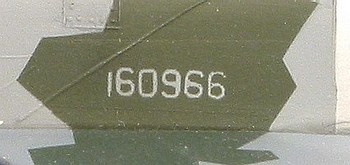
Left BuNo |
|
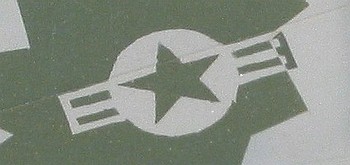
Wing Top |
Wing Bottom |
For decals, SuperScale includes this
aircraft on sheet #48-317, Topgun Aggressors. The problem is that they
also have about eight other F-5 and A-4 aggressor aircraft on the same
sheet. With that many aircraft on one sheet, needless to say, only the
very basic unit markings were provided. I supplemented the SuperScale
sheet with scrap decals for the data markings, in addition to the masked
and painted markings that I discussed above.
The RESCUE markings come from a SuperScale A-10 Warthog decal
sheet. I painted the green background of the arrow before applying the
decal. I did similarly with the DANGER triangles. These decals are black
outline triangles that come from one of the Hasegawa F-4E Phantom
decal sheets. Painting the opposing colors for the triangle backgrounds
made them stand out really well. The gold name blocks are straight off
the SuperScale 48-317 decal sheet.
For weathering, I used my typical style of thinned
down enamel paint washes and air brush shading. I finished the
weathering with some dry brushing to pop out the surface details. For a
more complete discussion of what I do to weather my models, see my
posting on
"Weathering Aircraft".
It is a "what-if", closely inspired by a real aircraft -- ohh well. I
like it, and I had fun building and finishing it. That is really what
matters. If I had refused to build the model until I knew all the
answers, I might never have built it.
I
ronically, I found some years after I finished the model that I had a
book in my library with quite a few images of the real aircraft and did
not know it at the time I built the model. I think I still like my
redition better that the real one ...
|
Additional Images and Project
Summary |
Click the
thumbnails below to view images full-sized.
Click the "Back" arrow on your browser to return to this page.
|
|
|
Project Statistics |
|
Completion Date: |
19 January, 1994 |
|
Total Building
Time: |
43.1 |
|
Research: |
1.3 |
|
Construction: |
11.1 |
|
Painting
(includes creation and printing of custom decals): |
21 |
|
Decals / Markings
(includes creating and printing custom decals): |
5.6 |
|
Extra Detailing /
Conversion: |
4.1 |
|
| |
Modelling the F-4 Phantom II
Osprey Modelling 3 |
|
| |
|
|
Author: Geoff Coughlin, Neil Ashby
US Price: $17.95
UK Price: £12.99
Publisher:
Osprey Publishing
Publish Date: September 25, 2003
Details: 80 pages; ISBN: 1841767468
|
|
|
Model, Description and Images Copyright © 2004 by
David Aungst
Page Created 27 May, 2004
Last Updated
26 May, 2004
Back to
HyperScale Main Page |
 Home
| What's New |
Features |
Gallery |
Reviews |
Reference |
Forum |
Search
Home
| What's New |
Features |
Gallery |
Reviews |
Reference |
Forum |
Search