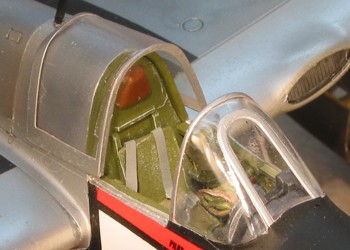
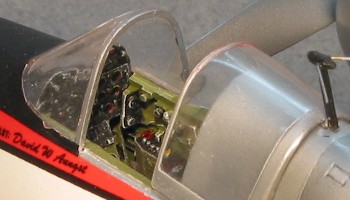
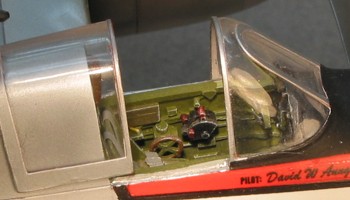
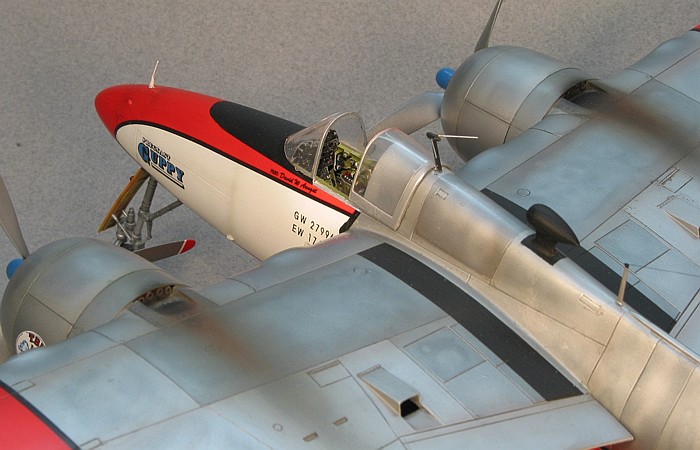
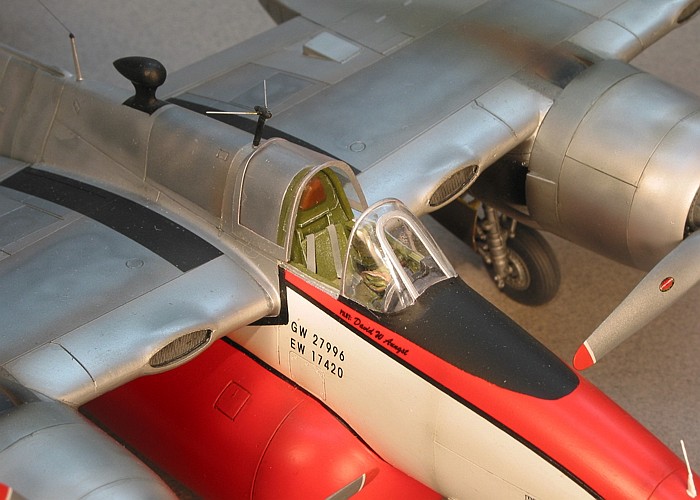
- I added seat harnesses to
the pilot's seat using True Details brass seat
harnesses.
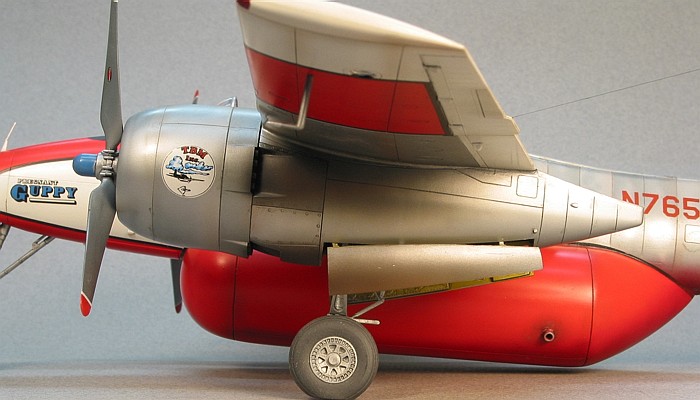
- I incorporated the Ventura Hobbies
Firefighter Tigercat conversion set (kit #4000).
This amounted to adding the enlarged belly tank
used for Borate fire retardant. This tank is the
extra-large, double-bay fire retardant tank. It
is huge and not to be confused with the smaller
single-bay tank provided by several other
after-market manufactures.
- I sealed and sanded smooth the gun ports in
the nose and wings.
- I drilled out the engine exhausts.
- I removed the W.W.II antenna fit and scratch
built replacement antennas for more modern radio
gear. This includes:
- the whip antenna on the top of the nose
- the "V" antenna behind the cockpit
- the DF "football" antenna on the spine
- the mast and line antenna running to the
top of the tail
- Not as apparent in the final model, I
partitioned off the interior of the entire nose
section around the nose landing gear bay and
under the cockpit floor. Then I completely
filled the area with lead shot to offset the
weight of the fire retardant tank (most of the
tank is behind the main landing gear and behind
the center of gravity). As heavy as this made
the nose, it proved to be only just enough
weight to overcome the fire retardant tank's
weight.
Construction of the model went pretty smoothly
with only the previously mentioned problems working
with the AeroMaster resin. The AeroMaster cockpit
pieces do not interact well with each other. I
needed to grind off about 1/8th inch of the right
side of the main instrument panel to clear the side
wall detail piece so the fuselage would close around
the cockpit.

I attached and detached the fire retardant tank
three times until I got it in the right place.
Thankfully I was using super glue to attach the
tank, rather than the two-part epoxy that the
Ventura instructions called for. This made slipping
a knife blade in and cracking off the tank a simple
task. The problem is the tank's shape. It is not as
symmetrical as it should be, making it difficult to
line up on the airframe. When I finally got it lined
up as best as possible, I called it quits and
painted the model. On the completed model, the lack
of symmetry on the tank is not that noticeable.
 I
used all Testor's Model Master enamel paints and
metalizers to finish the model. Oddly, the Ventura
conversion instructions provided a better color
reference than did the AeroMaster decal sheet where
I got the markings. The Ventura instructions claim
that Model Master Chevrolet Engine Red is a near
perfect match for the red used by the TBM Company on
their firefighters. Armed with this information, I
painted the whole model gloss white, then masked and
painted the red areas. I
used all Testor's Model Master enamel paints and
metalizers to finish the model. Oddly, the Ventura
conversion instructions provided a better color
reference than did the AeroMaster decal sheet where
I got the markings. The Ventura instructions claim
that Model Master Chevrolet Engine Red is a near
perfect match for the red used by the TBM Company on
their firefighters. Armed with this information, I
painted the whole model gloss white, then masked and
painted the red areas.
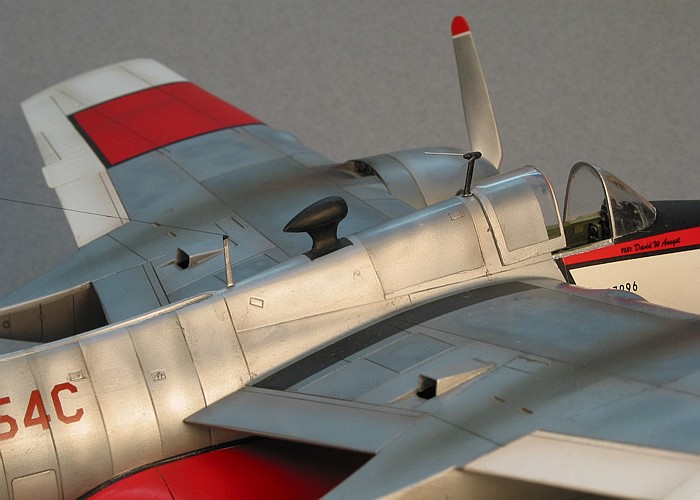
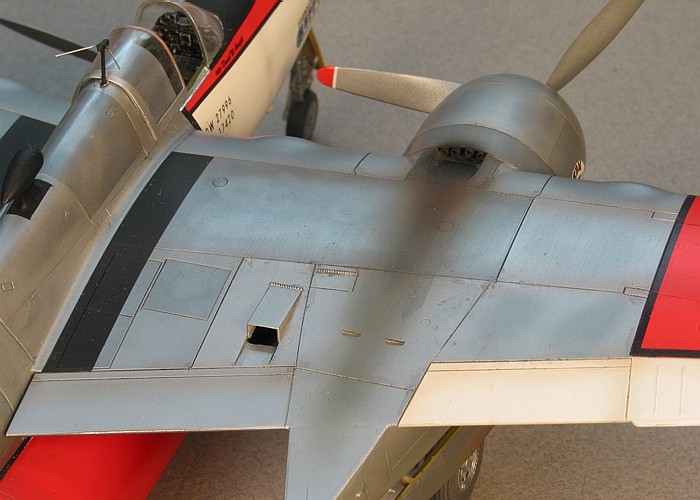
Natural metal is every modeler's nightmare. I
look on it as a challenge, though, and have
developed a system that works for me. I use gloss
paint to prime the model for metalizing, turning a
weeklong polishing job into an evening's air
brushing with an overnight dry. This was why I
painted the entire model in gloss white. It was not
just to prime for the red, but also to prime the
rest of the model's surfaces for metalizing.
I use multiple shades of metalizer, masked and
applied like a patchwork quilt to represent the
varying panels of metal. Then, I apply varying
shades of metalizer (without masking) to the center
areas of the already painted metal panels. This
gives a good feel of weathering and fatigue to the
metal. I polish with a facial tissue and seal with
clear lacquer between each metalizer application. As
long as the metal shades are not too widely varying
in color, the effect comes off quite good (I won
"Best Natural Metal Subject" at an IPMS regional
competition with this model).
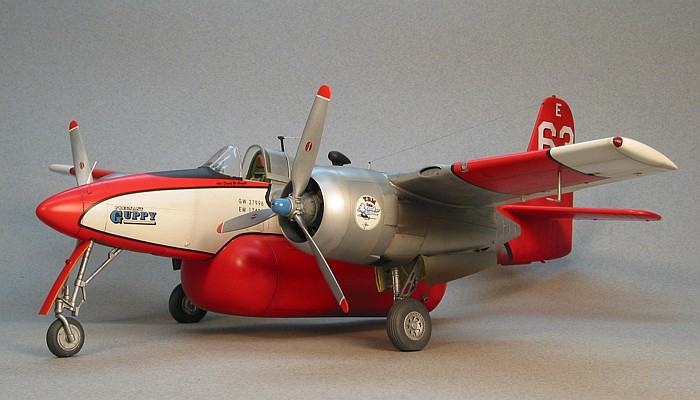
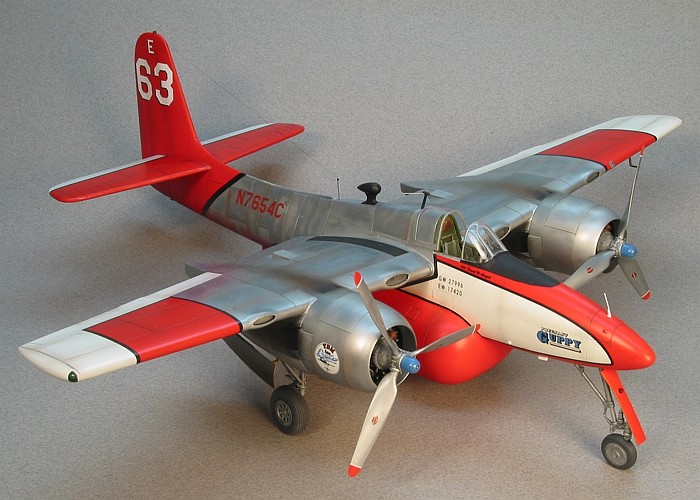
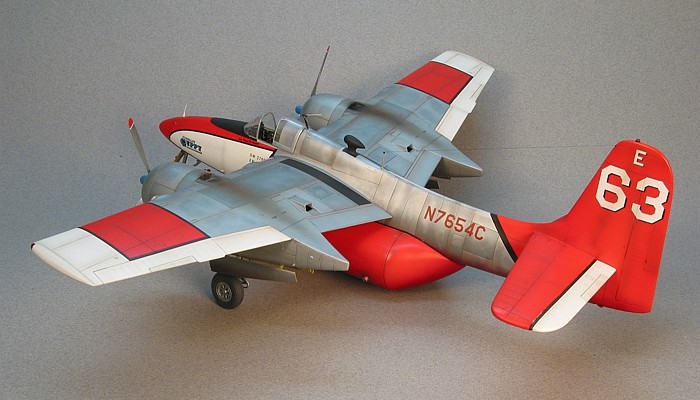
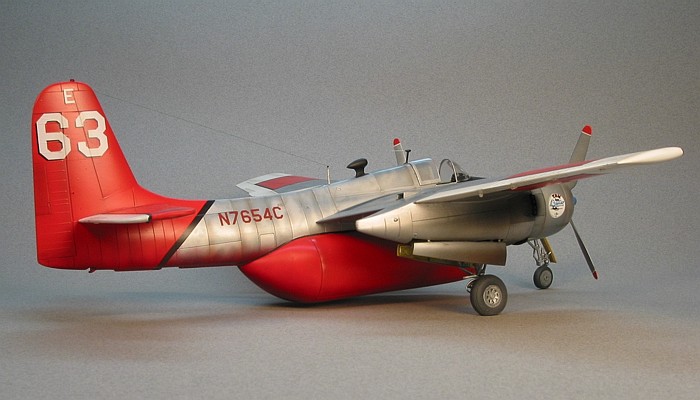
The decals are from AeroMaster sheet #48-307.
This sheet provides markings for three different
fire fighting Tigercat aircraft, all from TBM, Inc.
- #62, #63, and #64. Since it was #63 that I had
pictures of, I chose it to model. The decals went
down easily, although the long stretches of striping
required careful alignment. Especially difficult was
the alignment of the stripe running around the fire
retardant tank. The white numbers for the tail were
not opaque enough to match the white painted areas
of the model, so I secured a second AeroMaster decal
sheet to apply a second set of decals over the tail
numbers. The doubling of decals allowed the white
numbers to turn white enough to match the white
painted areas of the model.
The aircraft name, "Pregnant Guppy", on either
side of the nose is my own touch. I could not leave
those massive nose sides all white, so I pretended
that I was the pilot (my name is under the
windscreen on each side) and named the aircraft
something fitting. The look of the fuselage through
the entire build, with that huge fire retardant tank
attached, reminded me of the guppies I used to have
as a kid. When the Mommy guppies were "expecting",
they had a very similar shape. I created these
decals on my computer and printed them onto clear
decal film so I could apply them to the model.
I weathered the model using dilute mixtures of
enamel paints, both as washes and as airbrush
shading. Primarily this was done in black and rust,
but the exhaust stains used some dark gray to get
the proper feel. A somewhat heavy coat of insignia
red applied under the fire retardant tank and on the
lower rear fuselage represents the look of the
aircraft after returning from a Borate drop. For a
more complete discussion of what I do to weather my
models, see my posting on
"Weathering Aircraft".
The model is striking sitting on my display
shelves. It is funny how sometimes your more favored
models are the ones you build by accident without a
long planning period.
Post Script
This Tigercat model is a
reposting of an article I placed on HyperScale in
March of 2000, four years ago. I decided to take
newer, better pictures of the model using my Canon
PowerShot-G2. Two days after I took the new
pictures, I had what I call the "great avalanche". I
was carrying a stack of five models out to my car
for a model club meeting, this model amoung them. I
slipped on the steps leading out of my house. You
can guess the rest.
It is funny how your mind races at critical times
like that. In a split second I weighed the
differences between me trying to save the models and
breaking my leg or saving myself from substancial
injury and forgetting the models. I released the
model box from my grasp and caught myself. Then I
watched in slow motion as the model box crashed to
the bottom of the steps in a heap. The two models in
the box survived mostly intact. The Tigercat and two
other models that were on top of the box were not so
lucky. The following image shows what happened to
the Tigercat.
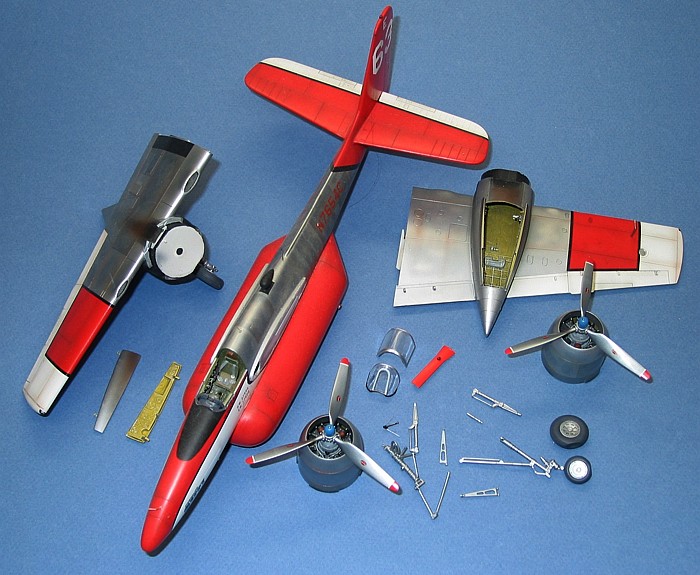
As can be seen, the damage is not as bad as it
could be. The model shed its wings and engine
nacelles, but these are all clean breaks thanks to
the usage of super glue in assembly. The worst
damage is that all three landing gear legs were
crushed. I have since purchased another F7F kit just
so I can use its landing gear in the repair of this
kit.
The spirit has not motivated me, yet, into fixing
the model, though. The "avalanche" happened November
of 2002. The model still looks like this image,
today. Someday...
|
 Home
| What's New |
Features |
Gallery |
Reviews |
Reference |
Forum |
Search
Home
| What's New |
Features |
Gallery |
Reviews |
Reference |
Forum |
Search