|
Academy's 1/32 scale
F/A-18C Hornet
by Esteban Murador
|
 |
|
F/A-18C Hornet
Captain "Brick" Nelson and Captain "Killer" Kilkenny of VFA-37
Bulls, USS Enterprise, Operation Desert Fox, 1999 |

Academy's
1/32 scale F/A-18C Hornet is available online from Squadron
The "Three Seven" was established as an A-7
Corsair II attack squadron in July of 1966.
Today, this Navy strike fighter squadron,
known as the VFA-37 "Ragin' Bulls" use the powerful F-18 Hornet for
training and missions. In 1999, the Bulls participated in operation
"Desert Fox" and flew successful missions without any friendly losses.
Later, the Bulls joined other squadrons to spearhead combat missions
during operation "Iraqi Freedom", participating in the "Shock and Awe"
campaign in southern Iraq before shifting focus to assisting U.S. forces
in northern Iraq.
The squadron returned home to Virginia in
2003 for continued training.

Intended to replace the A-7 Corsair, the F-4 Phantom, and the powerful
F-14 Tomcat, the F/A-18 Hornet was created to perform as a multi role
fighter. Serving as fighter escort, reconnaissance, close air support,
forward air control, enemy air defence suppressant and utilized for day
and night strike missions, the Hornet has proven to be the most
versatile combat aircraft in service today. With its great structure and
performance, the Hornet has become one of the most exciting aircrafts to
see at air shows.
I used Academy’s 1/32 kit to produce this wonderful looking jet. This
special project, consisting of about 150 hours of detailed labour, is
undeniably my favourite jet project ever. I hope everybody enjoys these
photos as much as I enjoyed building the Hornet.
You can see more images of this aircraft at
http://www.ModelAces.com/
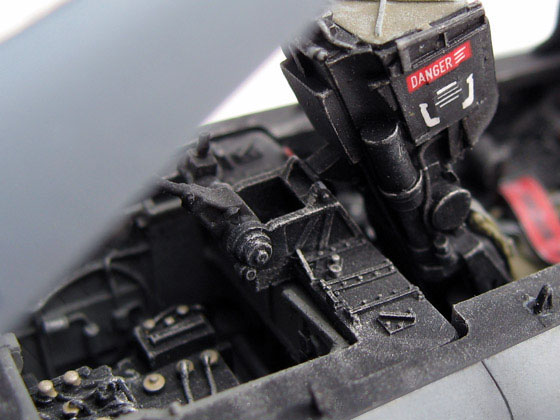
Cockpit
I started off with the Cutting Edge 1/32
super detailed resin cockpit set. After about 45 hours of tedious labour,
the cockpit for this aircraft looked absolutely stunning.
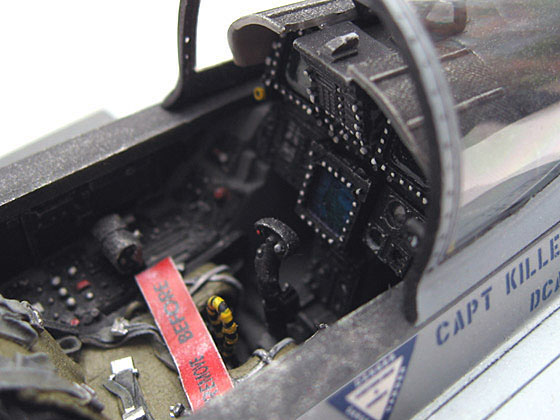
The ejection seat was airbrushed Flat Black.
The colour used on the cushion is Olive Drab while a Medium Grey, very
similar to the fuselage, was used on the seatbelts. The colour scheme is
very accurate, as research was completed before hand and reference
photos were utilized for the correct colour of the seatbelts. The
buckles were painted silver, as most buckles are, and a lot of attention
went into the painting of the dashboard. Once completed, I attached
radar screen images on the back of the clear parts for a realistic
appearance.
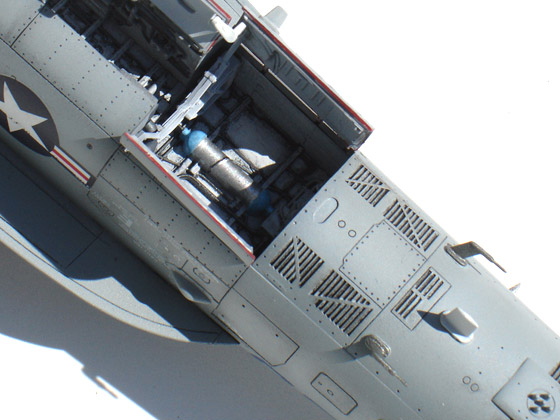
The electronic bay is fully detailed. This
area was painted as per the interior colour, Dark Gull Grey.
The electronic boxes were painted to match
photo references I used for this compartment and, to make it look like
the actual aircraft, a net was carefully cut out to match the opening of
the bay area.
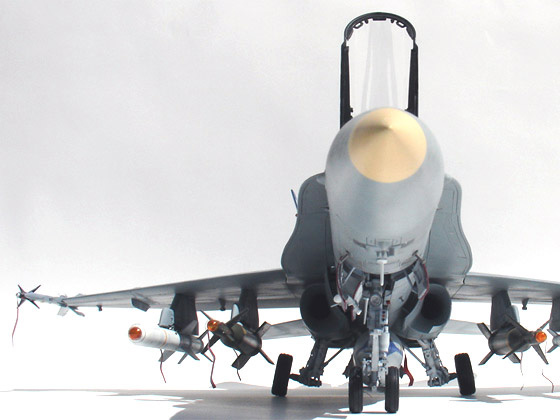
Upon completing the model, I painted the
entire aircraft Flat Black and permitted a substantial amount of time
for drying. Then, using low pressure on my compressor, I painted the
Navy Tactical scheme; Dark Ghost Grey on the upper surface and Light
Ghost Grey on the under surface. The tails were also painted Flat Black
then applied a coat of Light Ghost Grey. This was done to achieve the
faded look between panel lines. The wheel well bay and landing gear
received the same attention. They were initially painted Flat Black,
then, with low pressure on my compressor, I applied Flat White. This
made the raised areas and corners of the gears and bays look dirty.

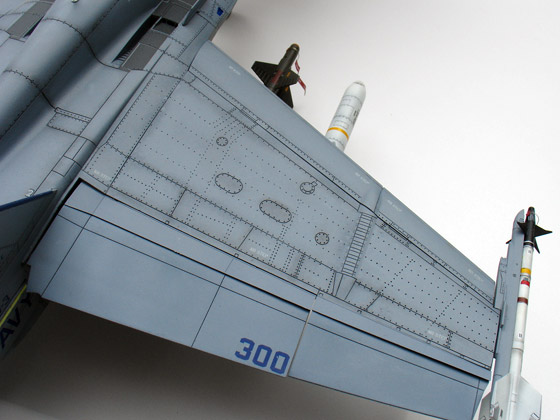
Sometimes, when applying Future, you tend to
lose engraved details. So I decided to try something new [see dictionary
under ‘insane’] and it turned out to be extremely effective. Once the
paint scheme was completely dry, I used a modeling knife and started
running it down all the panel lines. The greys were accurately scraped
off, revealing the underlying black. Without having to apply a wash, I
achieved the appearance of dirty panel lines. I used the same method to
create the rivets, but instead of a modeling knife, I used a pin vise.
This took a VERY LONG TIME, going after every single rivet, from the
fuselage, upper and under surfaces of the wings to both sides of the
tails. But, at the end, the results are FABULOUS! Now you can apply as
much Future as you want for the decals without losing any detail.
Armament and Extras
Assembling the armament can sometimes be a
huge hassle, but again, the results can be stunning. I installed two
GBU-24 Paveway III missiles in Olive Drab, one AGM-88 Harm missile in
Flat White, one AGM-84D Harpoon missile in Flat White and two Live
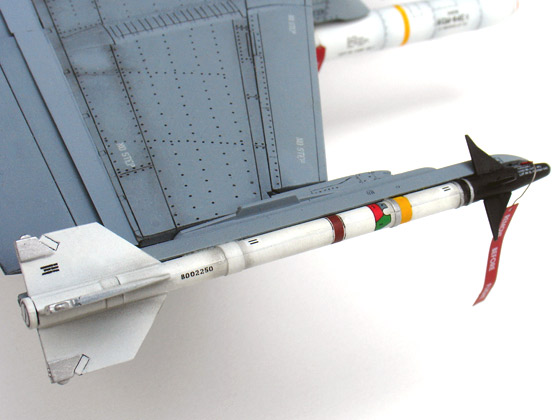
AIM–9L Sidewinders with all the proper markings.
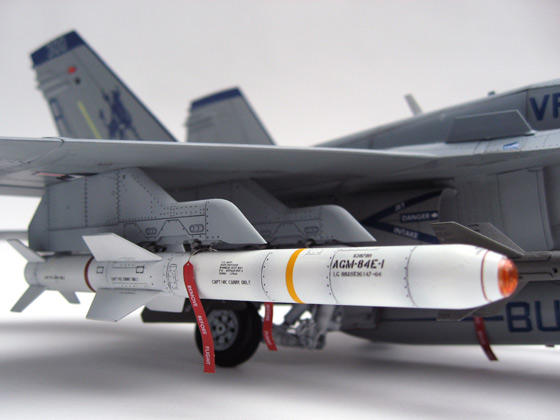
To finish, the "Remove Before Flight" tags
were installed on all the appropriate sections; inside the cockpit, fuel
tank, missiles, etc.
Click the thumbnails below to view larger
images:
Model, Images and Text Copyright ©
2006 by Esteban Murador
Page Created 24 November, 2006
Last Updated
21 February, 2007
Back to
HyperScale Main Page |
 Home
| What's New |
Features |
Gallery |
Reviews |
Reference |
Forum |
Search
Home
| What's New |
Features |
Gallery |
Reviews |
Reference |
Forum |
Search