|
F/A-18C Hornet
by Mike Grant
|
 |
|
F/A-18C Hornet |

Hasegawa's 1/48 scale
F/A-18C Hornet is available online from Squadron
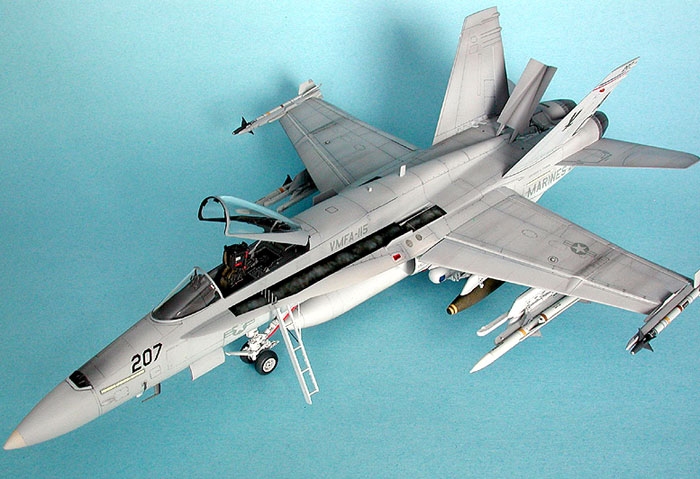
This Hasegawa 1/48 F/A-18C was built for a U.S. Marines pilot to
represent an aircraft from his squadron, VMFA-115. When I agreed to do
it I envisaged a straight-forward out-of-box build, though it turned out
to be neither.
I found the Hasegawa kit to be very nicely detailed but poorly
engineered. The fit of the rear fuselage parts and intakes was
particularly troublesome, and the separate nose section created a nasty
seam that took a long time to eradicate. Interestingly most on-line
reviews/builds of this kit make no mention of similar problems so
perhaps I got a bad copy of the kit (or am just inept).
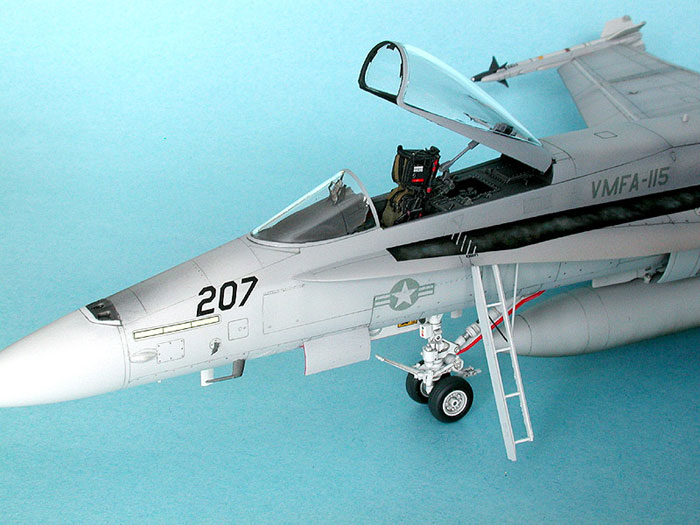
I was quite prepared to use the kit cockpit until I found pictures of
Fred List's superb model on HyperScale (
http://www.kitparade.com/features01/fa18cfl_1.htm ). Fred used a
Black Box cockpit and I was inspired to do the same.

At this point the buyer contacted me with a very specific weapons
load request, and I had to purchase SOL resin AIM-120s and borrow items
from a friend's Hasegawa weapons set to comply. The 1,000lb bombs didn't
come with the ablative coating so I used MiG-Productions' acrylic resin
to stipple on the distinctive fire-retardant texture.
Assembling/painting/decalling the weapons and pylons took 6 long
evenings of work, I'd forgotten just how labour-intensive modern jets
can be.
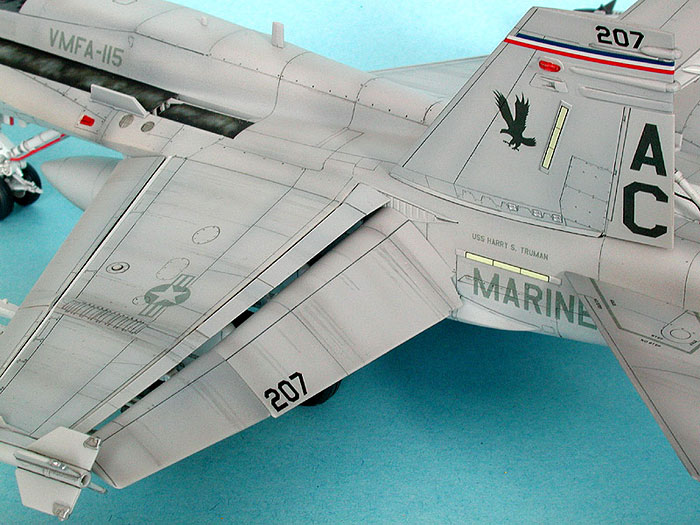
Paint
The model was painted with Polly Scale acrylics, thinned with
Future/alcohol and lightened with 50% white. I did some dark grey
pre-shading but very selectively, trying to avoid the circuit-board look
which can occur when every single line is shaded. After a few coats of
Future I painted the panel lines with watercolours, varying the colour
between browns, greys and blues. I then airbrushed some streaks and
post-shading, then applied further streaking with watercolour and a fine
brush.
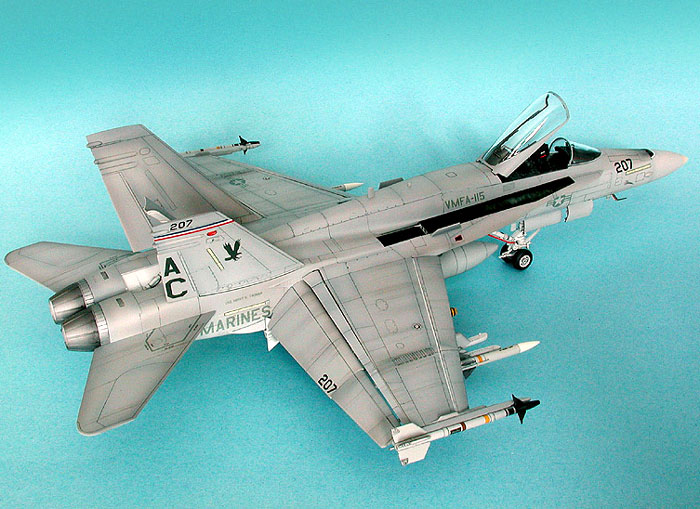
Decals
I'd found a set of Hi-Decal decals which included a VMA-115 aircraft
and had duly ordered the sheet, along with the accompanying set of
stencil data.
The day they arrived the buyer e-mailed me some photos of the exact
aircraft he wanted depicting, so I consigned the Hi-Decal sheet to the
spares box and proceeded to create a custom set to his requirements.
Although the ALPS struggles to create greys they turned out acceptably
and once on the kit, the half-tone dots become virtually invisible.
I still intended to use the HD stencils but they proved quite
inflexible and, short of using a staple-gun as a solvent, would not
conform to even the slightest curve. In the end I left most stencils
off. (Had I bought a Hasegawa kit in USMC markings I could have at least
used the kit stencils but in my infinite wisdom I'd bought a Canadian AF
boxing of the kit) I did create the walk-way decals, applying scuff
marks and wear-and-tear in Photoshop before printing them.
The photos depict the aircraft 99% complete, I still have to add bomb
fuses and a few aerials.
Click on the thumbnails
below to view larger images:
Model, Images and Text Copyright ©
2004 by Mike Grant
Page Created 25 March, 2004
Last Updated 25 March, 2004
Back to HyperScale
Main Page
|
 Home
| What's New |
Features |
Gallery |
Reviews |
Reference |
Forum |
Search
Home
| What's New |
Features |
Gallery |
Reviews |
Reference |
Forum |
Search