|
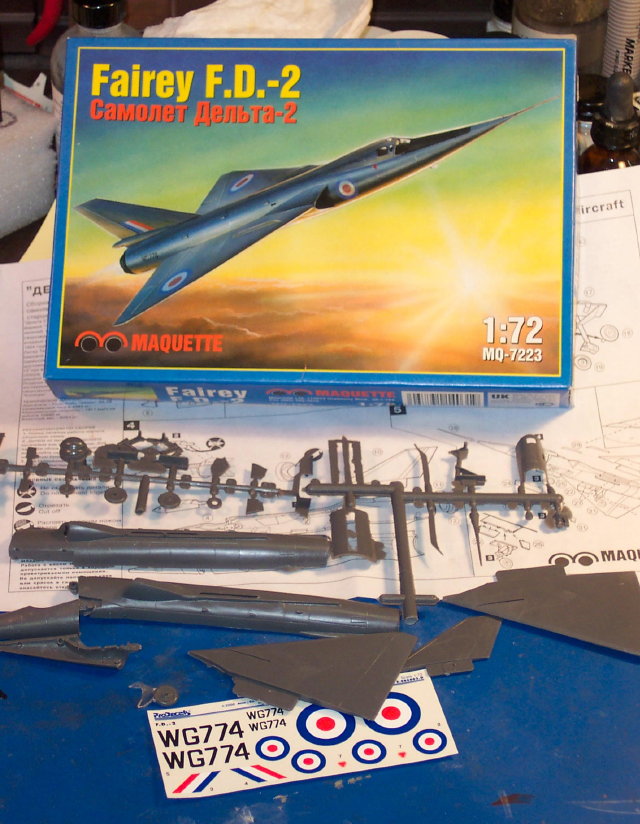
Maquette's 1/72 scale
Fairey F.D.2
by Bill Dye
|
 |
|
British Fairey F.D. 2 Experimental Aircraft |

HyperScale is proudly supported by Squadron
Background
or, why do I do this over and over?
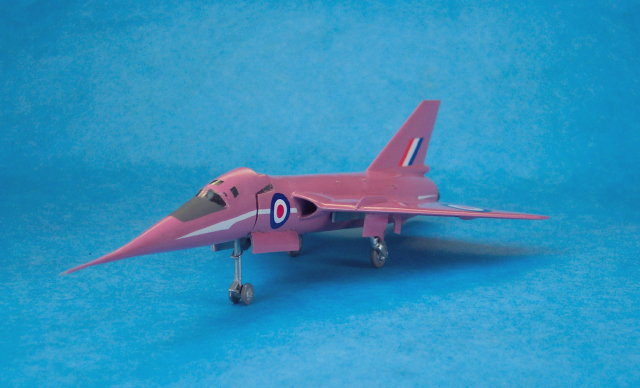
Yes, it’s British, it’s mauve (no, it’s not
pink, it’s not!) and I think it’s a really cool looking airplane.
It looks . . fast. When I saw this kit for about 6 bucks I (again) had
thoughts like, ‘How hard could it be?’ ‘Couldn’t be as bad as a Mach 2
Trident!’. . ‘Beats building the vac-u-form kit’, and, ‘You never know
-- there might be a pink theme for a contest some day. And there was
a pink theme day, but I “missed it by that much”! OK, OK so it’s
sort-a pink! Anyway, I bought it.
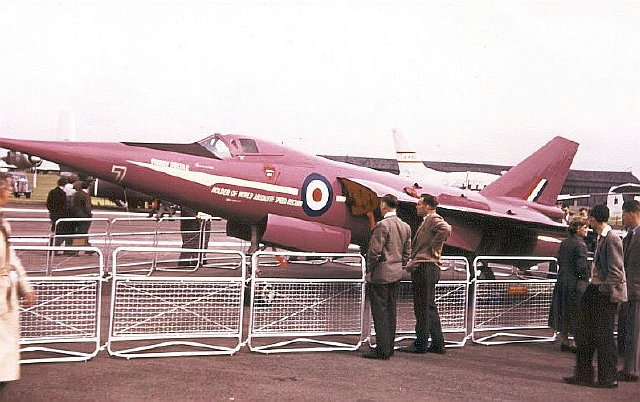
The real airplane:
The first FD2 was aircraft WG774
which made its maiden flight on 6 October 1954, under the command of
Fairey test pilot Peter Twiss. In March 1956 this aircraft broke the
World Air Speed Record raising it to 1132 mph (1820 km/h), an increase
of some 300 mph (480 km/h) over the record set in year before by an
F-100 Super Sabre, and thus became the first aircraft to exceed 1000 mph
in level flight. This aircraft was later converted to become the BAC 221
for aerodynamic research for Concorde and is now on display alongside
the British Concorde prototype at the Fleet Air Arm Museum at Yeovilton.
The second FD.2 ( WG777 ) is preserved at the Royal Air Force Museum,
Cosford Airfield alongside many other supersonic research aircraft.1
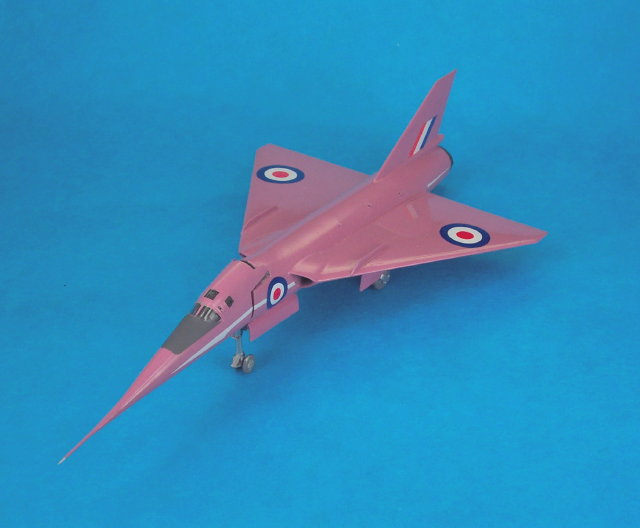
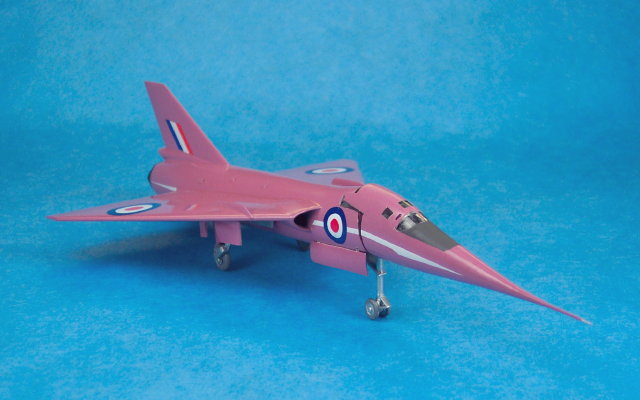
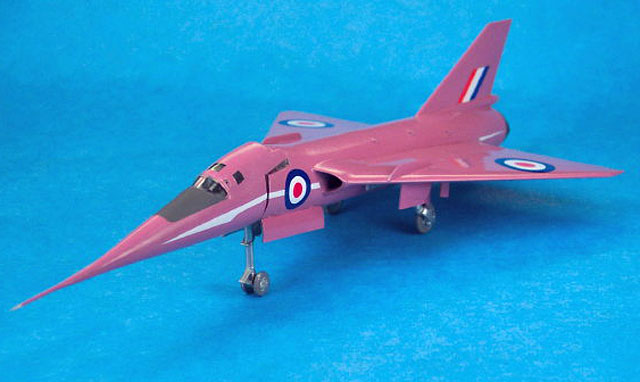
The most noticeable feature is the ‘droop snoot’.
The Fairey’s nose, including the pilot, drooped (well, he didn’t
droop, but I think you know what I mean) but with the Concorde just the
nose drooped not the entire cockpit. If you were the pilot in the
Fairey F.D. 2 this must have been strange; feeling as if you
were close to ‘level’ but behind you the rest of the aircraft was
hanging down at 10 degrees or so angle of attack on final!
There were a couple of color schemes: all natural
metal (looks really ‘hot’), all blue (I like that one too) and, of
course, the mauve (OK, pink) scheme. The mauve scheme was used when it
broke the speed record. That one’s for me!
The Model:
First of all . . Who or what is ‘Maquette’? There
are so many new (at least for me) kit manufacturers now – and that’s
great – but I just stumbled upon these guys and didn’t know much about
them. When I opened the box I noticed right off the bat a tremendous
amount of flash with many big flash bits in the box. I thought they
were ‘kit seeds’. Like the little pieces of paper that fall out of
magazines. . . . .magazine seeds. It’s where new magazines come from.
I planted the flash bits, watered with liquid glue, waited, waited . .
nothing. Not even a Mach 2 weed!
It really didn’t scare me though. I’d seen that
kind of flash before on models that cleaned up nicely.. However, my
normally positive thinking mind took off, and thoughts of, ‘Oh
brother, this is crap’ started to haunt me. Is this a ‘Crap toooo Cake
(C2C*) project?’
I just had to build a pink Fairey F.D.2 so I
decided to hold my breath and ‘dig in’.
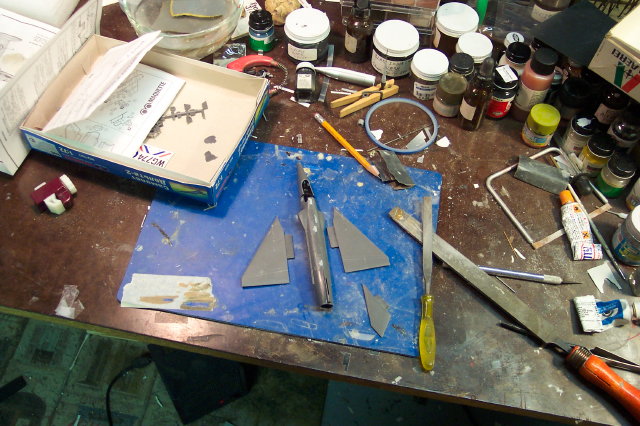
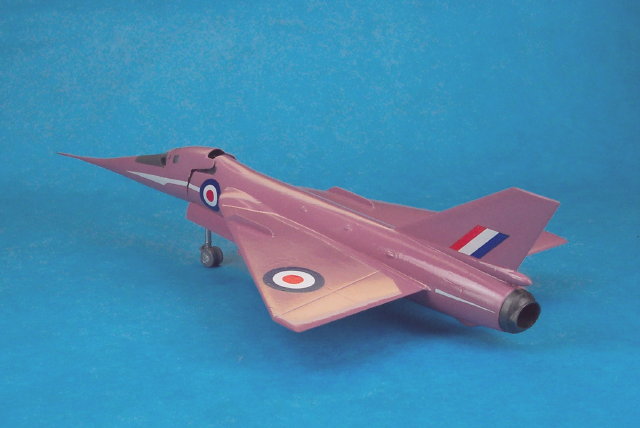
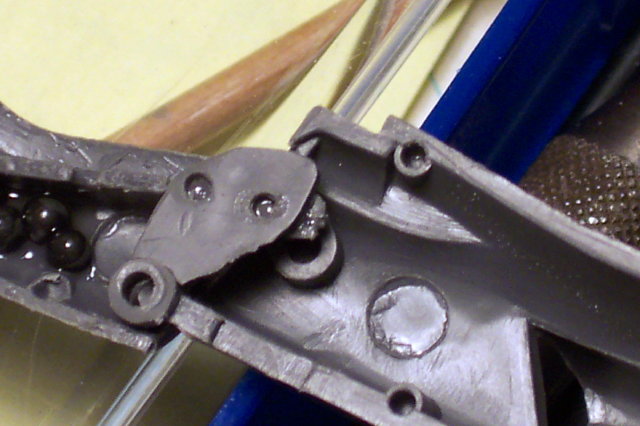
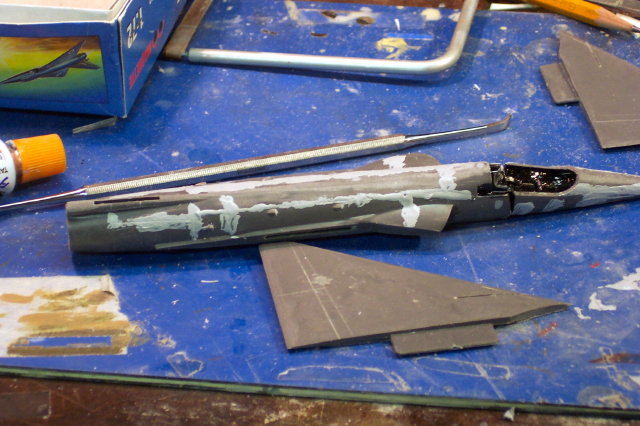
Fuselage:
I separated the major parts from the tree. When I
picked up a fuselage half I noticed that the nose/cockpit area was not
attached to the fuselage half that was in my hand. Hmmmm why’z zat?
When I found the nose halves among the flash encrusted trees I realized
that Maquette (or whoever, if they didn’t make the molds originally)
concocted a way to ‘droop the snoot’. And, make it moveable!
Cool!
So I cleaned up the fuselage halves and the
nose/cockpit halves and then fussed with this feature for two nights,
mostly because I wanted to see if it would really work. There was a
little bit of rough road though. There were slots, or rather, tracks
molded into the main fuselage halves and pins on the smaller nose
pieces. The pins, as shown on the instructions, were to ride in the
slots controlling the up and down movement. The bad news was
that my kit parts had no stinkin’ pins. So I made some from
small diameter aluminum tubing, drilled a hole where they were
supposed to be and glued them in. I finally got the whole assembly
to work but, after all that work, decided that I’m just going to leave
it drooped down. But it did work! I thought the design was
quite ingenious given how small it was.
I added enough weight to counter balance a draw
bridge and then noticed that there was basically no cockpit. Then I
looked at the canopy and the tiny windows. Never mind! Hey, if I can’t
see it, I ain’t gonna build it! Many un-built kits on my shelves are
screaming, “Make me!, no me!” I mean . . . . I really don’t hear
them, you see . . just figuratively.
The kit has no wheel wells to speak of either. For
Maquette (maybe old Frog molds?) to include a nose wheel well would have
been tough, perhaps, from a mold engineering standpoint, with all of
space taken for the droop snoot mechanism. Adding it after the fact –
by me – would be, frankly, not worth the effort. Besides the gear doors
are rather wide and it would take the Plastic Modeling Gynecologists
(it’s pink remember!) with their mirrors and flashlights to see that
there wasn’t a wheel well. In short . . I left it as is. Oh, yes, did
I mention that this model is not destined for the Nationals by
any means! Just my shelf, next to the screaming boxes. . . . . did I
say that out loud . . I mean the screaming part again . . .
The nose had to be assembled first because the
fuselage is glued around the nose to capture it in the droop snoot
‘track’. This was easy and I started to get encouraged that this could
look pretty cool.
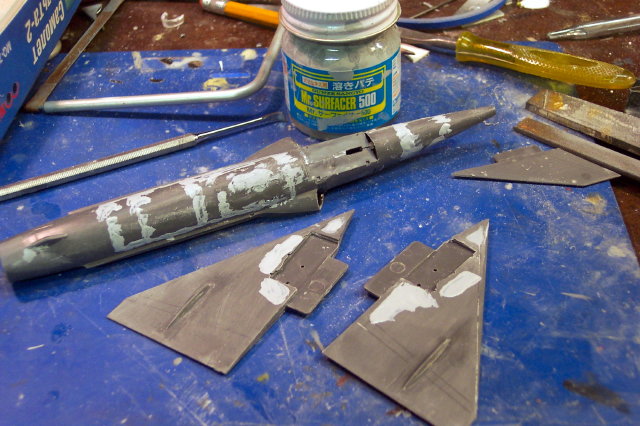
I didn’t really like the engraved panel lines so
they were filled several times with Mr. Surfacer. In hind sight I
should have just left them; they probably would have been just fine.
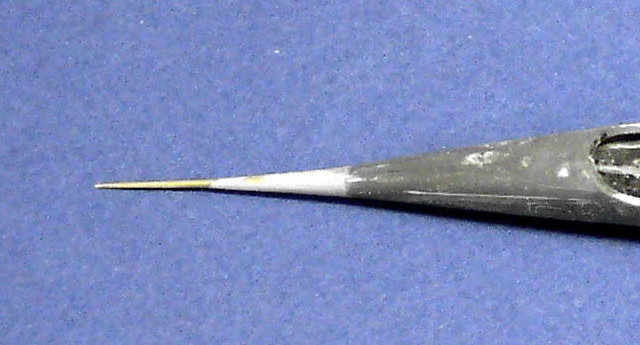
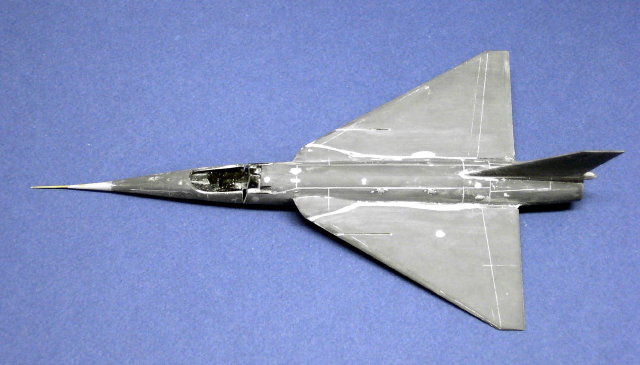
Maquette provided a pretty plastic pointy pitot
probe. I don’t like plastic pointy parts like pitot probes. Pitot
probes should puncture me – not break. (Note: do not try this at home.)
I figure that I’ll heal, it won’t . . but then again, that’s me. So, I
got a brass rod about 1/16th inch diameter, slid an Aluminum
tube over that and another and another in a telescoping fashion and
staggered them to get the basis of the pointy nose curving shape. I cut
each tube to the length I thought looked right and Epoxied them together
(took about 45 minutes). The brass rod added stiffness and was the
final tip of the pitot that I turned on the Dremel with a file (Wear
Goggles and watch out, it’s a thigh stabber!)
HINT: The secret to
spinning brass rod is to carefully hold the Dremel tool such that the
rod lies in an indentation made on a flat surface – like a small slot
carved into a piece of masonite – like the edge of my workbench top.
The slot is just deep enough to hold the rod but shallow enough that you
can still file it. A filing motion with much more pressure can then be
exerted with a medium size file while the slot provides support for the
rod (while it’s spinning!). You can press much harder because the slot
is keeping the rod from bending from the file pressure. You will see a
great deal more brass come off much more quickly this way! What used to
take 45 minutes to an hour now takes 5 to 10 minutes using the slot.
I coated the ‘assembly of tubes’ with Tamiya putty,
waited 48 hours and then put it in the Dremel and carefully filed it to
the basic shape (wear goggles). I puttied any voids or holes with more
Tamiya putty (love that stuff) or Mr. Surfacer – love that stuff too.
I epoxied it to the nose with 5 minute epoxy and
then Tamiya puttied the joint. An hour or so of sanding and puttying
and it was ready for primer to see where we were, so to speak.
Click the thumbnails below
to view larger images:
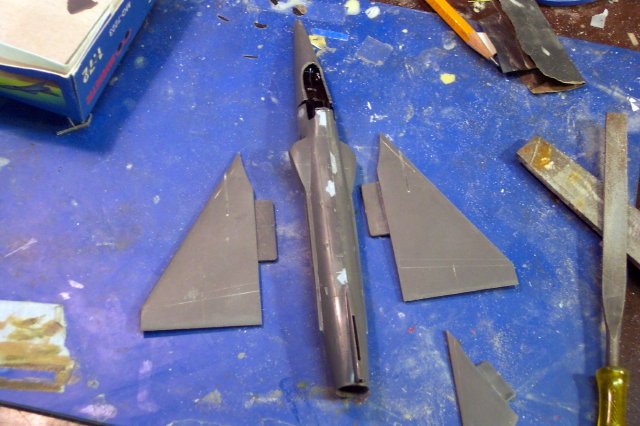
Wings:
Ah, the wings. First, the wings were solid, and I
mean solid. Next, the tabs for inserting them into the fuselage
took about an hour of filing etc. to get them into the fuselage.
I looked at the alignment. The right wing had a root incidence angle of
about 2 degrees and the left wing had zero degrees. I looked at the box
. . nope, not a Mach 2 kit! – it says Maquette. Anyway, I filed the slot
in the fuselage on the right side to drop the angle to zero. Why the
right you ask? Because the wing glove to fuselage joint was way out a
whack on the right side. It was obvious I needed to file the bottom of
the right fuselage slot to allow the right wing root to rotate down.
File, file, file, done.
Next I noticed that at the very ‘meaty’ part of the
plastic wing, where the tab was molded, there was a distinct and
unprototypical looking raised area caused by, what looked like,
expansion of the plastic, lots of plastic, around that tab. Enter big
flat bastard file . . vumpa, vumpa, gone. But wait the file discovered
sink holes next to the place I just filed. Wonderful! More Tamiya
putty then sanded with 400/600, re-scribed a few lines, then 600 again.
All done with the wings for now.
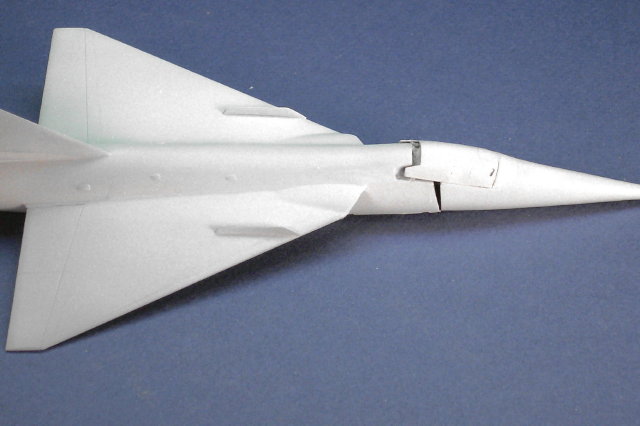
Intakes:
Intake blocks (so you don’t see through the intakes
to the other side) were provided but they were too thin. I don’t think
a rearward facing step in an intake is prototypical. I used theirs as a
pattern and then made new ones out of .040 sheet plastic. Glued them in
before gluing the fuselage halves together and slathered on some gap
filling super glue. I then shaped them to the contour of the intake and
went to watch LOST on TV.
Exhaust/Tail Section:
The exhaust, for some reason, was not opened. The
afterburner eyelid exhaust (also a novel feature of the aircraft) was
plugged with some serious plastic (not just flash). I started by
drilling a hole and then spinning an XActo blade back and forth to open
it up. I finished it with a medium size oval file. I attached a tube
that I made out of 0.005” plastic rolled around a rod about the same ID
as the nozzle; put an end cap on, painted it Polly Scale Grimy Black
(sorry, a railroad black on my workbench) and gloss black on the inside
of the end cap.
Hint: Gloss black makes
the inside of vents, exhausts etc. look like they never end, invisible
so to speak – it makes it seem like the ‘hole’ goes on forever. But
flat black can be seen . . that’s why the British painted the bottom of
their bombers gloss black (or so I read that somewhere). So
paint the tube near the exit flat but deep inside paint it gloss black.
Try this . . . paint the
whole thing (the inside) flat black and let it dry. Look inside the
tube. Humph! You can see the bottom. Now get a brush a jam some gloss
paint on the bottom. Let it dry and look down the tube again. Cool,
huh!
I got done just in time to make some popcorn and
watch ATLANTIS on TV with the Darlin’.
Assembly:
The pieces were done and now it was a matter of
gluing the wings, tail and exhaust to the fuselage. I spent many
evenings filling gaps, sanding, repeat, and repeat. There were a lot of
creases, sink holes, panel line fixes and joints on this airplane.
I looked at the kit canopy and then the photo of
the real aircraft, then the kit canopy and the real a/c photo and
something was wrong. I’m not usually fussy about things like this but
this was just not right. The windows in the canopy were way to far aft.
Almost like they thought it was a two-seater (It’s not). So I filled
the windows with putty and carved out new ones in the right locations
plus I added the tiny tear drop windows on each side. I got some clear
plastic stock, cut out the windows, sanded to shape, glued them in and
later filed them to the contour of the canopy with a file, and then
sanded with wet 400, 600, 1000, 1500, 2000, Blue Magic polish then
Future floor wax (all that took about an hour not including the window
glue drying time).

I installed the windscreen, filled the gaps and
then glued on the canopy. I masked the windscreen and canopy glass with
scotch tape and was ready for the paint shop.
 Since
there were really no wheel wells, I didn’t even bother with filling
these things with tissue paper. I just hosed on some primer. Hmmm,
more touch ups. More primer, more touch ups, primer, touch-ups . . Since
there were really no wheel wells, I didn’t even bother with filling
these things with tissue paper. I just hosed on some primer. Hmmm,
more touch ups. More primer, more touch ups, primer, touch-ups . .
“Oh the heck with it! Good enough!”. . you get the
idea.
I sanded the whole airplane lightly with wet 1500
paper to get off the primer boulders then put pieces of masking tape
over the ‘wheel wells’ and hosed on Polly Scale semi-gloss white and
then the mauve.
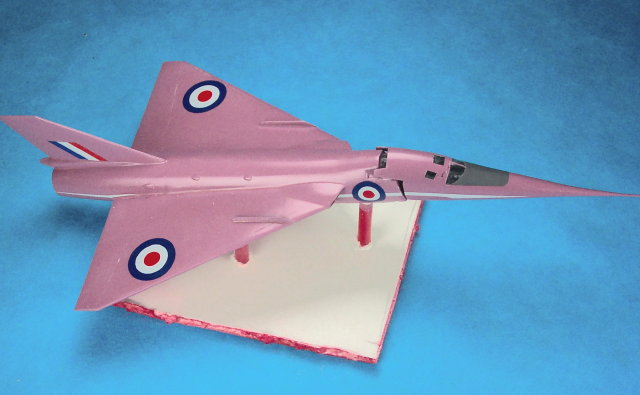
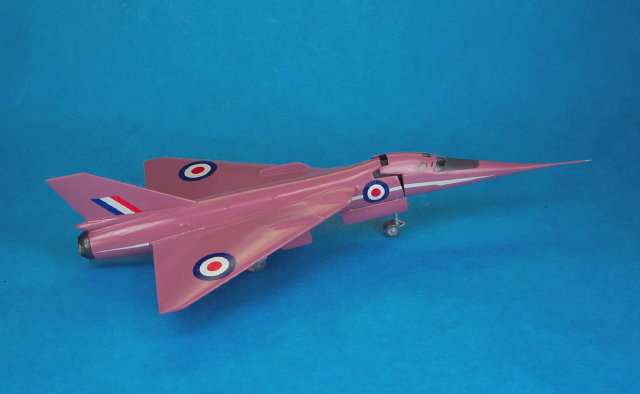
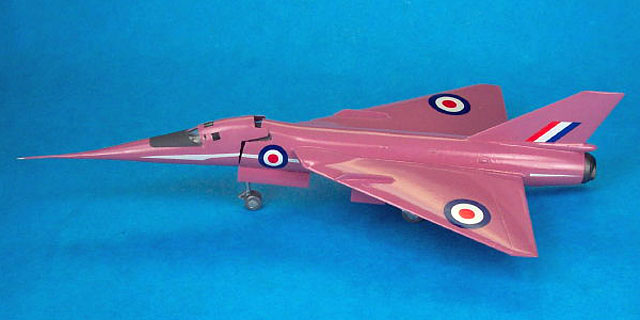
Let’s talk about the mauve. Al at D&J Hobby in
Campbell, CA helped me pick the closest color to this thing. We settled
on Poly Scale ‘German mauve’. We knew it was a tad too purple but I
thought I could fix it. I went on the web and finally found a
color photo of the FD-2 in mauve. So I printed it and set it on the
workbench beside my paint mixing station – a 6 inch square working space
amongst paint bottles, thinners, pipe cleaners and Q-tips. I ended up
with the following mixing ratio: Gloss Mauve 10 parts, Gloss White 15
parts, Gloss Red 5 parts . .all thinned about 25% with alcohol. I
splotched some onto the color print out . . . . Looks good to meeeee.
I hosed it on the airplane. Lightly first, then more to get the gloss.
Hey look! A pink airplane!
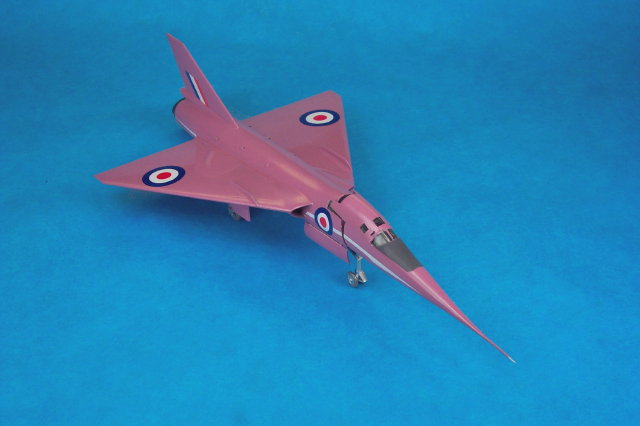
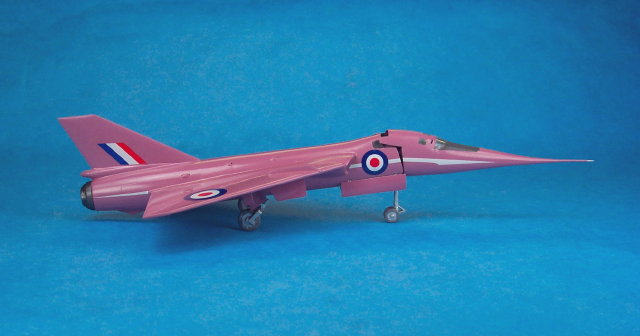
I gave it a clear high gloss coating of Future.
After that dried I added the kit roundels and serial numbers, etc. But
wait just a minute . . . the roundels on the wings were huge. They
looked like meatballs in a Petri dish. A quick check at the photo in
Hygate’s book2 and I pulled them off with scotch tape and put
on some Microscale ones I had in the decal bin. Those were the right
size.
I made the decal stripe from Micro Scale white
decal stripes and put those on. The decals were coated with another
coat of Future to seal them
Gears, wheels, doors, exhaust, canopy touch-ups.
Done.
Not too shabby – well, I like it! And at the risk
of sounding immodest – I think I turned (enter obnoxious announcer:
“CRAAAAP TOOOOO CAAAAAKE!”).
But with all due respect to Maquette, the basic
shapes were there and I thank them for that! It wasn’t the best kit that
I’ve ever built but I think it turned out OK. Not a contest winner but
I’ll enjoy it for quite sometime. Also, the droop snoot feature was
pretty cool. It would have been very difficult making all of the droop
snoot fuselage bulkheads that would be required if I made the vacuform
version. So, Maquette’s droop snoot made building this worth while.
If you want a Fairey F.D. 2 give this a shot. It
may be worth the pain to get a pink plane!
Bury me with sandpaper
-
Free text taken from:
http://en.wikipedia.org/wiki/Fairey_Delta BTW I like this site!
-
Hygate, Barrie; British Experimental Jet Aircraft, Argus Books, 1980
*C2C: Crap To
Cake, a la Roy Sutherland at a Fremont Hornets meeting (California)
several years ago: “Leave it to Bill to turn crap [bad kit] to cake.”
(Or words to that effect.)
Click the thumbnails below
to view larger images:
Model, Images and Text by Copyright ©
2006 by Bill Dye
Page Created 20 September, 2006
Last Updated
21 February, 2007
Back to
HyperScale Main Page |
 Home
| What's New |
Features |
Gallery |
Reviews |
Reference |
Forum |
Search
Home
| What's New |
Features |
Gallery |
Reviews |
Reference |
Forum |
Search