|
Every so often, I run across an aviation picture or artwork
that just captures my imagination and makes me want to build
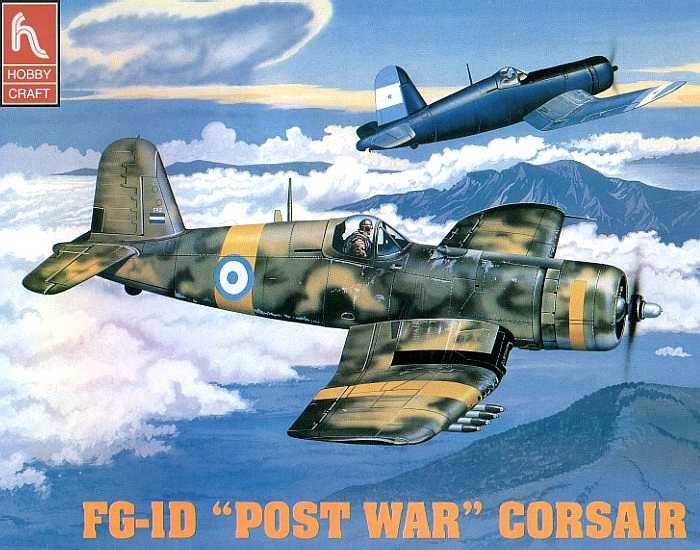
a model. The box art on the Hobby Craft FG-1D "Post
War" Corsair kit (stock #HC1529) is one such occurrence for
me. The box art depicts a Salvadoran FG-1D as seen in the
1969 time period. I do not remember seeing this box art when
the kit was first released some time ago, but when I came
across the kit on the shelves of a hobby shop this spring, I
had to buy it. See
for yourself...
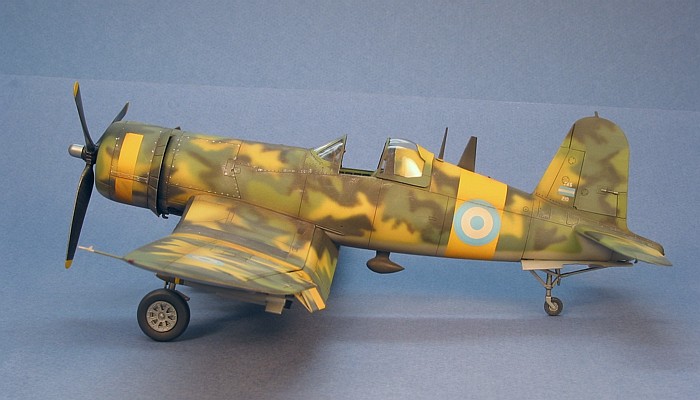
What really got me was the fact that I had almost never
seen a Corsair in any colors except blue (all blue,
tri-color blue, blue/gray, etc...). Here I have a shape that
everybody recognizes in a color scheme that just looks
wrong. I had to build it. The background aircraft in the
Hobby Craft box art is a Honduran Air Force Corsair (either
an F4U-4 or F4U-5). The two countries participated against
each other in a minor conflict known as the "Football War"
(or "Soccer War" as it is known in the States). The
background aircraft may someday be the subject of another
Corsair model to go with the one built in this article.
While I loved the box art, I was not real happy with the
actual model kit in the Hobby Craft box. It is not
that the Hobby Craft kit is a bad kit. The trouble
was that I had just recently completed the new F4U-1D
Corsair from Tamiya and the Hobby Craft kit is
not as nice as the Tamiya offering (in my opinion). I
decided to secure another Tamiya kit and build it
using the Hobby Craft kit decals.
The Tamiya Corsair builds extremely easily. I had
no construction problems (especially since this was my
second time building the kit). I stayed out-of-the-box for
the most part, only adding the following items to the kit:
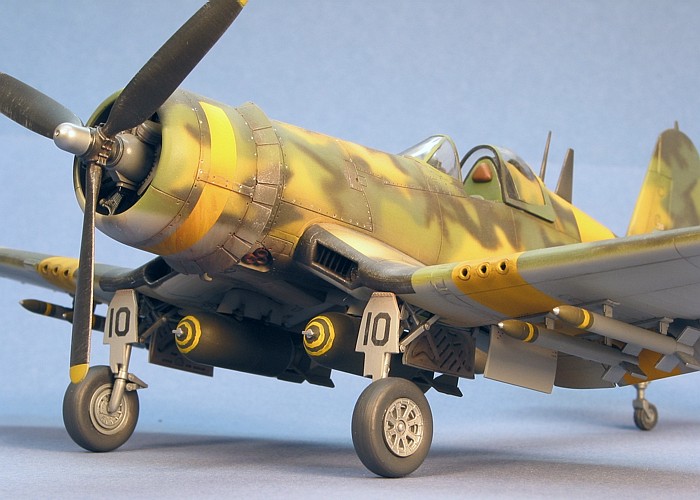
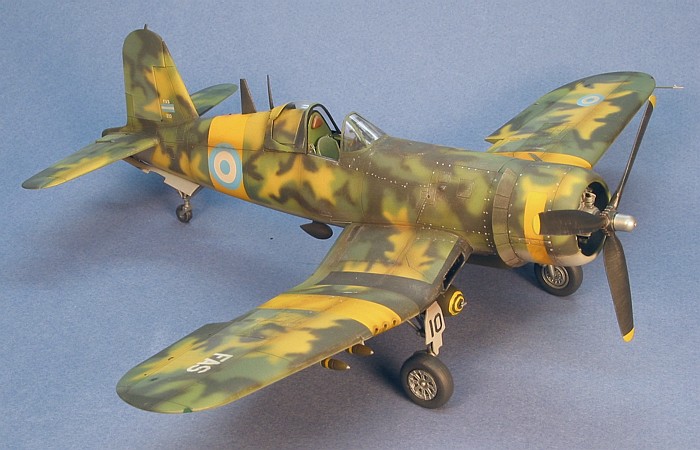
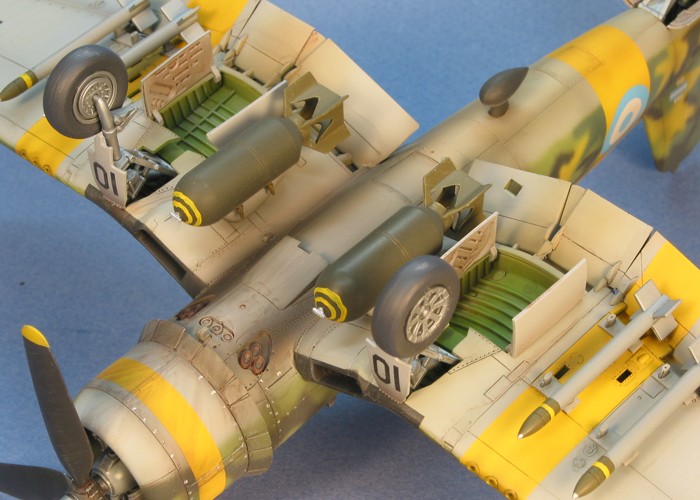
- Weapons. The Tamiya kit already
provides the launchers and pylons. All I needed was the
weapons. I wanted 5" HVAR Rockets and a couple of W.W.II
vintage bombs. I obtained all of these from the
Hasegawa P-38L kit.
- With the rockets, I had trouble with their size.
Either Tamiya made the wing launchers too
small or Hasegawa made the rockets too big.
It is hard to say which is the case. In either
event, I was only able to mount two rockets under
either wing. The fins on the rockets would not clear
each other if I attempted to put any more rockets
under the wings.
- I think the bombs are 750 Pound bombs. I
understand the F4U-1 kit from Tamiya actually
provides bombs. Why Tamiya chose to delete
them from the F4U-1D kit is a mystery to me. I did
need to add bomb sway braces to the pylons, though.
I obtained these from a Monogram F-8 Crusader
kit.
- Antennas. I wanted to add a DF "football"
antenna under the fuselage and a large blade antenna on
top of the fuselage. I obtained these from the Hobby
Craft FG-1D kit.
 The
model is painted using Testor's Model Master and
Floquil Military enamel paints. The
model is painted using Testor's Model Master and
Floquil Military enamel paints.
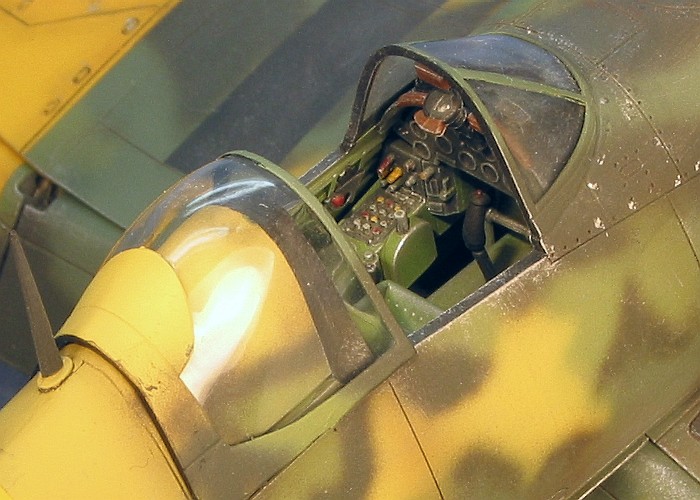
All the interior portions of the kit, including the
cockpit, were painted in Zinc Chromate Green. I used
Testors Model Master Interior Black to paint the
instrument panels in the cockpit. I heavily weathered the
interior surfaces as the airframe was pushing 30 years of
use by the period of the "Soccer War".
I used washes of tans, brown, and black with dry brushing
of light green, light gray, and silver.
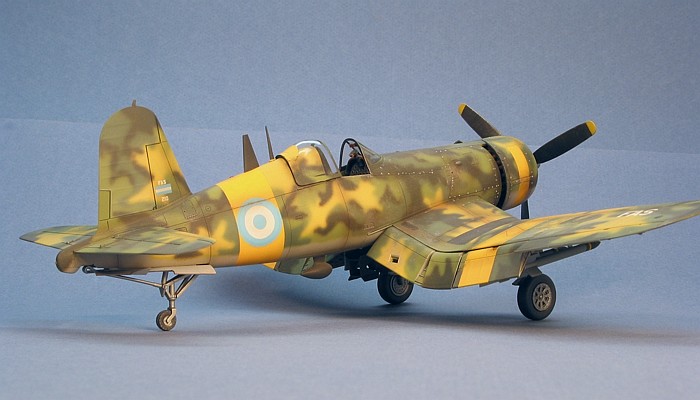
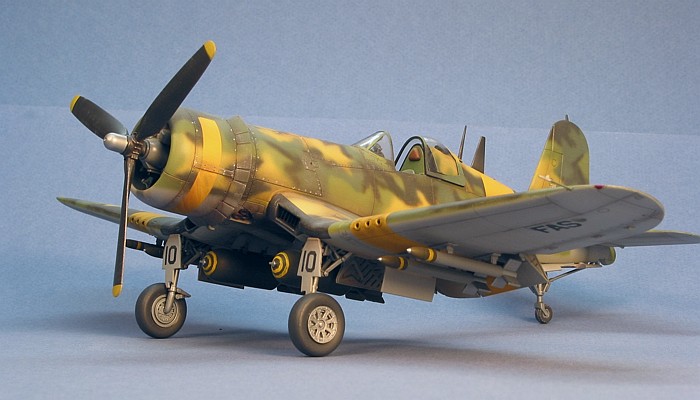
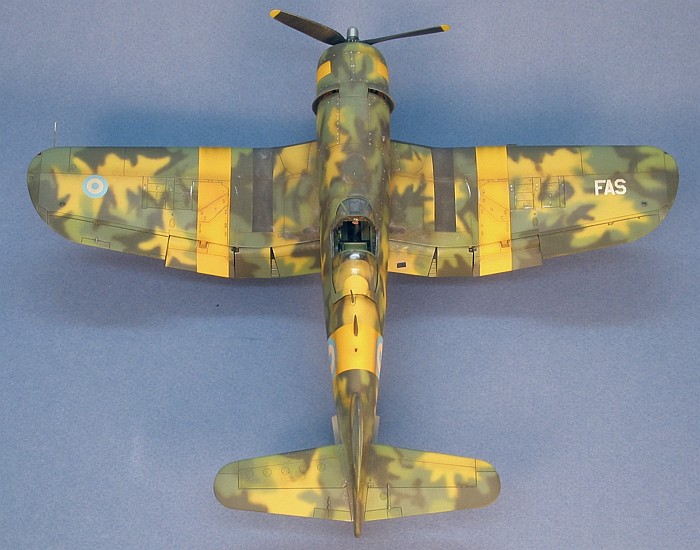
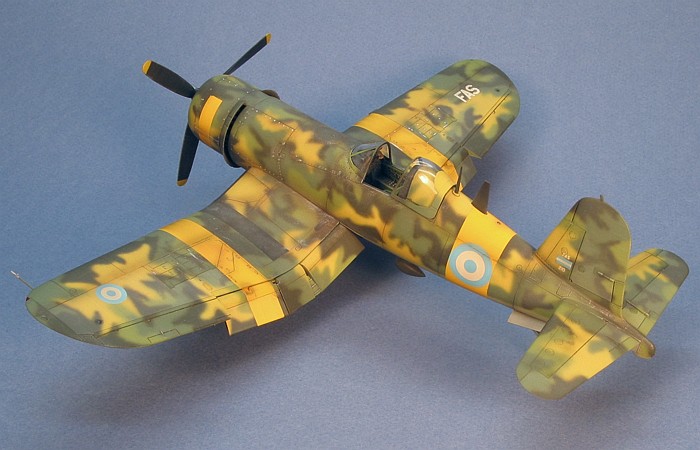
The camouflage is the whole reason I built this model.
The colors I settled on for the camouflage are different
from those specified in the Hobby Craft kit
instructions. The kit instructions only call for three
colors on the upper surfaces and are much more gray, instead
of the greener colors present on the box art. The painting
instructions are also somewhat lacking as they do not show
both sides of the aircraft and give a completely different
pattern from that seen on the box art. They also provide a
scrap view of a second aircraft tail to show the placement
of the optional aircraft serial number, and this scap view
has a different pattern than that on the main drawing. I
took all these disagreeing sources to mean I was on my own
for the camouflage pattern and chose to use the box art as
my guide, not the instruction sheet. After some playing
around, I came up with the following colors to match the
artwork on the cover of the Hobby Craft kit:
- Dark Green (F.S.34079)
- Tan (Custom Mix)
- 10 parts Tan Special (F.S.20400)
- 5 parts Insignia Yellow (F.S.33538)
- 5 parts Flat White
- 1 part SAC Bomber Green (F.S.34159)
- SAC Bomber Green (F.S.34159)
- Aggressor Green (F.S.34258)
- Light Ghost Gray (F.S.36375)
All of these are Testor's Model Master
enamels except the Dark Green (F.S.34079) which is
Floquil Military enamel. |
|
 |
These are my interpretations of someone else's artwork
interpretation. I have not found it written anywhere what
the true colors of the Salvadoran camouflage were. Hence, I
have no idea what the real colors actually should be. I have
seen a single color photograph of an FG-1D in this
camouflage, but the picture is grainy and taken from the
shadow side of the aircraft, making it hard to determine the
colors. It does look much darker, overall, than the Corsair
on the Hobby Craft box art. Whether my model is right
or wrong, I built it to represent the aircraft in the box
art.
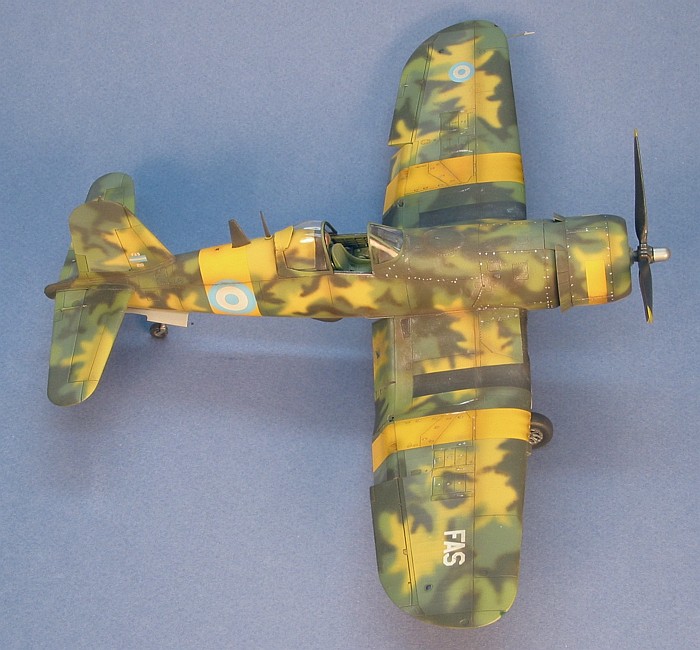
I started by painting the bottom of the model in Ghost
Gray and the entire upper surfaces in the Aggressor Green. I
then added a random coverage of about 50% of the upper
surfaces in the SAC Green. I continued with a random
covering of the Tan color, keeping in mind that I wanted to
simulate a person with a spray gun just standing next to the
aircraft and creating patches of tan that were within an
arms reach. I finished with the Dark Green, applied using
the same consideration that I used on the Tan color. The box
art showed that the Dark Green was also used for smaller
"highlight" spotting around the airframe. When I was done, I
felt I had captured the spirit of the box art as well as
creating the most complex camouflage I had ever attempted
(except for a couple of JAWS camouflaged A-10 Warhogs).
The decals came from the Hobby Craft kit. They
presented no real difficulties and reacted well to setting
solution. I only needed 12 decals for the whole model. I did
note that the kit decals were very brittle compared to other
decals I have used. I tried to move one of the decals off of
its backing paper before it was completly ready, and the
decal started to break up. I gave it another minute to free
itself of the backing paper and then had no trouble moving
it. The breakage was internal to the decal (not a full tear)
and did not effect movement or placement of the decal after
it was free of the backing paper.
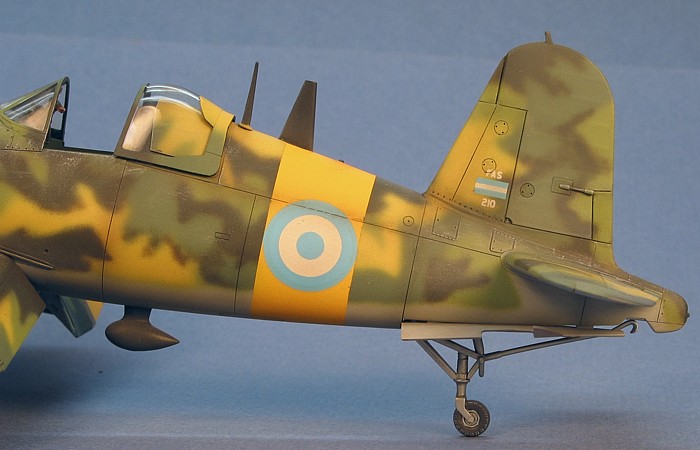
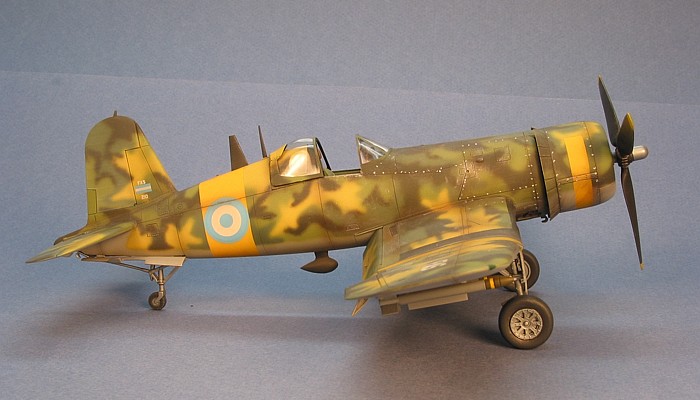
I heavily weathered the airframe with thinned down enamel
paints using washes and air brush shading. Then I applied a
significant amount of silver dry brushing. Additionally, I
picked off a significant number of bolt heads on the
removable forward fuselage access panels using the tip of a
10/0 brush and silver paint. From what I read, the
Salvadoran Corsairs were well used and abused.
For a more complete discussion of what I do to weather my
models, see my posting on
"Weathering Aircraft".
|
 Home
| What's New |
Features |
Gallery |
Reviews |
Reference |
Forum |
Search
Home
| What's New |
Features |
Gallery |
Reviews |
Reference |
Forum |
Search