|
Classic
Airframes new 1/48 scale
Fiat CR.42 Falco
by
John Valo
|
 |
|
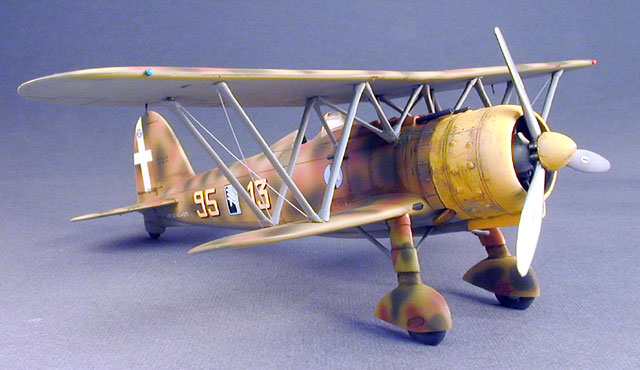
Fiat CR.42 Falco |

Classic
Airframes' 1/48 scale Fiat CR 42 kits may be ordered online from
Squadron
For a detailed examination of the kit
contents, see
Steven "Modeldad" Eisenman's in-box review here on HyperScale.
The highly-maneuverable but feebly-armed CR.42 has
always been a favorite modeling subject for me, with numerous attractive
camouflage schemes and its anachronistic charm. However, in my preferred
1/48th scale, for many years the only model available was the crude
European kit that was 1/40th, 1/48th or 1/50th scale, depending on which
manufacturer was doing the marketing.
In 1995, Classic Airframes released a new-tool true 1/48
scale kit of the CR.42 which, despite some minor inaccuracies, was a
vast improvement over the older kit, albeit a fairly challenging kit for
experienced modelers.
Now, CA has released a NEW-new-tool kit of the CR.42,
which leaves the older version in the dust.
The new kit has the requisite crisply-molded grey sprues with very fine
scribing, nicely molded resin parts for the engine and cockpit, and two
frets of some very ambitious photo-etch parts. As Eduard does the
photo-etch work for Classic Airframes, it was a pleasant surprise to see
the inclusion of their unique pre-painted photo-etched parts for the
instrument panels and seat harness. As the wings are both one-piece
moldings, construction goes rather rapidly - once you get past the
cockpit (cue spooky music).
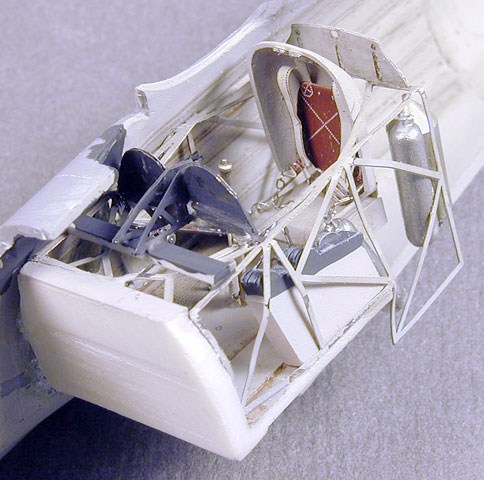
Cockpit
The cockpit construction starts with a resin floor which
must be narrowed slightly - a quick dry-fit and a few swipes of the
sanding stick will take care of this.
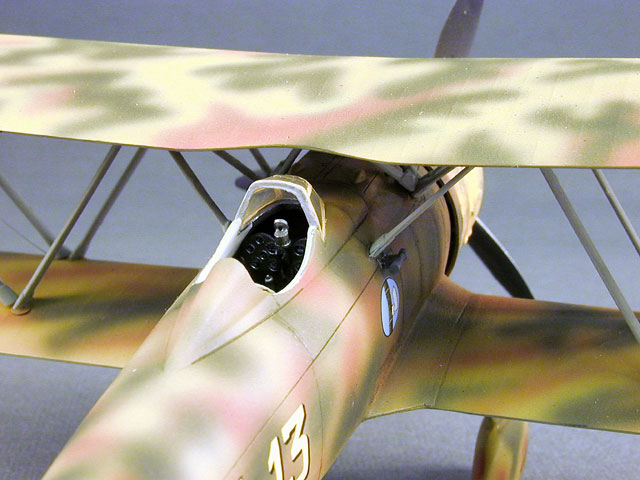
Almost the entire balance of the cockpit is photo-etch,
which is assembled as a cage-like affair that is festooned with various
photo-etched and resin parts. Unfortunately, the instruction drawings
are rather ambiguous in showing the proper relationship of the parts,
and this initially led to some frustration and head-scratching on my
part. It simply boils down to gluing the photo-etched sides more closely
inboard than is shown in the instructions, and also moving the seat
rearward to hang over the edge of the resin floor.
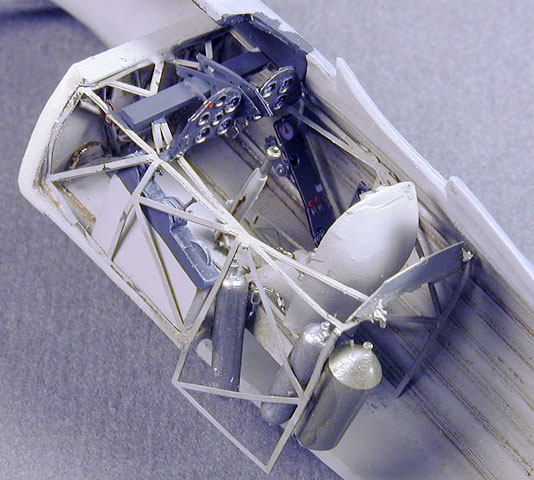
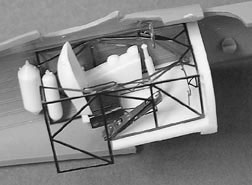 I
contacted Classic Airframes, and was emailed a photo confirming my
impressions - refer to the black-and-white photo in this article. Be
advised, the photo-etched parts are very delicate and easily distorted,
but once in place look very nice. I
contacted Classic Airframes, and was emailed a photo confirming my
impressions - refer to the black-and-white photo in this article. Be
advised, the photo-etched parts are very delicate and easily distorted,
but once in place look very nice.
I found it advantageous to also thin the fuselage halves
where the instrument panels fit, as they need a bit of room to avoid
distorting the photo-etched cage and squeezing the panels too closely
together.
It is essential to be patient and take the time to
dry-fit all the parts during this step. It will be time well spent.
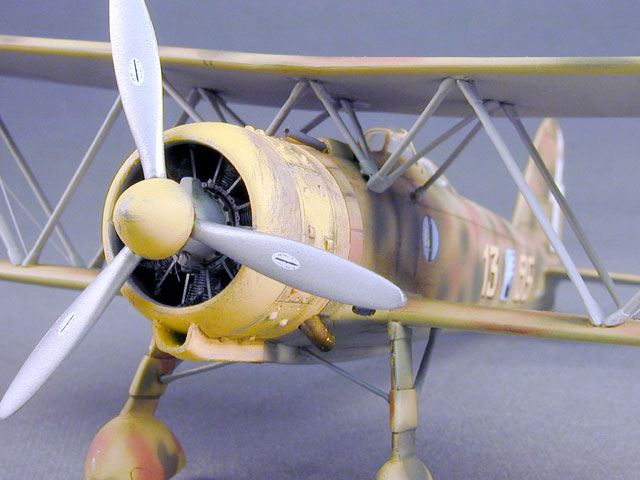
Engine
The resin engine is crisply molded, and features a
convincing photo-etch set of pushrods. A neat feature is that the
finished engine 'plugs in' to the front of the assembled fuselage and
aligns easily to assist fitting the cowling.
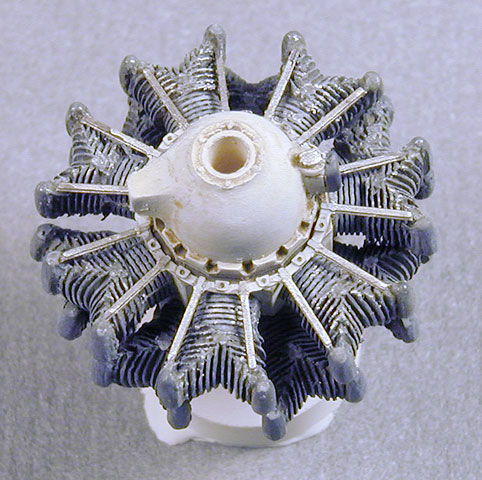
I did note that the CR.42 had two small intakes at the
wing roots which aren't represented in the kit. On this model, I simply
painted them on, but on my next CR.42, I intend to drill them out.
Fuselage/Stabilizer/Lower Wing Assembly
I proceeded to assemble the fuselage/stabilizers/lower
wing and windscreen as a unit before painting.
The injection-molded windscreen is just a tad too wide,
so I gently squeezed it in a soft-jawed clamp and applied heat from a
hair dryer.
Worked like a charm.
 I
painted the model with Polly Scale paints. I had forgotten just how
challenging Italian mottle schemes were to paint and soon the air in my
studio was a lurid shade of blue. I
painted the model with Polly Scale paints. I had forgotten just how
challenging Italian mottle schemes were to paint and soon the air in my
studio was a lurid shade of blue.
I did surprise myself with my hidden talent for
stringing together various invectives into some impressive, full-blown
freight-train vulgarities. Ah, the relaxation of model-building...
After painting the model what seemed like a half-dozen
times over, the time came for assembling the wings and struts. When
building a biplane, I usually devise a simple jig to hold the wings in
alignment while I attach the struts.
For some reason I elected to bypass that simple
operation on this model, and proceeded to start gluing away. OK -
cabanes first - nope, that didn't work. Outboard struts first - no.
Despite the functional alignment pins on the struts, I couldn't get the
constituent parts to stay in place long enough to align and glue them.
More practice with my new-found talent. I finally put things in the
proper order, and if you want to assemble the wings and struts without
resorting to a jig, I would recommend tack-gluing the inboard interplane
struts to the lower wing, using a flexible glue. Then attach the top
wing to the struts, align and glue.
The assembly will be sturdy enough to be handled as you
add the remaining struts. Again, the instruction drawing have an error,
in showing the cabane V-struts (parts B5/B17) upside down. The upper
wing has alignment holes in the proper place, so this was easily sorted
out by looking at pictures.
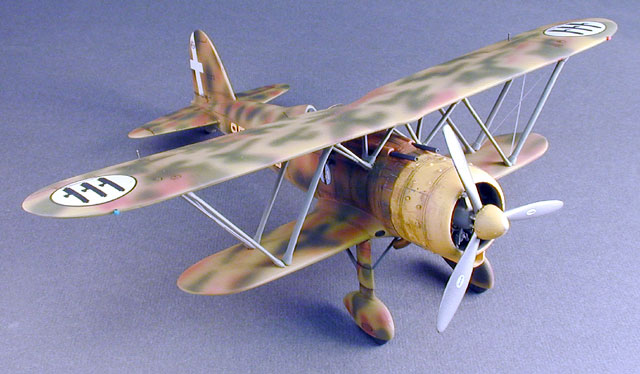
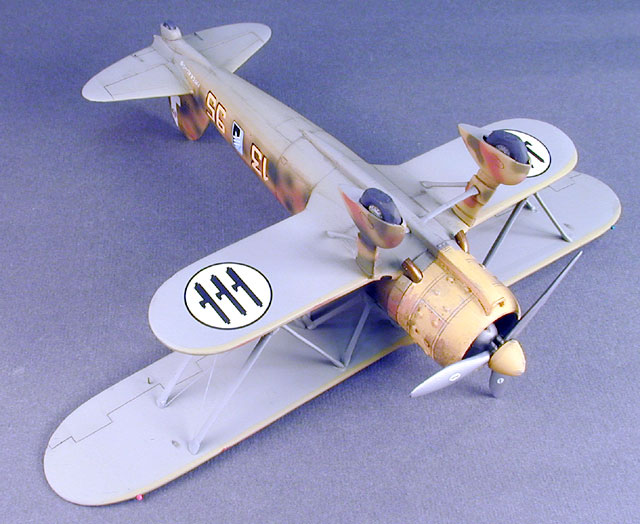
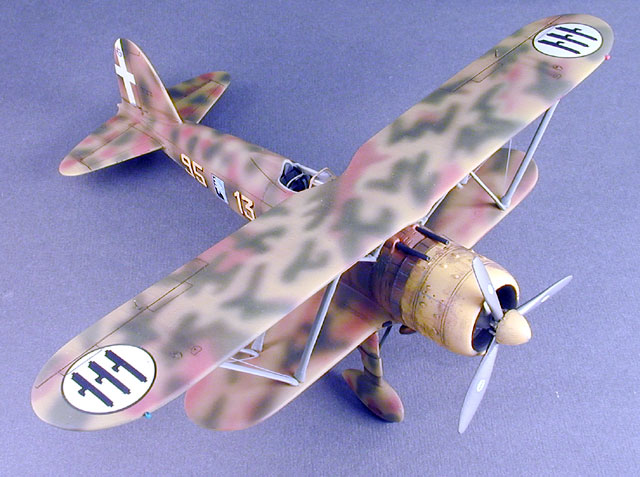
Markings
The kit provides markings for five aircraft, all
Italian, from the prototype to a postwar aircraft. I chose to model the
somewhat famous Yellow-cowled CR.42 that wound up crash-landing in
England and survives in the RAF museum in Hendon.
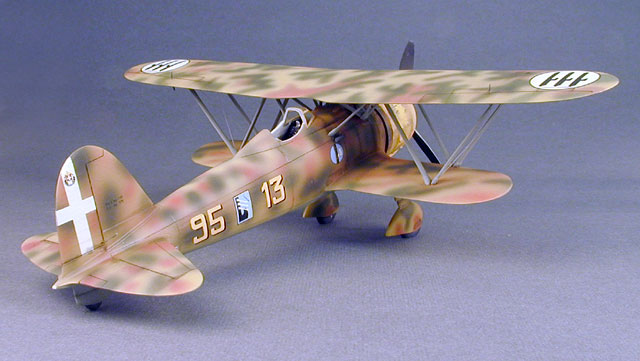
The Microscale - printed decals went on beautifully,
with nice, opaque white wing insignias (no problem with camouflage
showing through).
Overall, I would give this kit high marks, as it is an
improvement over the older CA release, being more accurate, better
detailed and much easier to build.
I personally have no real affinity for photo-etched
parts, so I found the cockpit to be a bit over-engineered and
challenging to be patient with.
That having been said, the finished model looks good and
is overall a satisfying build.
Click the thumbnails below to view larger images:
Italian Aces of World War
2
Aircraft of the Aces 34 |
|
|
|
|
Author: Giorgio Apostolo
Illustrator: Richard Caruana
US Price: $19.95
UK Price: £12.99
Publisher:
Osprey Publishing
Publish Date:
November 25, 2000
Details: 96 pages; ISBN: 1841760781 |
|
|
Model, Images and Text Copyright © 2004
by John Valo
Page Created 13 December, 2004
Last Updated
13 December, 2004
Back to
HyperScale Main Page
|
 Home
| What's New |
Features |
Gallery |
Reviews |
Reference |
Forum |
Search
Home
| What's New |
Features |
Gallery |
Reviews |
Reference |
Forum |
Search