|
Classic
Airframes new 1/48 scale
Fiat CR.42 Falco
by
Phil Hale
|
 |
|
Fiat CR.42 Falco |

Classic
Airframes' 1/48 scale Fiat CR 42 kits may be ordered online from
Squadron
For a detailed examination of the kit
contents, see
Steven "Modeldad" Eisenman's in-box review here on HyperScale.
I’m back with another new release from Classic Airframes. One has to
say that Jules has certainly been busy this year with several new and
exciting releases. Let me put your fears aside, this is a totally new
tooled CR 42.
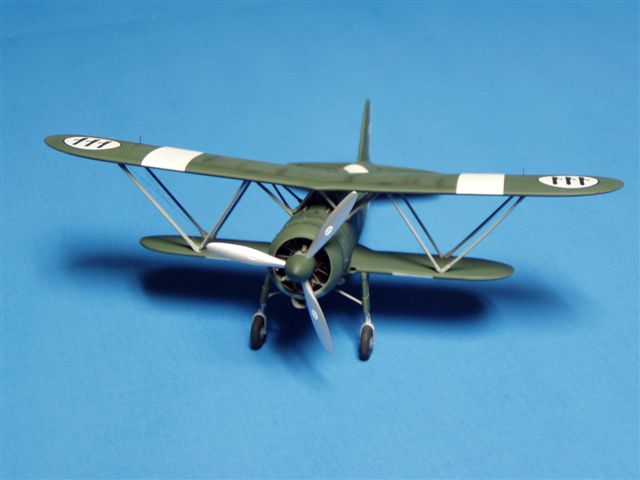
The surface detail is outstanding with finely engraved panel lines and
excellent texture for the fabric surfaces. The kit contains the usual
excellent decal sheet with 5 colorful schemes including the prototype.
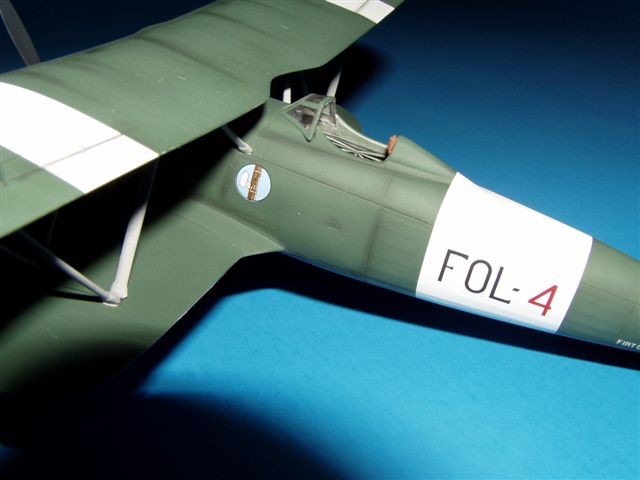
Wanting to be a little different, I chose the Foligno Fighter School
scheme.
More about that later.
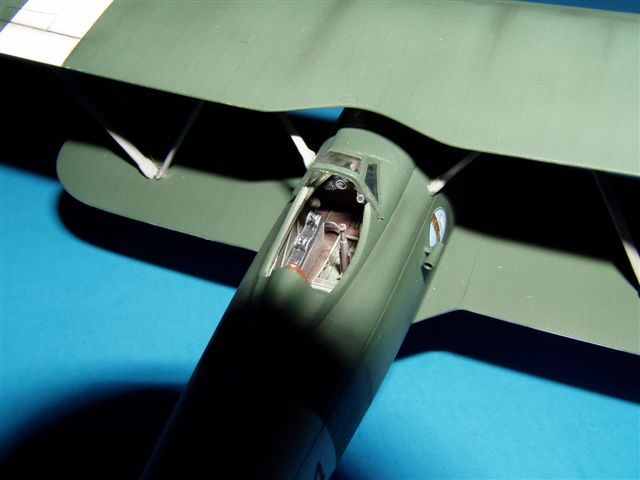
The cockpit is made up of resin and photo-etched parts. The resin is
first rate and the photo-etch is from Eduard. Some of the photo-etched
parts are from Eduard’s pre-painted line including seat belts and
instrument panels. The green seems a little too dark to me but then
again I’m not an expert on Italian machines. There are plenty of details
to create an outstanding cockpit straight from the box but there is
still room for all you super detailers to work your magic.
The windscreen is injection molded and with a little polishing or a bath
in Future makes it crystal clear.
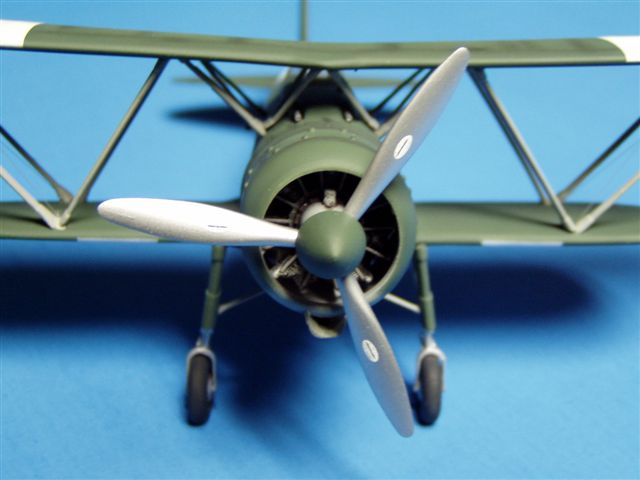
The engine is mostly resin and is beautiful. A photo-etched ring and
push rods finishes the engine. All of the cylinders are separate pieces
and fit into holes in the crankcase. I used the Ali D-Italia book as a
reference and highly recommend it. The engine is good out of the box but
once again there is room to detail. It fits into the two piece cowling
perfectly. Don’t forget to trim the ejector pins as they will interfere
with the proper placement of the engine. Sometimes with resin engines,
you may have to sand down the tops of the cylinder heads to make it fit
but this is not necessary with this kit. You will need to sand the seams
on the cowling carefully as not to lose any of the teardrop fairings. No
replacements are given in the kit. Back to the cockpit. The cockpit can
be assembled and then fit to one side of the fuselage. You may want to
test fit this area to ensure a perfect fit. I had to lightly sand the
right side of the cockpit floor to get a perfect fit. Don’t forget to
clip off or dremel the ejector pins. They don’t interfere with the fit
of the cockpit but the one closest to the tail will keep the fuselage
from fitting. As I said before the cockpit detailing is excellent
especially the seat belts. They even include the chain assembly. I had
to scratch build the rudder bar as I lost the photo-etched piece in the
carpet. I figure I’ll find it when I’m bare-footed and it slices my big
toe off. Photo-etch is a love-hate relationship.
Assembly is fairly straight forward. I needed a little filler at the
wing/ fuselage seam. You need to test fit this area as I had to sand the
mating surface on the fuselage to make the lower one piece wing fit
better. It still required a little filler and sanding to achieve a good
joint. The rear stabilizers are butt joints and this does not present
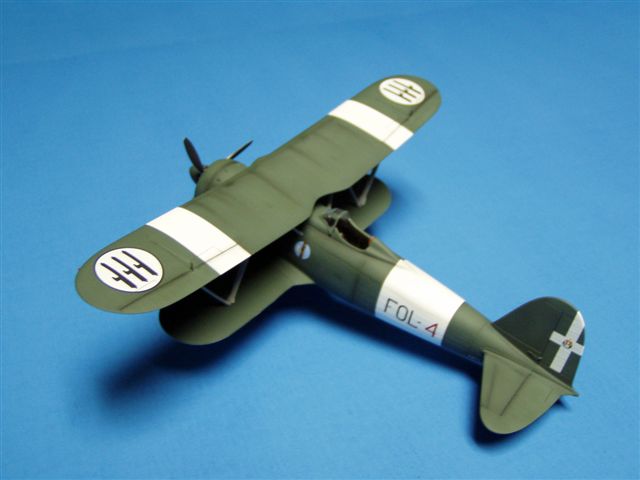
any major problems. The upper wing is one piece and solid. I cleaned the
mold lines off and it was ready to paint. Clean up of the struts takes a
little time. They are very fragile and need to be treated with care. The
CR 42 has very little rigging because of the struts. Each wing has four
main struts that form a “v” shape and then two sets of fuselage struts.
This is the only problem area on this model. The struts need to be
painted the underside color and I chose to paint before installing them.
I glued the fuselage struts to the fuselage before painting and while
trying to attach the upper wing, I realized that they were too long. I
had to trim them to get the proper height of the wing from the top of
the fuselage. I trimmed over a sixteenth of an inch off of each strut.
Here again a good set of plans will be invaluable. I would recommend
filling in the locator holes on the wings and making new ones. Make use
of the plans in the Ali D’Italia book and they will help to locate the
positions for the struts. There is no easy way to attach these struts
but with patience and time you can get them to fit good. Don’t forget to
rig the outboard struts. The inboard fuselage struts have been reversed
on the instruction sheet. The instructions would have you place them on
the fuselage in an inverted “v” but they should form a “v” with the
single attachment point at the bottom of the “v”. See page 8 of the Ali
D’ Italia book for the proper placement. There is a great photo at the
top right. It shows a CR 42 during construction and shows the strut
placement.
You’ll also need to make the machine gun blast tubes and place them
in the upper forward fuselage. There are vents on either side of the
cowling in the forward lower wing fairing. You’ll need to make these
yourself. They are an odd oval shape. Take care adding the photo-etched
exterior details as they are fragile but they really enhance the
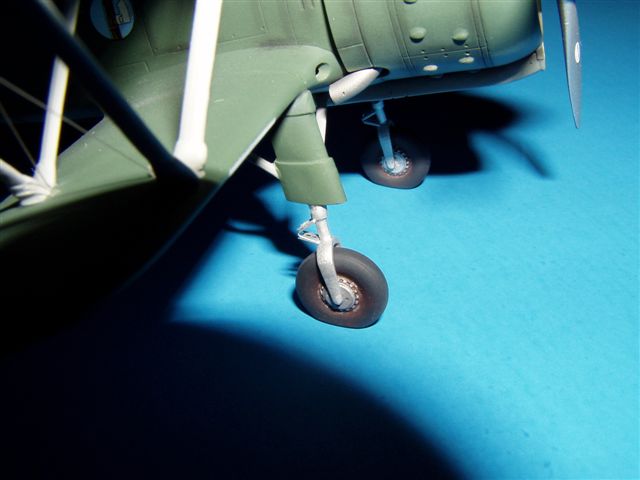
appearance of the model. Since I picked the trainer version, I had to
cut the wheel spats off the landing gear legs and use the optional
exposed gear forks. There are beautiful photo-etched oleo scissors
provided and it is a shame not to use them.
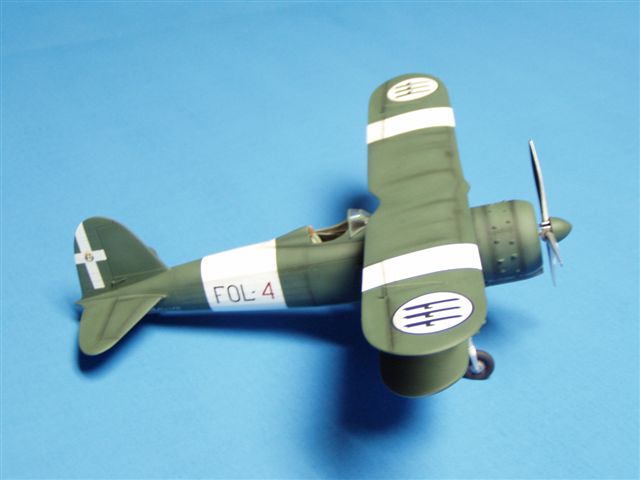
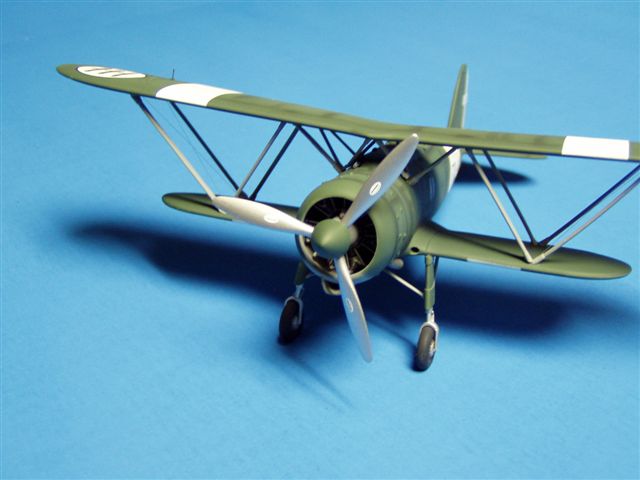
I chose the Foligno fighter School scheme because of the large white
bands on the wings and fuselage. The Ali D’Italia book shows the
fuselage and wing bands but I could not find any info about the
underside. I could not tell if the bands extend to the underside of the
upper wing or if they were on the lower side of the lower wing.
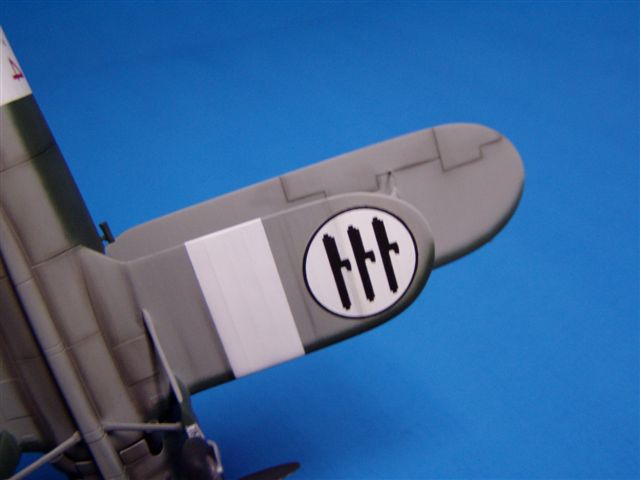
The painting guide shows them too far inboard and too wide. I refer
to the Ali D’Italia book again for the proper placement. From what few
pictures I could find, it seems as though the inboard edge of stripe is
aligned with the inboard edge of the aileron and extend outboard towards
the wing tip. All this is just nit picking and it may be that they were
all sizes and locations. If you have any info concerning this, please
let me know.
I am not going to even attempt to claim that I know very much about
Italian aircraft. I love Macchi 200’s, 202’s, 205’s and such but I have
to have advice when I building them. My attempt here is only to show you
that with a little more effort and patience, these kits can be built
into an attractive display.
Are they perfect? No, but they can be turned into a masterpiece if you
desire.
I like a little challenge in my life and I like knowing that I’ve built
something that not everybody else has built. Take a chance and if you
like Italian aircraft get a few of these. You’ll enjoy the results.
Special thanks to Jules Bringuier and Bob Asbury for the Itatlian advice
and thanks to Walt Holmes for the photo advice.
Dr. Phil
Thanks to
Classic Airframes for the sample
Click the thumbnails below to view larger images:
Italian Aces of World War
2
Aircraft of the Aces 34 |
|
|
|
|
Author: Giorgio Apostolo
Illustrator: Richard Caruana
US Price: $19.95
UK Price: £12.99
Publisher:
Osprey Publishing
Publish Date:
November 25, 2000
Details: 96 pages; ISBN: 1841760781 |
|
|
Model, Images and Text Copyright © 2004
by Phil Hale
Page Created 13 December, 2004
Last Updated
13 December, 2004
Back to
HyperScale Main Page
|
 Home
| What's New |
Features |
Gallery |
Reviews |
Reference |
Forum |
Search
Home
| What's New |
Features |
Gallery |
Reviews |
Reference |
Forum |
Search