|
 Home |
What's New
| Features
| Gallery
| Reviews
|
Reference |
Forum
|
Search
Home |
What's New
| Features
| Gallery
| Reviews
|
Reference |
Forum
|
Search
Fiat G.50
by
Thomas Pedersen
|
 |
|
FIat G.50 |

HyperScale is proudly supported by
Squadron.com
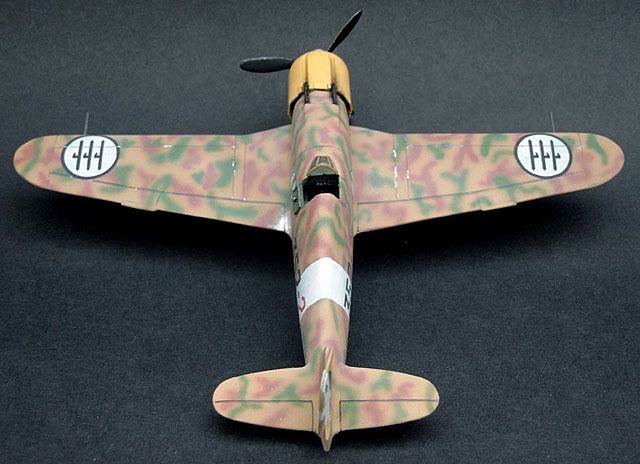
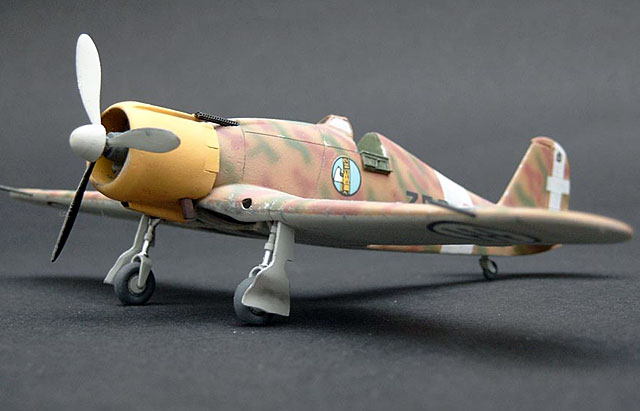
Here are some pics of my newly finished Airfix FIAT G-50 in
1/72 scale.
This started out as a quick-build, to get something finished,
but ended, not much, but a little more complicated.
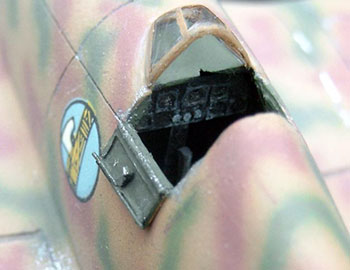
Interior:
I realized that what was supplied by Airfix (just a seat) was
not enough, as everything is very visible in the open cockpit.
So I had to do a little scratcing to fill out the empty hole! I
did a instrument panel, some structure on the fuselage sides,
and side consoles. Not much but that helped a lot.
I was so satisfied that I was disappointed when I glued the
two fuselage halves together and saw that most of it was almost
invisible! I therefore cut open the door so you could see the
interior. The door itself is made of thin sheet styrene with a
handle of stretched sprue.
Exterior:
There was only a few panel lines (raised) on this little
model so I decided to try and rescribe them as this seemed to be
a manageable task for me. I used a sewing needle in a pinwise
without any problems, as a guide I used dymo-tape.
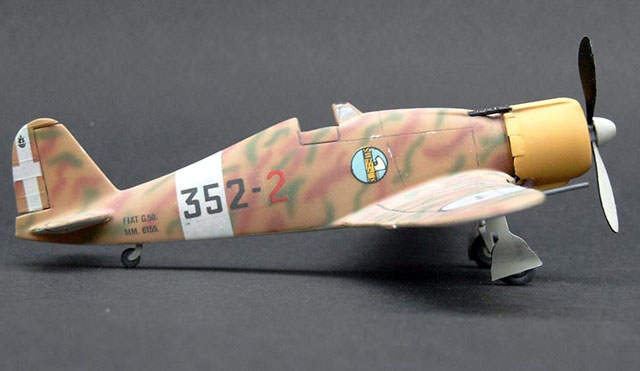
The cowling is in one piece and was thick walled, I cut out
the cowl flaps and made some of sheet plastic to get a more
realistic thickness.
The windscreen in the kit is also very thick, so I made a new
out of heat stretched clear plastic card, using the original as
a mold.
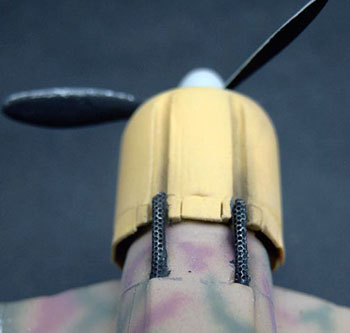 The
cowl guns were made from a set of etched gun jackets from Toms
Modelworks, and I think the effect even in this small scale is
good. I heated the etched mesh over a lighter untill it changed
color and then rolled it over some thin pieces of copper wire. The
cowl guns were made from a set of etched gun jackets from Toms
Modelworks, and I think the effect even in this small scale is
good. I heated the etched mesh over a lighter untill it changed
color and then rolled it over some thin pieces of copper wire.
I used True Details wheels. Normally I think their wheels are
too flat, but those "blurps" of plastic Airfix submitted was
simply too bad!
|