|
Grand Phoenix's 1/48 Scale
FJ-4B Fury
by John
Valo
|
 |
|
FJ-4B Fury |

HyperScale is proudly supported by
Squadron
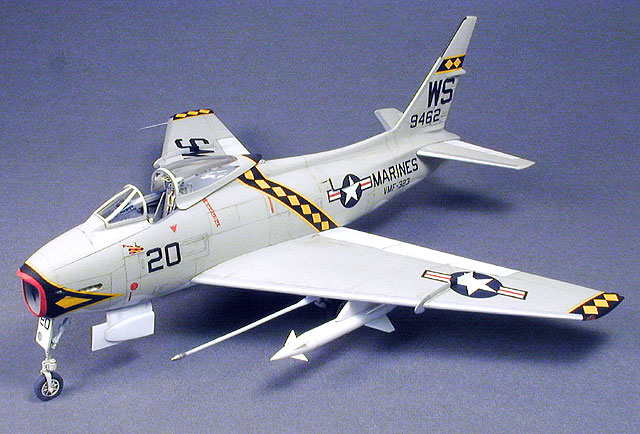
This kit is the second release of the Fury from Grand Phoenix, this
time featuring a collection of Bullpup missiles to adorn the model, as
well as three very striking decal options.
As is my usual practice with multi-release limited-run kits, I
collected and studied reviews of the first release of the kit to check
for any problematic areas.
I spent the first evening or two separating, cleaning and sorting
various parts. This kit demands that all parts be dry-fit before
assembly, with a bit of tweaking here and there to be done.
I find that if I get the tedious cleanup and initial dry-fitting out
of the way right off the bat, the rest of the experience is much more
enjoyable.
The most obvious challenge lay with the main wheel wells, which
consist of three resin pieces - one that fits in the fuselage, and two
that are sandwiched between the wing halves.
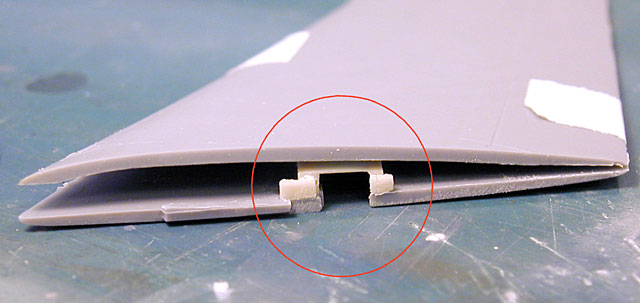
All of the parts needed considerable sanding and thinning to fit, and
I also ground out depressions in the upper wing halves to accomodate the
parts. Luckily, there are no panel lines or minute details to contend
with on the upper wing, in case you accidentally go through the surface
when grinding, like I managed to do. Once all the parts are thinned, the
fit is fine.
A good technique to use when joining wing or control surface parts
without locating pins is to dry-fit the parts, then apply a piece of
drafting tape to the trailing edge to hold the parts together. Open the
parts, apply CyA glue to the mating surfaces, and the tape 'hinge' will
allow precise alignment when the parts are folded back together.
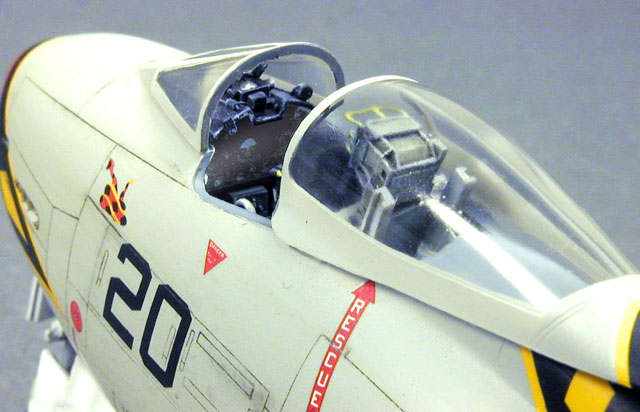
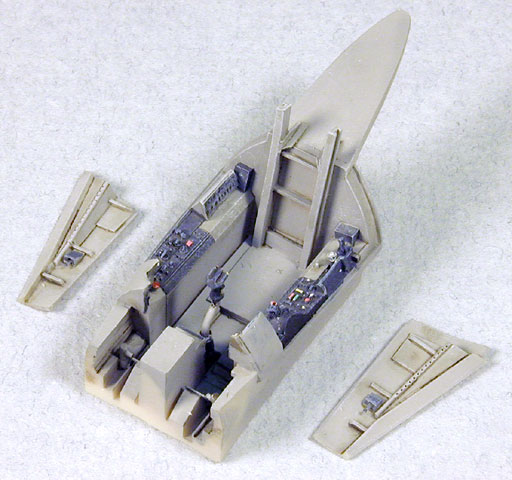
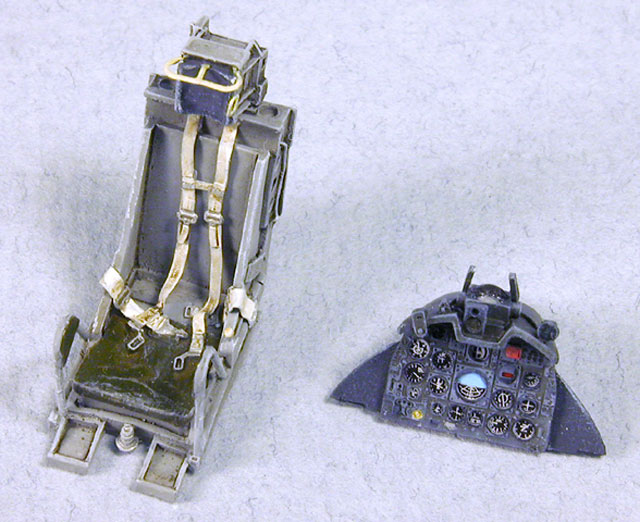
Next up was the cockpit, which is quite beautifully cast in resin. The
detail of the seat and instrument panel is enhanced by some nice
photo-etched bits and pieces, and with a wash and dry-brushing, the
cockpit looks first class. The cockpit tub fits the fuselage halves just
fine, but some tweaking needs to be done to the intake duct and lip to
fit over the nosewheel well. I ground down the roof of the well to
paper-thin, then also sanded the lower surface of the intake trunk as
much as possible. By first gluing the intake lip to the trunk, I was
able to adjust for a perfect fit at the nose with no putty necessary at
the intake lip and fuselage junction.
I used small chunks of lead to fill the nose area before joining the
fuselage halves to prevent tail-sitting.
I cut a small piece of .030 styrene to provide a smooth decking
behind the seat. The resin tail cone will need to be dry-fit and sanded
to avoid any unnecessary putty work.
Painting,
Final Assembly and Decals
|
 After
assembling the wings, fuselage and tail surfaces, I felt confident
enough in the parts fit to pre-paint the subassemblies. I used
PollyScale Gull Gray and White with Metalline Bright Silver for the
leading edges. After
assembling the wings, fuselage and tail surfaces, I felt confident
enough in the parts fit to pre-paint the subassemblies. I used
PollyScale Gull Gray and White with Metalline Bright Silver for the
leading edges.
When fitting the wings to the fuselage, the alignment tabs will need
to be thinned slightly to fit properly. The port wing basically clicked
into place; the starboard wing needed some finessing to fit properly.
Both wings exhibit a gap at the fuselage joint toward the rear, but I
found this to be acceptable as the gap starts at the hinge line of the
control surfaces.
 Whether
it is correct or not, it looks fine. Whether
it is correct or not, it looks fine.
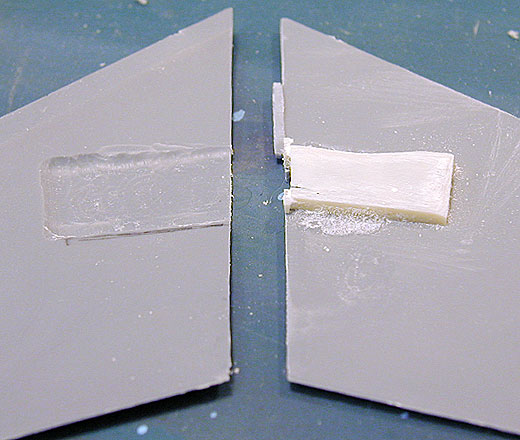
The stabilizers fit perfectly after using a needle file to clean up the
slots in the fuselage. I used a bit of putty and also thinned Krystal
Kleer to close up the minor gaps at the wing and tail surface joints.
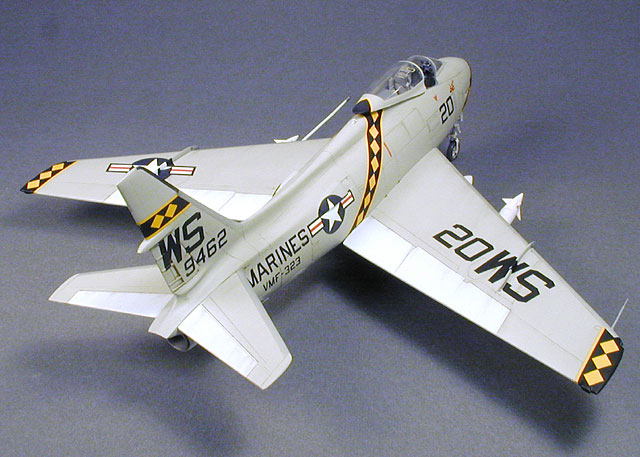
I elected to apply the decals before installing the wing fences, as the
fences intersect both upper wing markings. The decals were excellent,
and conformed beautifully to some tricky surfaces, such as the ribbed
rudder. I particularly liked the end result of the 'Diamondback' scheme
- it truly is an eye-catching aircraft.
A nice touch to the kit was the inclusion of masks for the canopy and
windscreen, which worked well and saved me a bunch of time. The
windscreen needs to have its forward edge sanded back just a bit, and a
few swipes with a sanding stick to the inside edge at the front to fit
properly.
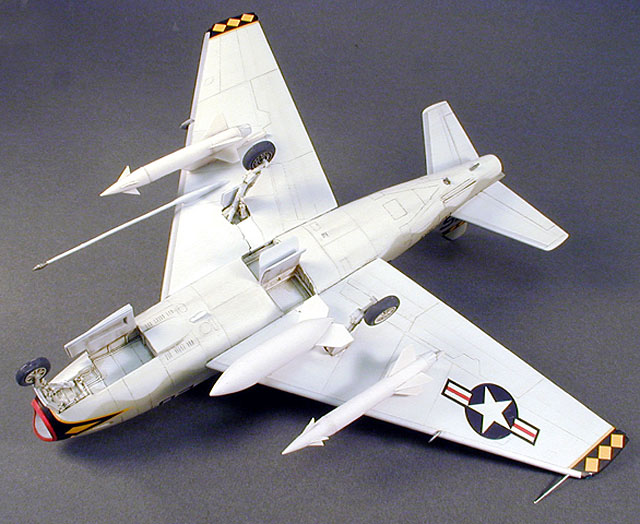
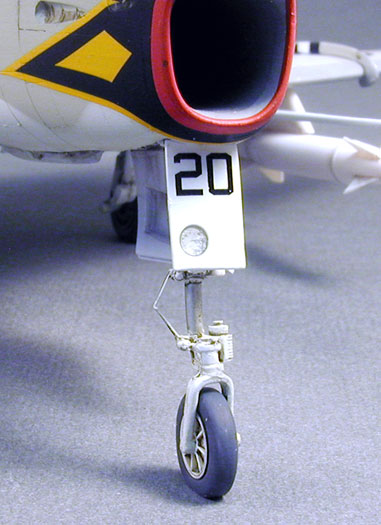
The main landing gear is straightforward and robust, just like the real
thing. The nose gear assembly is very detailed and delicate, again, just
like the real thing. The gear doors are rather featureless, but
additional detail could be added very easily. Although five Bullpups and
their associated radar pod are included in the kit, the kit's history
suggests that the usual loadout was only two missiles, so I took that
approach.
In conclusion, I would recommend this model to the experienced
builder.
Make no mistake, there will be considerable time spent testing and
refining the fit of parts, but the time is well spent. The end result is
extremely attractive, and let's face it - the Fury is one good looking
airplane! If you like early USN jets, take your time and enjoy this kit
- the end result is worth it.
This new boxing of the Grand Phoenix 1/48 scale FJ-4B Fury is
available online from the Grand Phoenix website for USD$34.95
Click on the thumbnails
below to view larger images:
Model, Images and Text Copyright © 2004
by
John C. Valo
Page Created 26 October, 2004
Last Updated
26 October, 2004
Back to
HyperScale Main Page |
 Home
| What's New |
Features |
Gallery |
Reviews |
Reference |
Forum |
Search
Home
| What's New |
Features |
Gallery |
Reviews |
Reference |
Forum |
Search